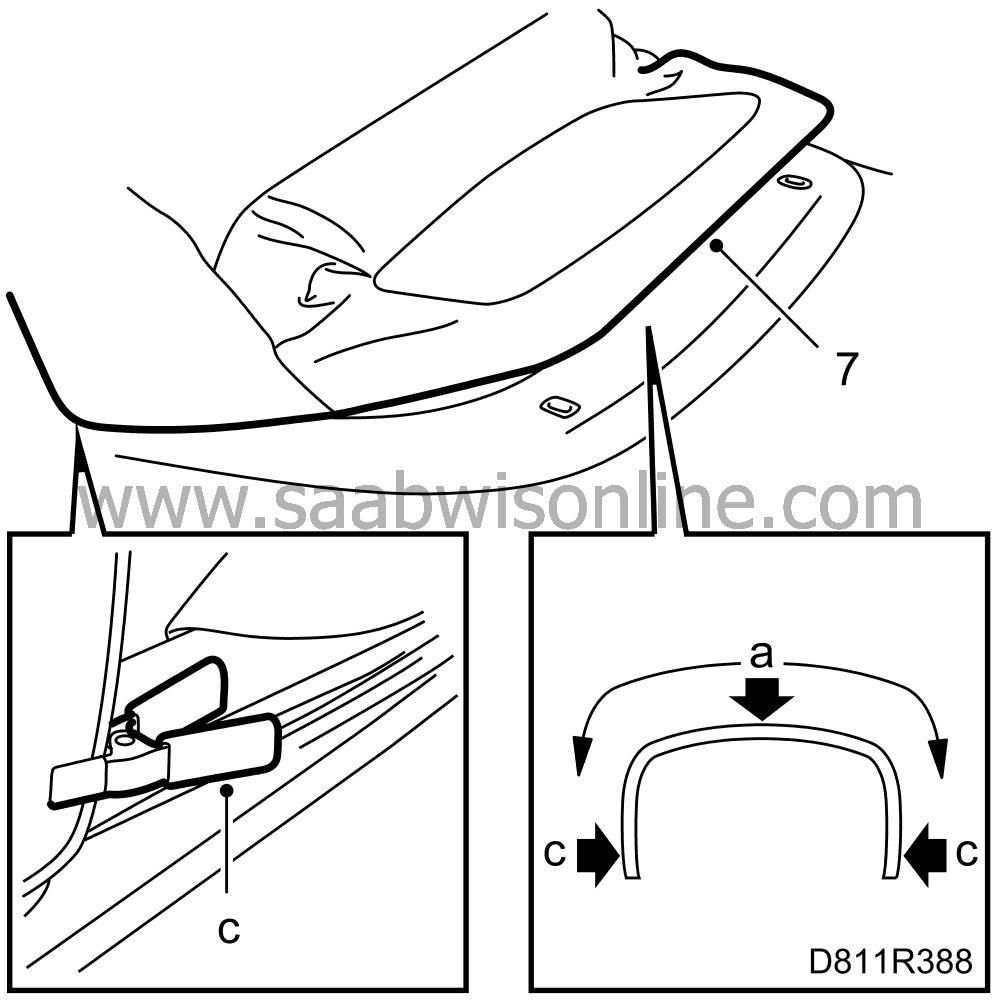
Outer roof
| Outer roof |
| Check |
Make sure the second bow has been cut in accordance with MI 812-1566 on cars within the VIN intervals S7000216 - S7002837 and S7010023 - S7016129.
If it has been cut correctly, the remainder of the end of the second bow should be 5 mm, see illustration.
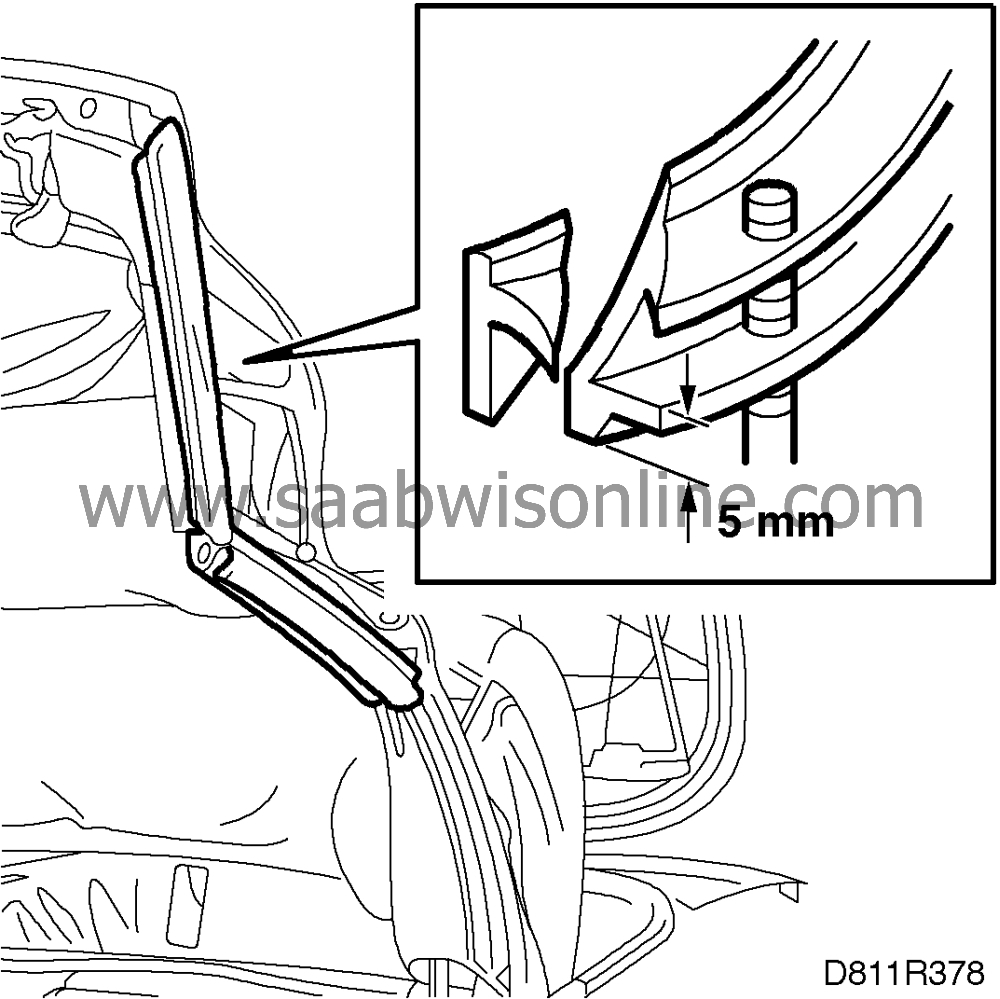
If the bow is cut incorrectly, the height of the second bow will be incorrect. If this is the case, it must be replaced before the new outer roof is fitted.
| Note | ||
|
The second bow has a new design from VIN V7008824, see below. |
The bow is cut towards the rear of the car.
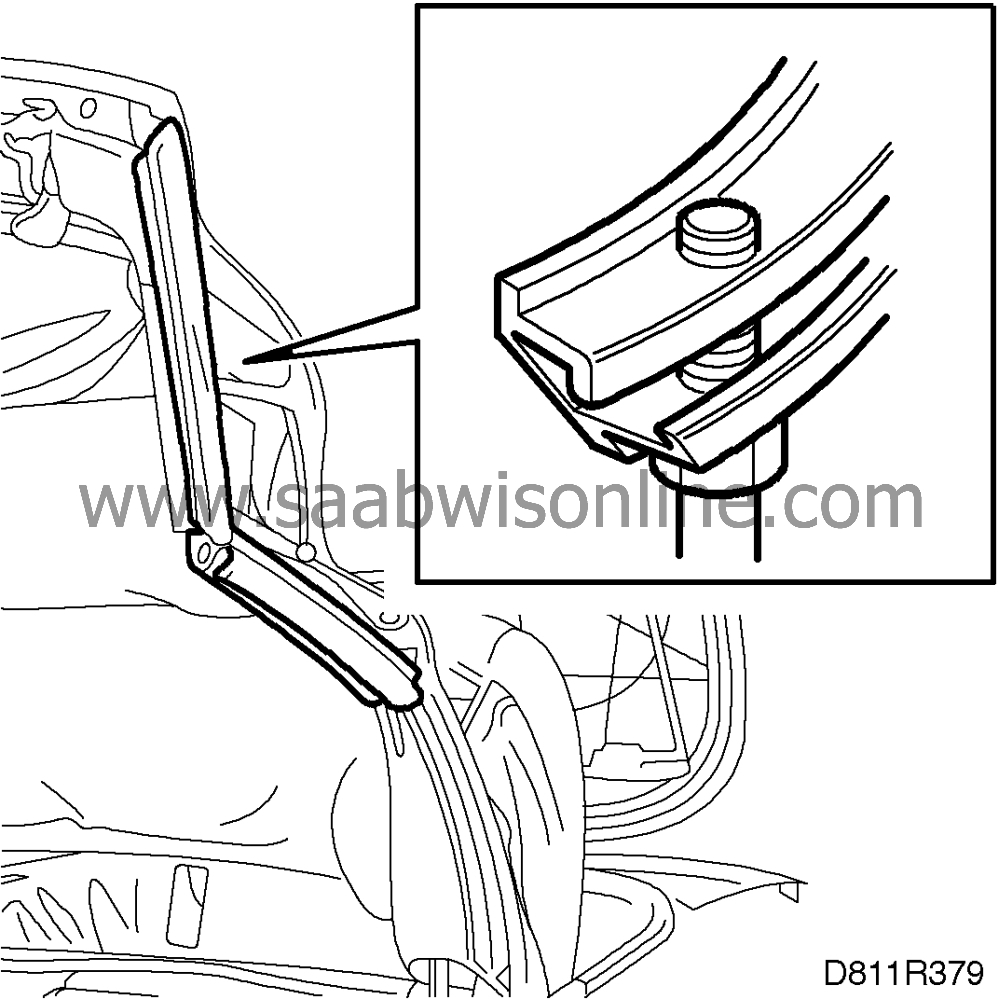
Make sure the fifth bow is fitted with guides for the rear window. If they are missing, the top stack must be modified before the roof cloth is fitted. See

| To remove |
| 1. |
Operate the soft top to half open position.
|
|
| 2. |
Remove the headlining. See
 .
.
|
|
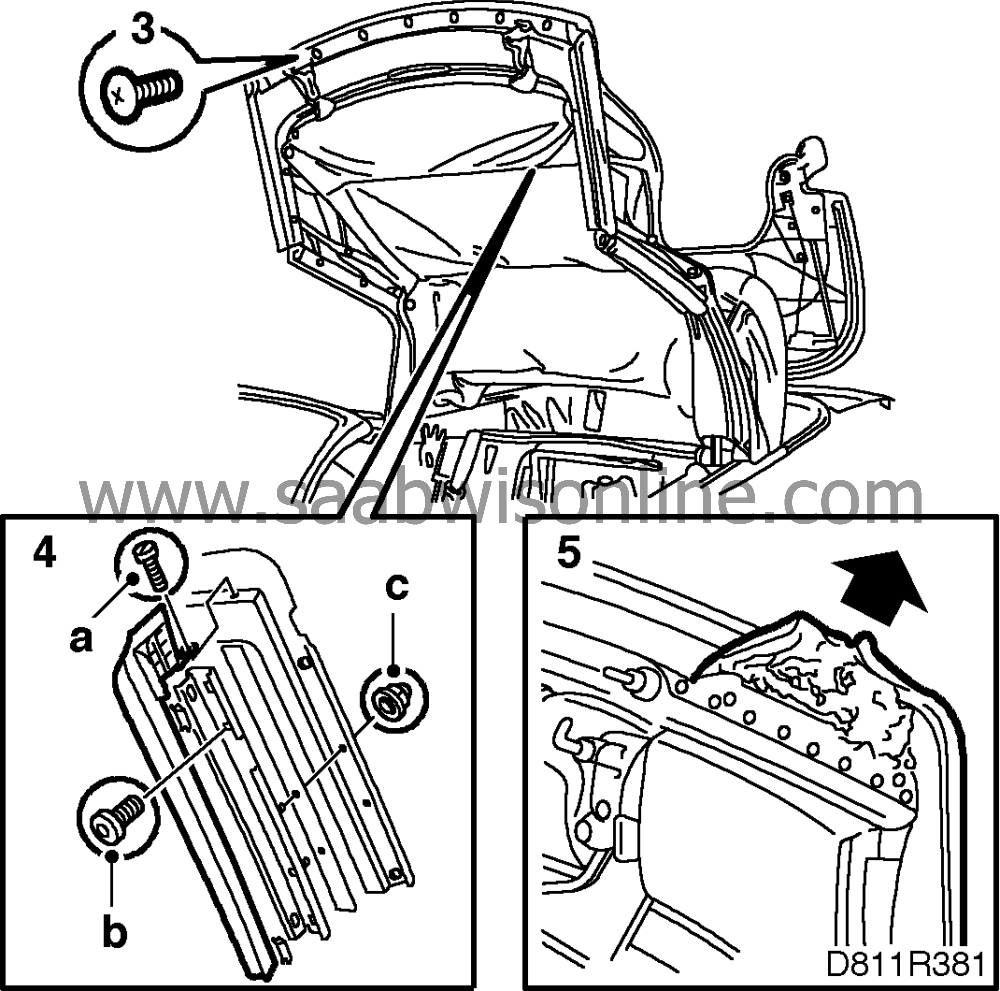
| 3. |
Remove the retaining strip
|
|
| 4. |
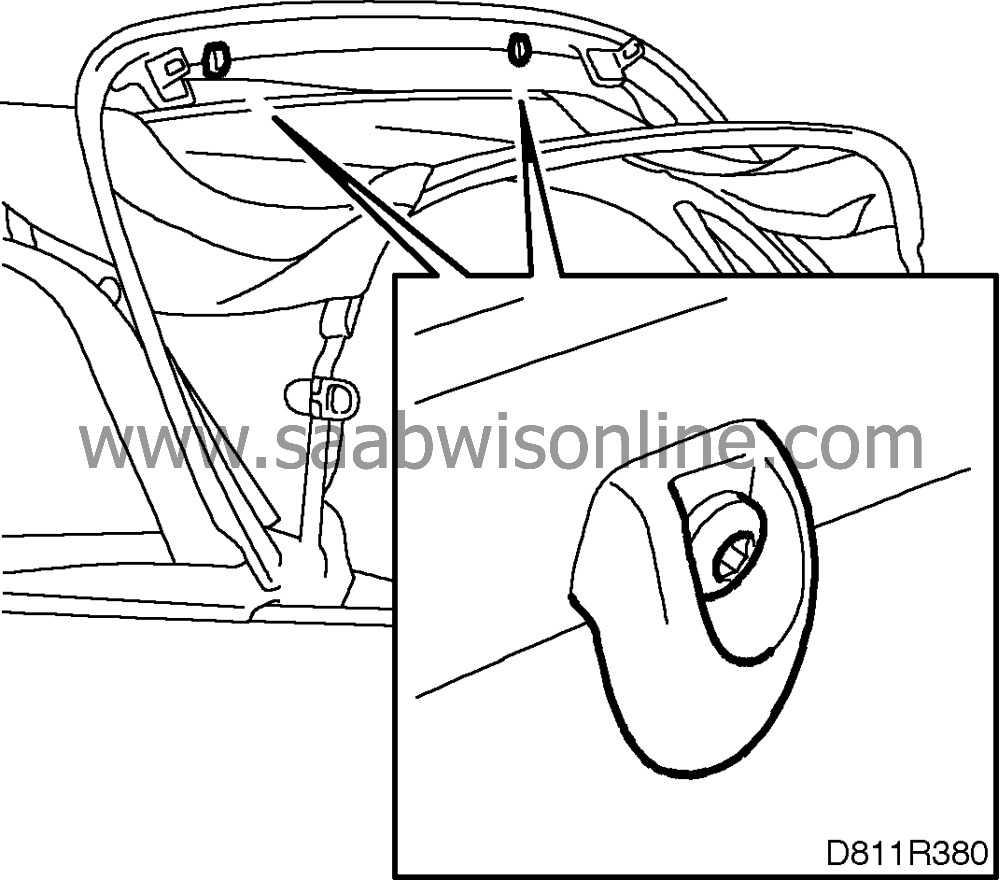
Remove the front rail seals and seal retainer by removing the front screw (a). Take out the seal from the retainer and undo the “concealed” screw (b). Then remove the two rear dome nuts (c).
|
|
| 5. |
Detach the roof cloth from the first bow.
|
|
| 6. |
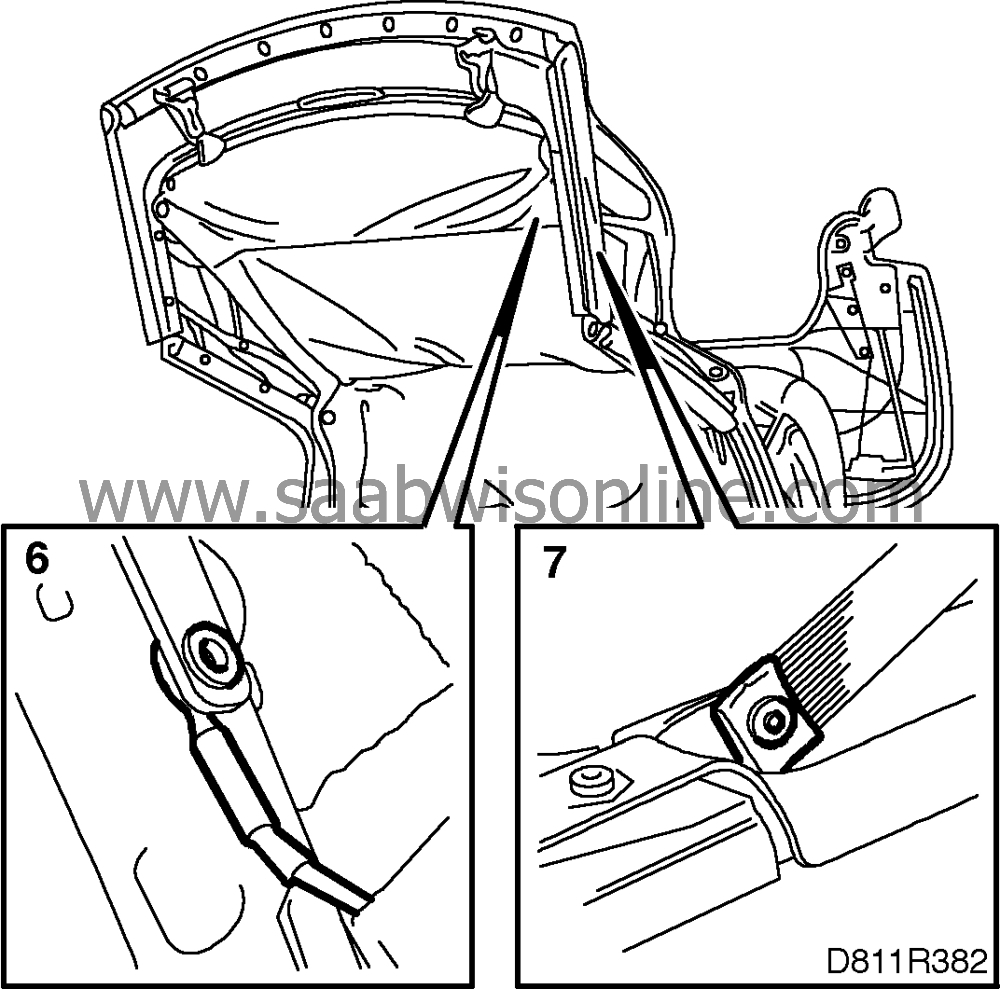
Drill away the blind rivets securing the cables to the roof cloth.
|
|
| 7. |
Drill away the blind rivets securing the front side ribbing to the front rails.
|
|
| 8. |
Detach the outer roof from the second bow.
|
|
| 9. |
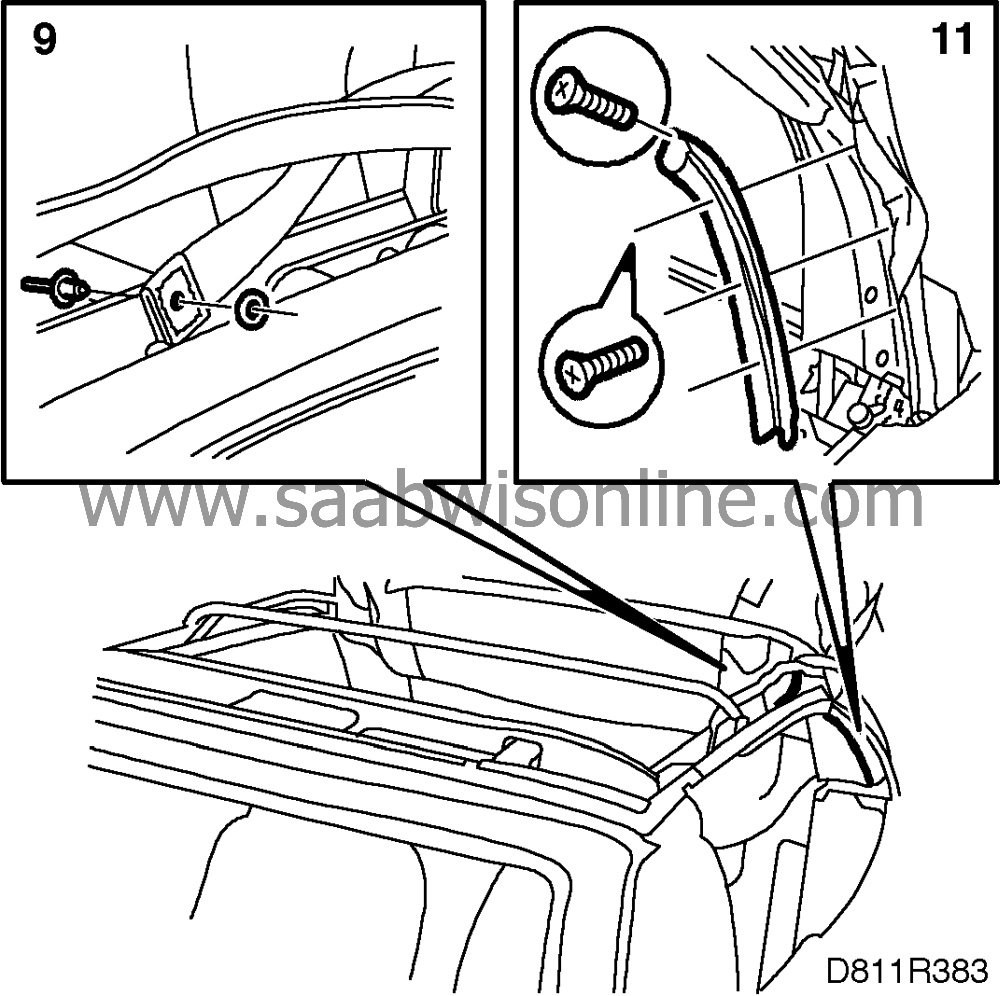
Drill away the blind rivets securing the rear side ribbing to the middle rails.
|
|
| 10. |
Detach the outer roof from the third bow.
|
|
| 11. |
Remove the rear rail seals.
|
|
| 12. |
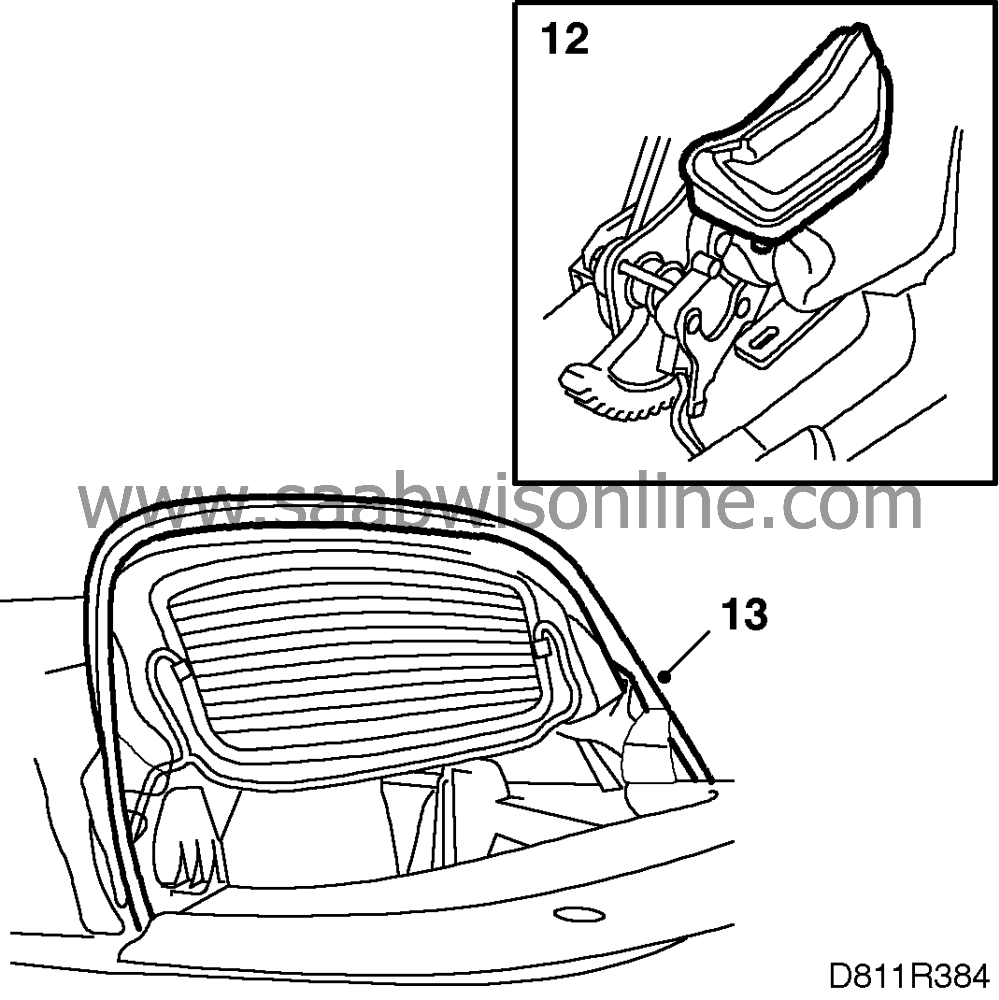
Remove the covers below the rear rails.
|
|
| 13. |
Remove the fifth bow seal.
|
|
| 14. |
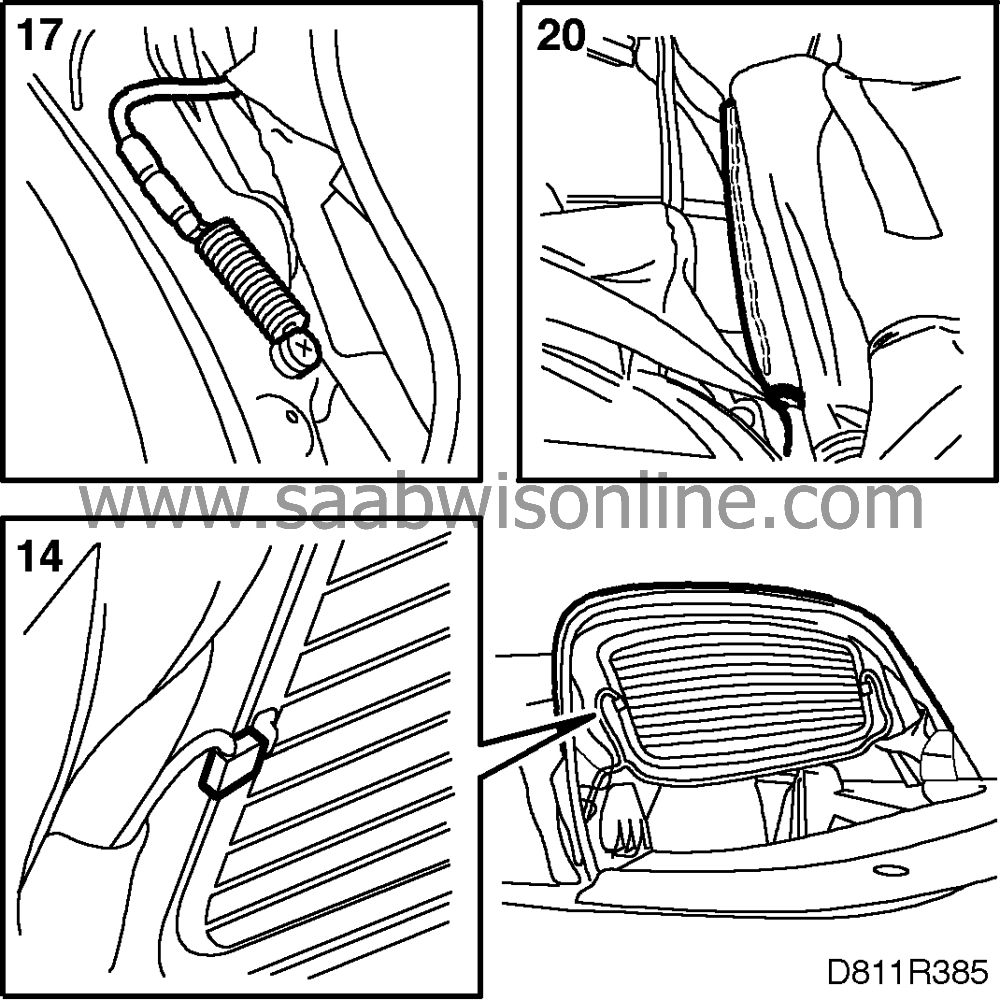
Unplug the connectors for the electrical wiring to the heated rear window and pull the wires out of the roof cloth.
|
|
| 15. |
Detach the roof cloth from the fifth bow.
|
|
| 16. |
Raise the soft top mechanism completely. (Fifth bow locked).
|
|
| 17. |
Pull the cables out of the sides of the roof cloth.
|
|||||||
| 18. |
Detach the roof cloth from the rear rail.
|
|
| 19. |
Remove the felt strip covering the staples in the fourth bow.
|
|
| 20. |
Mark out the centre on the fourth bow and on the part of the roof cloth that is stapled to the fourth bow. Then remove the staples.
|
|
| 21. |
Lift away the roof cloth.
|
|
| 22. |
Remove the window guides. These must not be fitted when the new roof cloth is drying.

|
|
| To fit |
Preparations for fitting a new outer roof
Preparations if the outer roof is to be changed to a roof with clip-mounted rear window.| • |
If the second bow is to be changed, this must be done now before the outer roof is fitted. For replacement see

|
|
| • |
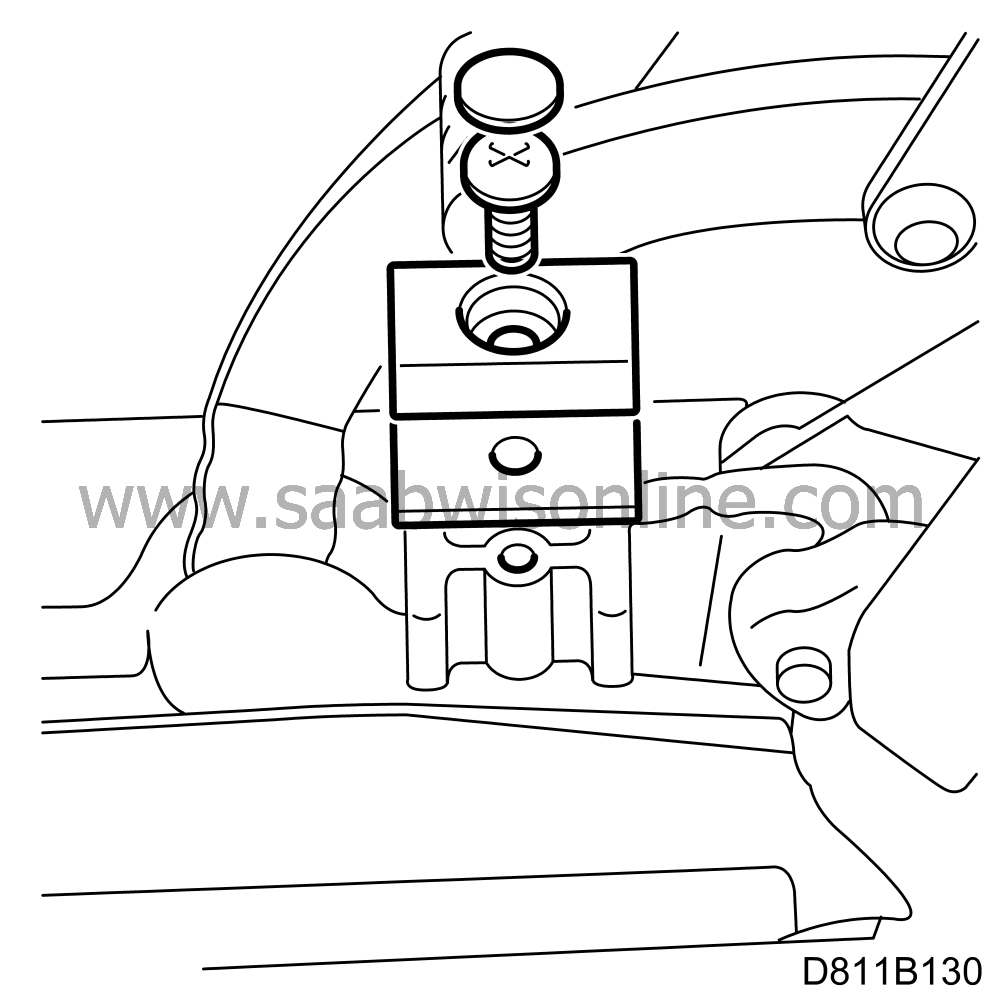
Loosen the second bow to make it easier to access the stop lug for drilling. Drill a 12 mm deep hole for the stop using a 3.5 mm bit.
|
|
| • |
Position the square spacer. Put a little grease on the screw and screw on the stop. Glue on the cap.
|
|
| • |
Remove any old glue from the top stack. Use Teroson or 3M cleaning agent.
|
||||||||||
Once the outer roof has been fitted, its tautness can be adjusted by changing the height of the fourth bow. To obtain allowance for adjustment, the fourth bow should be in the following position at the outset:
Bonded rear window: Centred (vertically).
Rear window fitted with clips: At the bottom.
| 1. |
Place the outer roof onto the top stack.
|
|
| 2. |
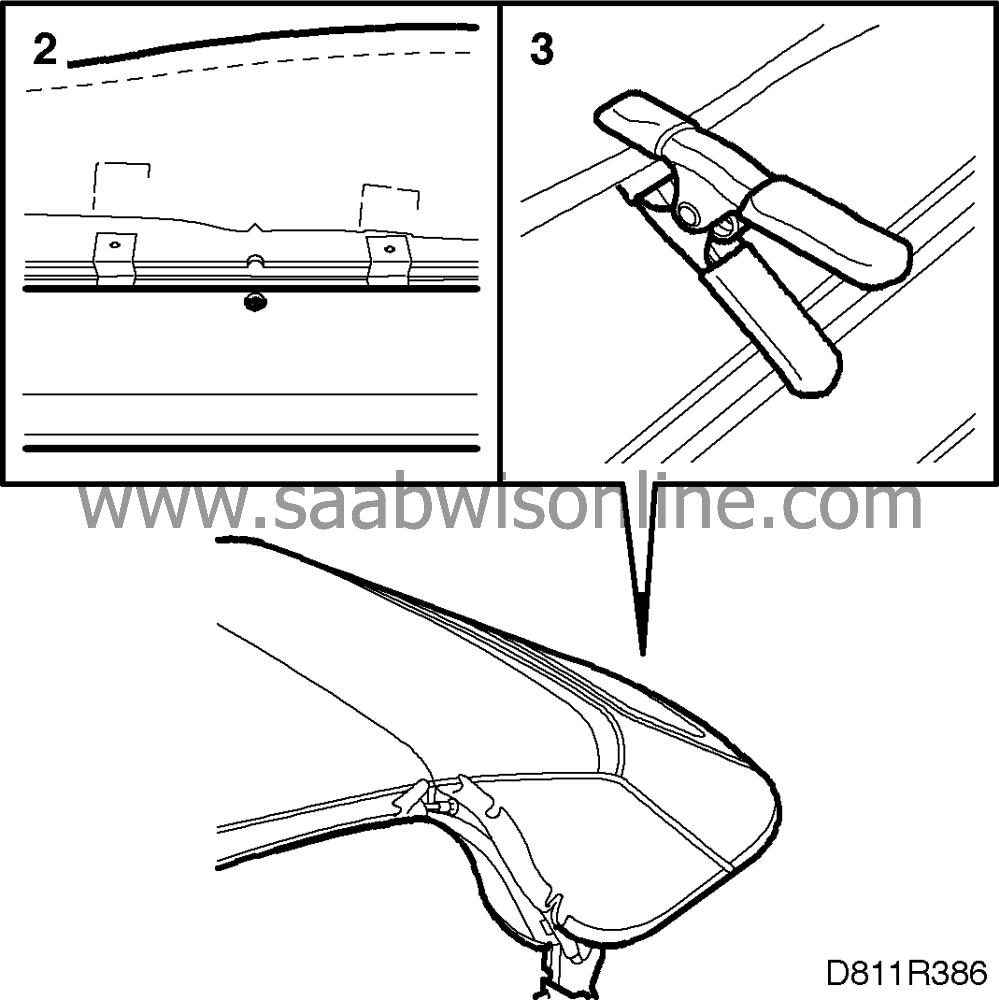
Make sure the centre mark for the window frame is in front of the centre hole on the fifth bow.
|
|
| 3. |
Then secure the position with a clamp.
|
|
| 4. |
Secure the corners of the rear rail with clamps.
|
|
| 5. |
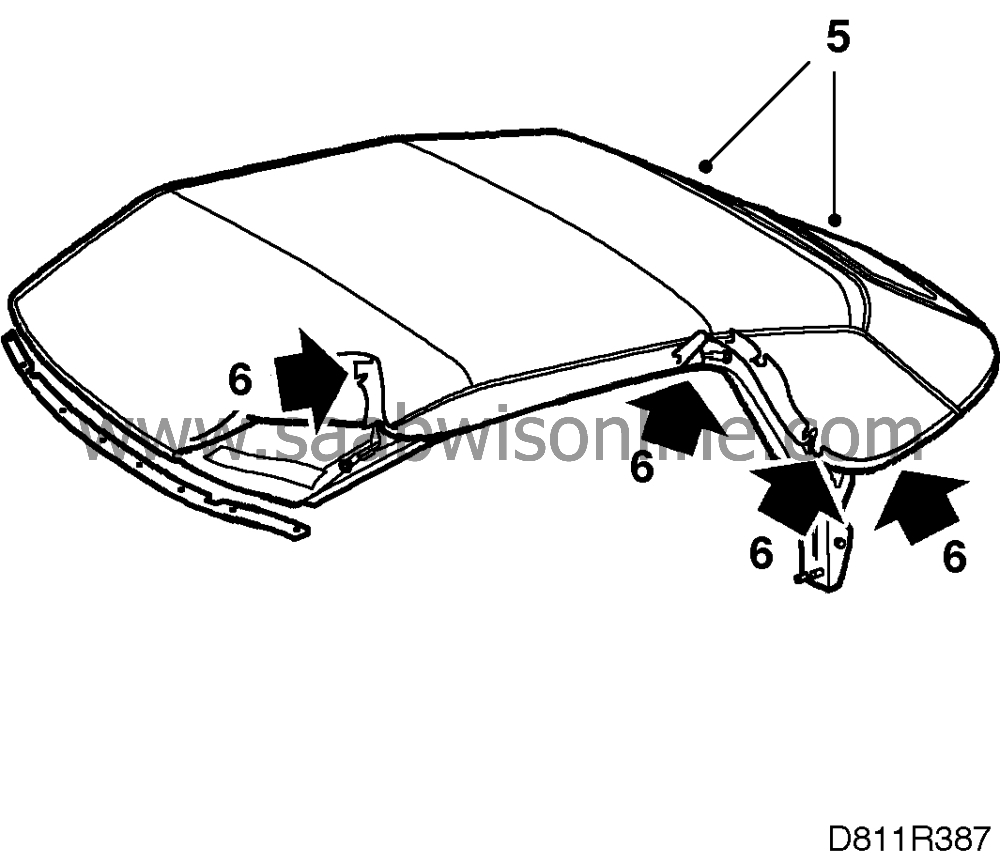
Operate the soft top so that the fifth bow is raised half way. Check that the roof cloth fits around the fifth bow and the corner of the rear rail.
|
|
| 6. |
Make incisions in the edge of the cloth to be glued so that it fits better to the stack. Use the stack and the old cloth as a template, making incisions as shown in the illustration.
|
|
| 7.a. |
Glue the roof cloth, starting in the centre of the fifth bow and working toward one corner. Secure with clamps.
|
| 7.b. |
Continue by gluing the cloth on the other side of the fifth bow.
|
| 7.c. |
Secure the roof cloth to the corners of the rear rails of the top stack before the adhesive dries. Use clamps to keep the cloth on the corners, otherwise, the roof cloth could become crooked.
|
||||||||||||||||
| 7.d. |
Remove the clamps.

|
| 7.e. |
Apply threadlock to the screws and fit the guides. Check their fit.
|
| 8. |
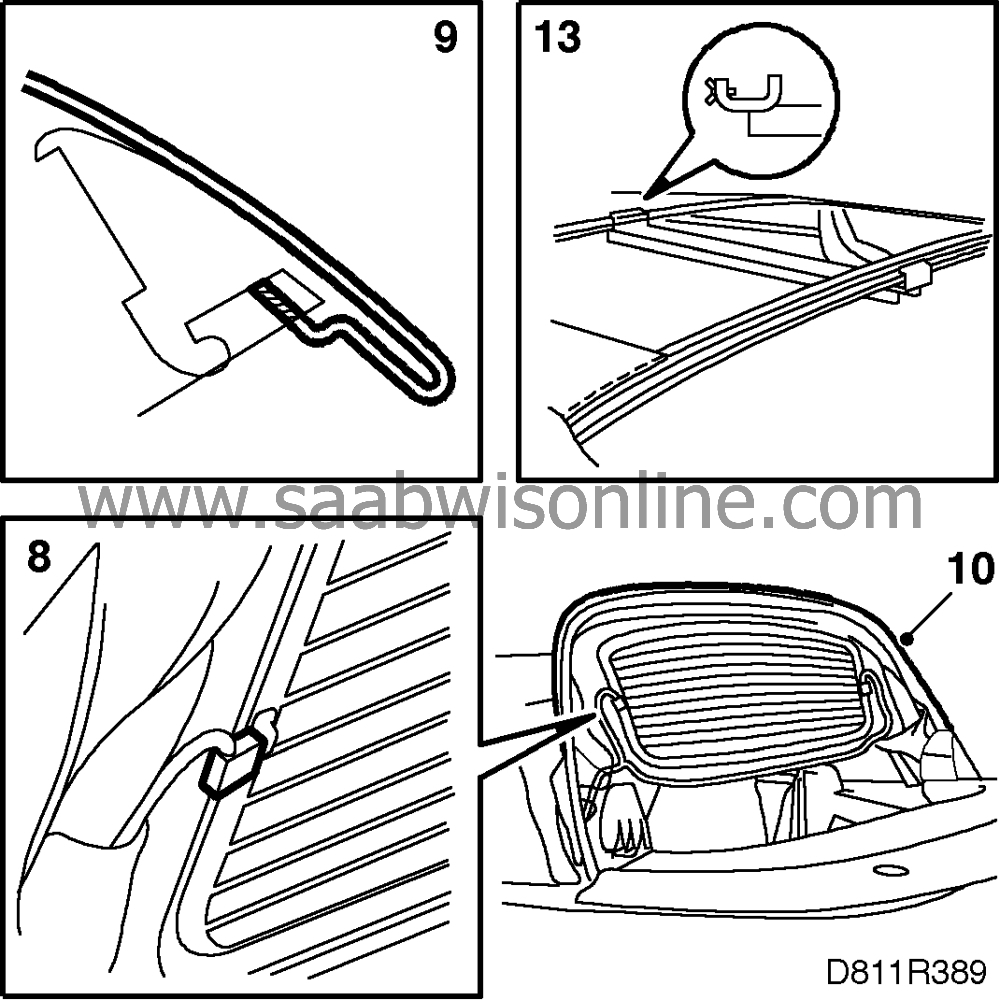
Thread the wiring to the electrically heated rear window through the roof cloth and plug in the connectors.
|
|
| 9. |
Cut away any excessive cloth round the fifth bow. Cut from the inside of the outer flange on the sealing strip so that adhesive spill is concealed by the sealing strip. Use a razor blade or carpet knife. Make sure the flange for the sealing strip is visible.
|
|
| 10. |
Press the sealing strip into place on the fifth bow. Use soapy water on the seal to facilitate fitting.
|
|
| 11. |
Raise the soft top completely so that the fifth bow is locked.
|
|
| 12. |
Fold the outer roof backwards.
|
|
| 13. |
Fix the fourth bow to the third bow with the special tool, part no. 82 93 045.
|
||||||||||
| 14. |
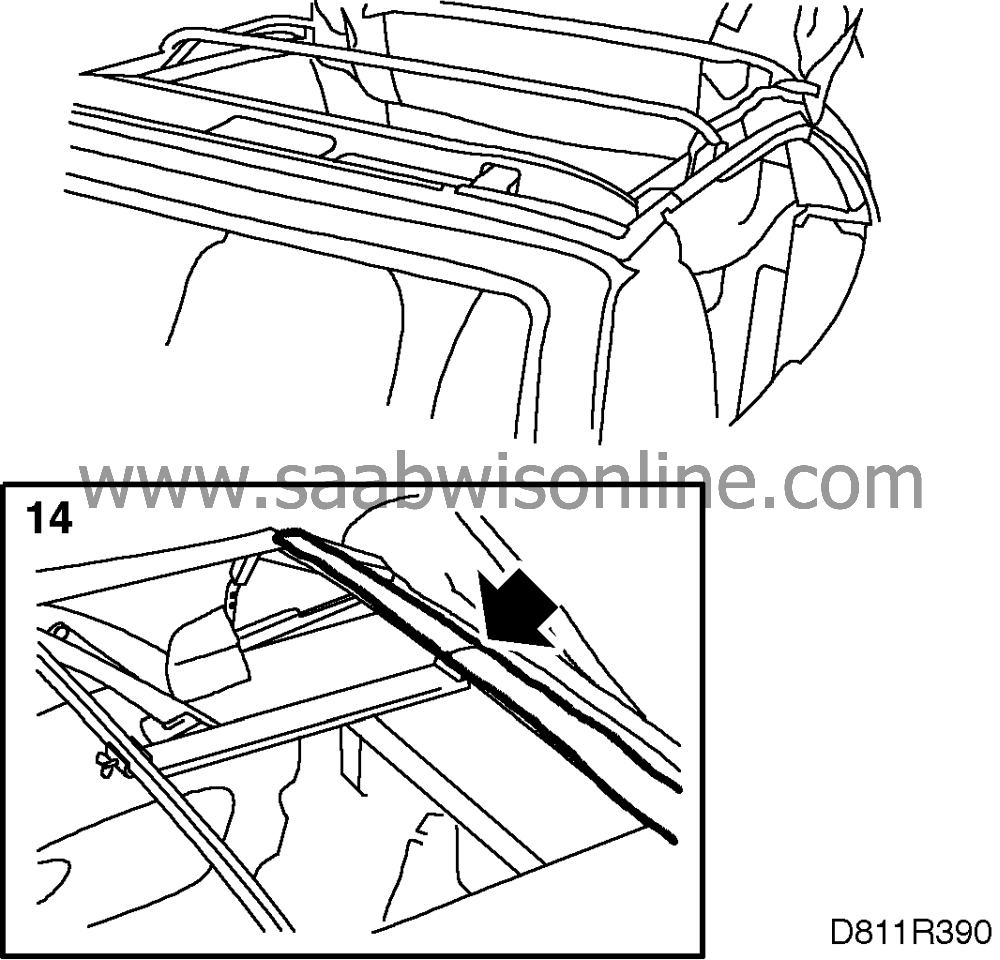
Pull the roof cloth flap over the fourth bow and centre it with the marking. The centre is marked with a cut on new outer roofs. Stretch tight and staple on the cloth flap.
|
|
| 15. |
Put the felt strip in place over the fourth bow.
|
|
| 16. |
Fold forward the roof cloth to the rear rails of the top stack. Glue the cloth to the rear rails. Use 3M Super Weatherstrip Adhesive. Allow the adhesive to dry and remove the clamps.
|
|
| 17. |
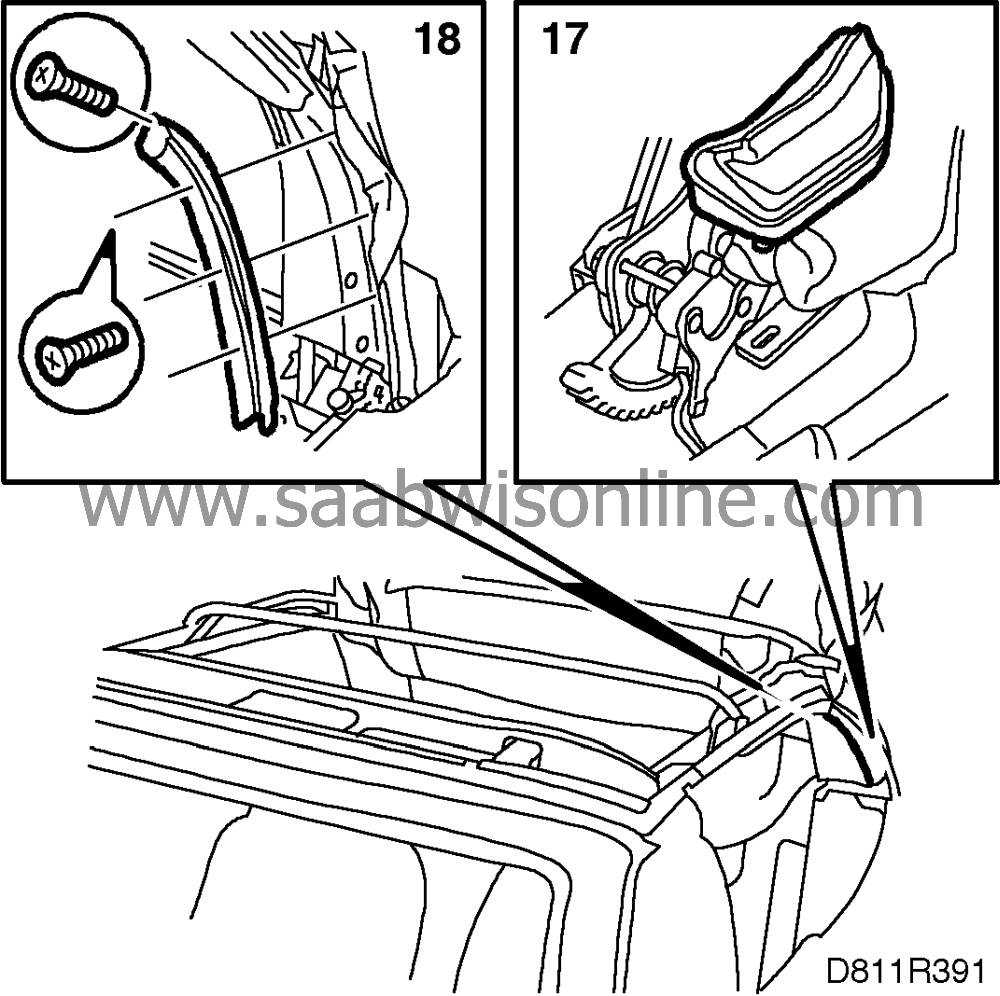
Put the covers back in place below the rear rails and tighten the nuts.
|
|
| 18. |
Put the rear rail seals back in place. Cut away any excess cloth.
|
|
| 19. |
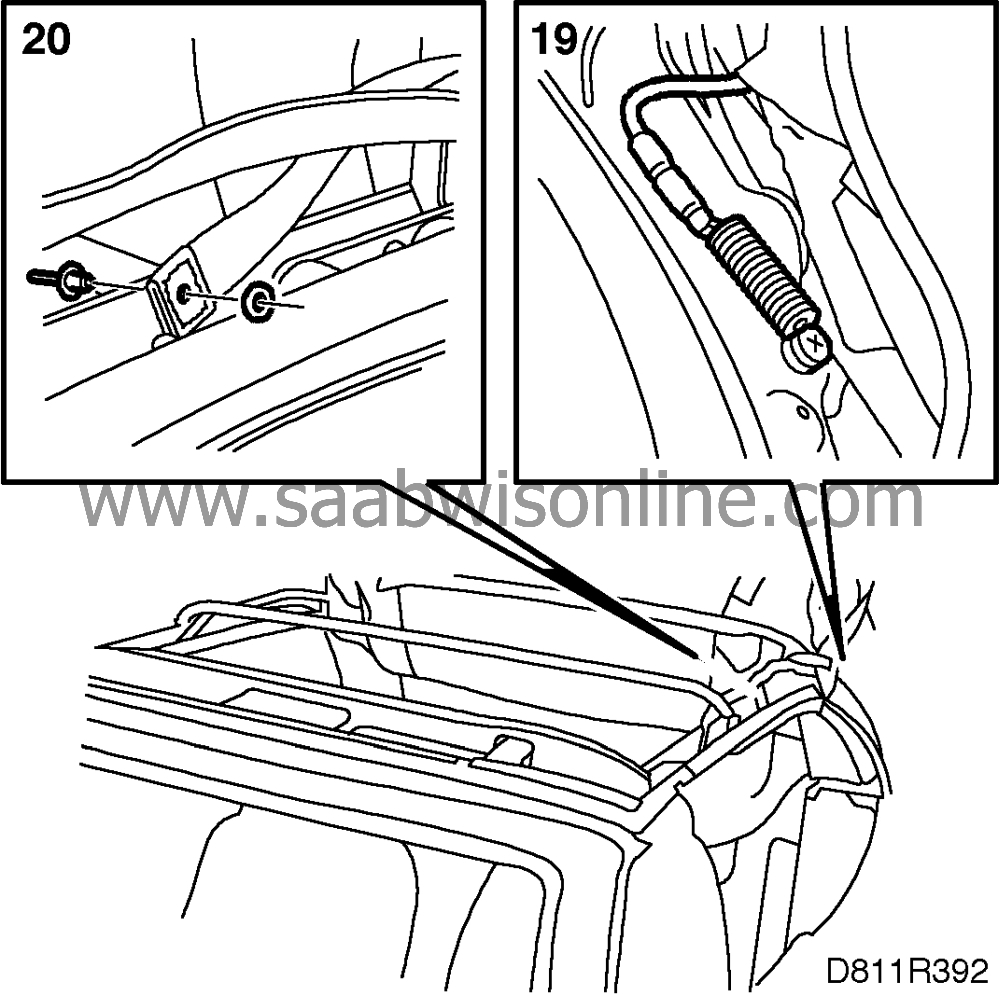
Thread the cables through the sides of the roof cloth.
|
|
| 20. |
Blind rivet the rear side ribbings to the middle rail on the top stack.
|
||||||||||
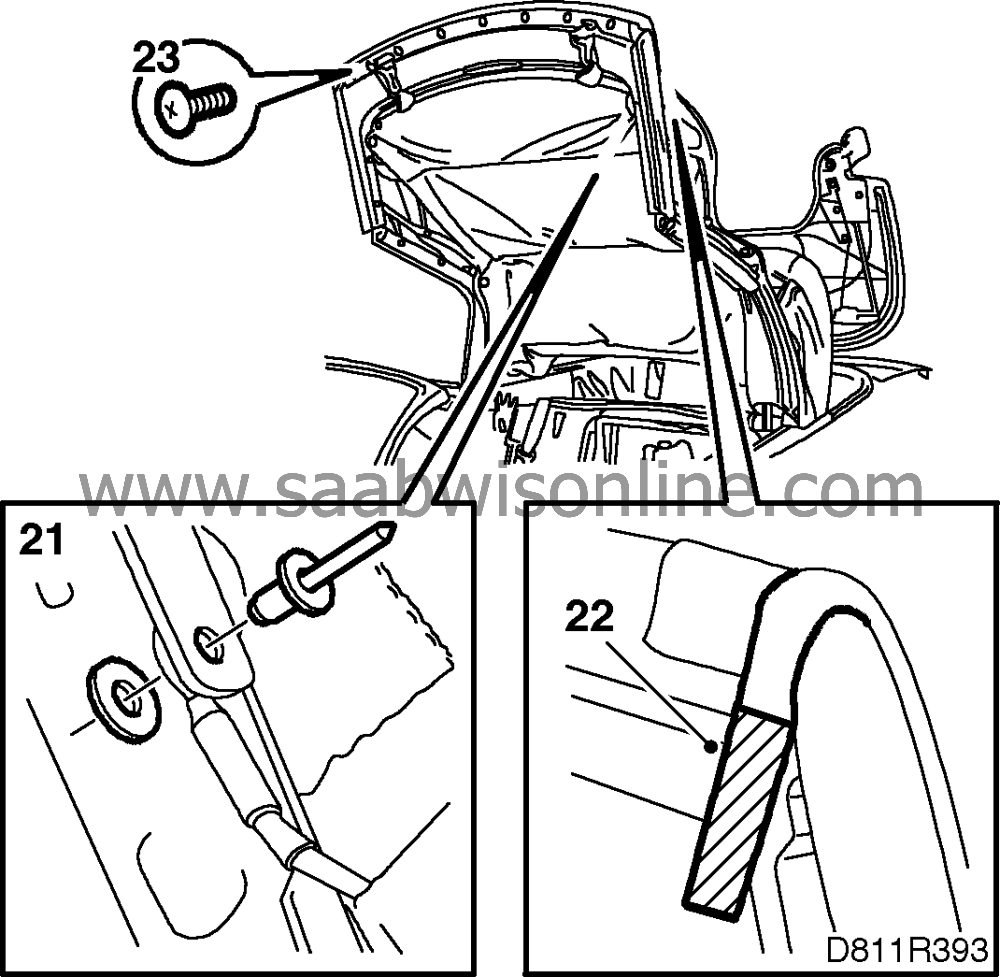
| 21. |
Blind rivet the cables flat side out.
|
|
| 22. |
Glue the outer roof to the first bow. Start at the corners, glue and fold down the flap. Cut away any excess cloth on the flap, see illustration. Use 3M Super Weatherstrip Adhesive.
|
|
| 23. |
Screw on the retaining strip to the first bow.
|
|
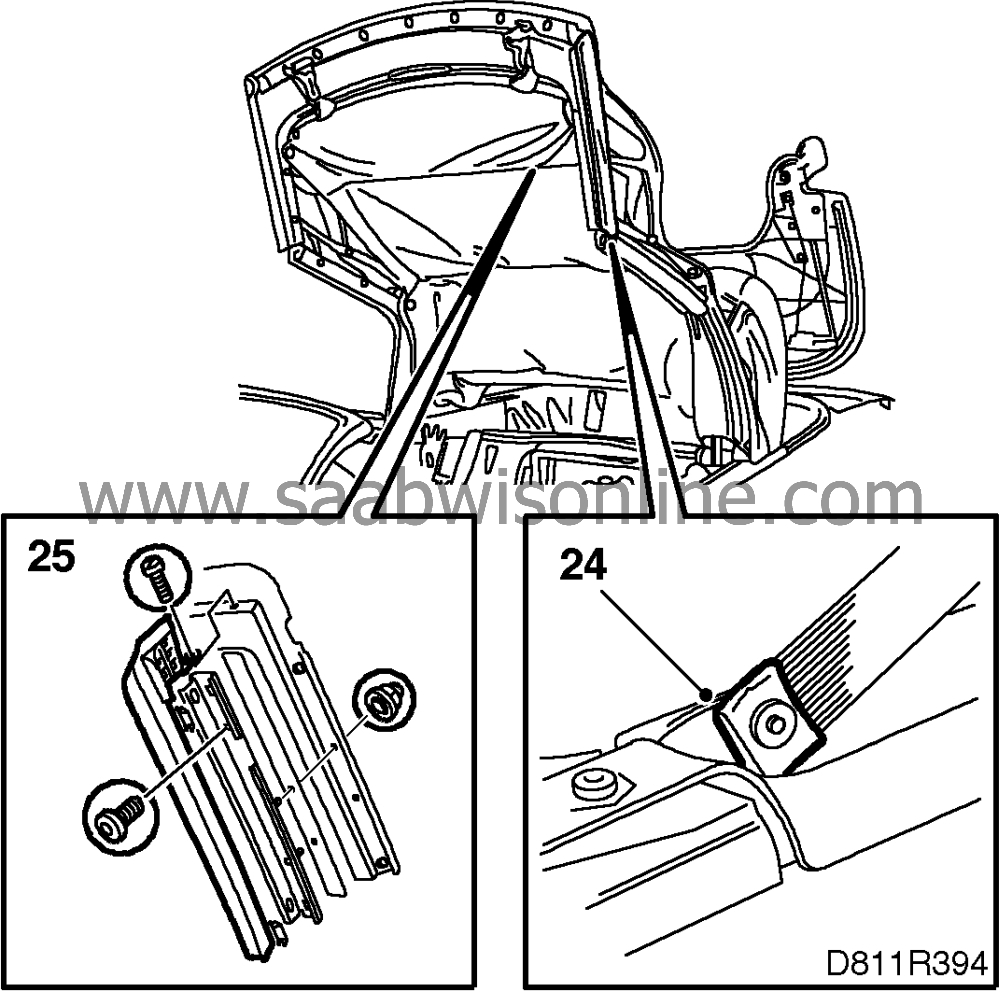
| 24. |
Blind rivet the front side ribbings to the front rails of the top stack. Proceed as for the rear side ribbings. See step 20.
|
|
| 25. |
Put back the front rail seal retainers and seals.
|
|
| 26. |
Fasten the outer roof to the third and second bows.
|
|
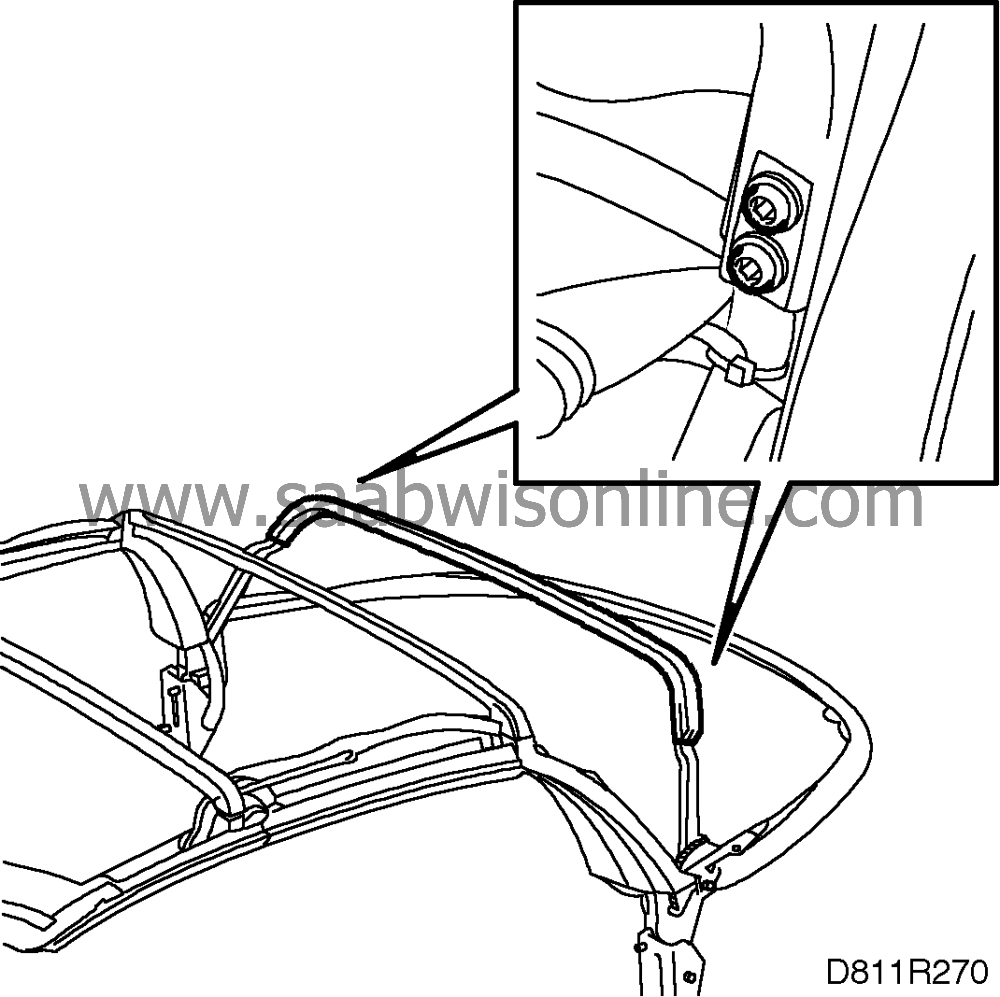
| 27. |
Check the fit of windows and seals. The second and fourth bows may need adjusting so that the door windows go free from the roof cloth when the doors are opened and closed.
|
|
| 28. |
Loosen the screws for the fourth bow and raise or lower the bow by moving it up or down.
|
|
| 29. |
Apply threadlocker to the screws and tighten them.
|
|
| 30. |
Adjust the second bow. See

|
|
| 31. |
Adjust the seal as necessary.
|
|
| 32. |
Put back the headlining. See
 .
.
|
|
| 33. |
Connect the diagnostic tool, clear any diagnostic trouble codes and then program the control module. See
 .
.
|
|
| 34. |
Check for leaks by flushing with water at an angle from above.
Never use high-pressure jets. |
|
| 35. |
The roof cloth is now very taut. To reduce the tension, you can dampen the roof or stand the car in the sun.
|
|

