Replacement of glove box lock
|
|
Replacement of glove box lock
|
|
1.
|
Remove the glove box lid
 .
.
|
|
2.
|
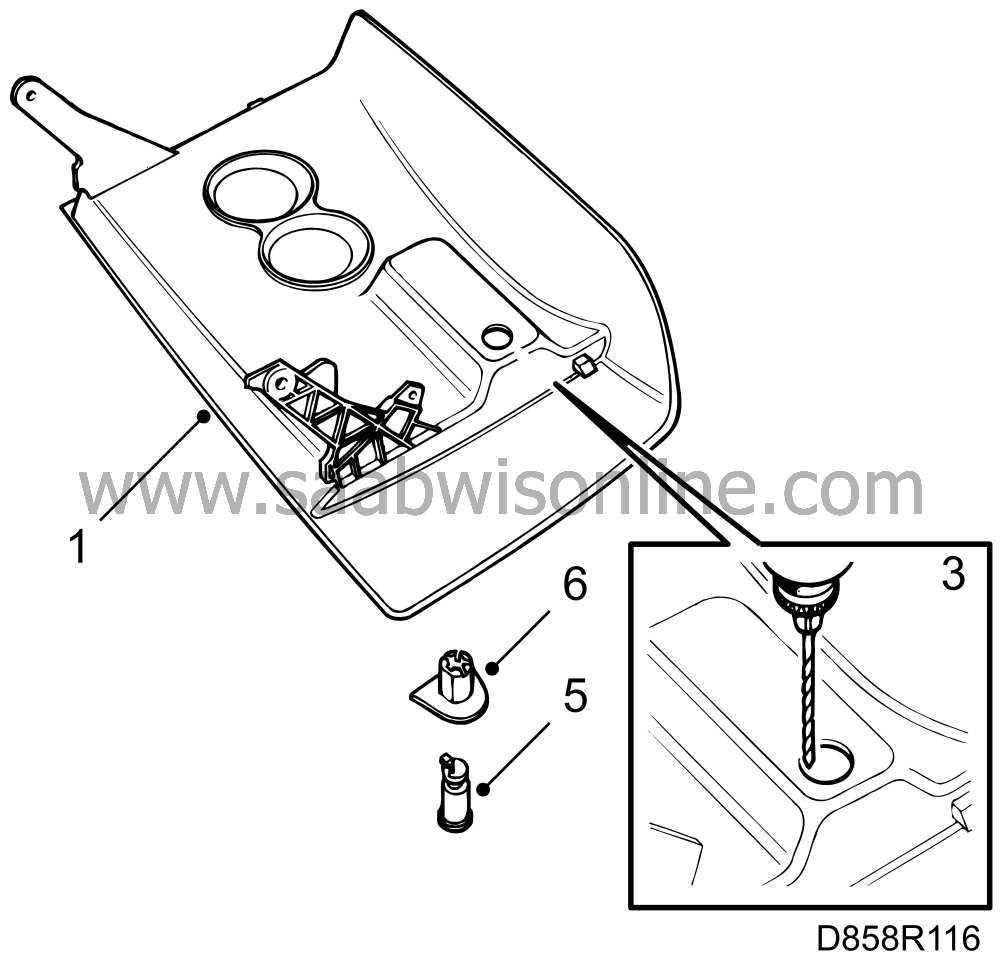
Place the lid on a workbench, protected by a cloth or the like.
|
|
3.
|
Drill a circle of 2 mm holes inside the circle marked on the rear of
the lid.
|
Note
|
|
The drill should not go more than just through, as the lock
mechanism might otherwise be damaged.
|
|
|
4.
|
Carefully cut away the remaining material.
|
|
5.
|
Bend out the hooks holding the lock cylinder in place and press it out.
|
|
6.
|
Remove the lock holder, using a screwdriver.
|
Fit in reverse order.
|
Note
|
|
Make sure that the lock cylinder is correctly positioned before pressing it into place.
Plug the drill hole by means of the plug supplied with the assembly kit for the new lock
cylinder. Use adhesive if necessary.
|
 .
.


