Parking lights
| Parking lights |
| 1. |
If only a single lamp is faulty, check that this lamp's fuse and bulb are OK and that the fuse is live.

|
|
| 2. |
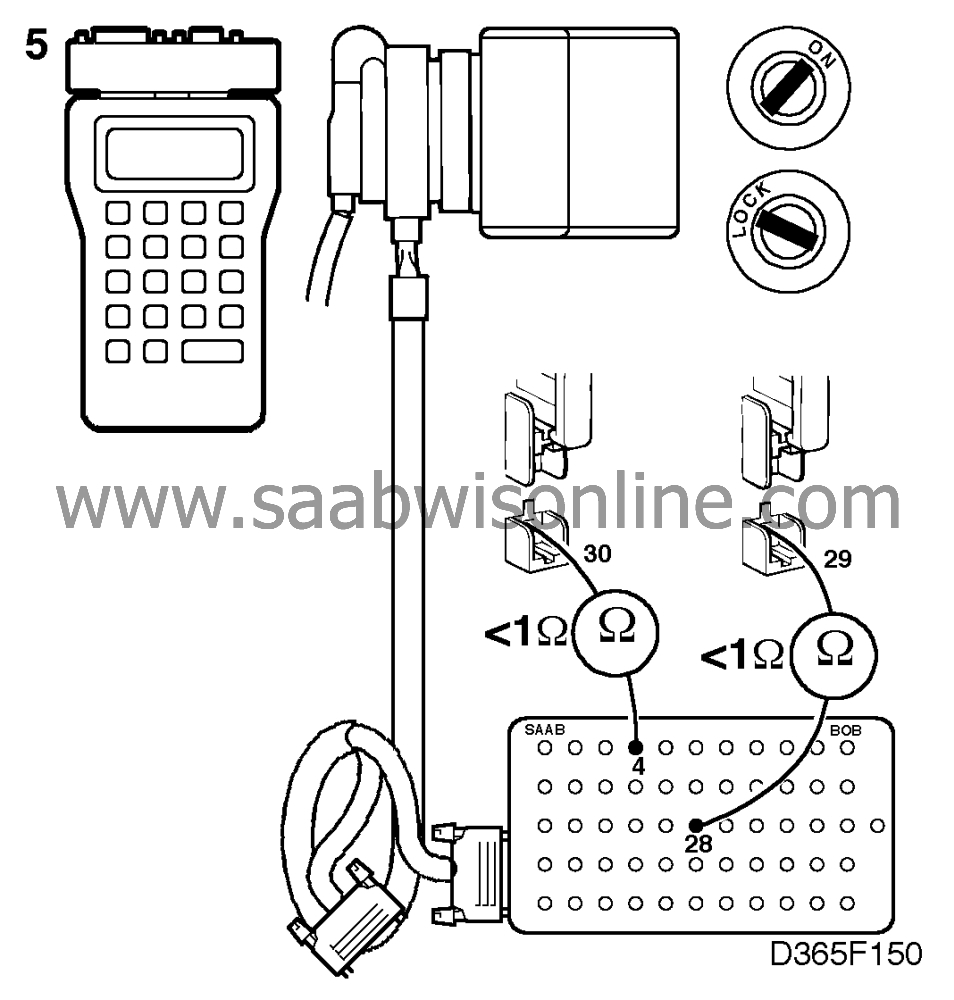
Connect a scan tool and select "READ SWITCHES" from the menu and then "PARKING LIGHTS".
Read the scan tool display. If the scan tool shows " OFF ", continue with point 3. If the scan tool shows " ON ", continue with point 4. |
|
| • |
ICE module connector pin 4 (left-hand).
|
| • |
ICE module connector pin 28 (right-hand).
|
| 6. |
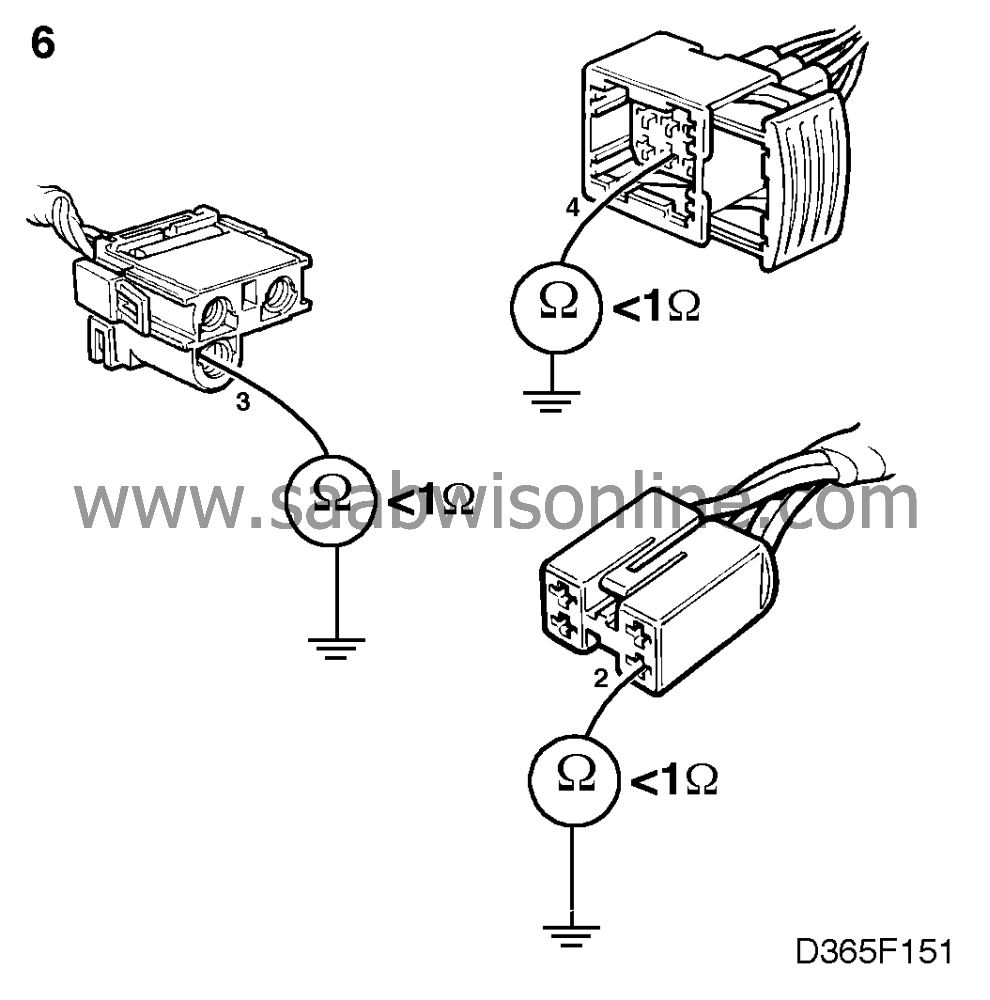
Unplug the lamp connectors and use an ohmmeter to check the ground connections of the lamps as follows:
|
|
| • |
between pin 4 of the connector and a good grounding point for the front parking lights.
|
| • |
between pin 3 of the connector and a good grounding pint for the side marker lights.
|
| • |
between pin 2 of the connector and a good grounding point for the rear parking lights.
The resistance should be < 1 ohm. If the resistance is OK, go to point 7. If the resistance is not OK, check the wiring for breaks/shorting. |
| 7. |
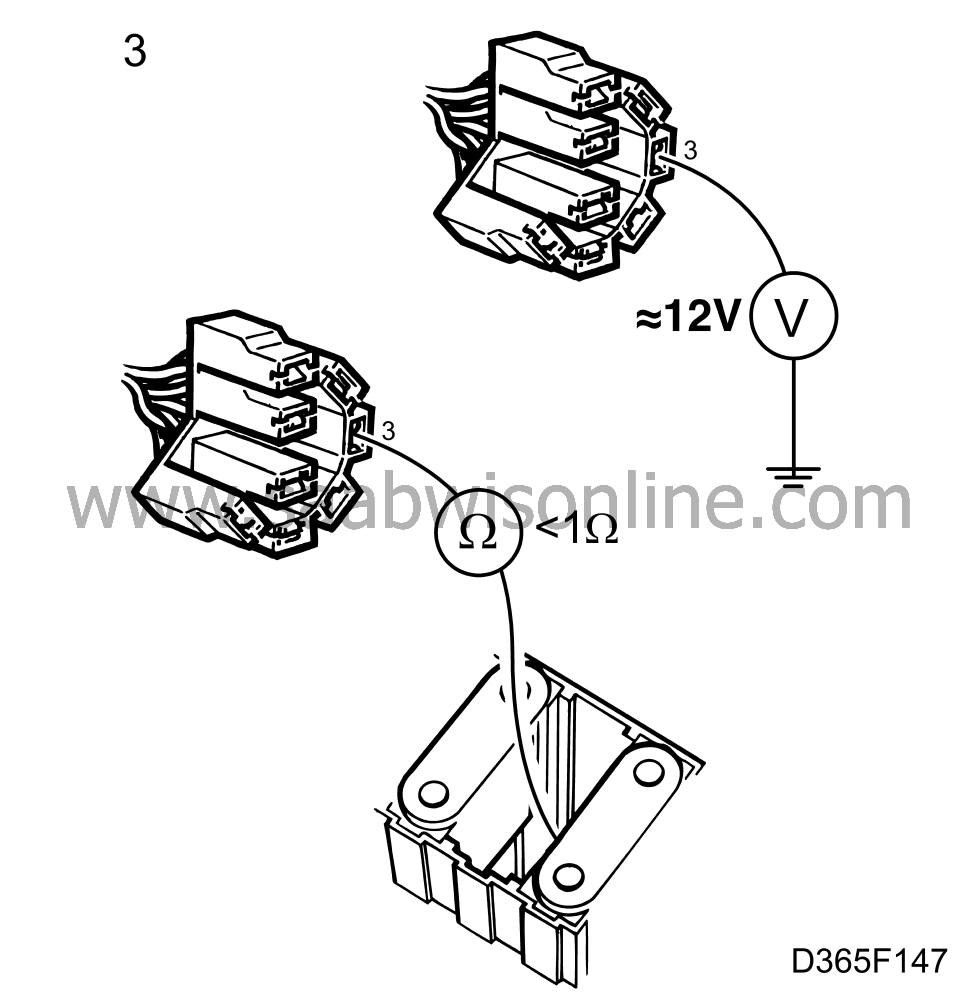
Using a voltmeter, check the lamp's power supply as follows:
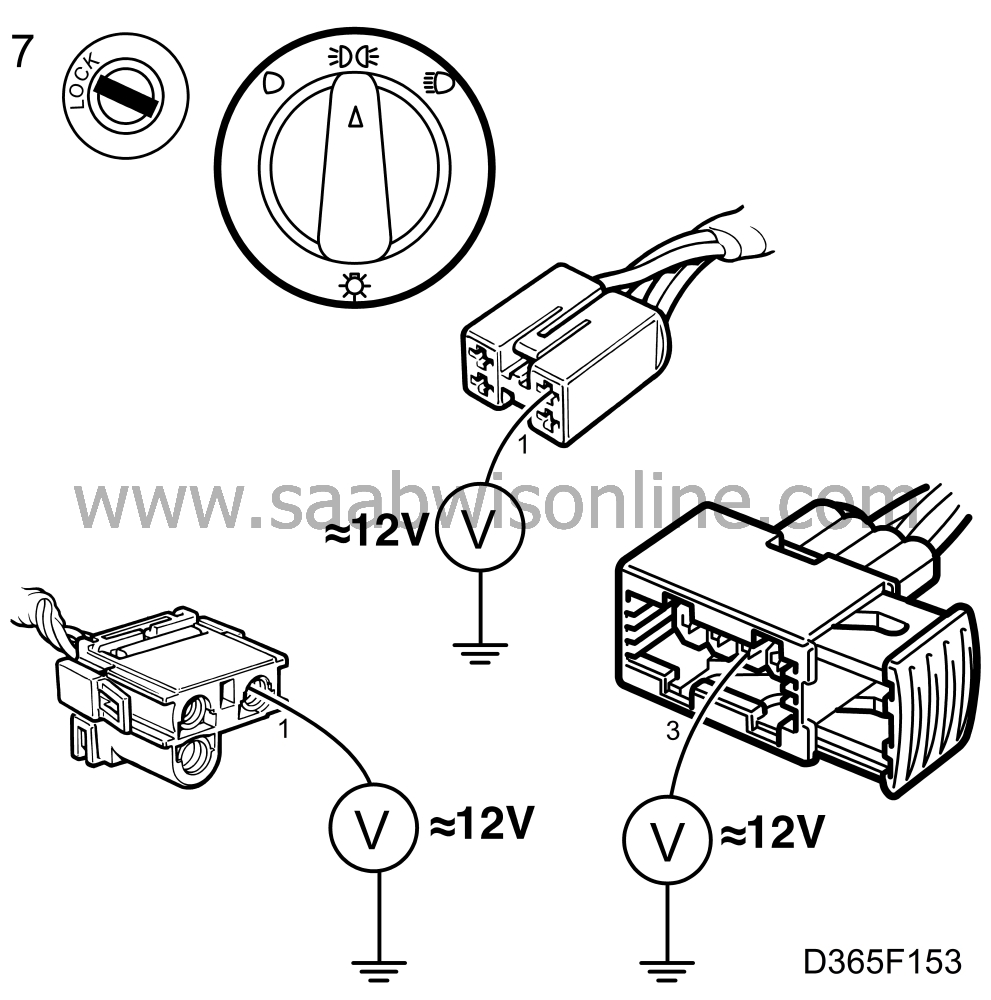
|
|
| • |
between connector pin 3 and a good grounding point for the front parking lights.
|
| • |
between connector pin 1 and a good grounding point for the side marker lights.
|
| • |
between connector pin 1 for the left-hand rear parking lights and connector pin 3 for the right-hand rear parking lights and a good grounding point. A reading of 12 V should be obtained.
|
| 8. |
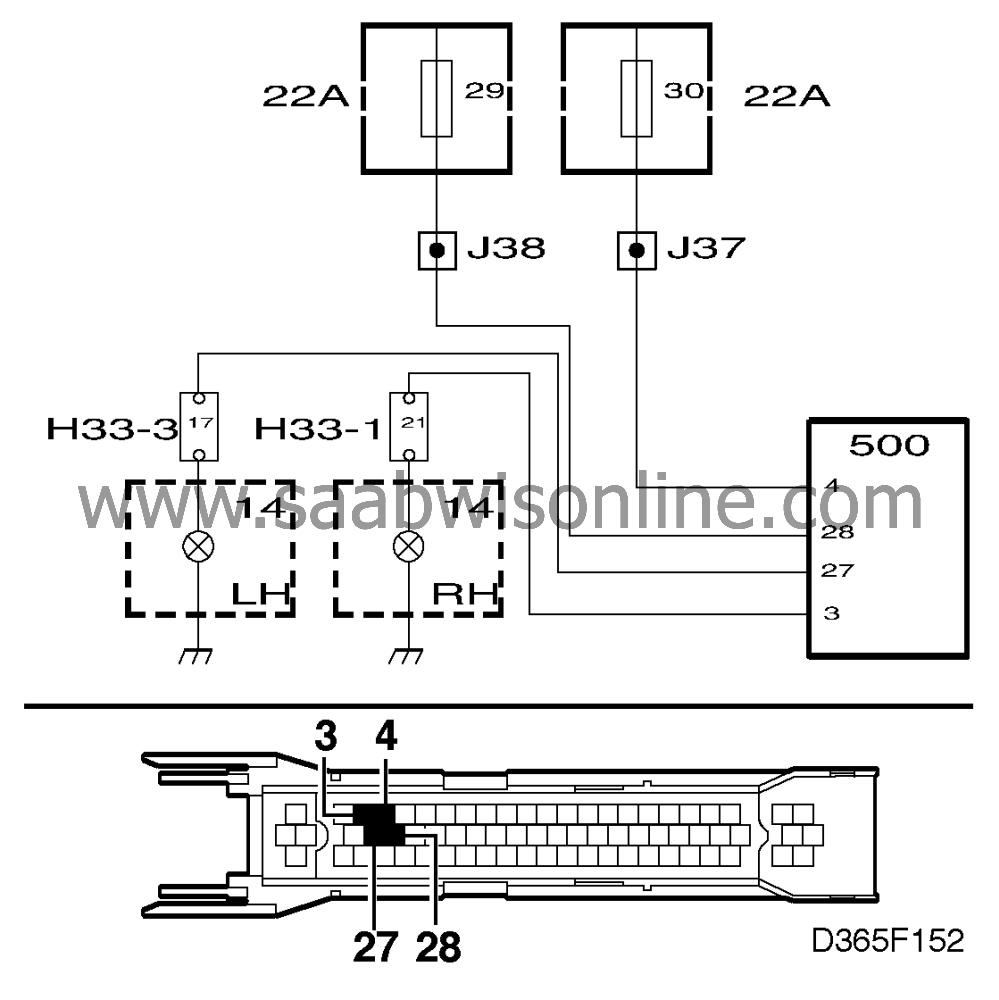
If a different reading is obtained, check the wiring for breaks/shorting as follows:

|
|
| • |
for the front parking lights, between the fuse and the lamp.
|
| • |
for the rear parking lights, between ICE module connector pins 27 (left-hand) and 3 (right-hand).
|

