Procedure for removing/fitting the steering column assembly
|
SERVICE INFORMATION
|
|
Bulletin Nbr:
|
641-1820
|
|
Date:
...........
|
NOVEMBER 1997
|
|
Market:
|
ALL
|
|
|
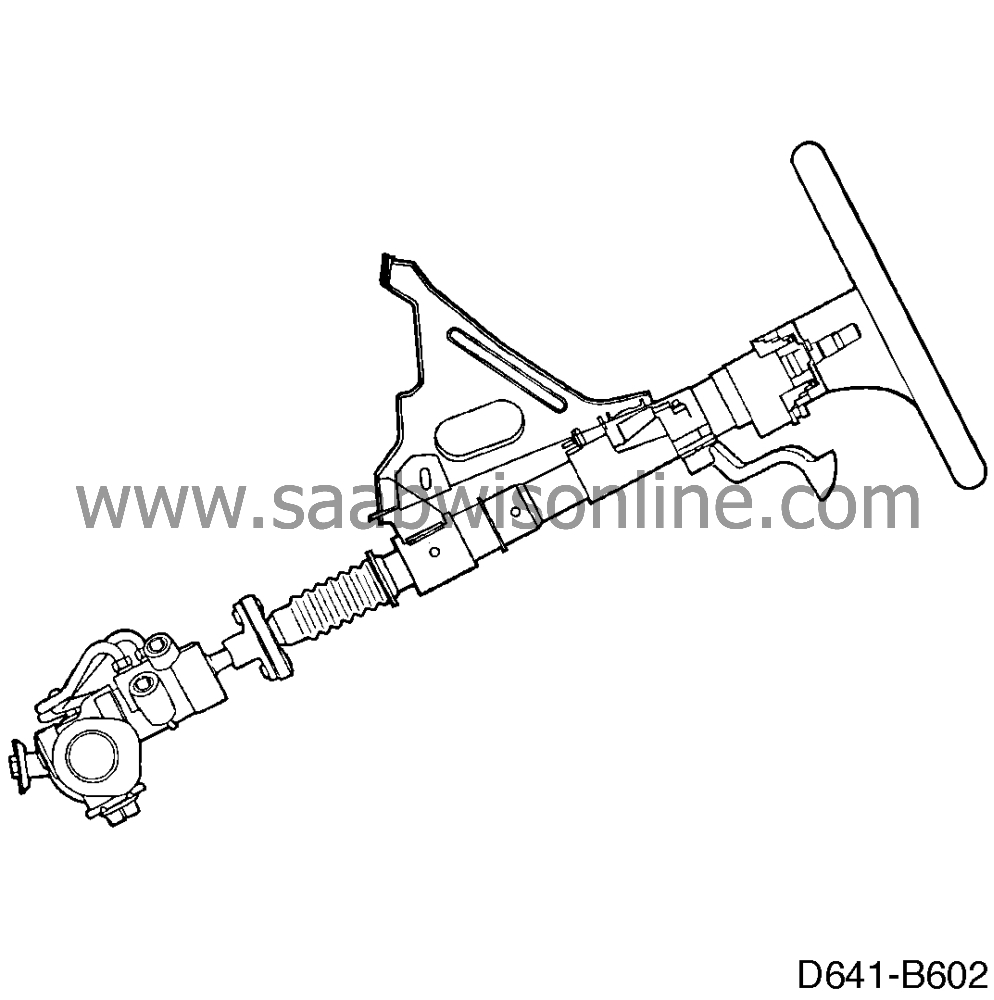
Procedure for removing/fitting the steering column assembly
|
All Saab 900 within the VIN interval:
R2000001-T2027261 (3D/5D)
S7000001-S7002837 (CV)
S7010001-S7025963 (CV)
T7000001-T7000153 (CV)
Certain steering column assemblies have been known to have handling damage and/or suffer from noise, alternatively the steering has been stiff or felt “lifeless” after replacing/fitting. This is due to uneven loads on the steering column assembly.
This can be rectified by carrying out the procedure described in this Service Information. The procedure is also described in Service Manual 6 “Front Assembly, Steering”, section “Steering Column Assembly” under the headings “Removing” and “Fitting” respectively
 .
.
|
Important
|
|
Avoid dismantling parts of the steering column assembly.
|
|
|
 Warning
|
|
Never strike the steering wheel adjustment device to knock the steering wheel loose. The steering column assembly's collision safety joints could then be damaged.
|
|
|
|
|
|
|
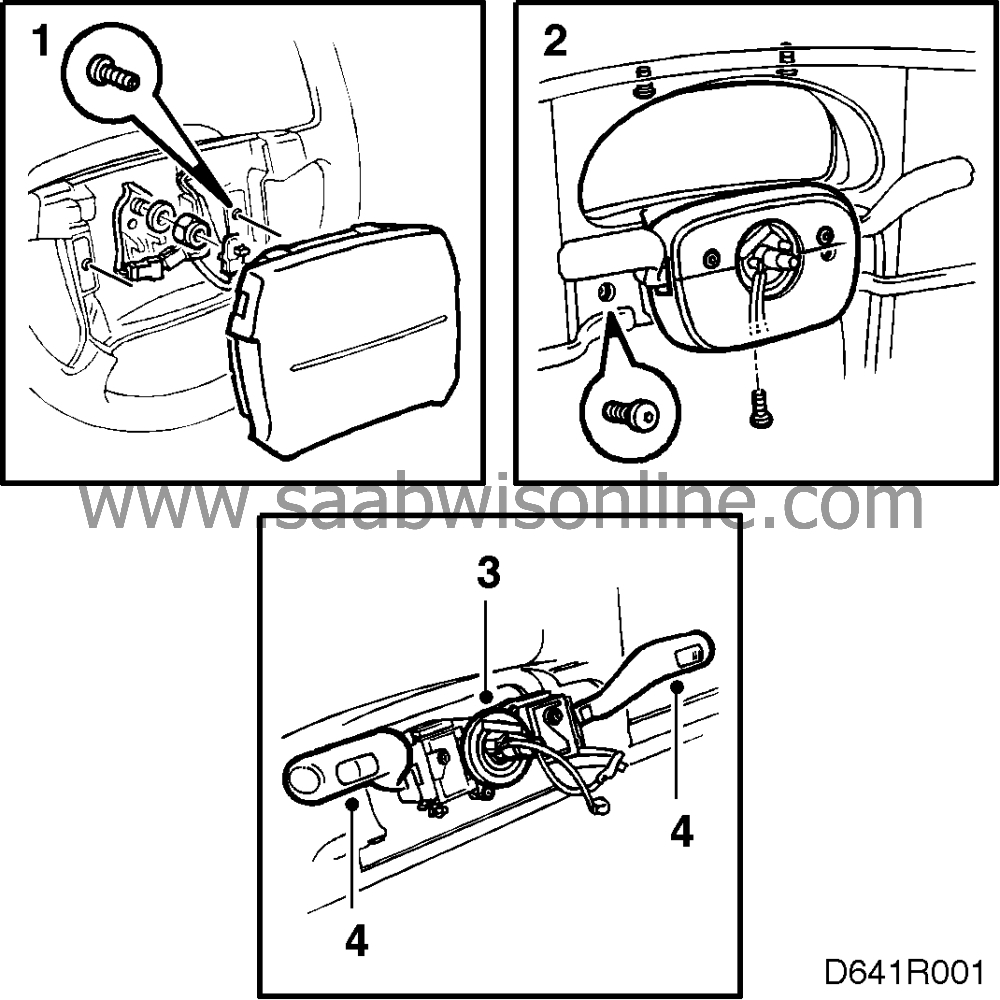
1.
|
Disconnect the negative cable on the battering, remove the steering wheel airbag and the steering wheel.
|
|
2.
|
Remove the upper and lower sections of the steering column cover.
|
|
3.
|
Remove the coil spring, the two retaining screws and the connector.
|
|
4.
|
Undo the direction indicator and wiper stalk switches. Also undo the retaining cable from the bearing housing.
|
|
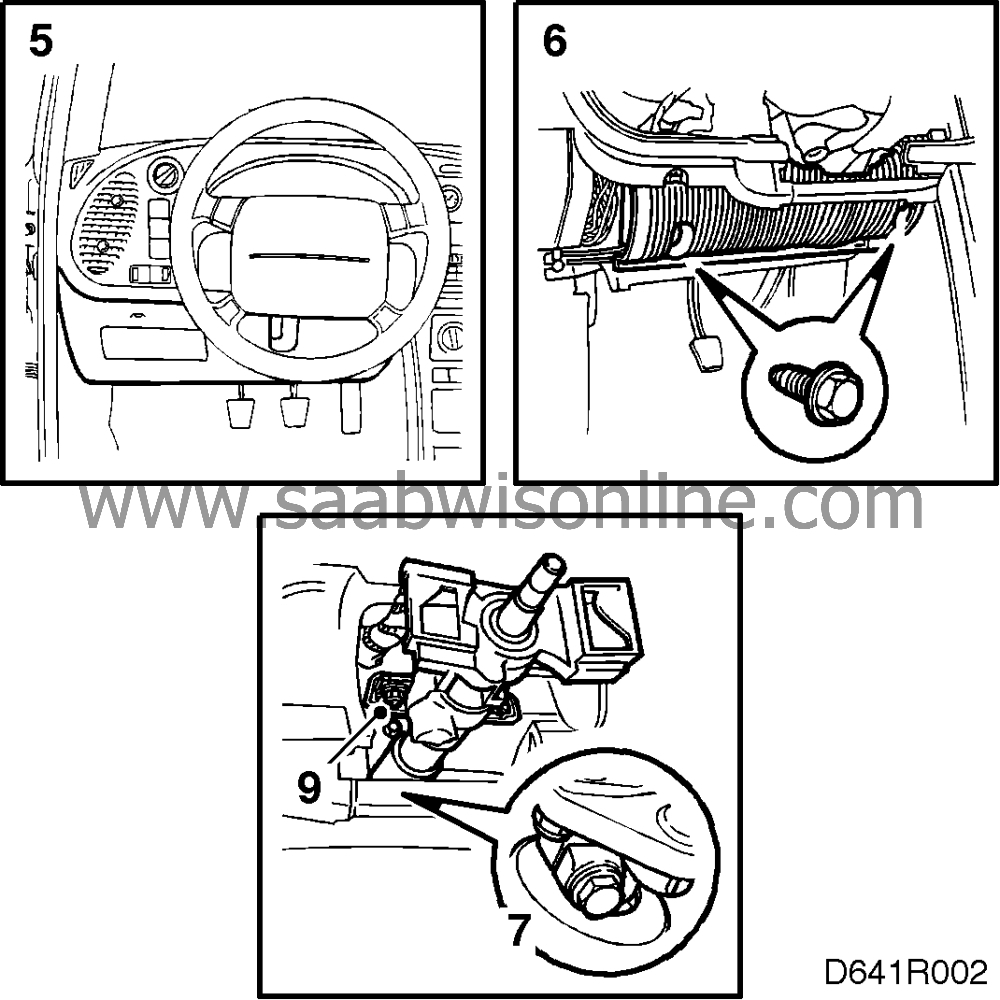
5.
|
Remove the lower section of the dashboard.
|
|
6.
|
Undo the two retaining screws on the knee member and remove it.
|
|
7.
|
Remove the locking bolt from the steering column's universal joint and lift the UJ off the pinion shaft.
|
|
8.
|
Undo the steering column retaining screw above the air duct.
|
|
9.
|
Remove the retaining nuts under the instruments.
|
|
10.
|
Lift out the steering column assembly.
|
|
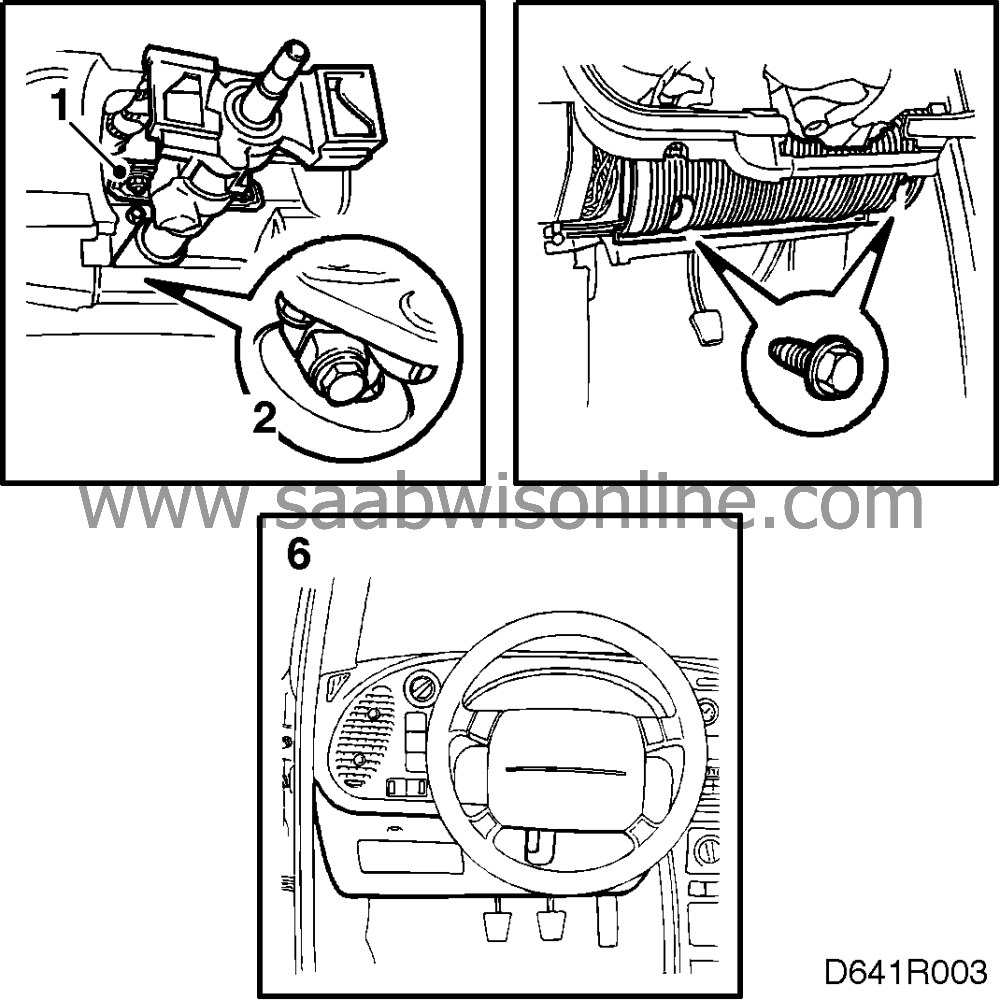
1.
|
Position the steering column assembly and the two retaining nuts without tightening them.
|
|
2.
|
Fit the steering column UJ to the pinion shaft and tighten the locking bolt
|
Important
|
|
The bolt's groove in the shaft.
|
|
|
Tightening torque 24 Nm (18 lbf ft).
|
|
3.
|
Lock the adjusting handle.
|
|
4.
|
Tighten the two retaining nuts under the instruments.
|
Important
|
|
It is very important that the steering column assembly mountings are tightened in the correct order.
|
|
|
Tightening torque 24 Nm (18 lbf ft).
|
|
5.
|
Fit the steering column retaining screw above the air duct.
Tightening torque 24 Nm (18 lbf ft).
|
|
6.
|
Fit the knee member and replace the lower section of the dashboard.
|
|
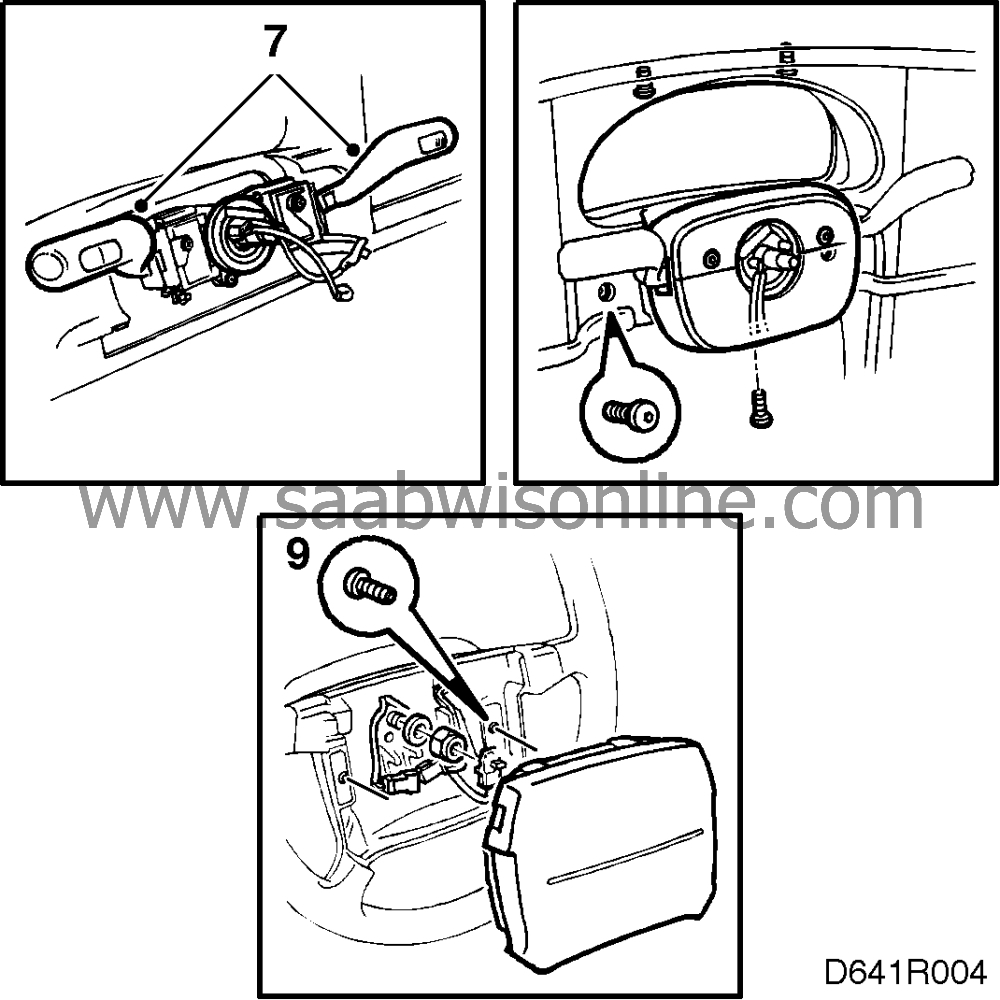
7.
|
Fit the stalk switches and the retainer to the bearing housing.
|
|
8.
|
Fit and connect the coil spring unit. Turn it to its end position and then back two and a half turns.
|
|
9.
|
Fit the upper and lower steering column covers and replace the steering wheel.
|
Important
|
|
The locating groove in the steering wheel mounting.
|
|
|
Tightening torque: 30 Nm (22 lbf ft).
|
|
10.
|
Fit the steering wheel airbag and connect the negative cable on the battery.
|
 .
.


 Warning

