The evaporator's low-pressure pipe
| The evaporator's low-pressure pipe |
| To remove |
| Important | ||
|
The evaporator's low-pressure pipe must be cut during removal. The spare is a hose in two parts. |
||
| 1. |
Place the car on a lift.
|
|
| 2. |
Remove the grille.
|
|
| 3. |
Drain the AC system of refrigerant.
|
|
| 4. |
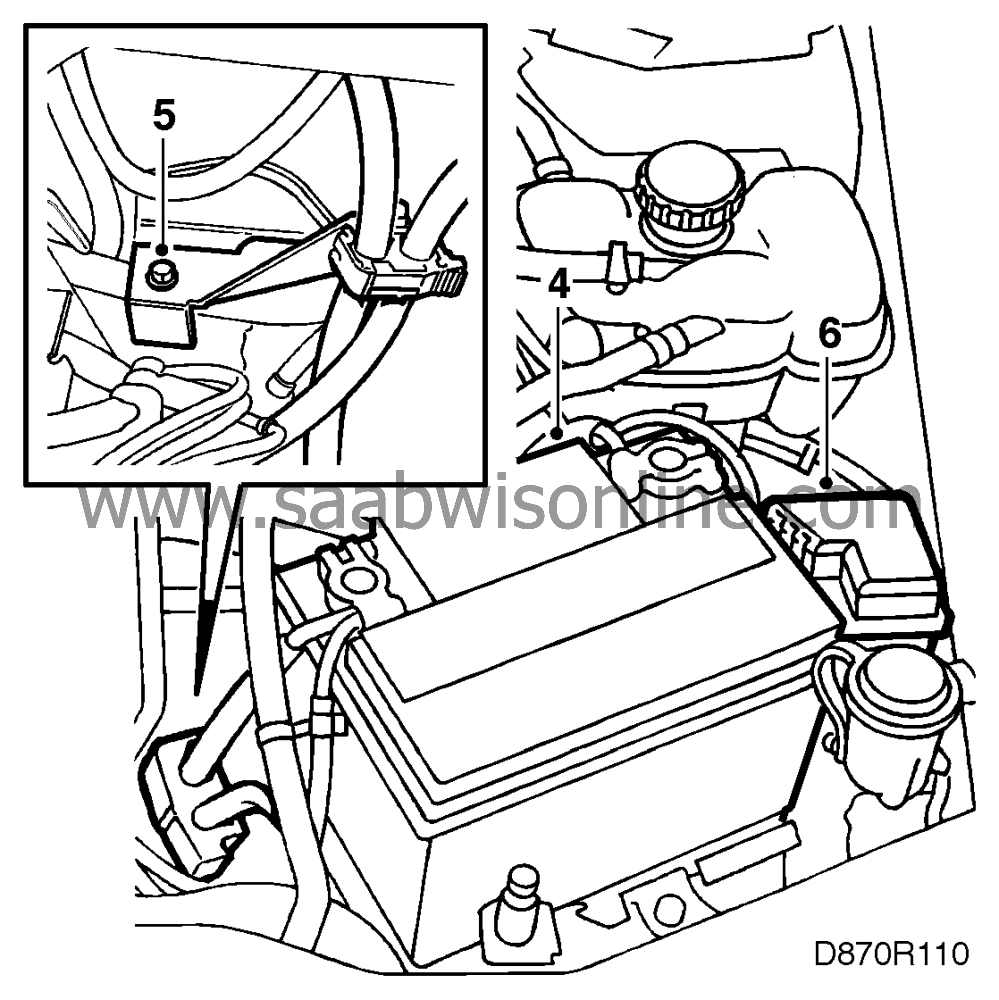
Remove the battery.
|
|
| 5. |
Remove the bolt in the bracket securing the battery cable holder.
|
|
| 6. |
Remove the main fuse box.
|
|
| 7. |
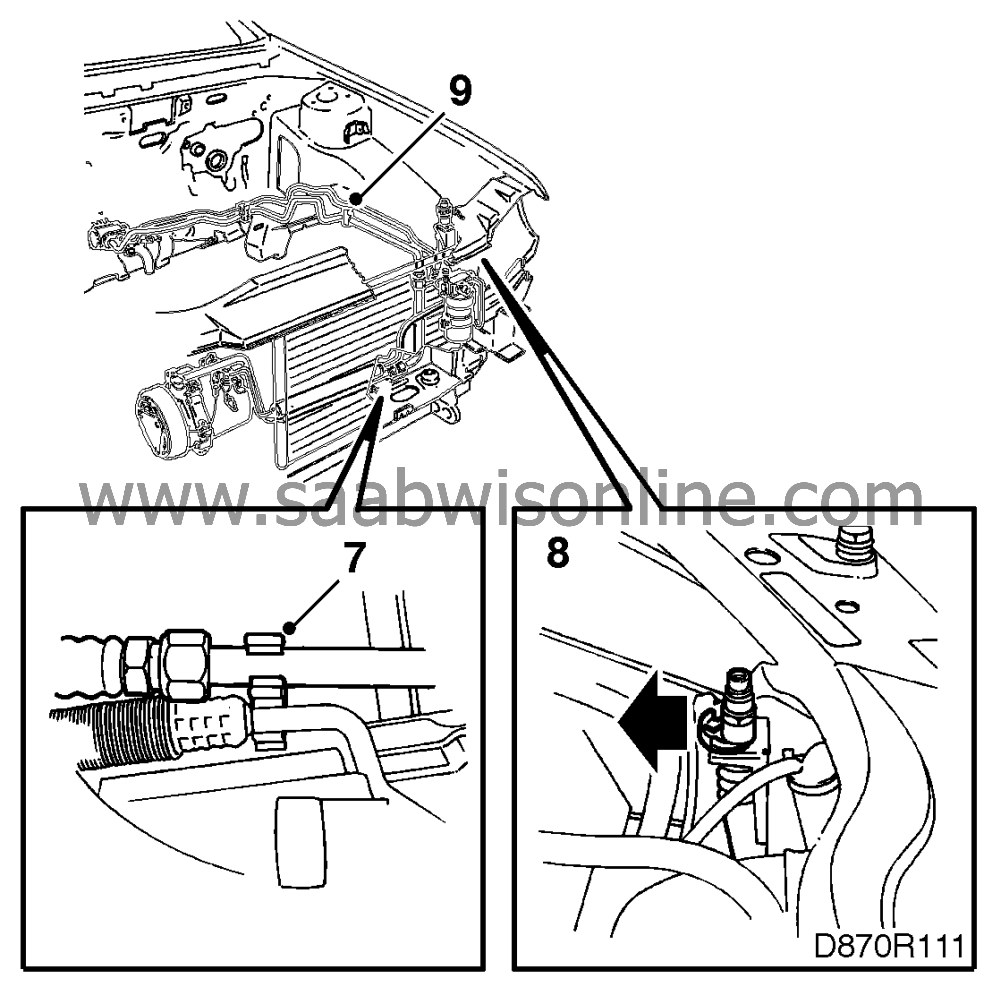
Remove the compressor's low-pressure pipe from the holder on the front cross-member.
|
|
| 8. |
Remove the clip holding the low-pressure side's service connection.
|
|
| 9. |
Remove the evaporator's low-pressure pipe from the holder on the wheel housing.
|
||||||||||
| 10. |
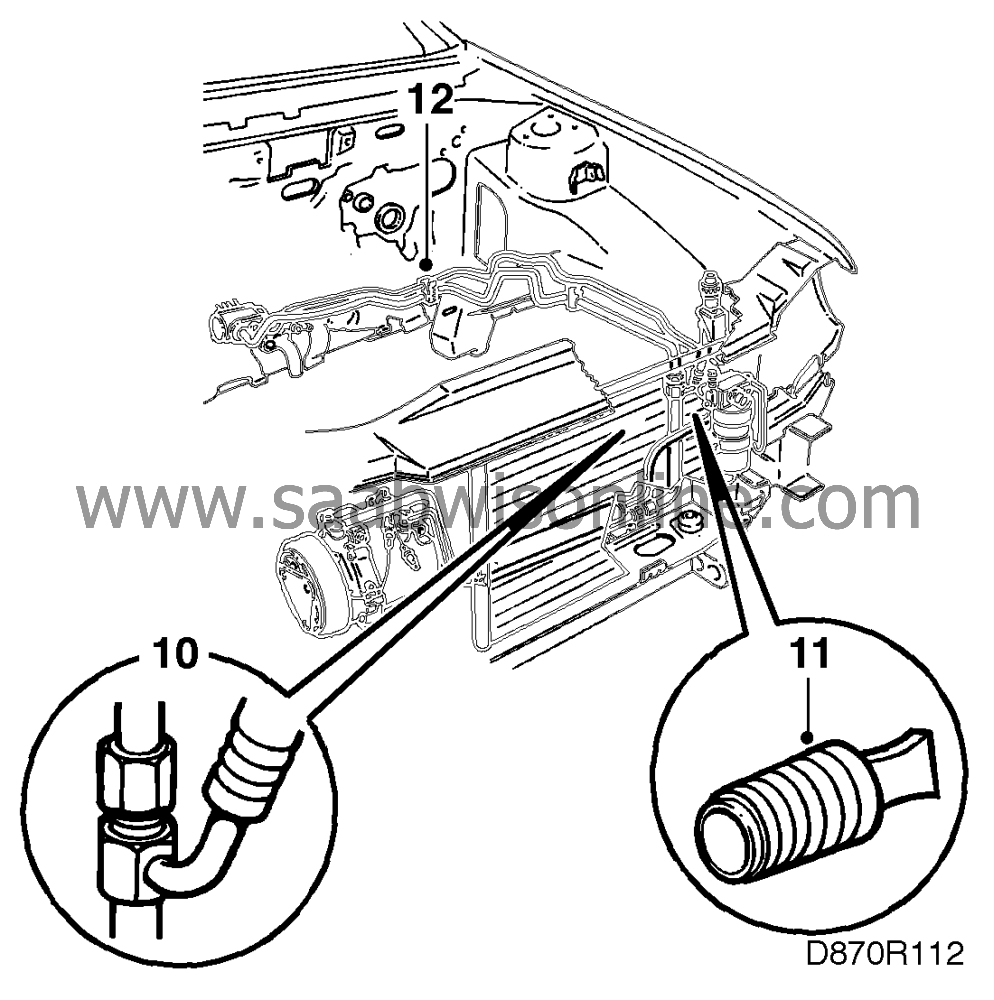
Remove the nut which securing the evaporator's low-pressure pipe to the service connection.
|
|
| 11. |
Plug the openings.
|
|
| 12. |
Remove the evaporator's low-pressure pipe from the holder on the bulkhead wall.
|
|
| 13. |
Unscrew the high-pressure pipe from the PAD connection adjacent to the lead-through in the bulkhead wall.

|
|
| 14. |
Plug the openings.
|
|
| 15. |
Remove the bolt securing the PAD connection.
|
|
| 16. |
Plug the openings.
|
|
| 17. |
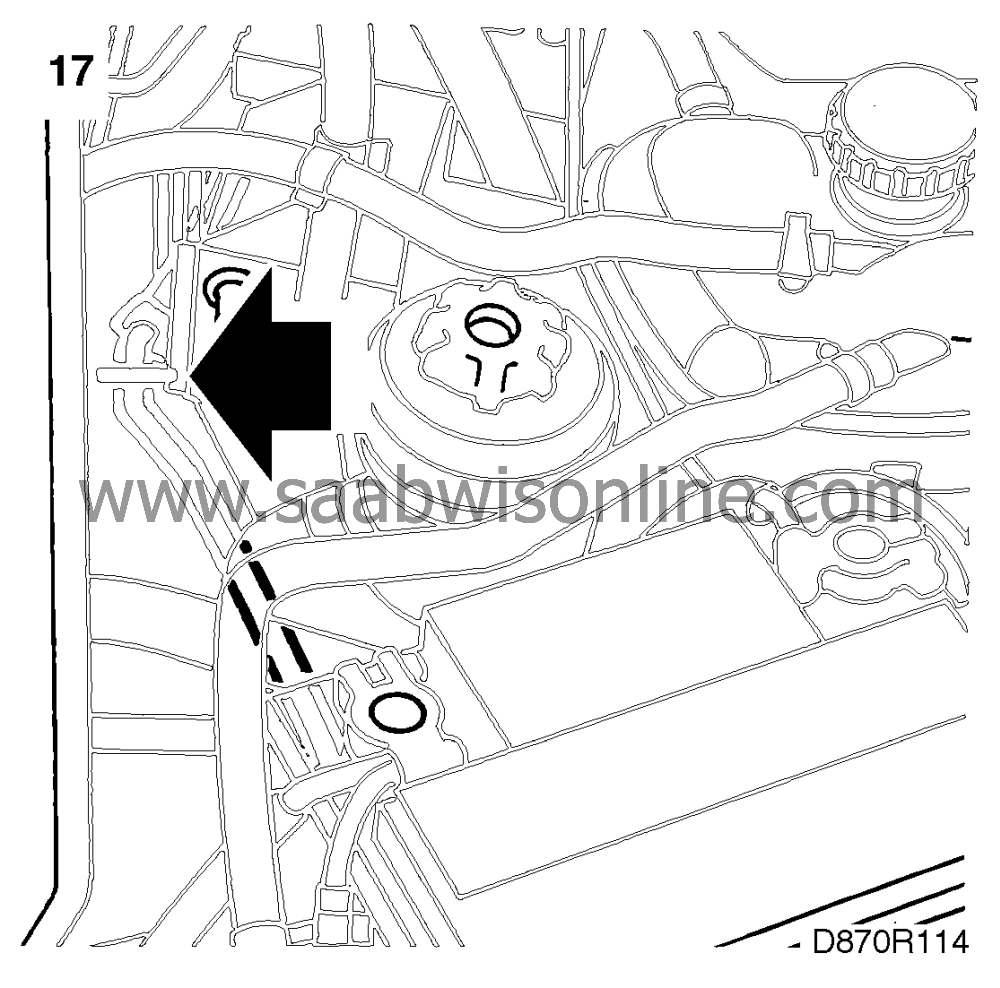
Raise the car. Cut the low-pressure pipe through the wheel housing as shown.
|
|
| 18. |
Lower the car and lift out the pipe sections.
|
|
| To fit |

| 1. |
Fit the rear end of the low-pressure pipe in place from above.
|
|
| 2. |
LHD cars: Raise the car.
|
|
| 3. |
Lubricate new O-rings with synthetic vaseline and fit them in place at the expansion valve or block.
|
|
| 4. |
Tighten the bolt securing the block or fit the PAD connection and pipes in place and tighten the bolt.
Tightening torque, block: 20 Nm (14.8 lbf ft) Tightening torque, PAD connection: 9 Nm (6.6 lbf ft) |
|
| 5. |
LHD cars: Lower the car.
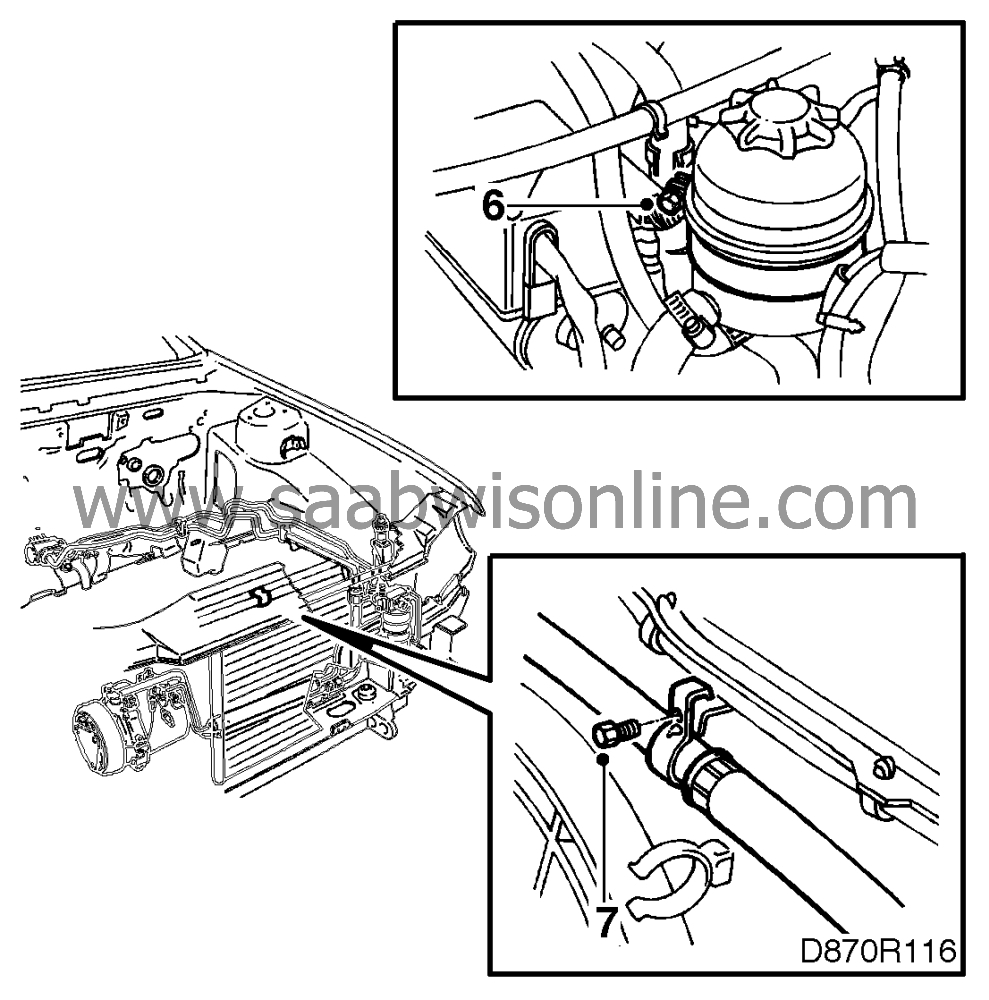
|
|
| 6. |
Remove the bolt securing the pipe between the power steering fluid reservoir and the servo pump.
|
|
| 7. |
Remove the power steering fluid reservoir's pipe from the holder under the battery tray.
|
|
| 8. |
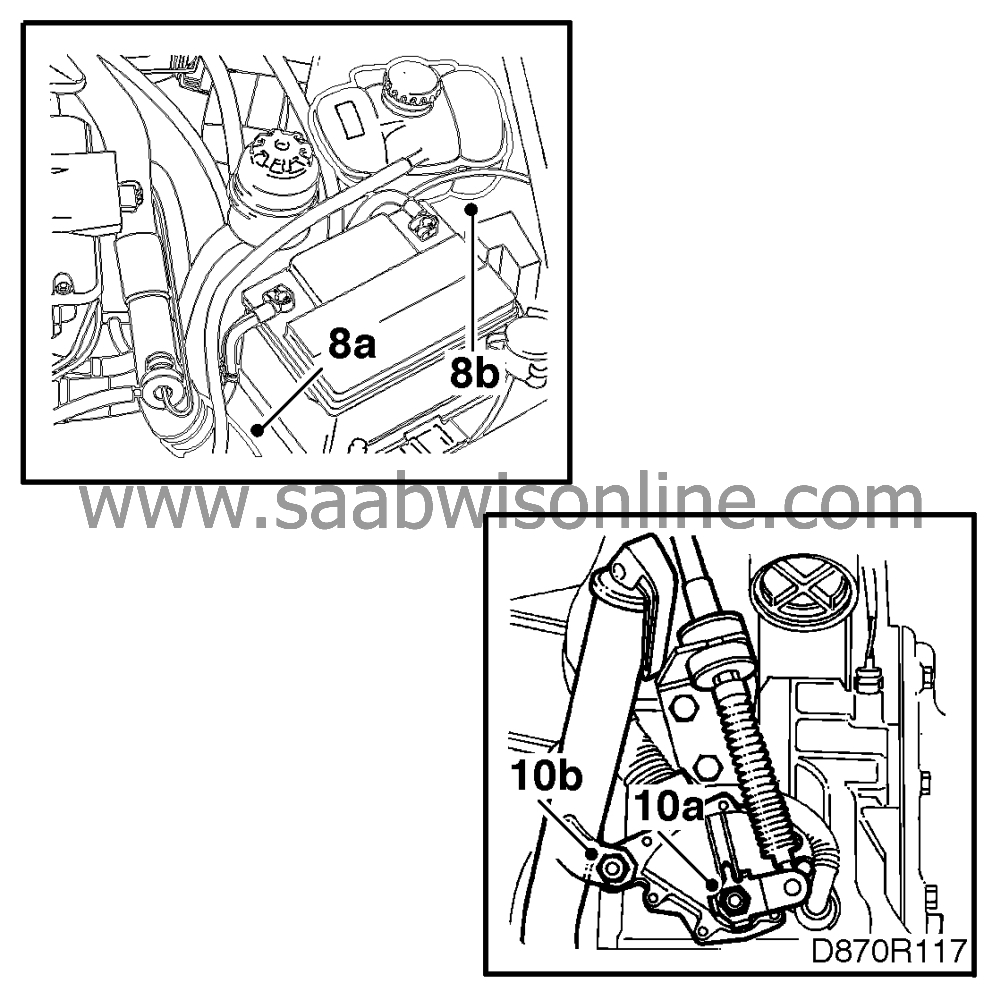
Cars with a turbo engine:
|
|
| 8.a. |
Remove the hose between the charge air cooler and the throttle body.
|
| 8.b. |
{blc}Remove the expansion tank retaining bolt.
|
| 9. |
Cars with a manual gearbox: Secure the clutch pedal in the depressed position.
|
|
| 10. |
Cars with automatic transmission:
|
|
| 10.a. |
Remove the nut securing the selector lever to the gearbox.
|
| 10.b. |
{blc}Remove the two bolts securing the gear selector's bracket to the gearcase.
|
| 11. |
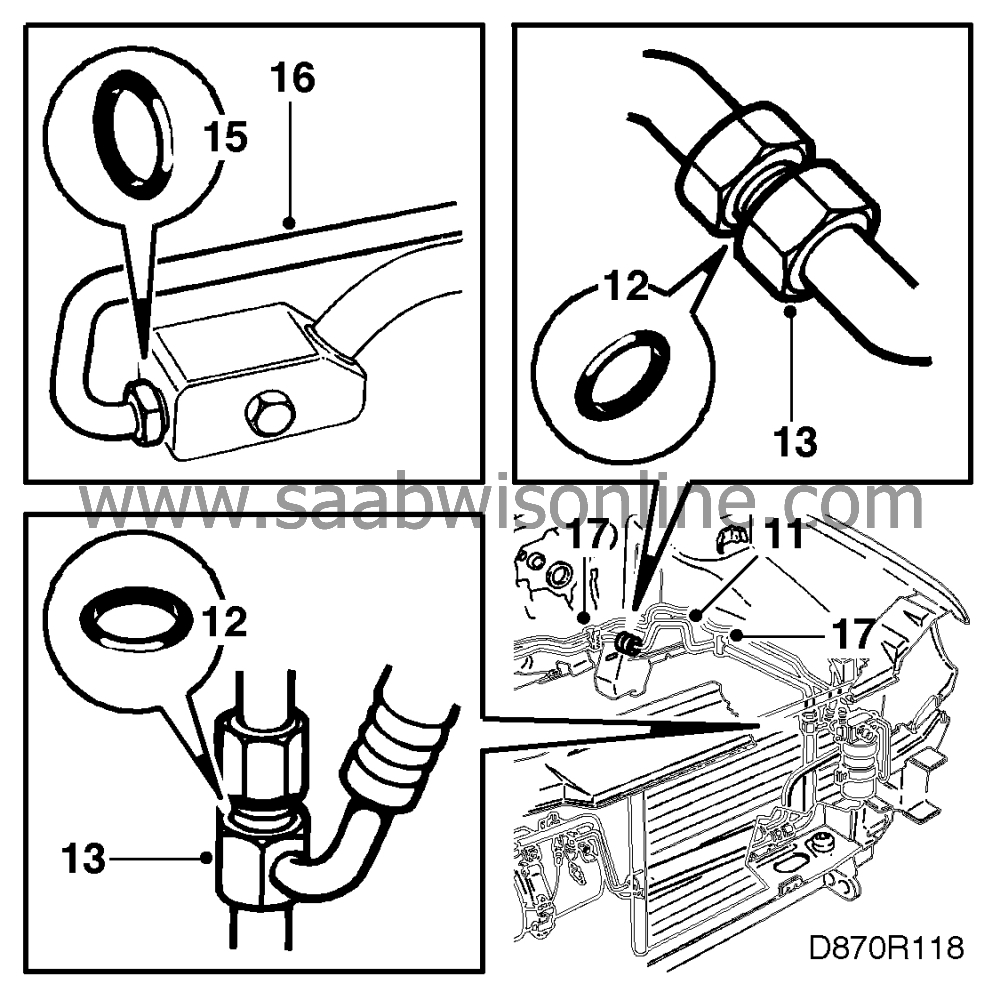
Fit the front part of the evaporator's low-pressure pipe in place.
|
|
| 12. |
Lubricate new O-rings with synthetic vaseline and fit them to both ends of the front part of the low-pressure pipe.
|
|
| 13. |
Insert both ends of the pipe.
|
|
| 14. |
Tighten both ends of the pipe.
Tightening torque: 34 Nm (25.1 lbf ft) |
|
| 15. |
Cars with block connection on the bulkhead wall: Lubricate a new O-ring with synthetic vaseline and fit it on the high-pressure pipe.
|
|
| 16. |
Cars with block connection on the bulkhead wall: Screw the high-pressure pipe to the block.
Tightening torque: 20 Nm (14.8 lbf ft) |
|
| 17. |
Fit the evaporator's low-pressure pipe in the holders on the bulkhead wall and wheel housing.
|
|
| 18. |
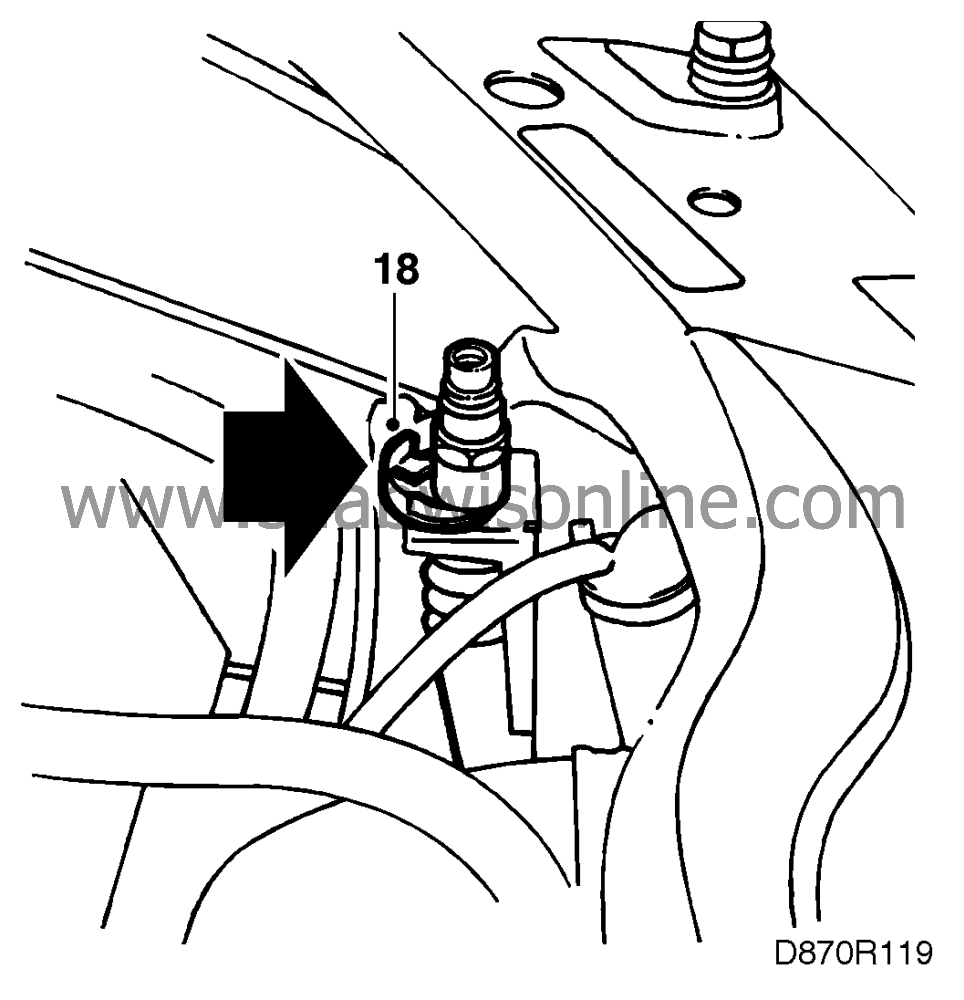
Fit the low-pressure side's service connection in place and press on the clip.
|
|
| 19. |
Cars with automatic transmission:
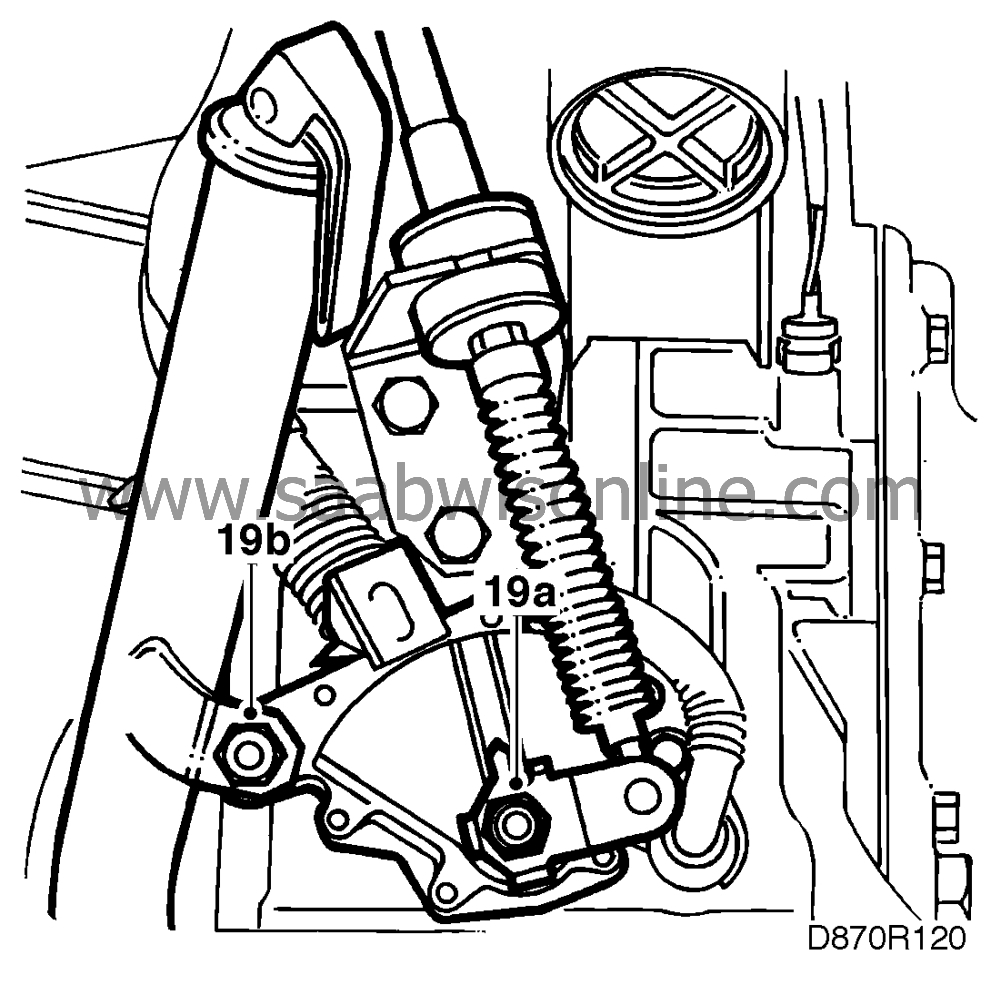
|
|
| 19.a. |
Tighten the nut securing the gear selector lever to the gearbox.
|
| 19.b. |
Tighten the two bolts securing the gear selector lever's bracket to the gearcase.
|
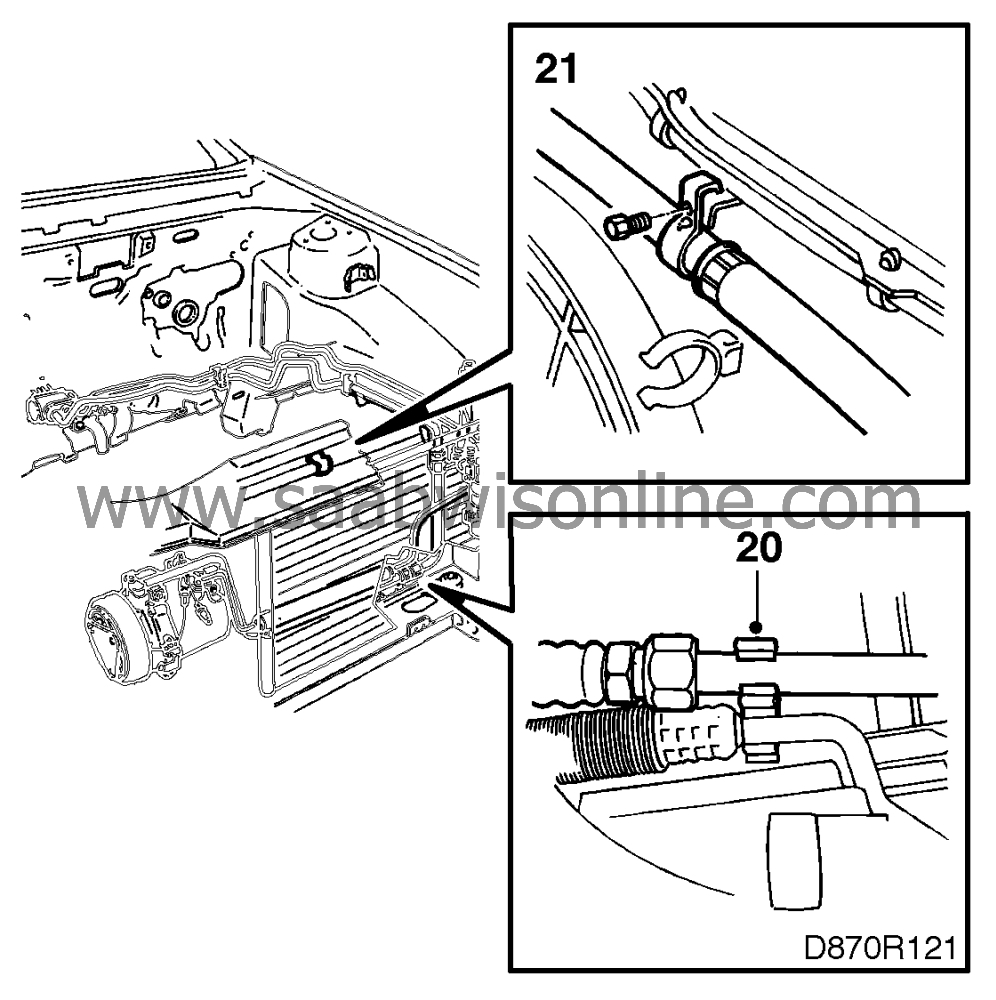
| 20. |
Fit the compressor's low-pressure pipe in the holder on the subframe.
|
|
| 21. |
Refit the hose between the power steering fluid reservoir and the servo pump. Secure the hose in the clip and tighten the screw.
|
|
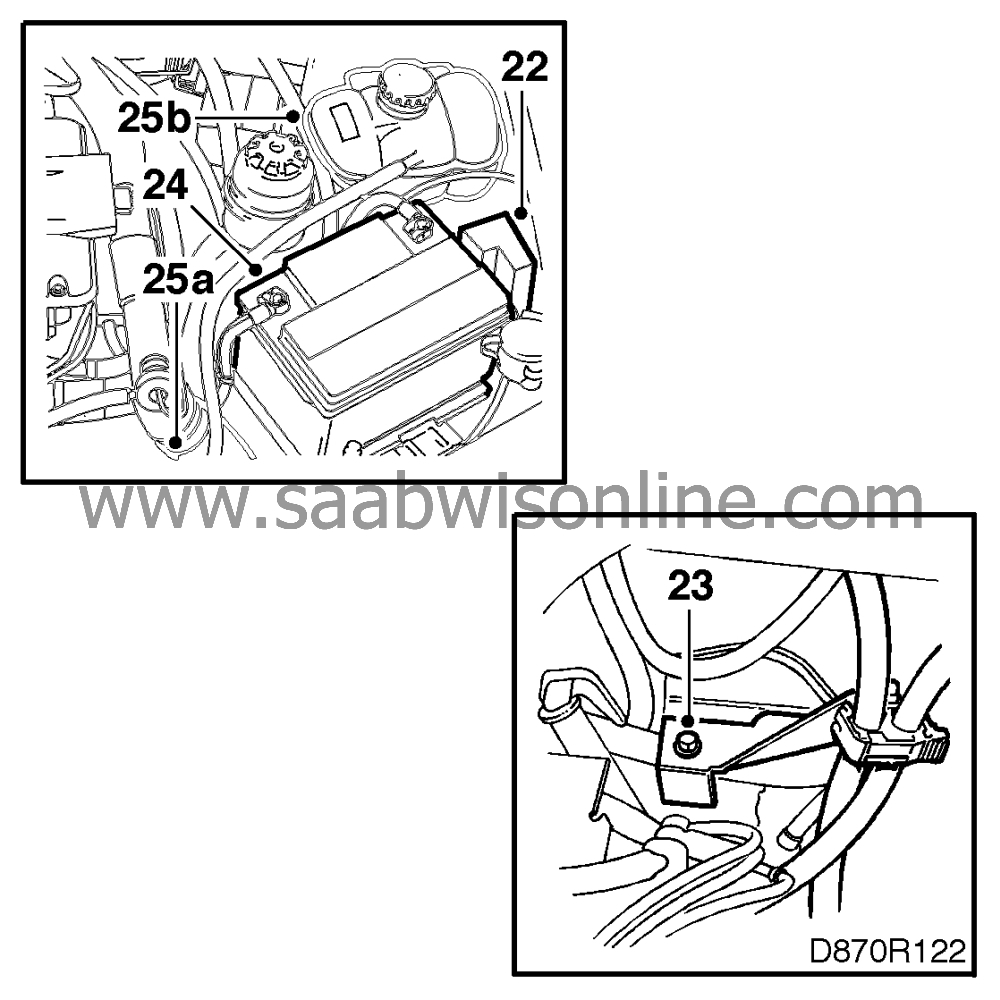
| 22. |
Refit the main fuse box.
|
|
| 23. |
Tighten the bolt securing the bracket for the battery cable holder.
|
|
| 24. |
Refit the battery.
|
|
| 25. |
Cars with a turbo engine:
|
|
| 25.a. |
Refit the hose between the charge air cooler and the throttle body.
|
| 25.b. |
Refit the expansion tank and tighten the screw.
|
| 26. |
Fill up with compressor oil, carry out vacuum pumping of the AC system and fill up with refrigerant.
|
|
| 27. |
Refit the grille.
|
|

