Whole side, top stack
| Whole side, top stack |
The method below describes the left-hand side.
| To remove |
| 1. |
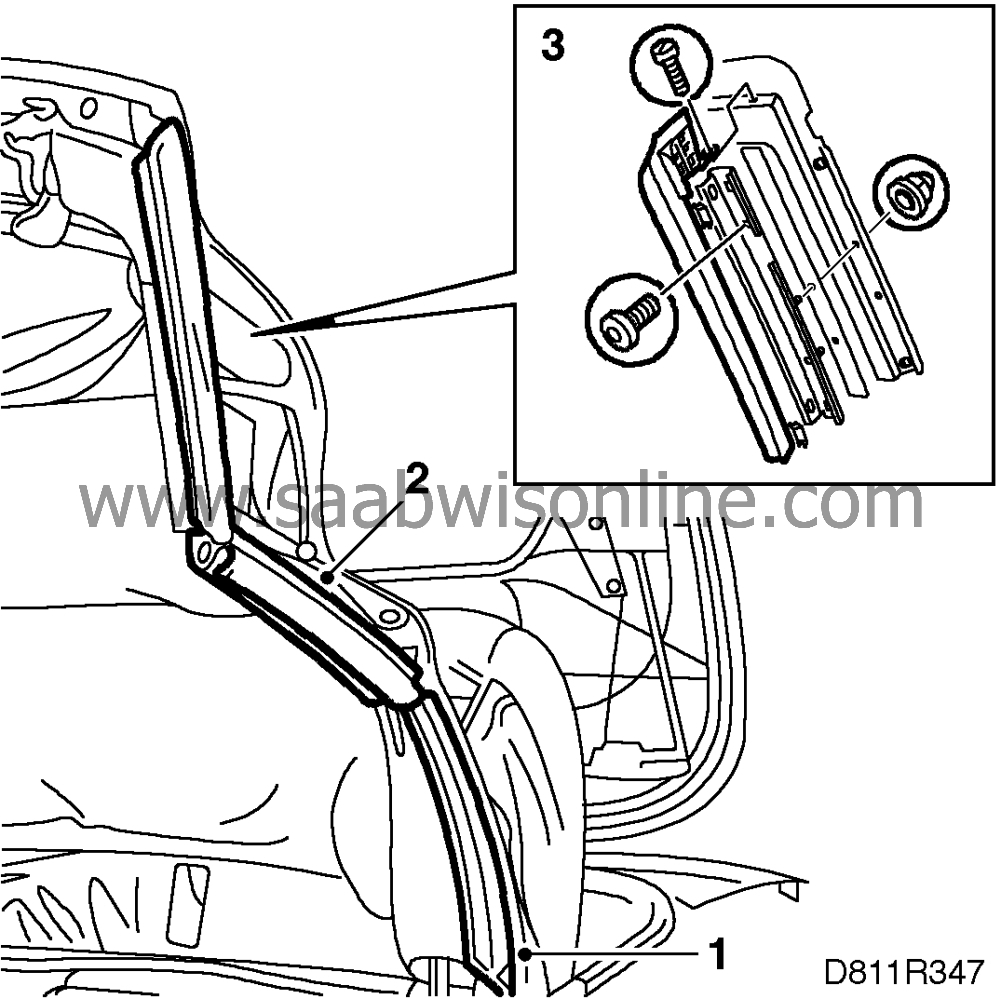
Remove the seal on the rear rail.
|
|
| 2. |
Remove the seal on the middle rail.
|
|
| 3. |
Remove the front seal. Lift the seal to access the front screw.
|
|
| 4. |
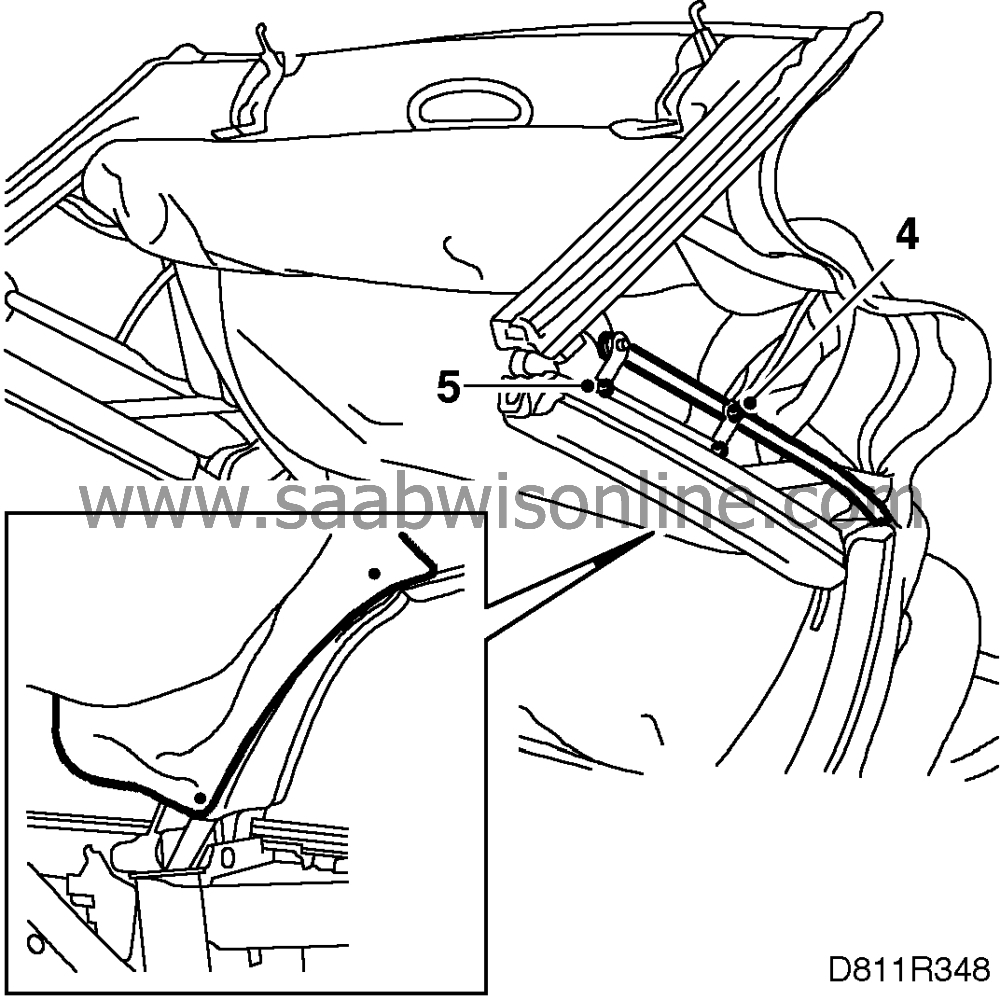
Remove the screws securing the threaded rod to the middle link and leave the rod attached to the second bow.
|
||||||||||
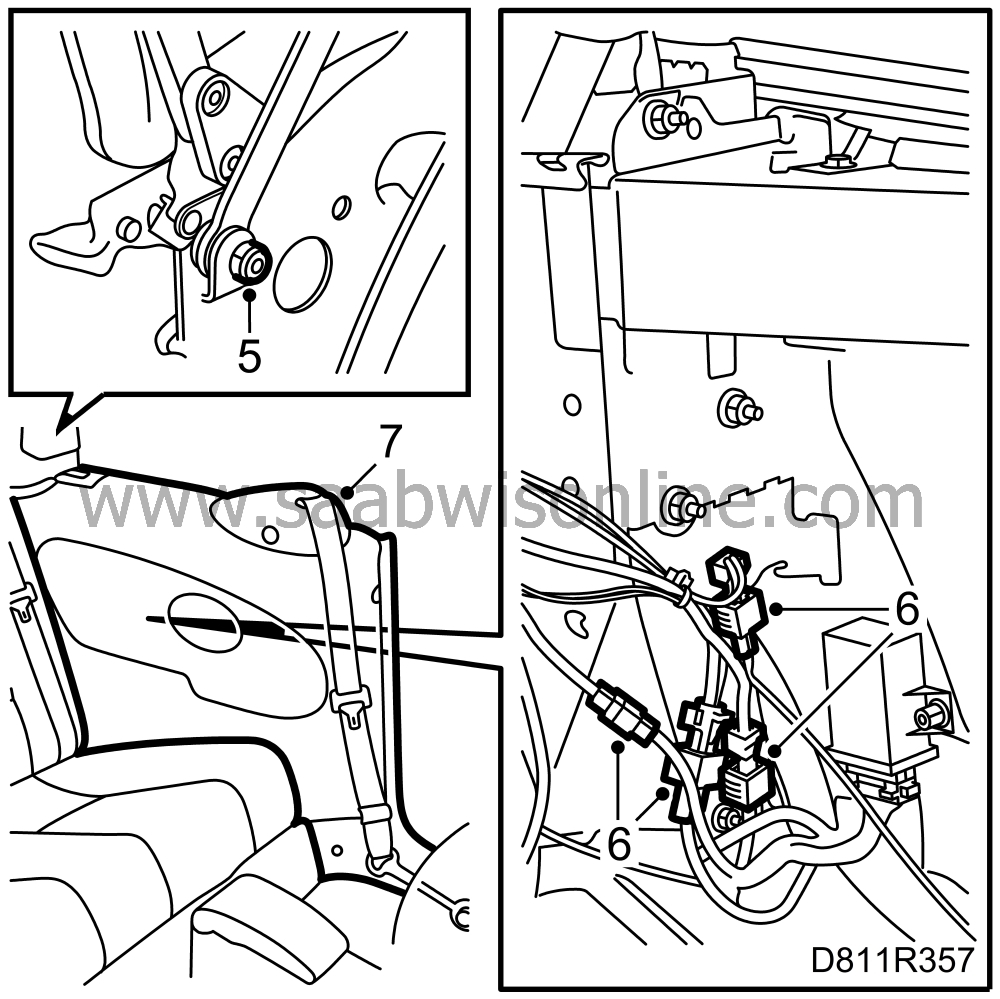
| 5. |
Remove the auxiliary link (left-hand side only) and the two blind rivets in the rear rail.
|
|
| 6. |
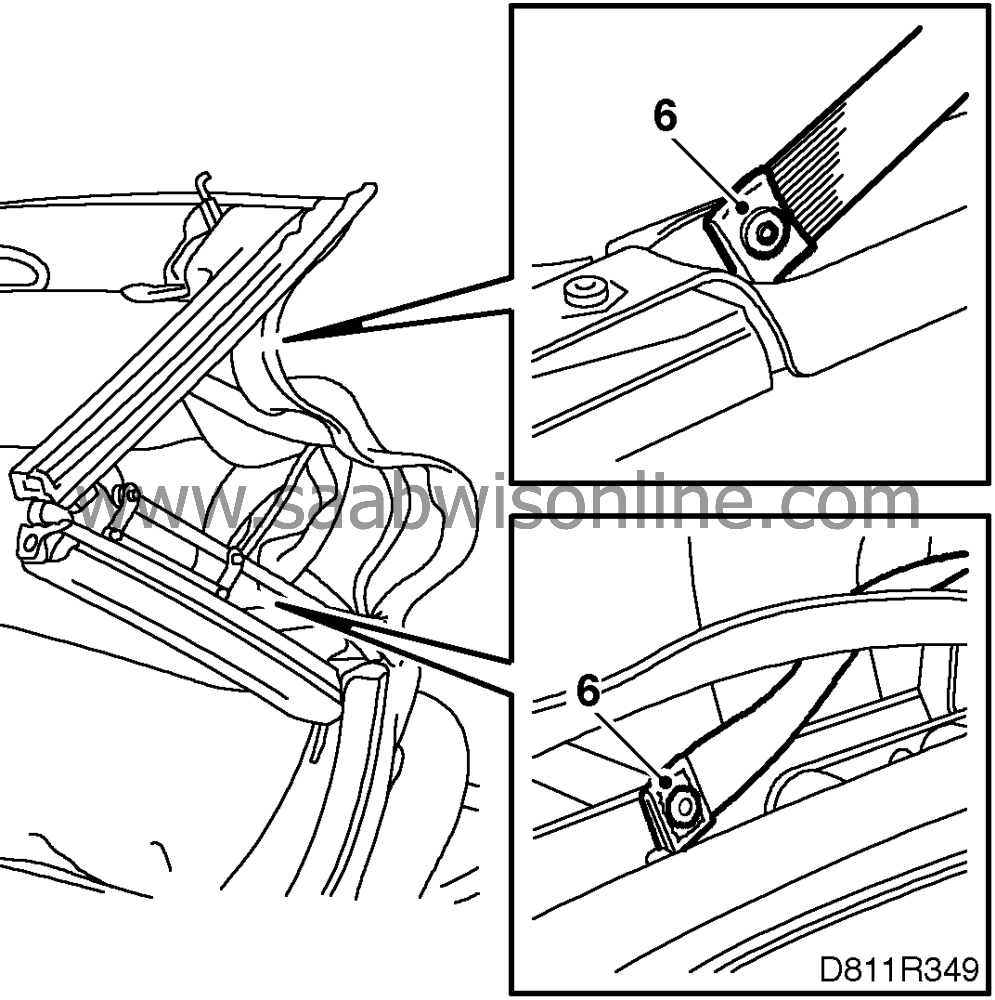
Drill away the blind rivets for the ribbing.
|
|
| 7. |
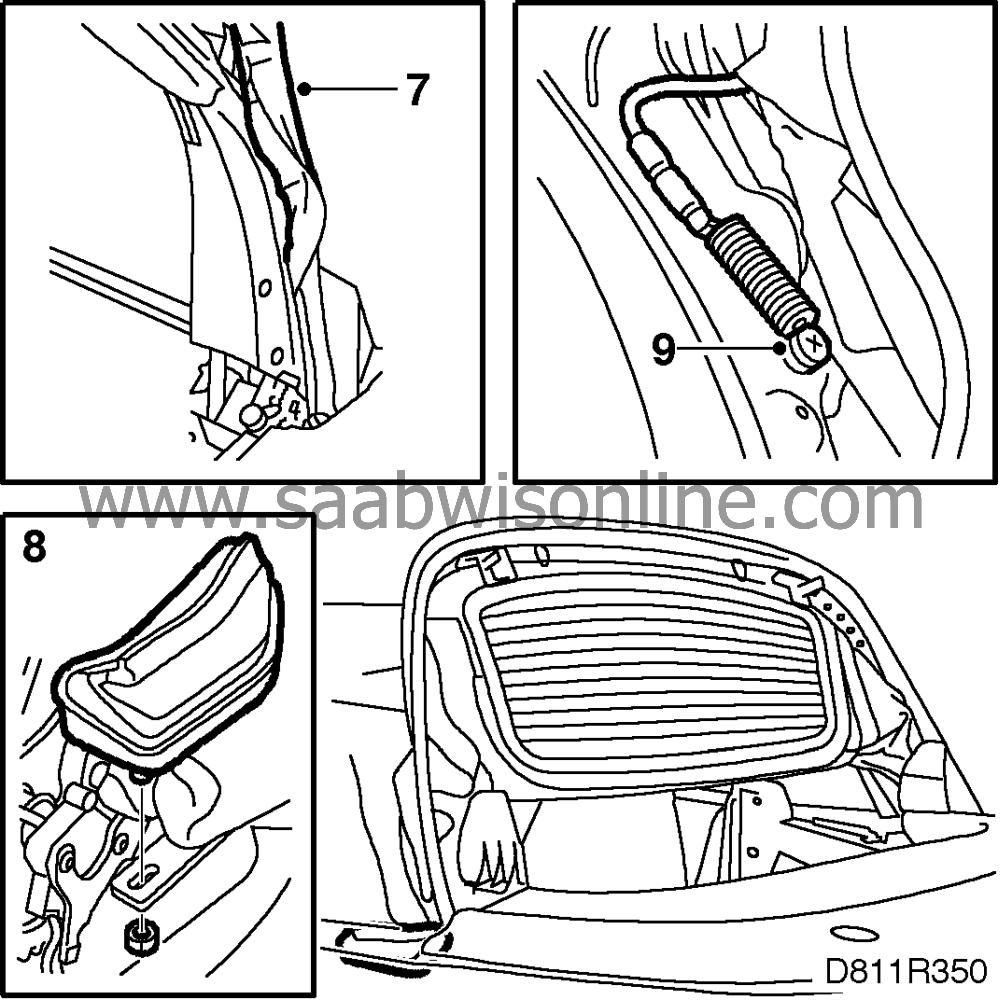
Detach the roof cloth from the rear rail.
|
|
| 8. |
Remove the seal below the rear rail.
|
|
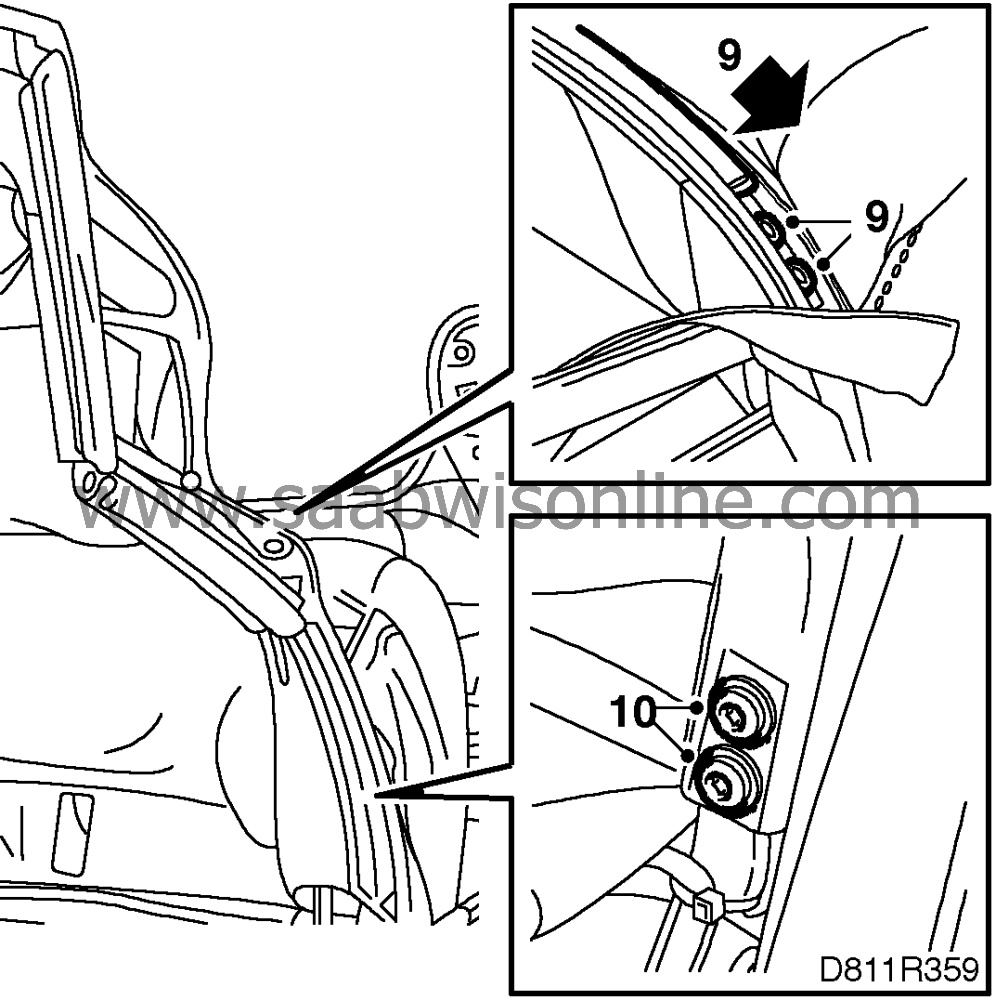
| 9. |
Remove the screw securing the cable to the rear rail.
|
|
| 10. |
Remove the screws securing the fourth bow and lift it away.

|
|
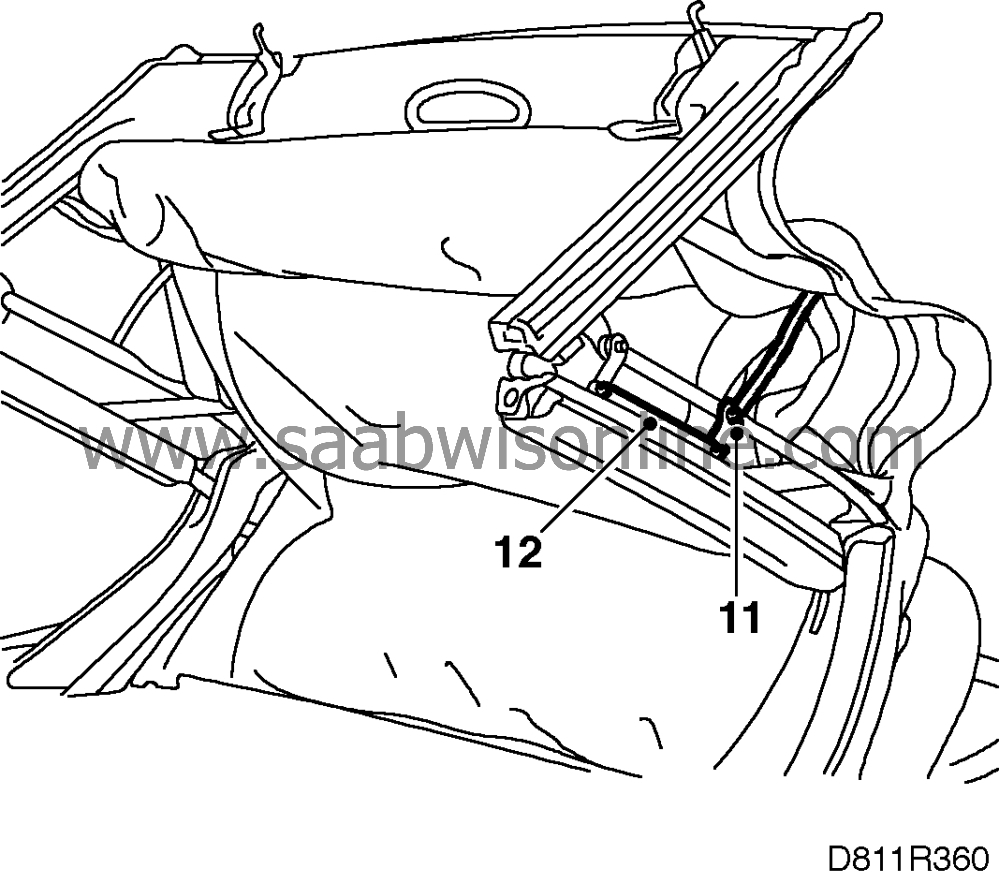
| 11. |
Lift up the tacking strip.
|
|
| 12. |
Remove the screws securing the third bow and lift it away.
|
|
| 13. |
Remove the three screws securing the retaining strip.
|
|
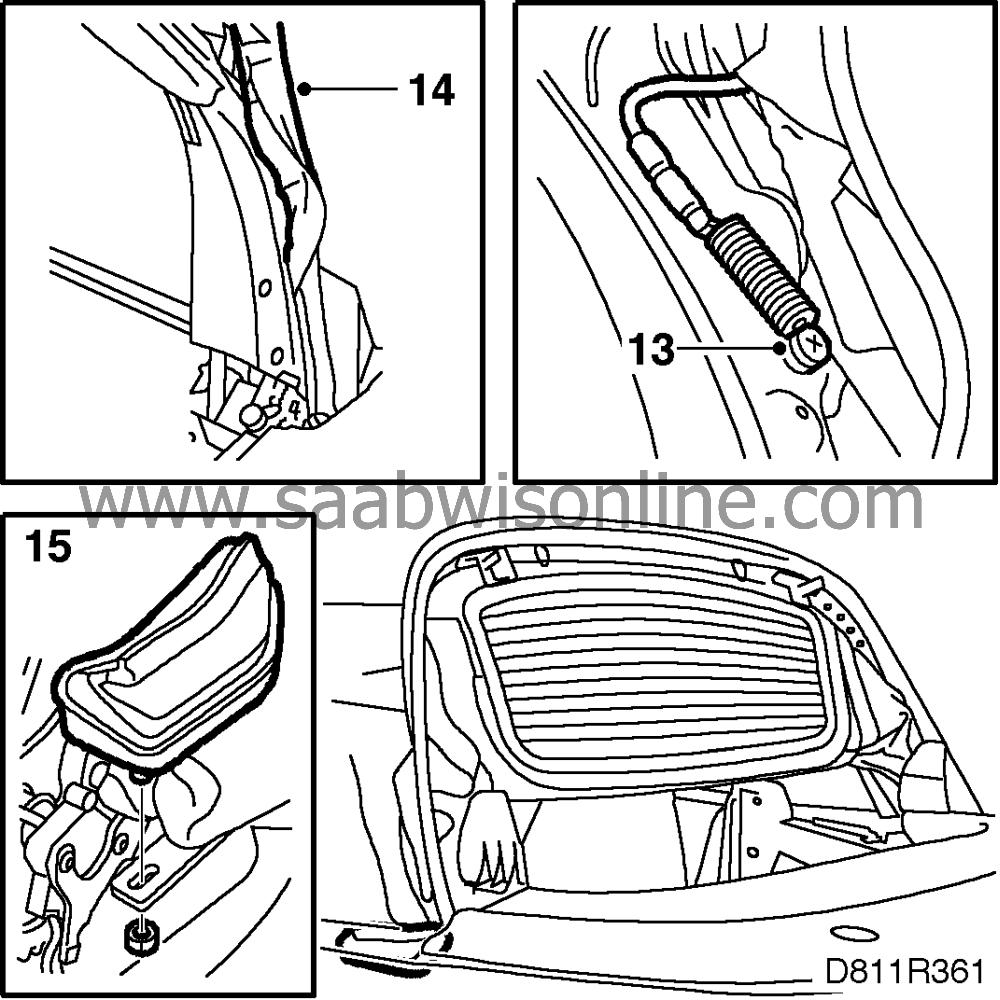
| 14. |
Lift up the corner of the roof cloth. Operate the soft top so that is resting on the windscreen member.
|
|
| 15. |
Remove the three screws securing the front rail to the first bow.
|
|
| 16. |
Drill away the blind rivets.
|
|
| 17. |
Lock the first bow to the windscreen member.
|
|
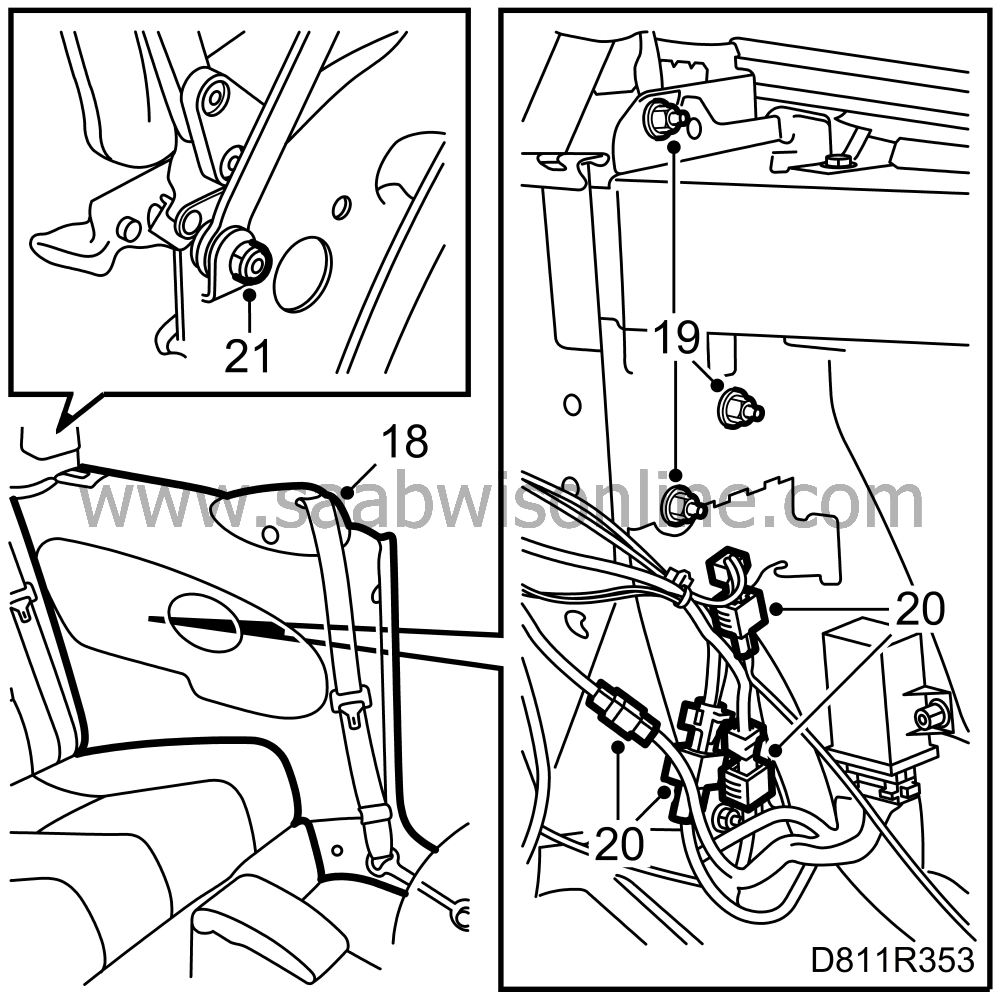
| 18. |
Remove the rear side trim.
|
|
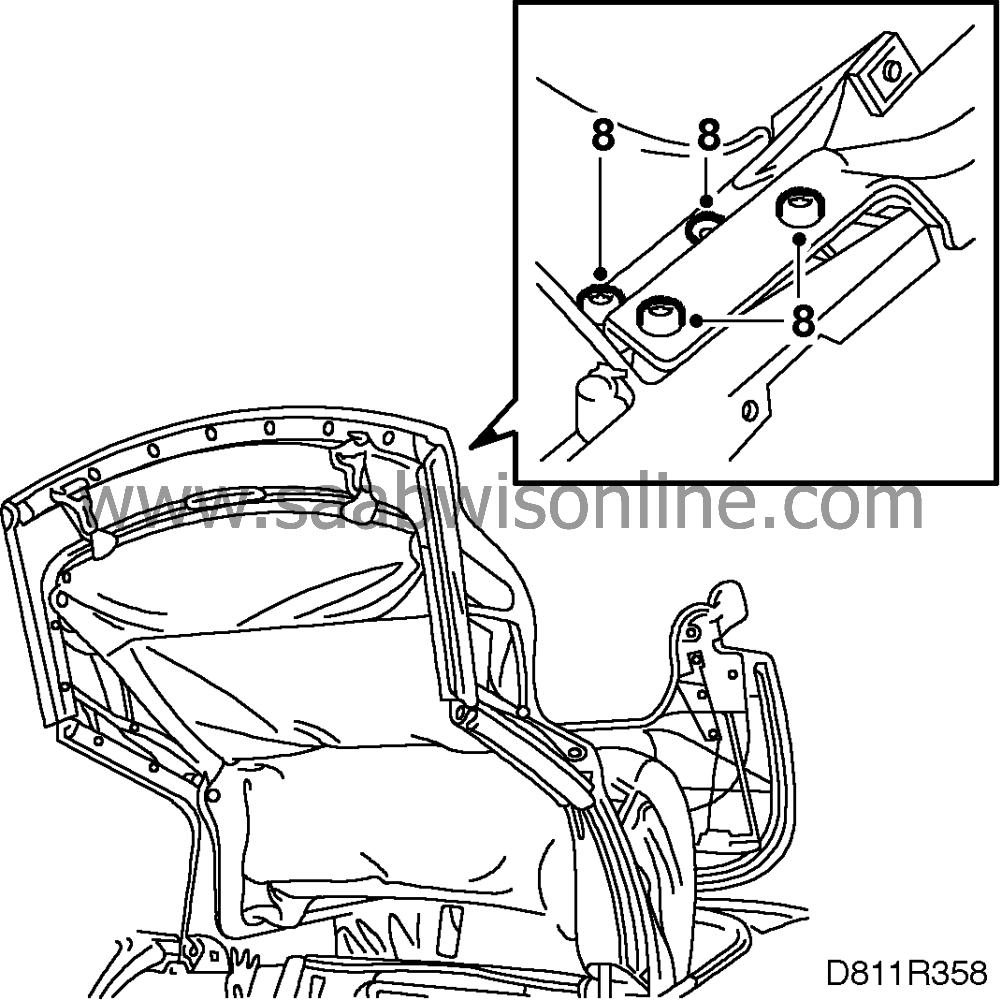
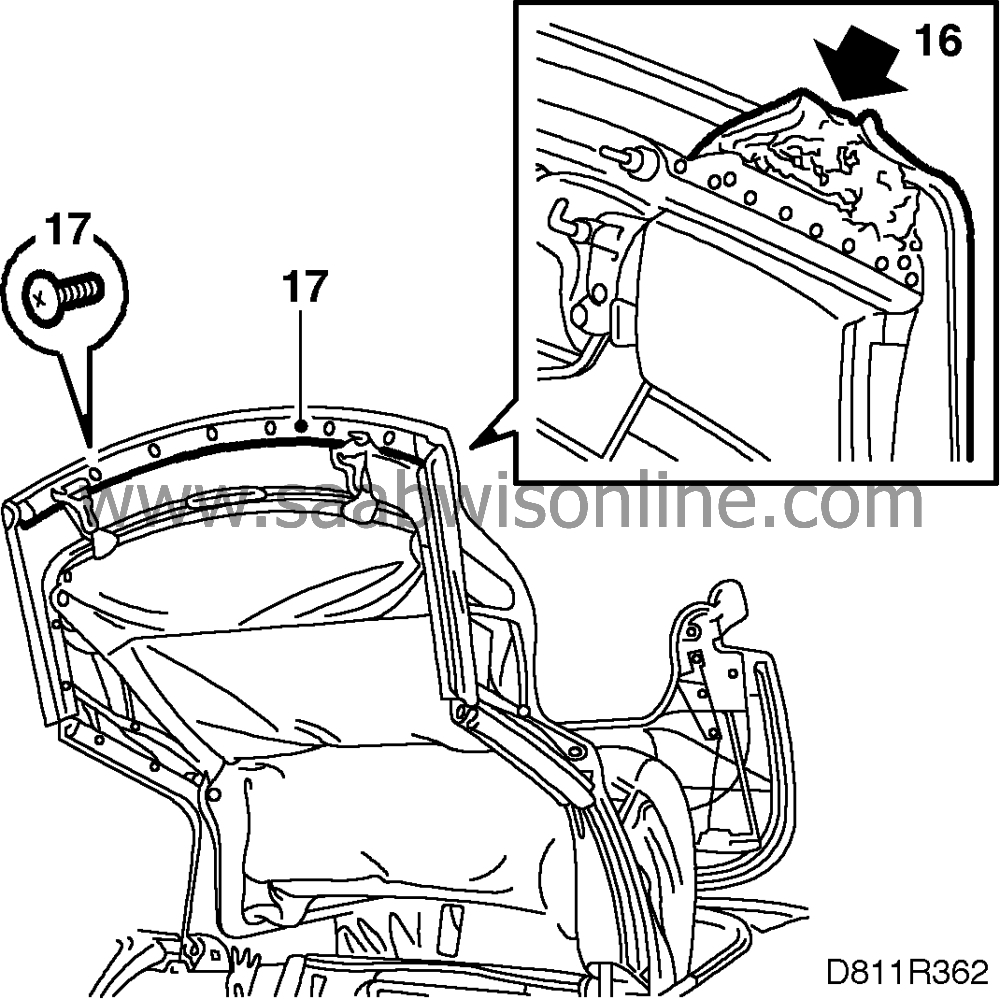
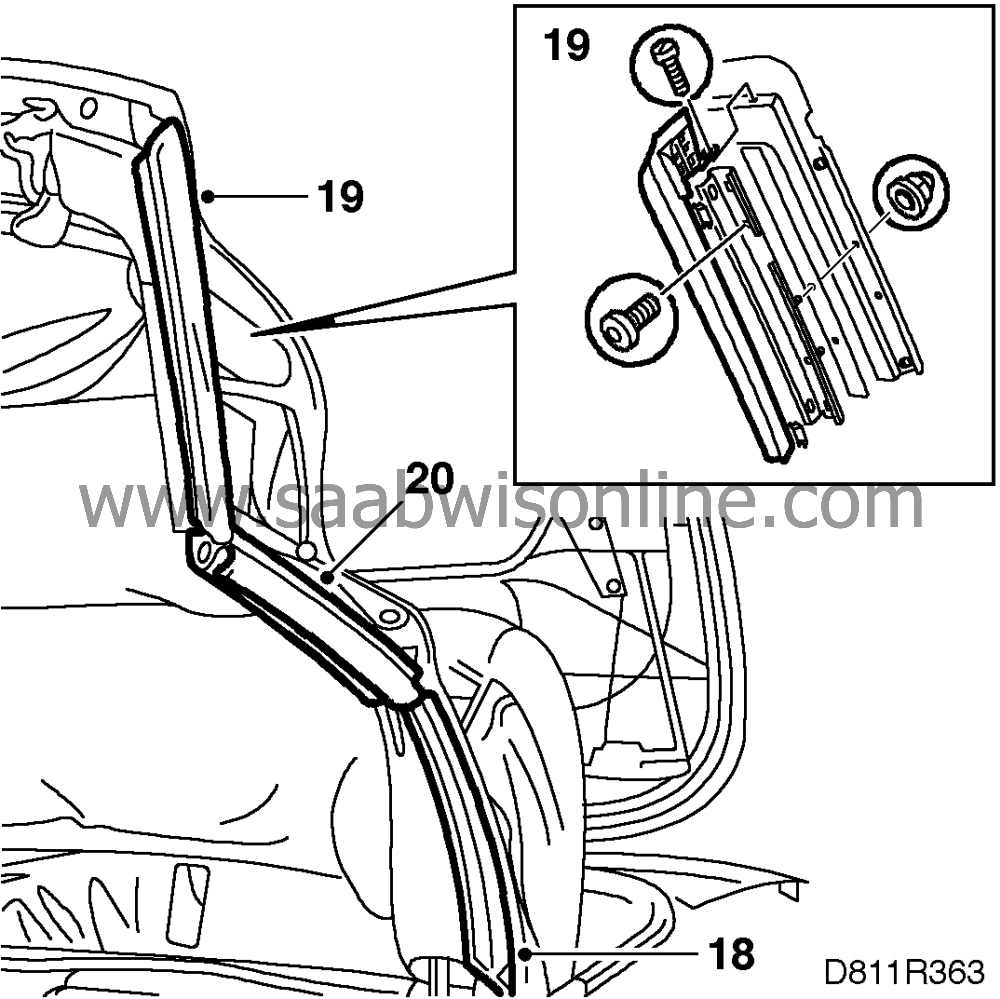
| 19. |
Remove the nuts securing the soft top and motor.
|
|
| 20. |
Unplug the connectors and cut the cable ties.
|
|
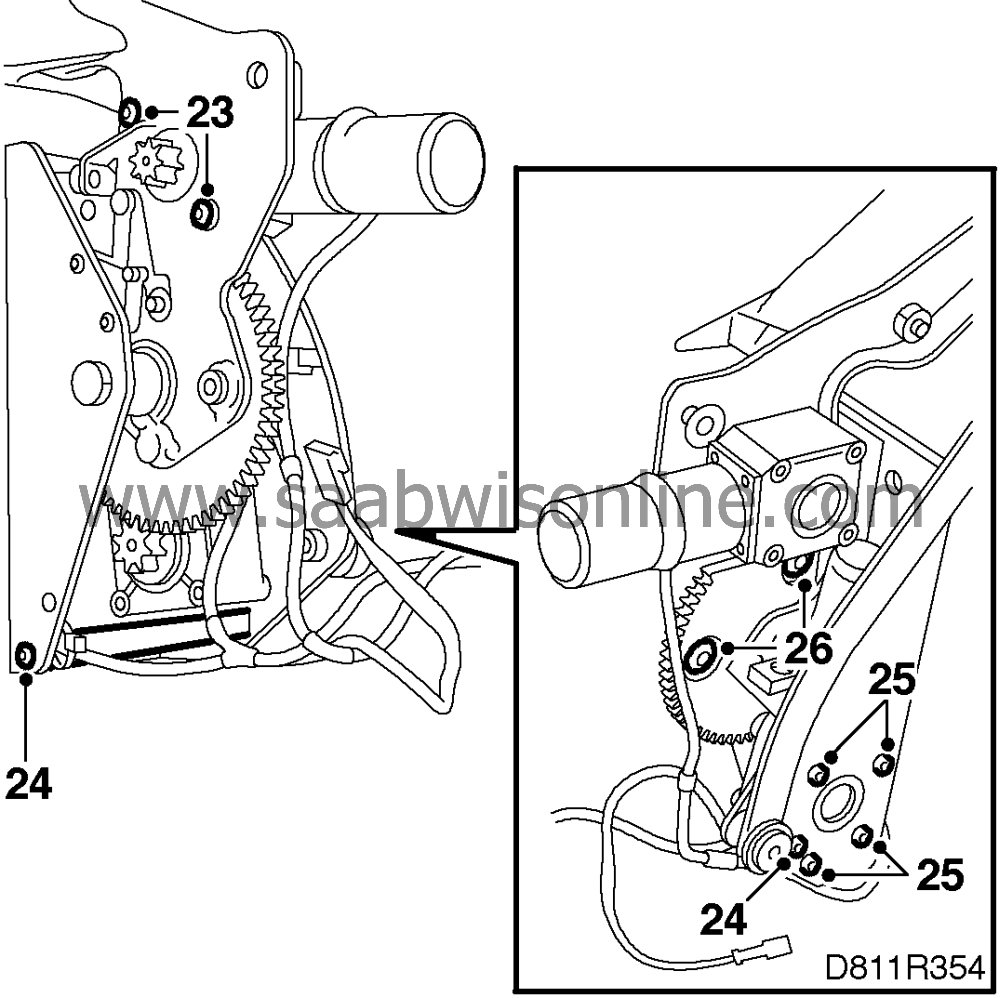
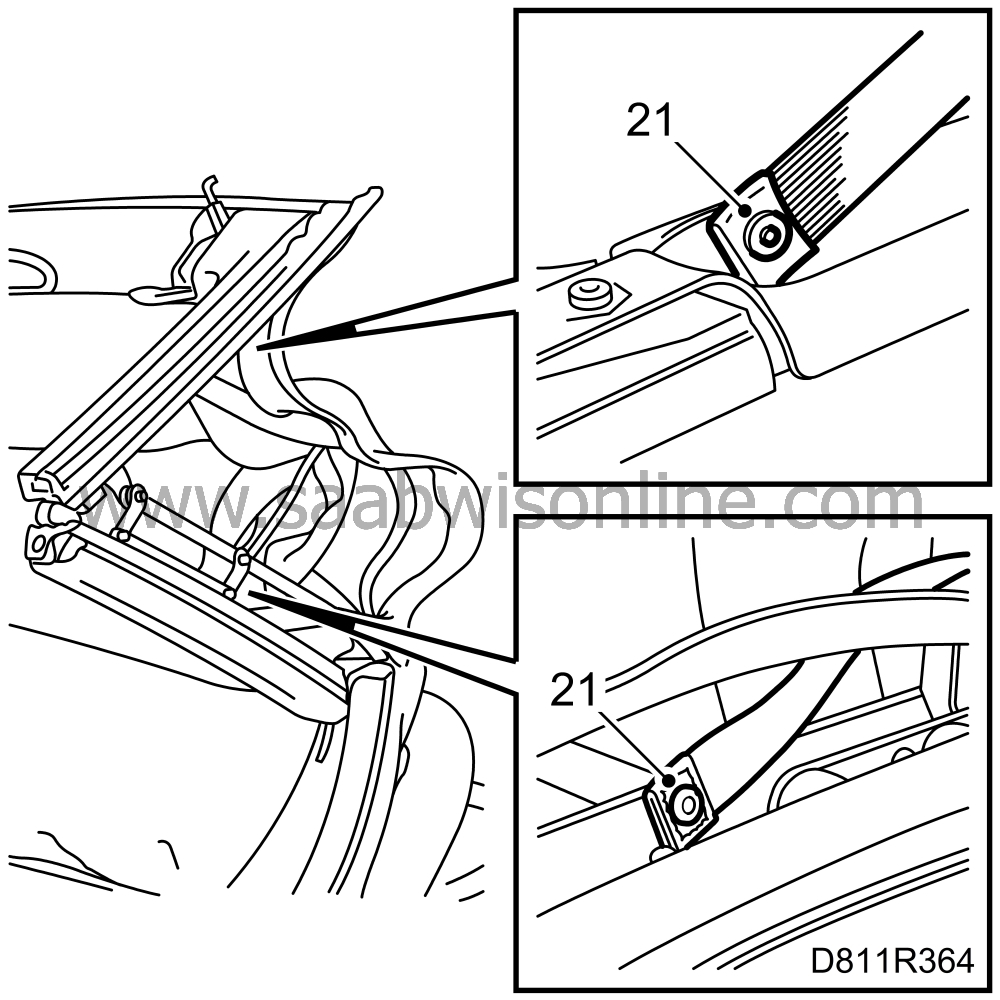
| 21. |
Remove the screw securing the fifth bow ratchets and the fourth bow link.
|
|
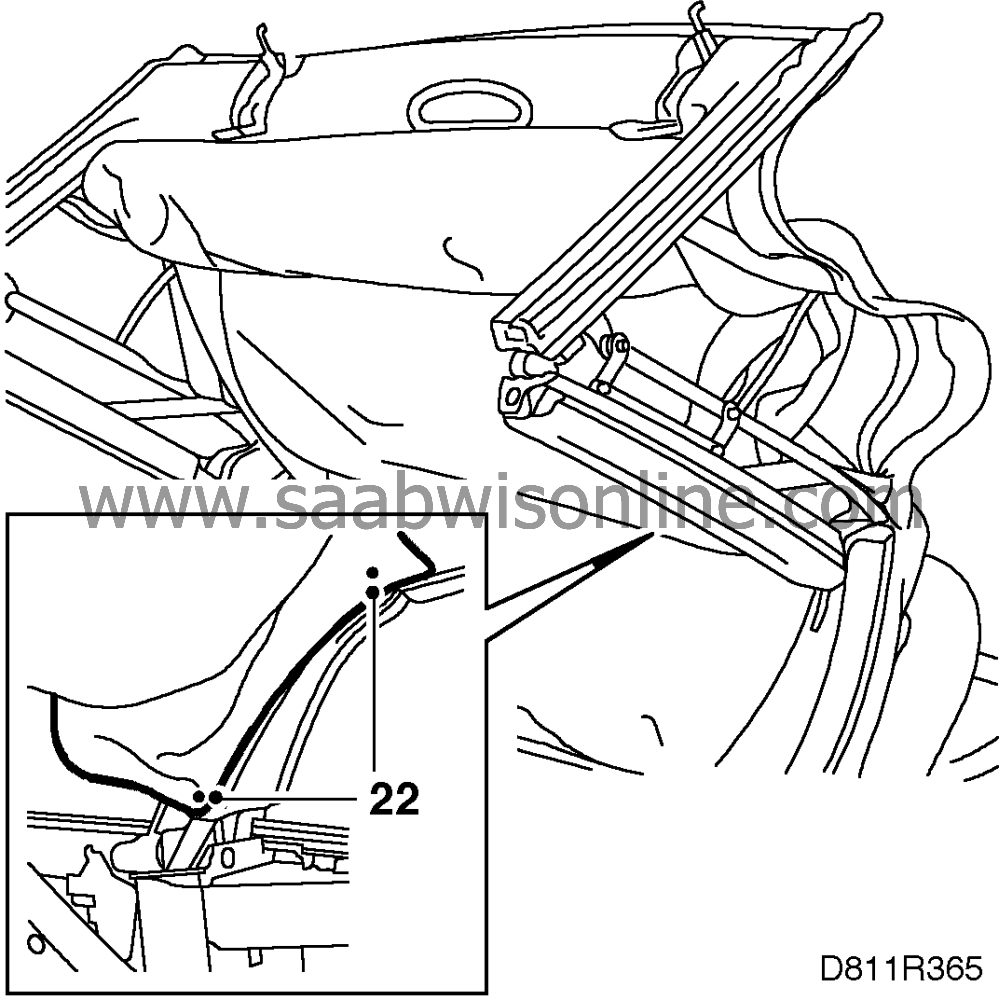
| 22. |
Lift out all the rails in one piece.
|
|
| 23. |
Remove the three screws securing the fifth bow motor and lift it away.
|
|
| 24. |
Unscrew the reinforcement, 2 screws, and remove it.
|
|
| 25. |
Remove the four screws securing the main motor and lift it away.
|
|
| 26. |
Remove the ratchet.
|
|
| To fit |
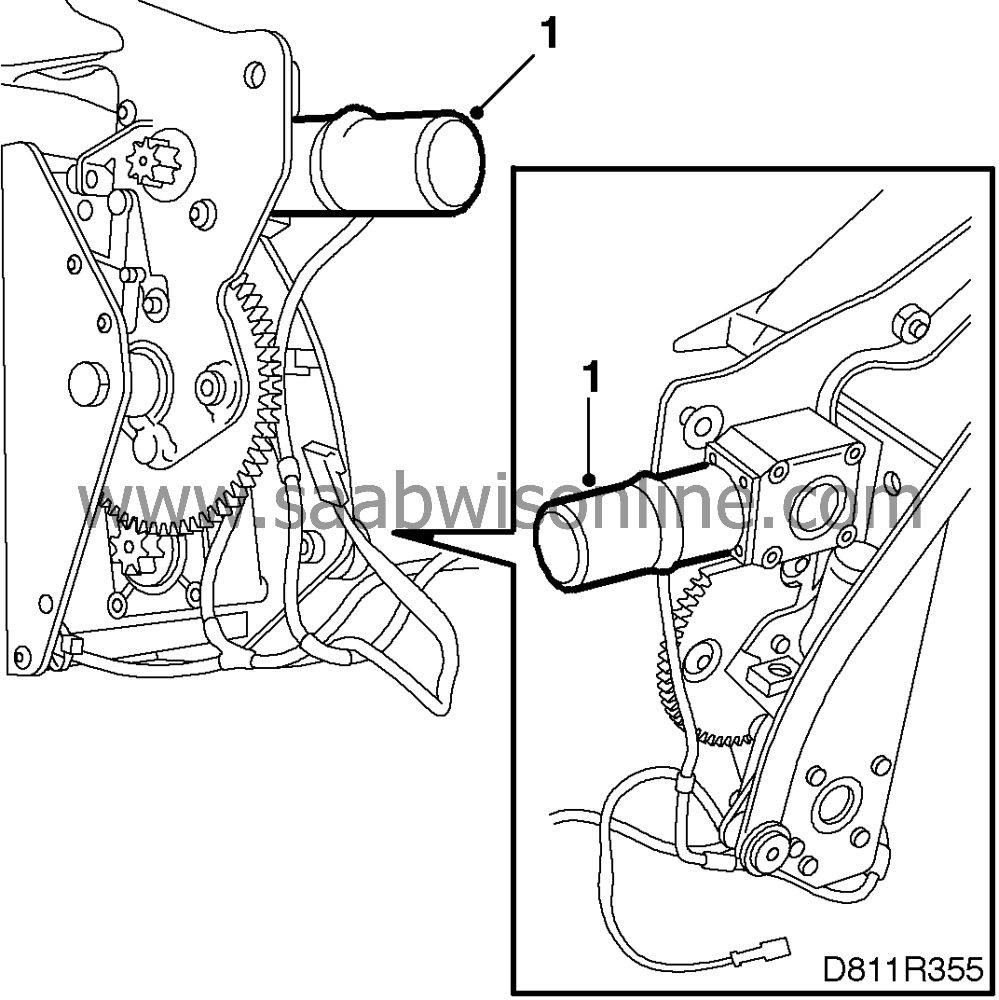
| 1. |
Fit the motors on the new spare part.
|
|
| 2. |
Position the side in one piece. Guide it in place with a 10 mm. drill.
|
|
| 3. |
Thread in the wiring.
|
|
| 4. |
Tighten the nuts.
Tightening torque 28 Nm (20.7 lbf ft) |
|
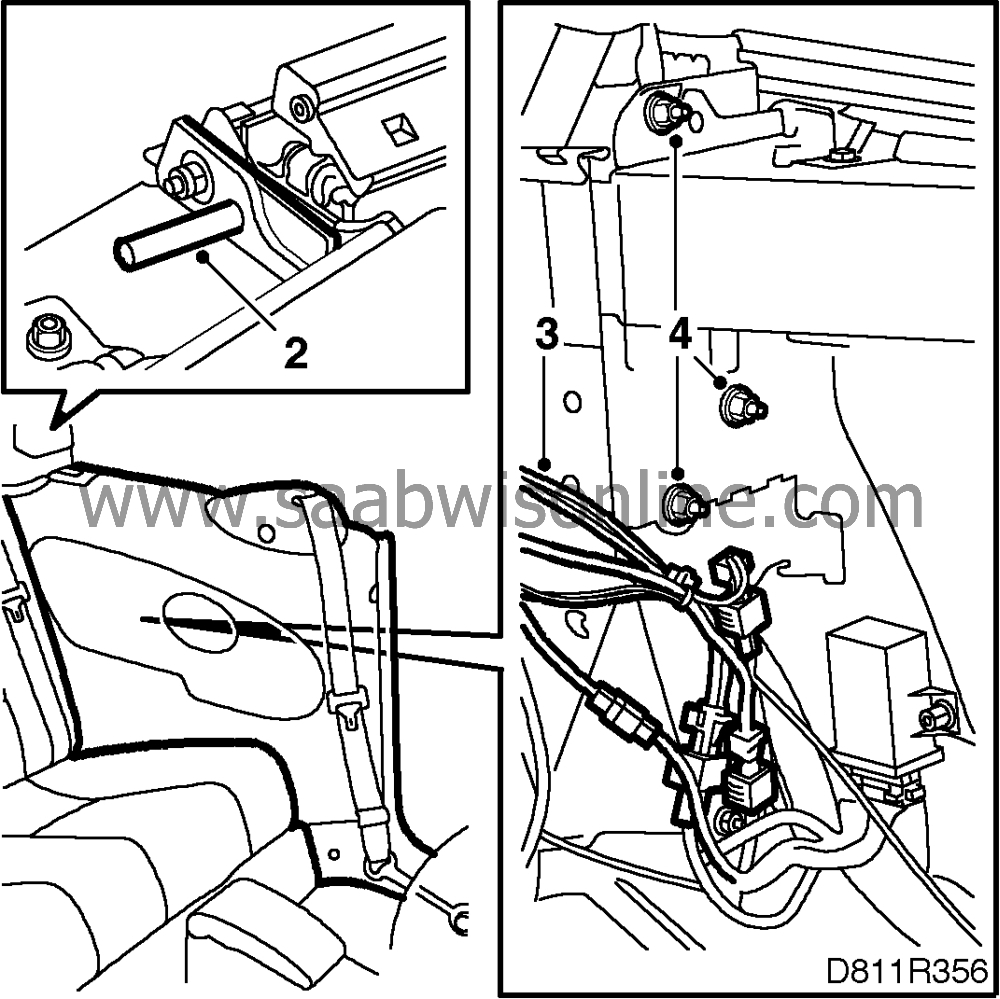
| 5. |
Tighten the link holding the fourth bow and the fifth bow ratchet.
Tightening torque 25 Nm (18.5 lbf ft) |
|
| 6. |
Plug in the connector and secure the wires with cable ties.
|
|
| 7. |
Put back the rear side trim.
|
|
| 8. |
Screw on the first bow and the front rail with the three screws. Fit blind rivets.
|
|
| 9. |
Apply threadlocker to the screws and screw on the third bow. Bend the tacking strip in place.
|
|
| 10. |
Screw on the fourth bow.
|
|
| 11. |
Apply threadlocker to the screws and screw on the threaded rod to the middle link.
|
|
| 12. |
Screw on the auxiliary link.
|
|
| 13. |
Fit the cable to the rear rail.
|
|
| 14. |
Glue the roof cloth to the rear rail.
|
|
| 15. |
Put back the seal below the rear rail.
|
|
| 16. |
Glue the roof cloth to the first bow.
|
|
| 17. |
Screw on the retaining strip.
|
|
| 18. |
Screw on the rear rail seal.
|
|
| 19. |
Fit the front rail seal.
|
|
| 20. |
Fit the middle rail seal.
|
|
| 21. |
Blind rivet the ribbing.
|
|
| 22. |
Rivet or screw on the headliner to the rear rail.
|
|
| 23. |
Connect the diagnostic tool, clear any diagnostic trouble codes and then program the control module. See
 .
.
|
|
This project is supported by memberships and donations. If you use this site, please consider Joining SCNA and/or making a donation.
Our Friends
