Replacement of door handle and lockcylinder, front doors, 5-D (3-D)
|
|
Replacement of door handle and lock
cylinder, front doors, 5-D (3-D)
|
Door handle
|
2.
|
Remove the door trim. See Service Manual 8:2 "Interior
equipment"
 .
.
|
|
3.
|
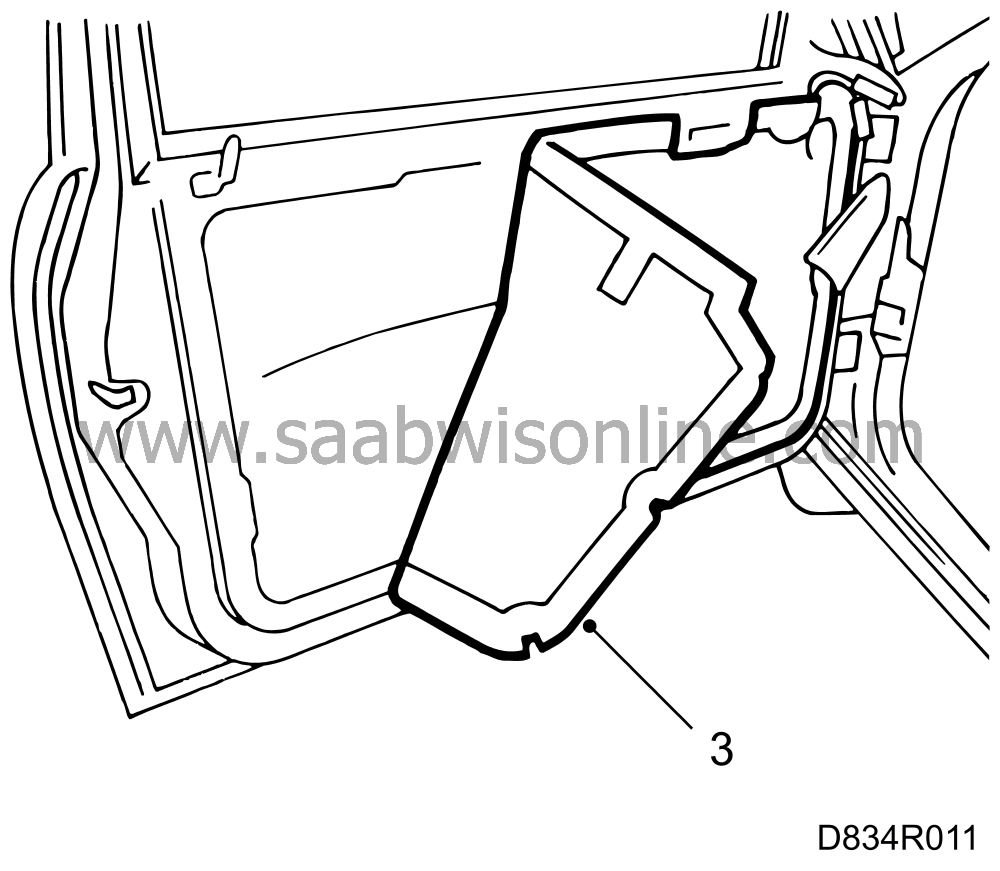
Remove the water barrier.
|
|
4.
|
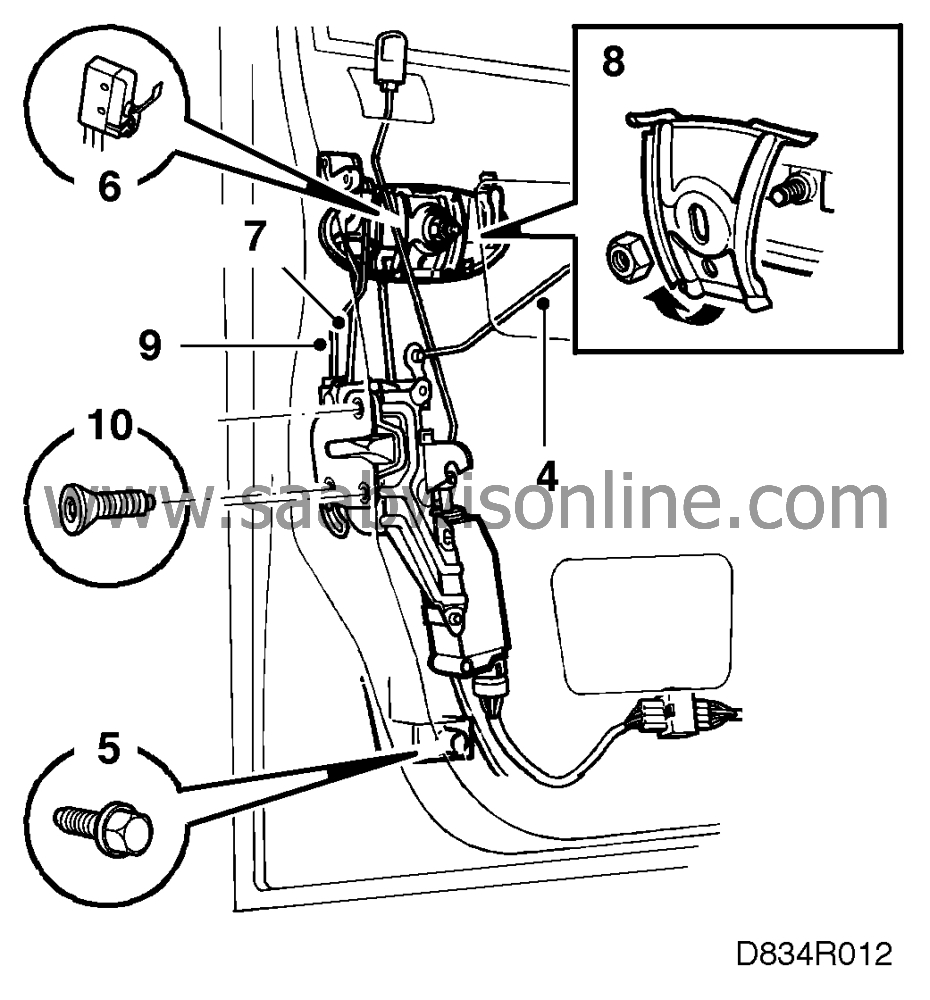
Detach the pull bar between the door handle and door lock from the door
side and let it hang down.

|
|
5.
|
Remove the guide channel's lower retaining screw and angle it out but
do not undo the retainer at the top (plug-in retainer).
|
Note
|
|
3-D, pull the guide channel down slightly before angling it out.
|
|
|
6.
|
Undo the clip securing the microswitch and unhook same.
|
|
7.
|
Detach the pull bar (between the lock cylinder and lock) from the
lock.
|
|
8.
|
Remove the handle's locknut and plate from the rear of the
handle.
|
|
9.
|
Detach the push bar (between outside door handle and lock) from the
lock.
|
|
10.
|
It may be necessary to remove the lock (three screws).
|
|
11.
|
Angle the handle out of the door.
|
 .
.


