Dashboard
| Dashboard |
| To remove |
|
|||||||
 Warning

| 1. |
Disconnect the cable from the
negative battery terminal.
|
|
| 2. |
Withdraw the steering wheel to the full extent of its adjustment.
|
|
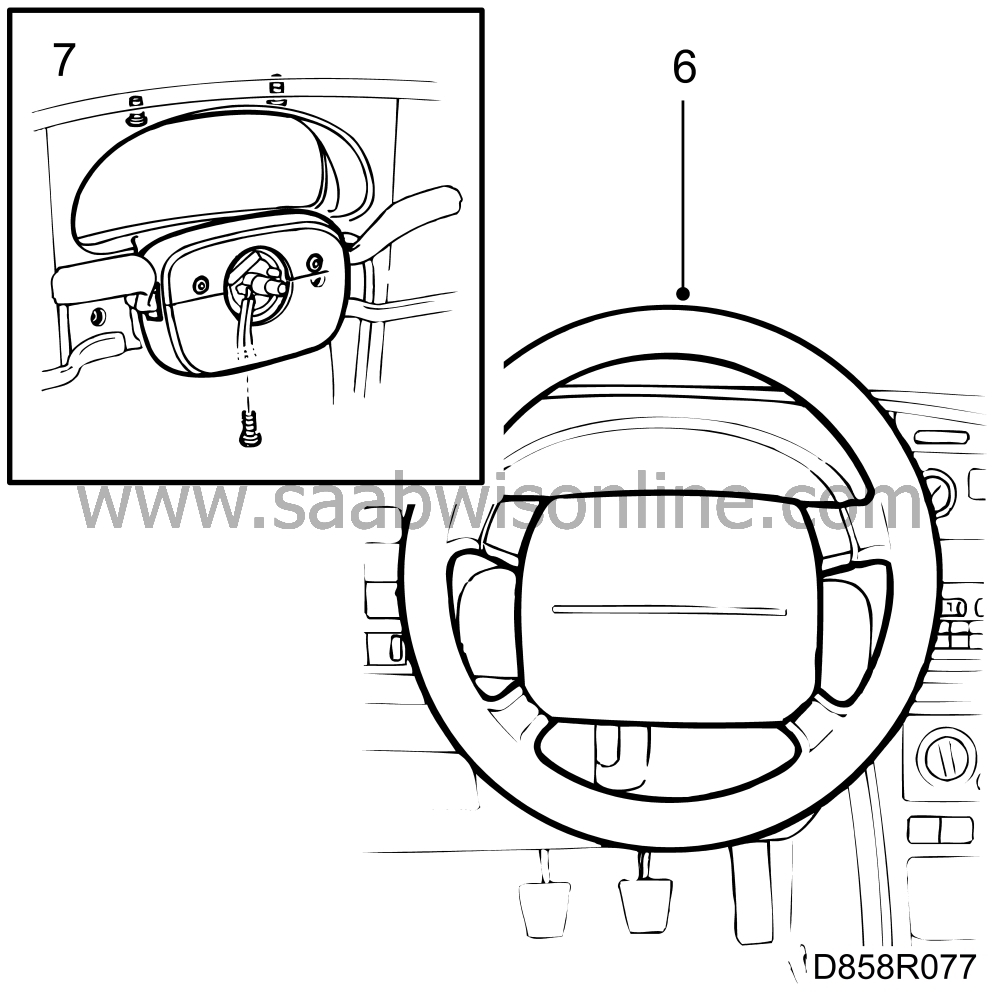
| 3. |
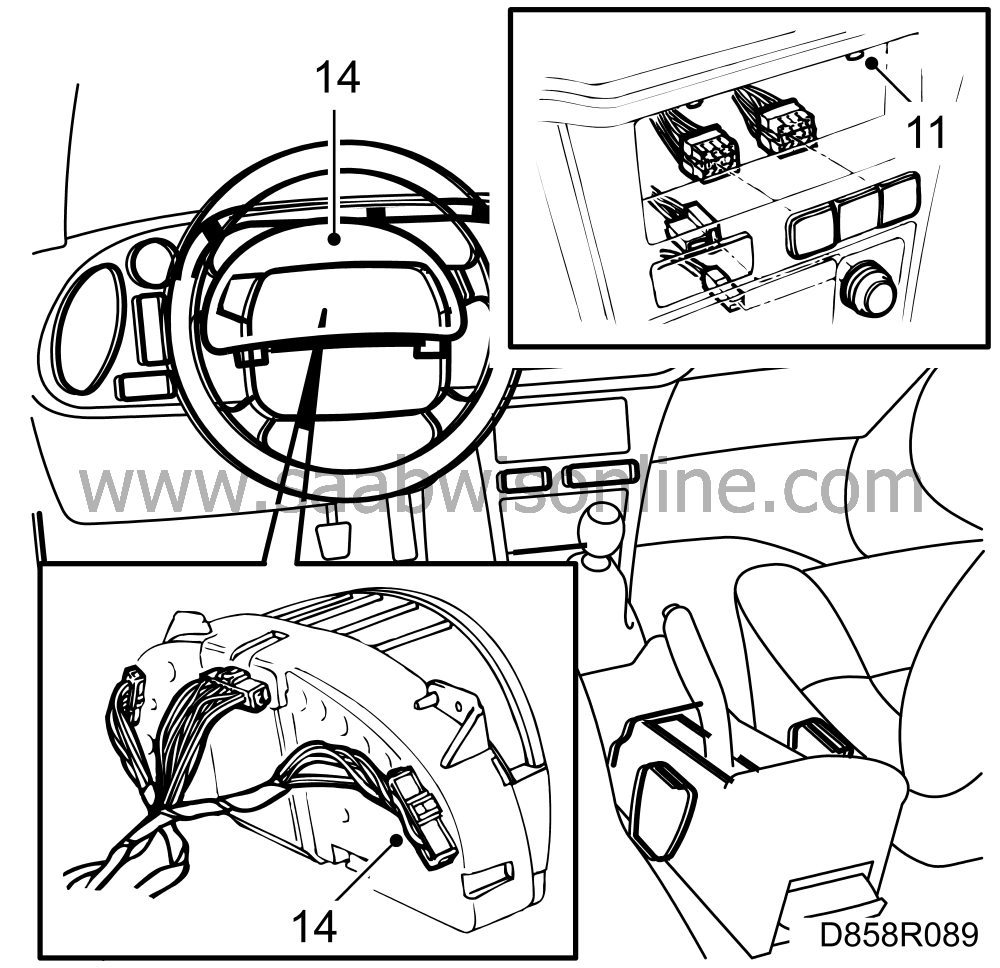
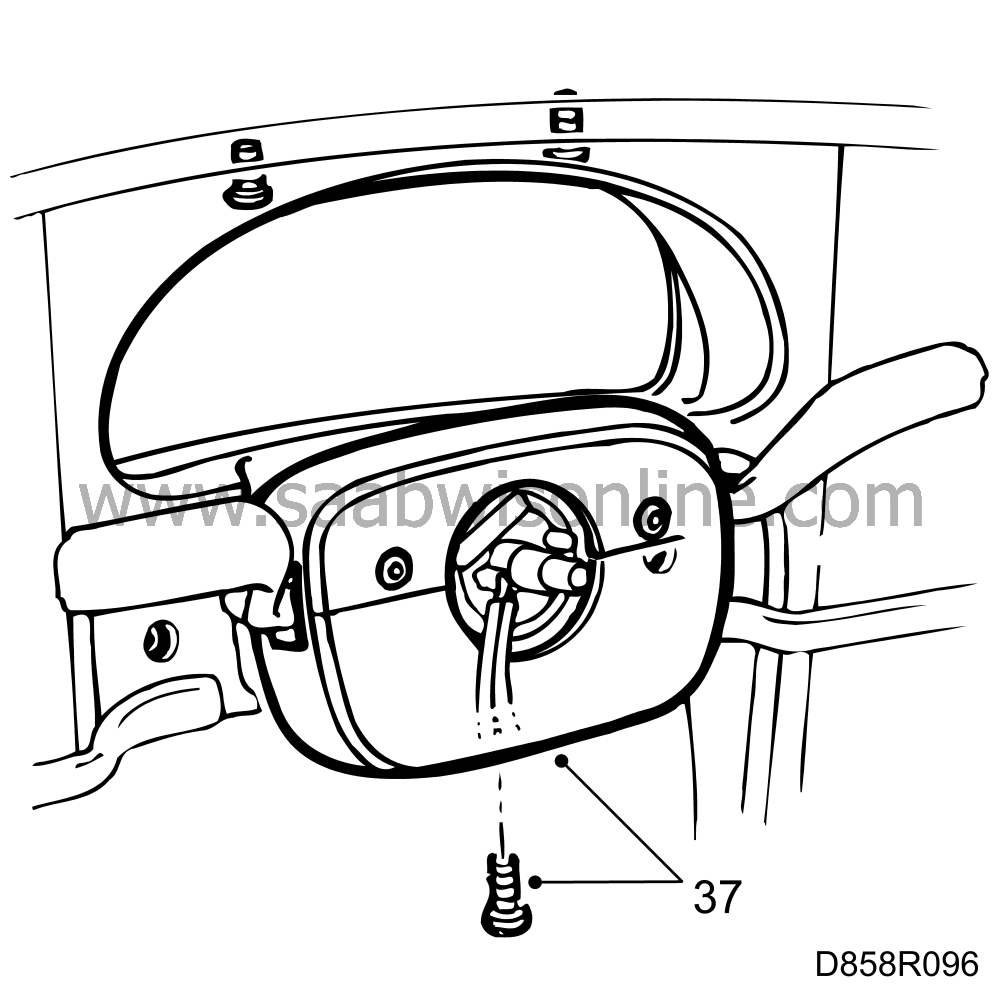
Remove the airbag module. To do this, remove the retaining screws on
the underside of the steering wheel and unplug the connector.
|
|
| 4. |
Unplug the horn connector.
|
|
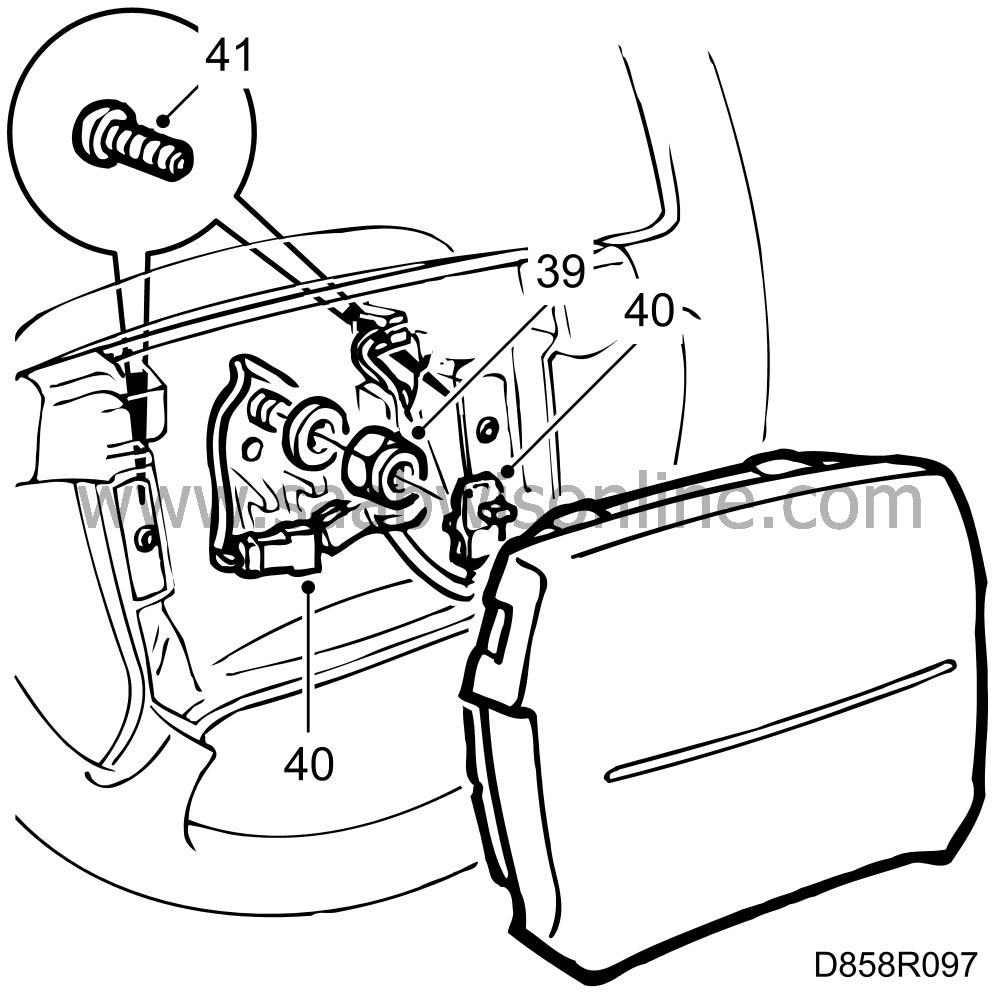
| 5. |
Turn the steering wheel so that the front wheels point straight ahead.
Slacken the steering column nut but do not unscrew it completely.
|
|
| 6. |
Rock the steering wheel loose, withdraw the connectors and unscrew the
steering column nut.
|
|
| 7. |
Undo the screws securing the upper and lower sections of the cowl and
remove same.
|
|
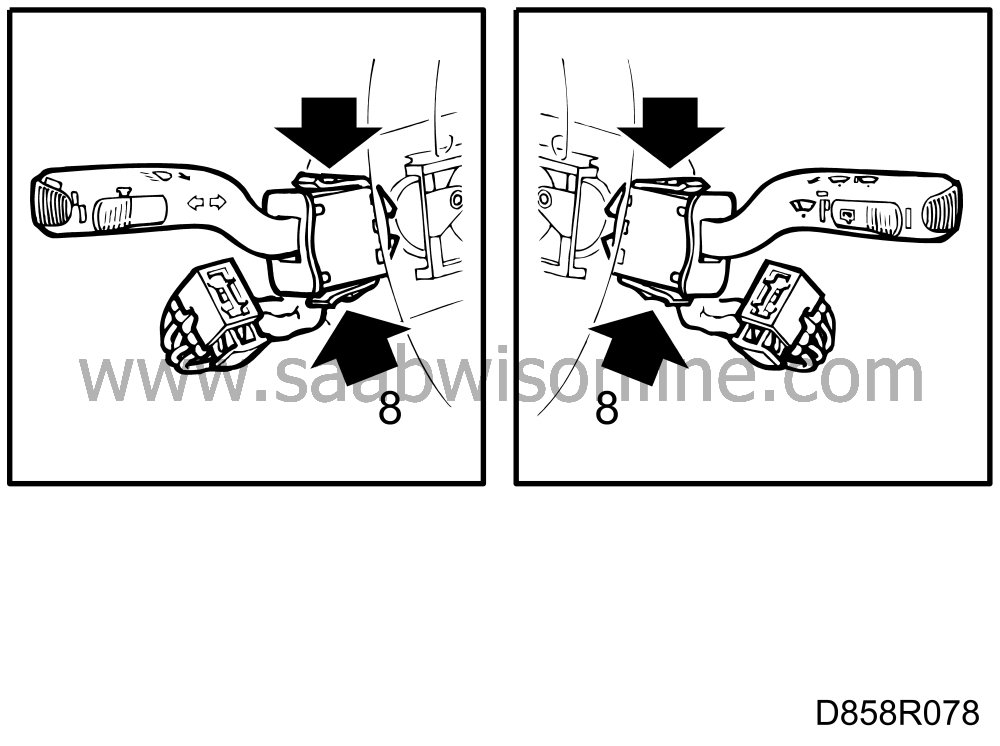
| 8. |
Press in the two clips on each mounting, pull the steering column
controls straight out and unplug the connectors.
|
|
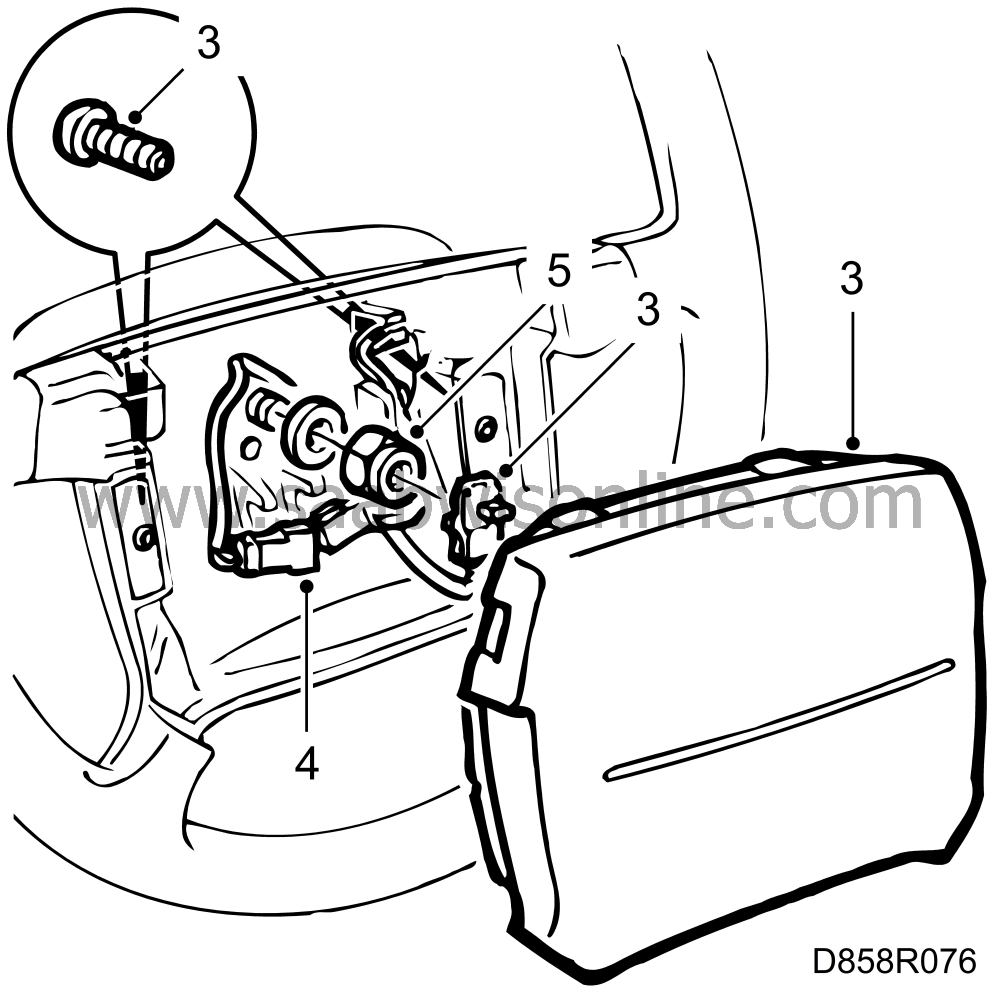
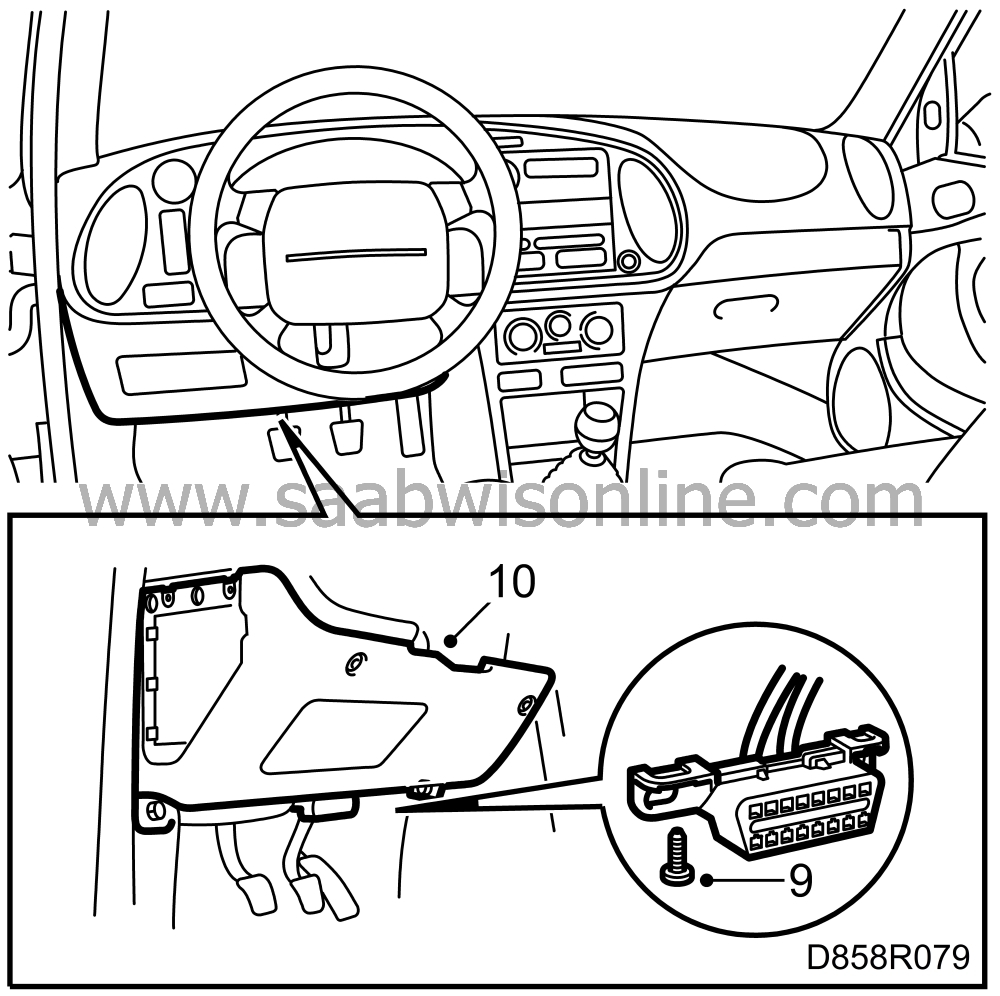
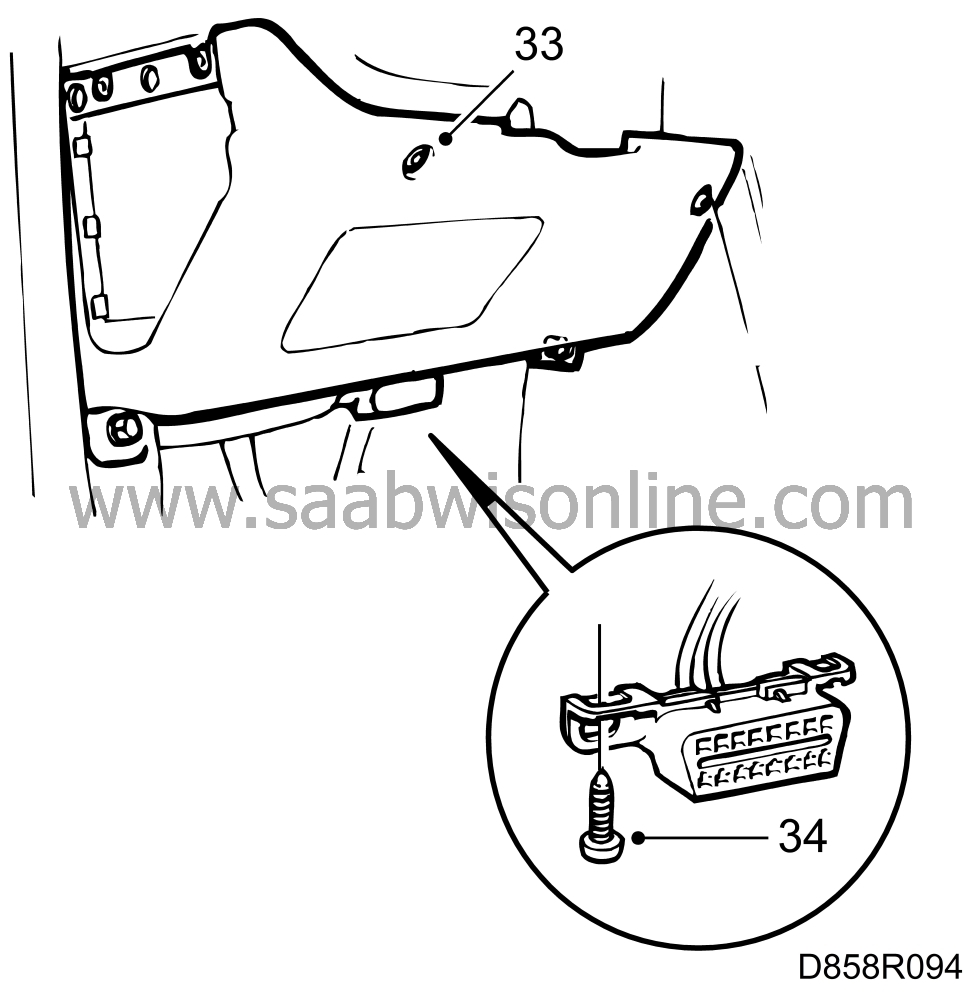
| 9. |
Remove the diagnostic socket. It is located underneath the dashboard
on the driver's side.
|
|
| 10. |
Remove the screws securing the lower dashboard section and the
expanding rivets in the front edge. To remove the expanding rivets, press the centre pin
further into the rivet.
|
|
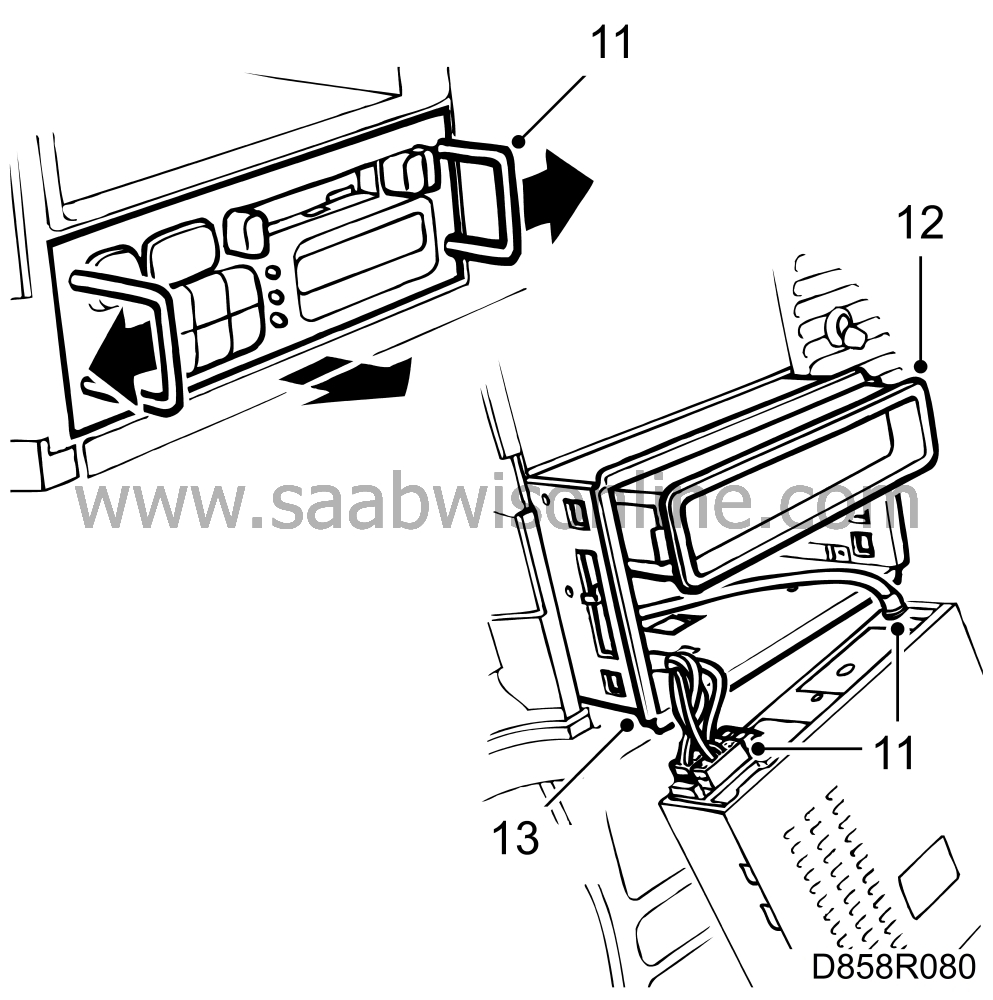
| 11. |
Release the radio by means of the "forks" and withdraw it.
Unplug the aerial and connectors.
|
|
| 12. |
Remove the storage compartment, if fitted.
|
|
| 13. |
Remove the radio contact box, using a screwdriver.
|
|
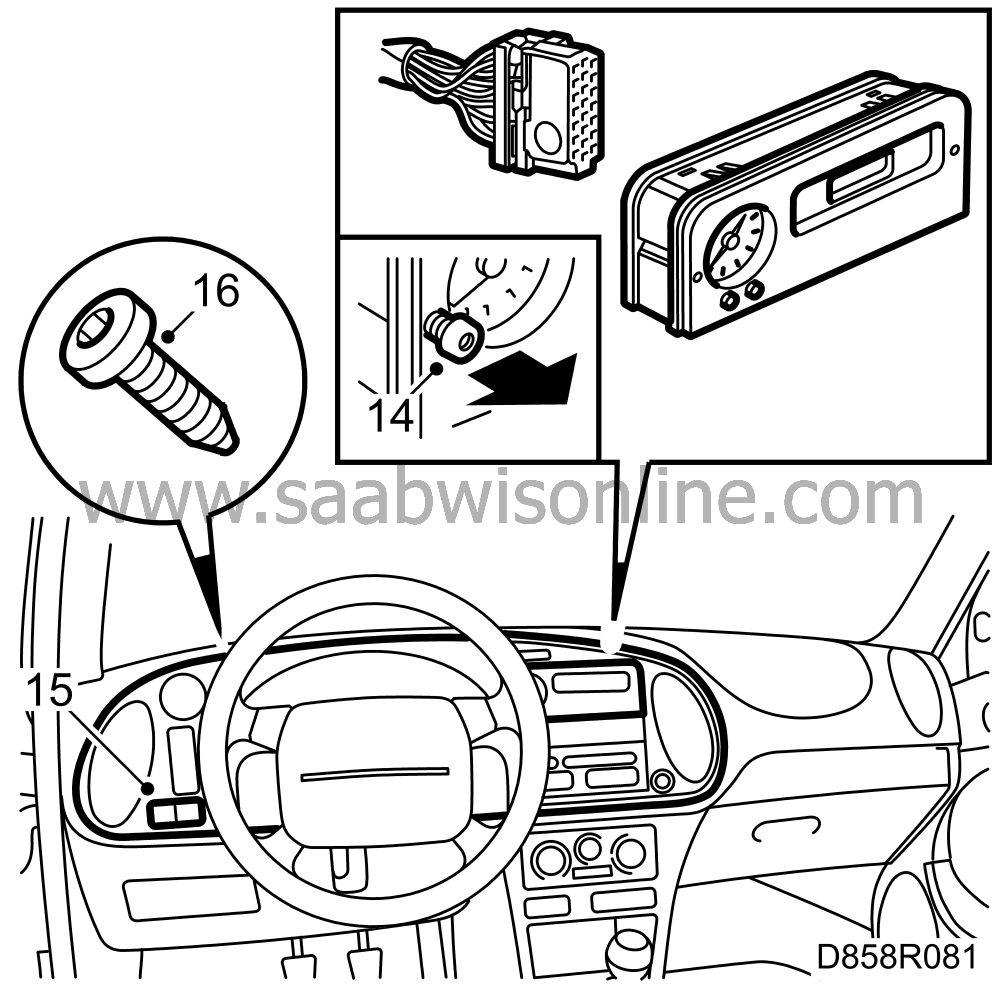
| 14. |
Remove the auxiliary instrument panel (SID unit) by means of extraction
screws (M3) and unplug the connector.
|
|
| 15. |
Remove the light switch and the headlamp beam control switch by
pressing out from behind.
|
|
| 16. |
Remove the instrument panel retaining screws.
|
|
| 17. |
Loosen the top of the instrument panel. Make sure that the clips on the
short sides release and go clear. Lift out the panel.
|
|
| 18. |
Unplug all the instrument panel connectors.
|
|
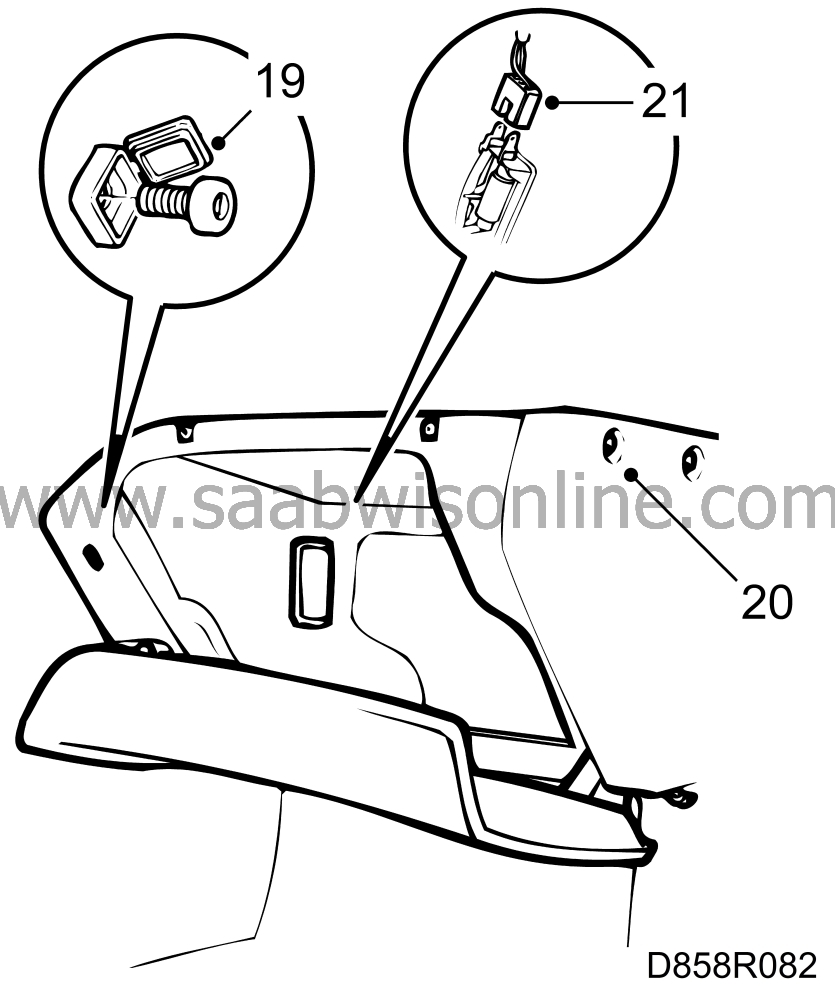
| 19. |
Open the glove box. Open the covers to expose the retaining screws and
remove same.
|
|
| 20. |
Remove the other retaining screws, the retaining bolt and the expanding
rivet in the front edge and remove the catch from the bulkhead bracket.
|
|
| 21. |
Withdraw the glove box and unplug the connector for the glove box lamp.
|
|
| 22. |
Lift the glove box away.
|
|
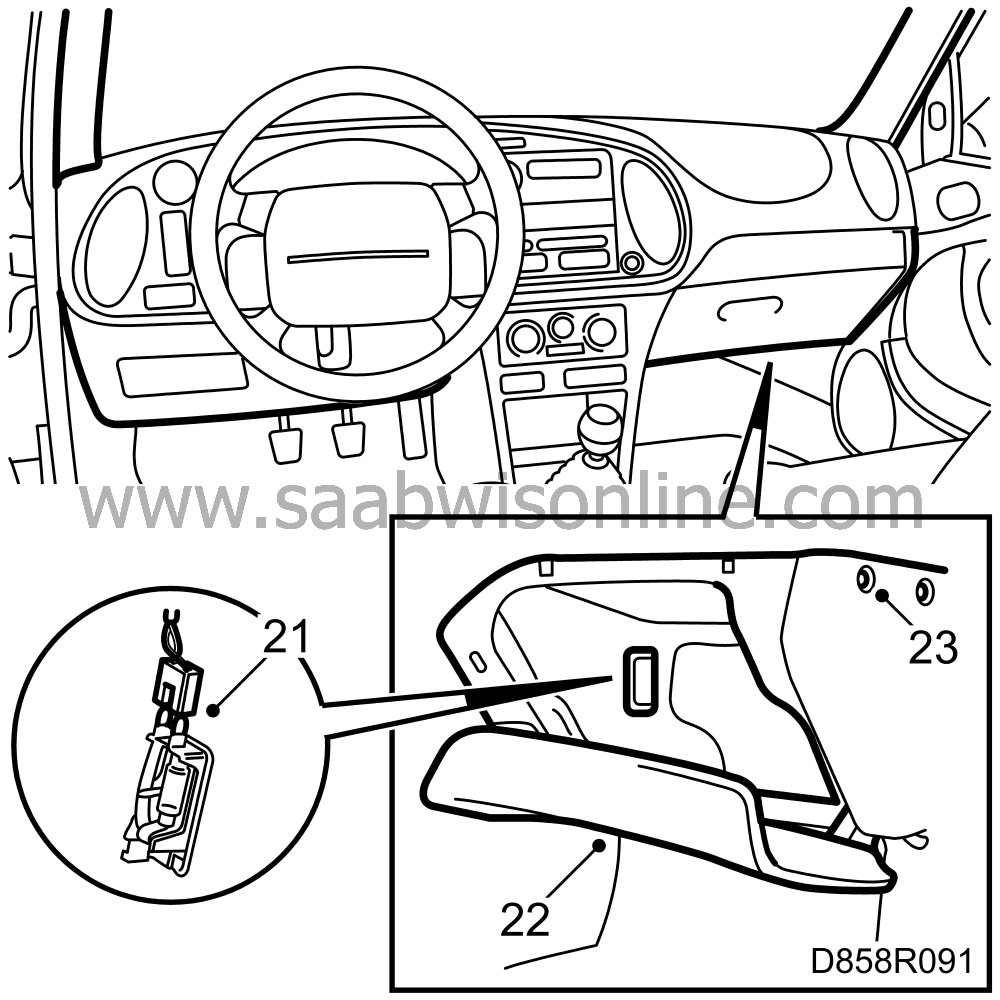
| 23. |
Pull the A-pillar rubber mouldings away and remove the pillar trim
(secured by clips).
|
|
| 24. |
Remove the left-hand and right-hand speaker grilles, using a screwdriver.
|
|
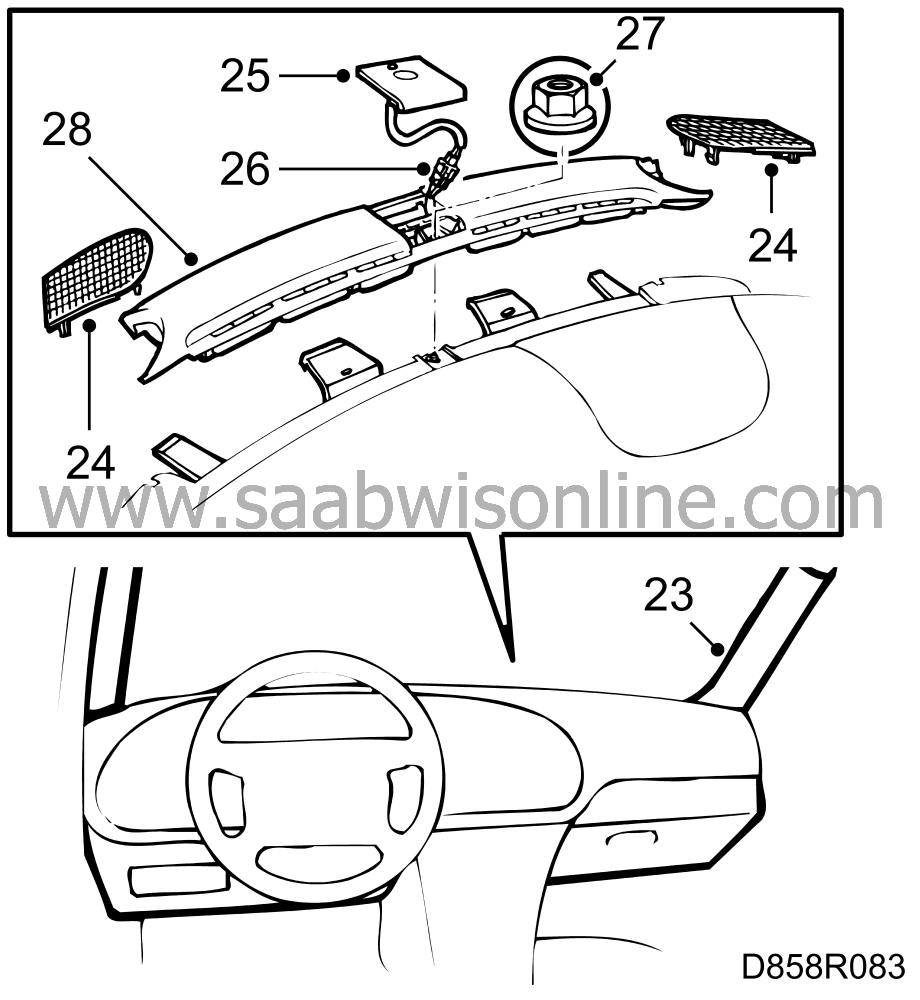
| 25. |
Pull the sun sensor surround slightly rearwards, lift if off and remove it.
|
|
| 26. |
Cars with ACC and/or alarm:
Unplug the
connector for the
sun sensor and/or alarm.
|
|
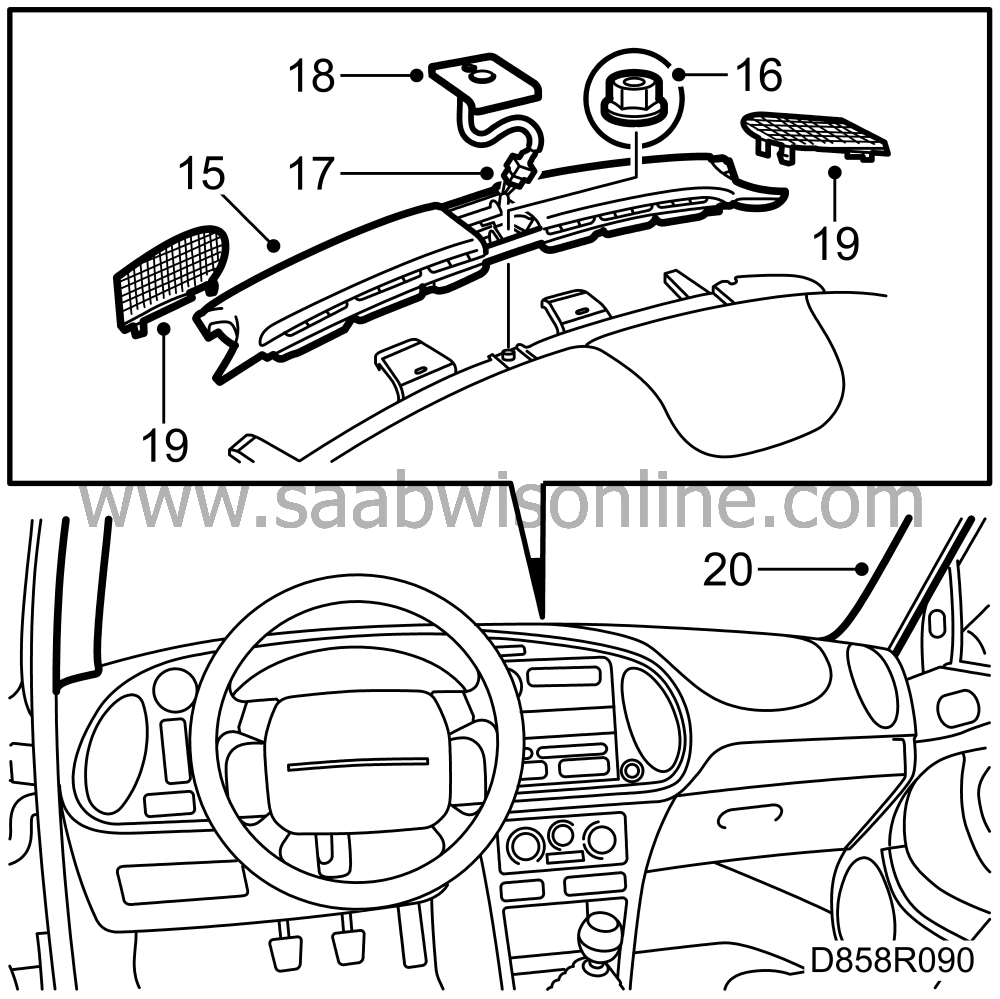
| 27. |
Remove the retaining nut for the defroster cover and dashboard.
|
|
| 28. |
Lift the rear edge of the defroster cover straight up (secured by clips), move it
sideways to clear the lugs on the dashboard and then lift it away.
|
|
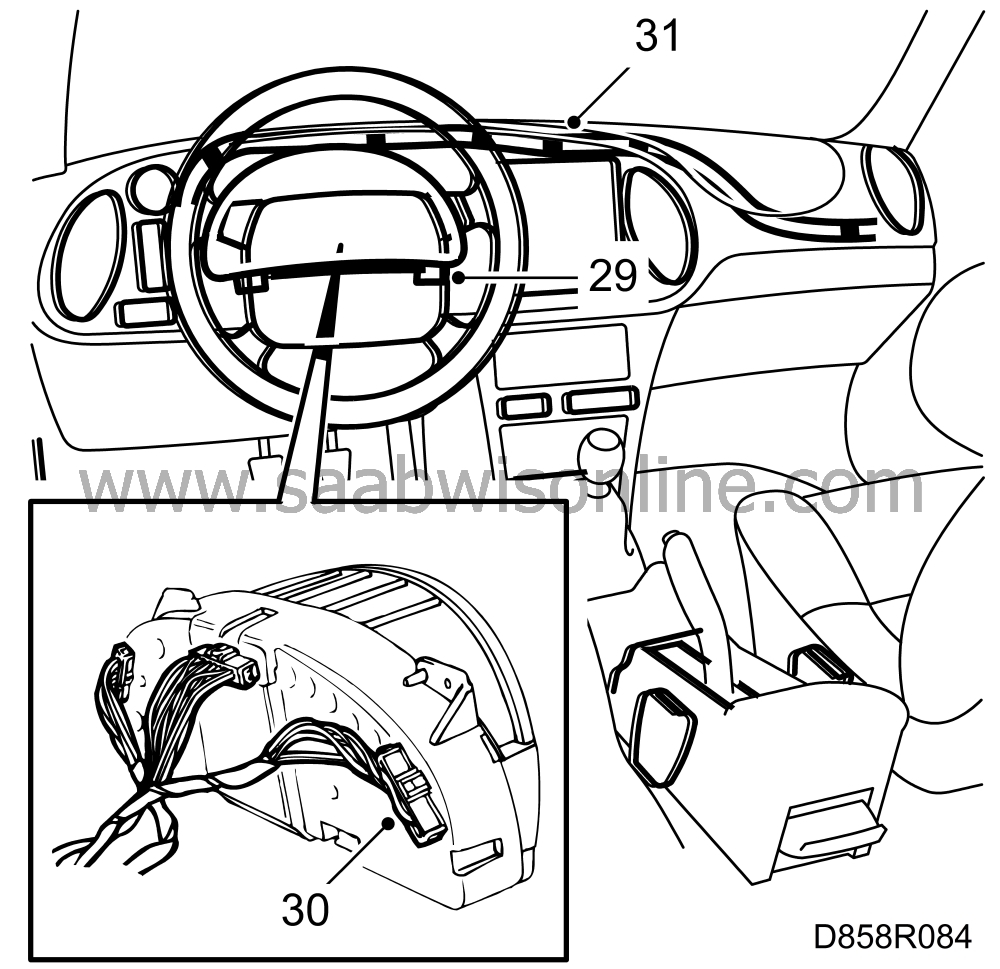
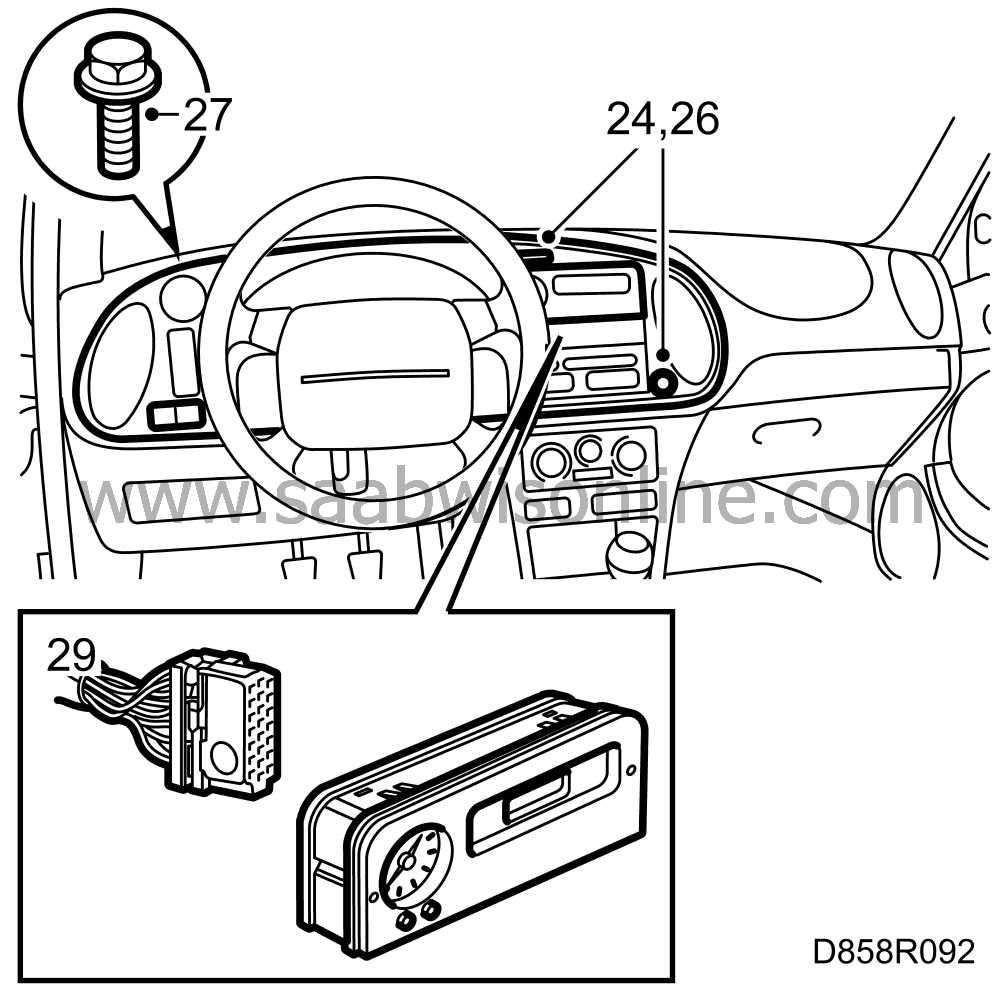
| 29. |
Remove the main instrument panel retaining screws and pull the it straight
out.
|
|
| 30. |
Unplug the connector.
|
|
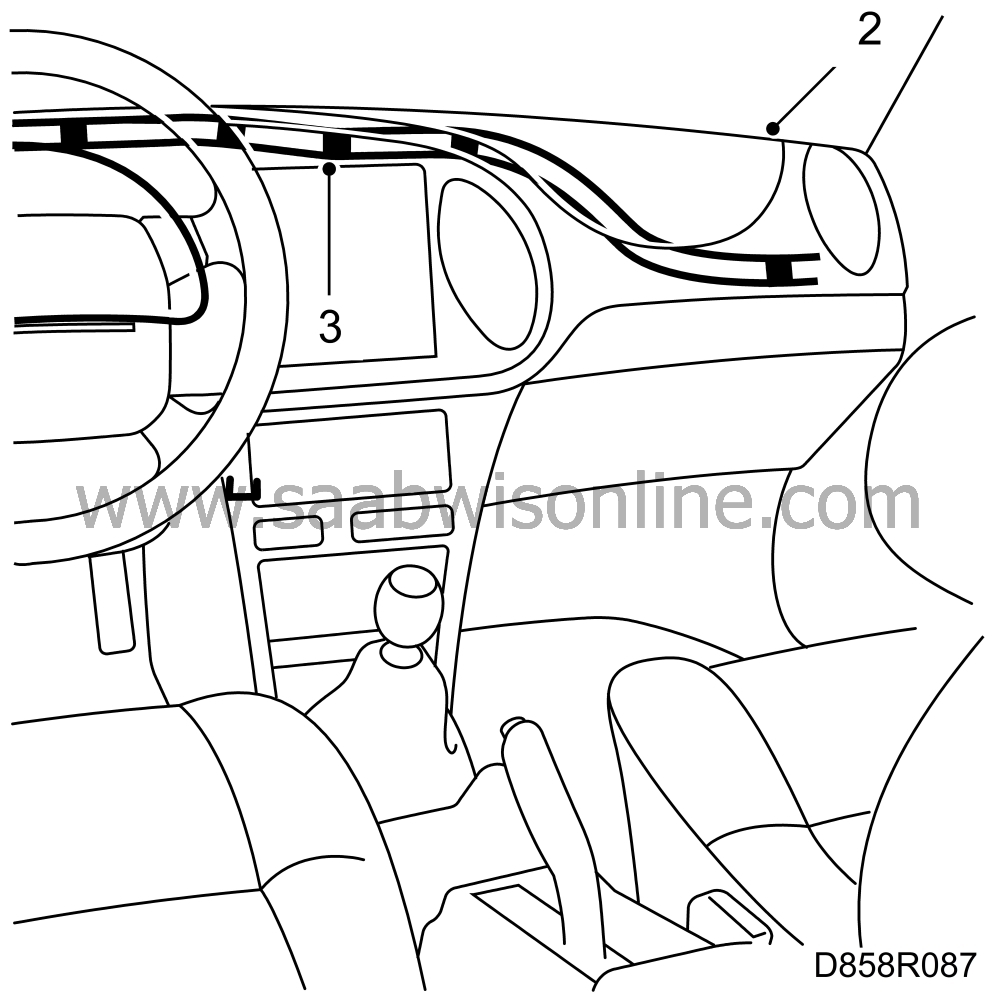
| 31. |
Snip through the cable ties to release the wiring harness
underneath the dashboard.
The cable tie on the passenger side can
be opened.
|
|
| 32. |
Remove the floor air duct on the driver's side.
|
|
| 33. |
Remove the two fuse holder retaining screws, remove the fuse holder and
let it hang down.
|
|
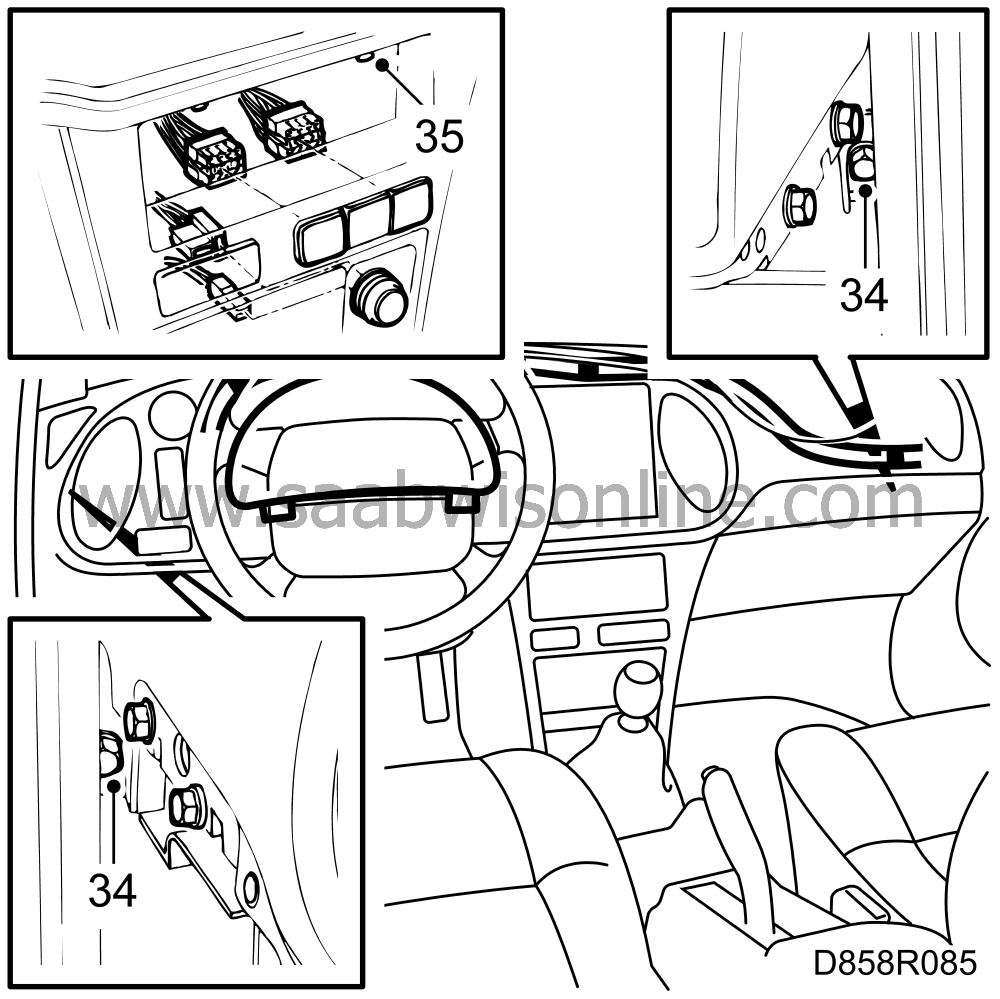
| 34. |
Remove the dashboard retaining bolts mounted in the A pillar.
|
|
| 35. |
Press out the heating control panel and remove the expanding rivets securing
the dashboard to the centre console (press in the centre pin about 3 mm and withdraw the
rivet).
|
|
| 36. |
Cars with an airbag on the passenger side:
Unplug the connector and remove the nut securing the stay.
|
|
| 37. |
Remove the air ducts for the right-hand and centre air vents.
|
|
| 38. |
Undo the cable ties holding the speaker wiring on the right- hand side and unplug
the speaker connectors.
|
|
| 39. |
Unscrew the retaining bolts on each side of the speakers.
|
|
| 40. |
Carefully lift the dashboard away.
|
|
| To fit |
| 1. |
Replace damaged cable ties.
|
|
| 2. |
Lift the complete dashboard roughly into position. The underside
should still be accessible so that work can be carried out on it.
Position all connectors in their respective places.
|
|
| 3. |
Fit the wiring harness under the dashboard.
|
|
| 4. |
Connect the air duct for the middle air vent to the heating and ventilation unit.
|
|
| 5. |
Plug in the connectors for the left-hand and right-hand speakers.
|
|
| 6. |
Position the dashboard correctly. Take care to avoid nipping the wiring.
Cars with an airbag on the passenger's side:
Make sure that
the bolt securing the stay is correctly positioned.
|
|
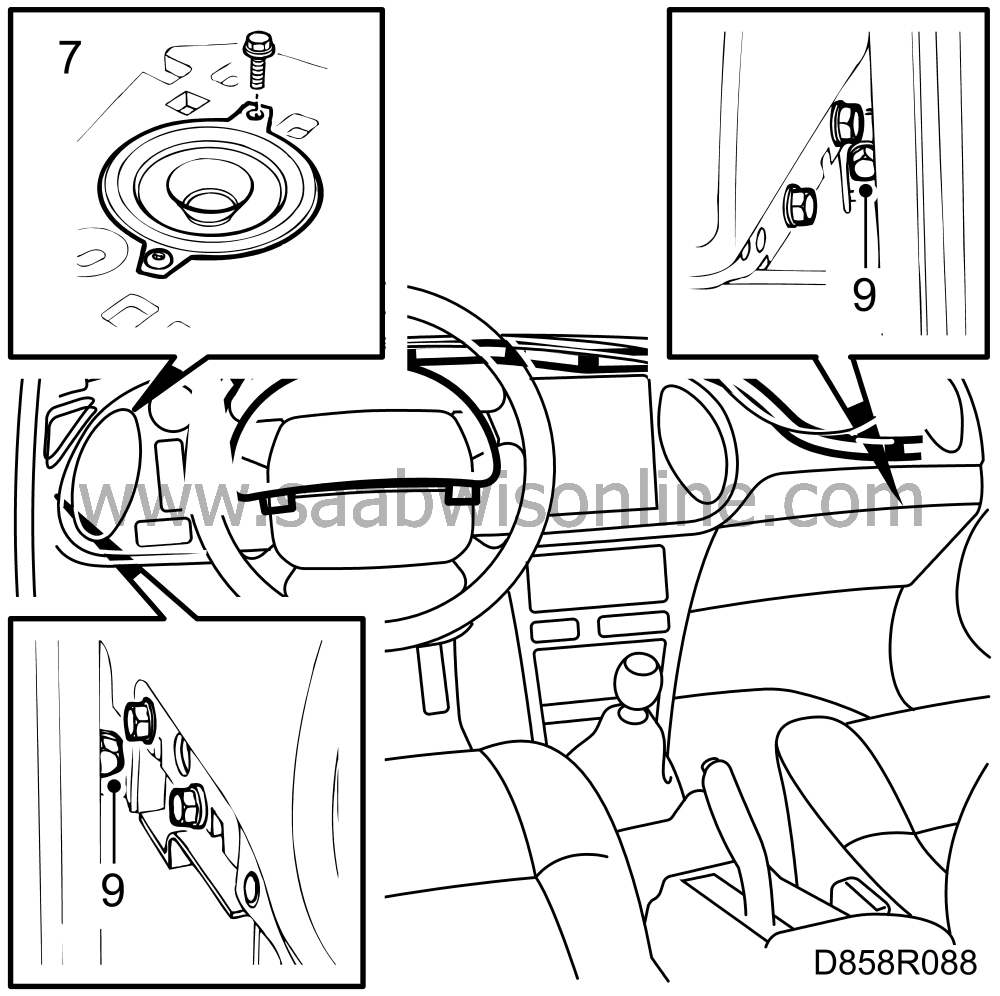
| 7. |
Fit the dashboard bolts at the side of each speaker.
|
|
| 8. |
Connect the air duct for the right-hand air vent.
|
|
| 9. |
Screw the dashboard retaining bolts into the A pillars.
|
|
| 10. |
Cars with an airbag on the passenger side:
Fit
the nut securing the airbag stay and plug in the connector.
Tightening torque: 20 Nm (15 lbf ft) |
|
| 11. |
Fasten the dashboard to the centre console by means of the expanding
rivets.
|
|
| 12. |
Fit the heating control panel and its various parts.
|
|
| 13. |
Fit the fuse holder in place.
|
|
| 14. |
Plug in the main instrument panel connector and fit the instrument panel in place.
|
|
| 15. |
Position the defroster cover so that you can move it sideways and
hook it into the dashboard lugs. Press the cover into place (clips).
|
|
| 16. |
Screw on the retaining nut securing both the cover and the dashboard in the
space for the sun sensor.
|
|
| 17. |
Cars with ACC and/or alarm:
Unplug the
connector for the
sun sensor and/or alarm.
|
|
| 18. |
Refit the sun sensor surround.
|
|
| 19. |
Press the left-hand and right-hand speaker grilles into place. They are
secured by clips.
|
|
| 20. |
Fit the left-hand and right-hand A-pillar trim (clips). Press the
rubber mouldings into place on the A pillars, making sure that they
come outside the pillar trim.
|
|
| 21. |
Plug in the connector for the glove box lamp.
|
|
| 22. |
Refit the glove box.
|
|
| 23. |
Fit the glove box retaining screws and expanding rivet.
|
|
| 24. |
Fit the instrument panel roughly into position.
|
|
| 25. |
Plug in the following connectors. On the left of the steering wheel (top to bottom):
Rear fog light, black connector Front fog lights, green connector Unused button Headlamp
beam control, orange connector Instrument lighting, white connector. On the right of the
steering wheel: Hazard flashers and seat-belt warning lamp
|
|||||||
| 26. |
Fit the instrument panel by first inserting the bottom edge and
then pressing the top edge into place.
|
|
| 27. |
Fit the instrument panel retaining screws.
|
|
| 28. |
Press all switches on the left of the steering wheel into place.
|
|
| 29. |
Refit the auxiliary instrument panel (SID unit).
|
|
| 30. |
Refit the radio contact box.

|
|
| 31. |
Refit the storage compartment, if previously removed.
|
|
| 32. |
Plug in the radio connectors and the aerial. Insert the radio into the
contact box.
|
|
| 33. |
Refit the lower dashboard section on the driver's side.
|
|
| 34. |
Refit the diagnostics socket.
|
|
| 35. |
Plug in the connectors for the steering column stalk controls. Wiper
control (black mounting) on right. Direction indicator control (white mounting) on left.
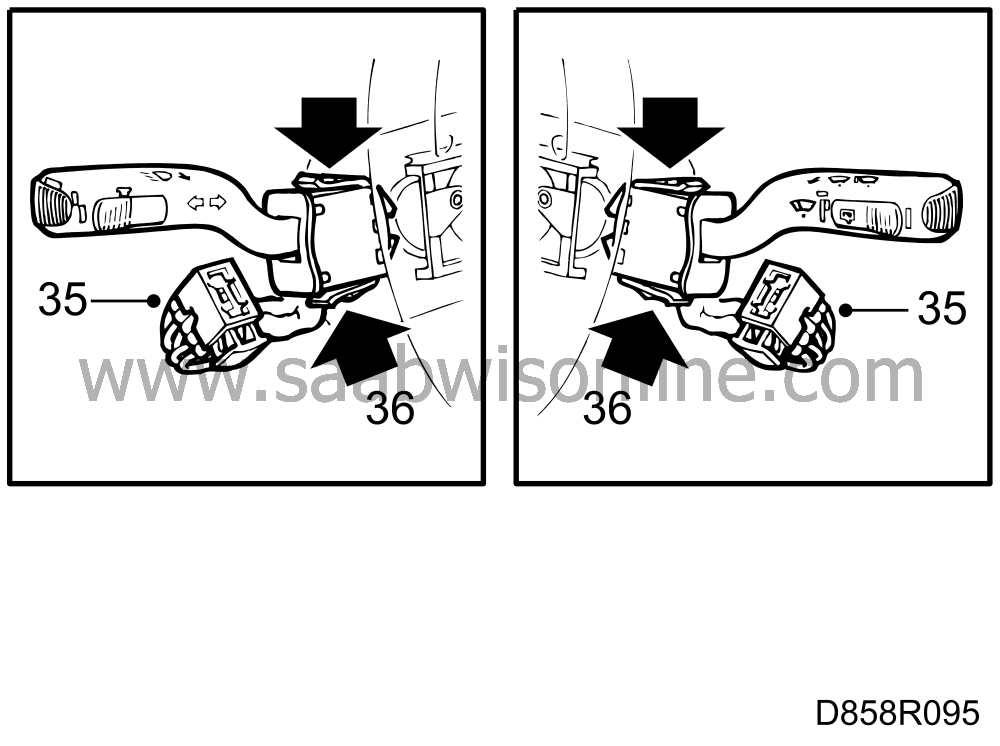
|
|
| 36. |
Fit the steering column controls.
|
|
| 37. |
Refit the upper and lower sections of the steering column cowl.
|
|
| 38. |
Turn the contact unit (coil spring) anticlockwise to the end position and then 2.5
turns back.
|
|
| 39. |
Pass the connectors for the airbag module and horn through the steering
wheel and refit the steering wheel.
|
|
| 40. |
Plug in the connectors for the horn and airbag module.
|
|
| 41. |
Tighten the airbag module retaining screws.
|
|
| 42. |
Reconnect the negative battery cable.
|
|
This project is supported by memberships and donations. If you use this site, please consider Joining SCNA and/or making a donation.
Our Friends
