Checking the operation of pushbuttons and manual controls
Symptom: Seat cannot be operated in certain positions. No diagnostic trouble code. One of the "Read switches" in the ISAT shows "Open".
|
|
Checking the operation of pushbuttons and manual controls
|
Fault symptom:
|
•
|
Seat cannot be operated.
|
|
•
|
No diagnostic trouble code.
|
|
•
|
All "Read switches" in the ISAT show "open".
|
Diagnostic procedure:
|
1.
|
Check that the control module is supplied with power,

|
|
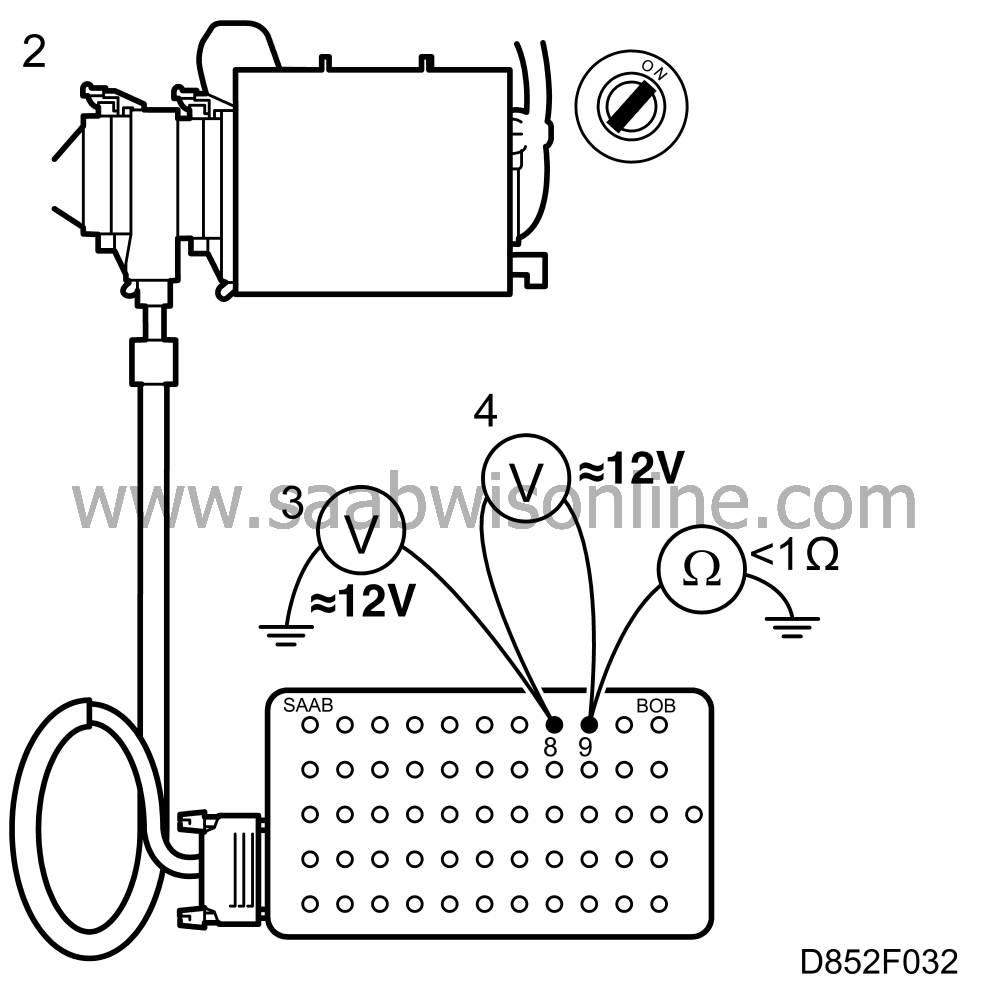
2.
|
Unplug the control module's 16-pole connector and plug in a BOB.
|
|
3.
|
Check that a supply of about 12 V is present across pin 8 and chassis ground. If it is not
.
|
|
4.
|
Measure the voltage across pins 8 and 9. It should be about 12 V. If it is not, check the ground cable (pin 9) for continuity/shorting.
|
Fault symptom:
|
•
|
Seat cannot be operated in certain positions.
|
|
•
|
No diagnostic trouble code.
|
|
•
|
One of the "Read switches" in the ISAT shows "Open".
|
Diagnostic procedure:
|
1.
|
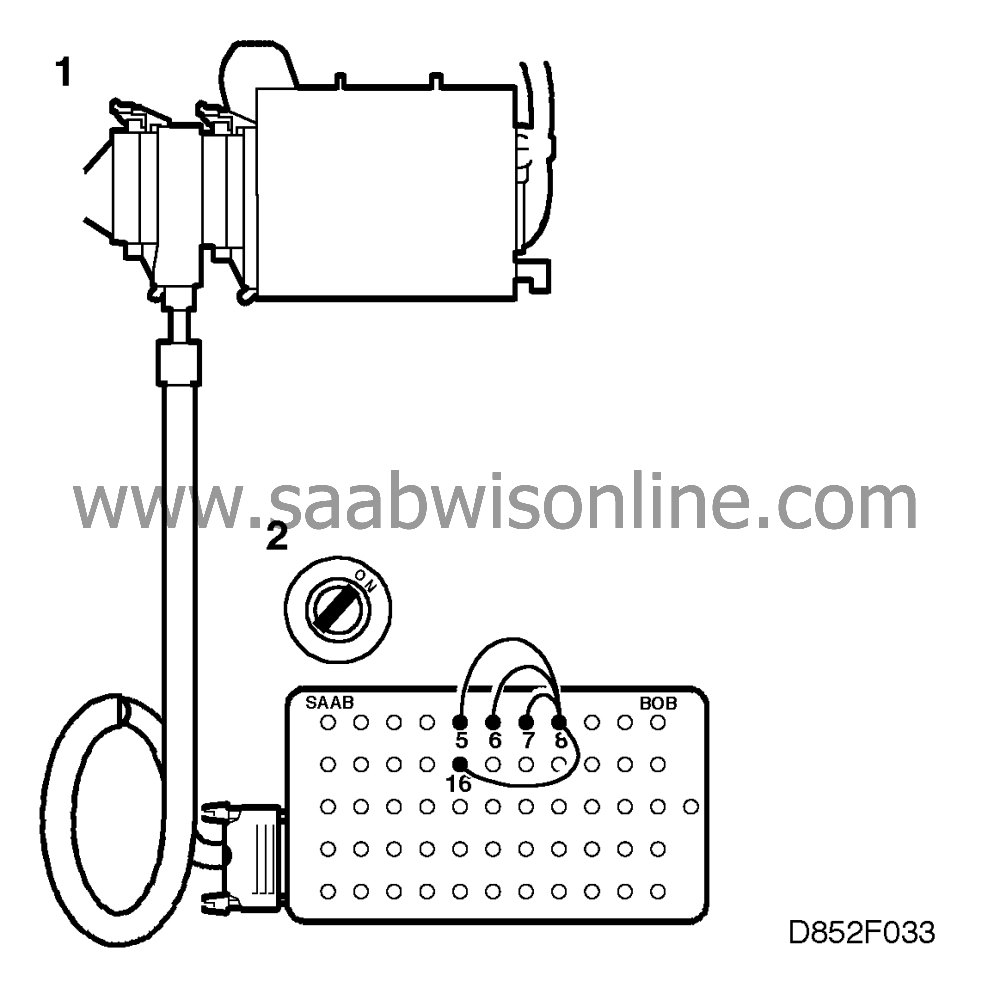
Unplug the control module's 16-pole connector and plug in a BOB.
|
|
2.
|
Connect the BOB between pin 8 and the following pins, depending on the fault:
Pin 7 - memory button 1 Pin 6 - memory button 2 Pin 5 - memory button 3 Pin 16 - memory button M
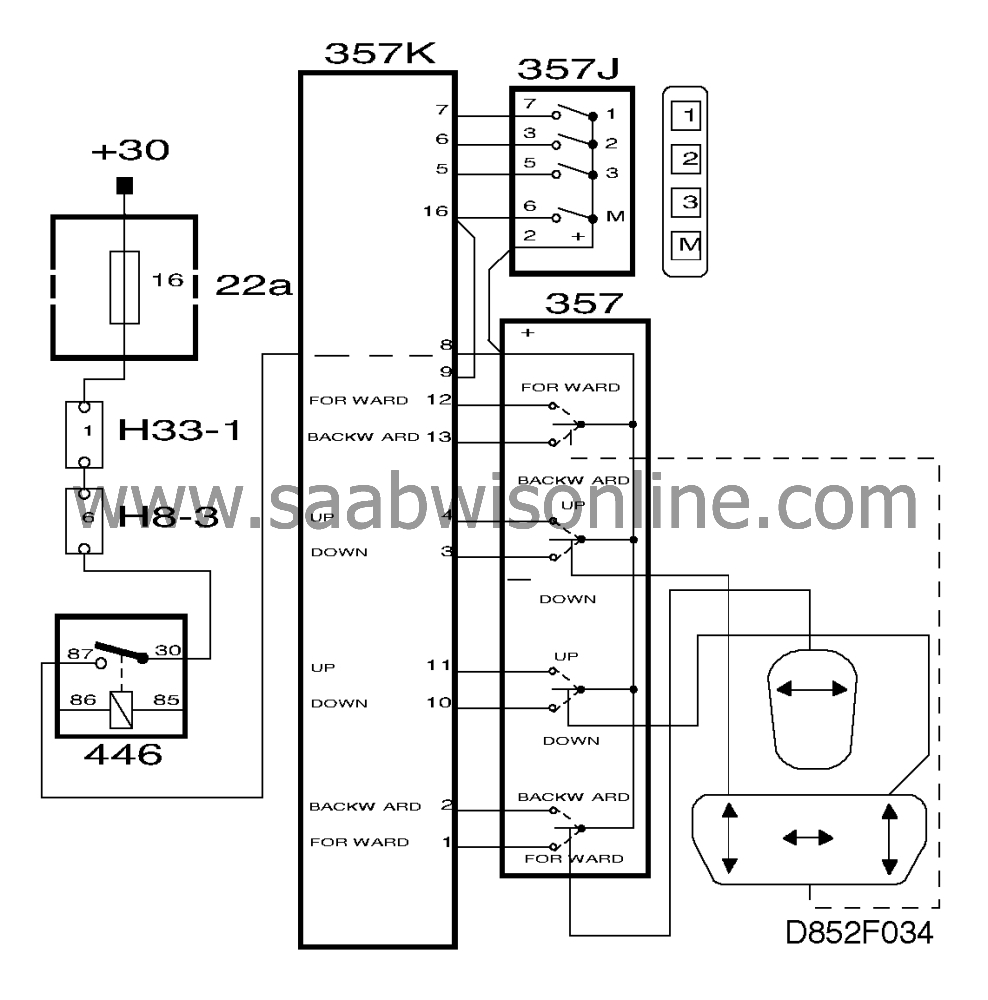
If entire functions are inoperative, check the wiring between pin 8 of the control module and pin 1 of the pushbutton assembly.
|
|
3.
|
Connect a jumper lead between pin 8 and
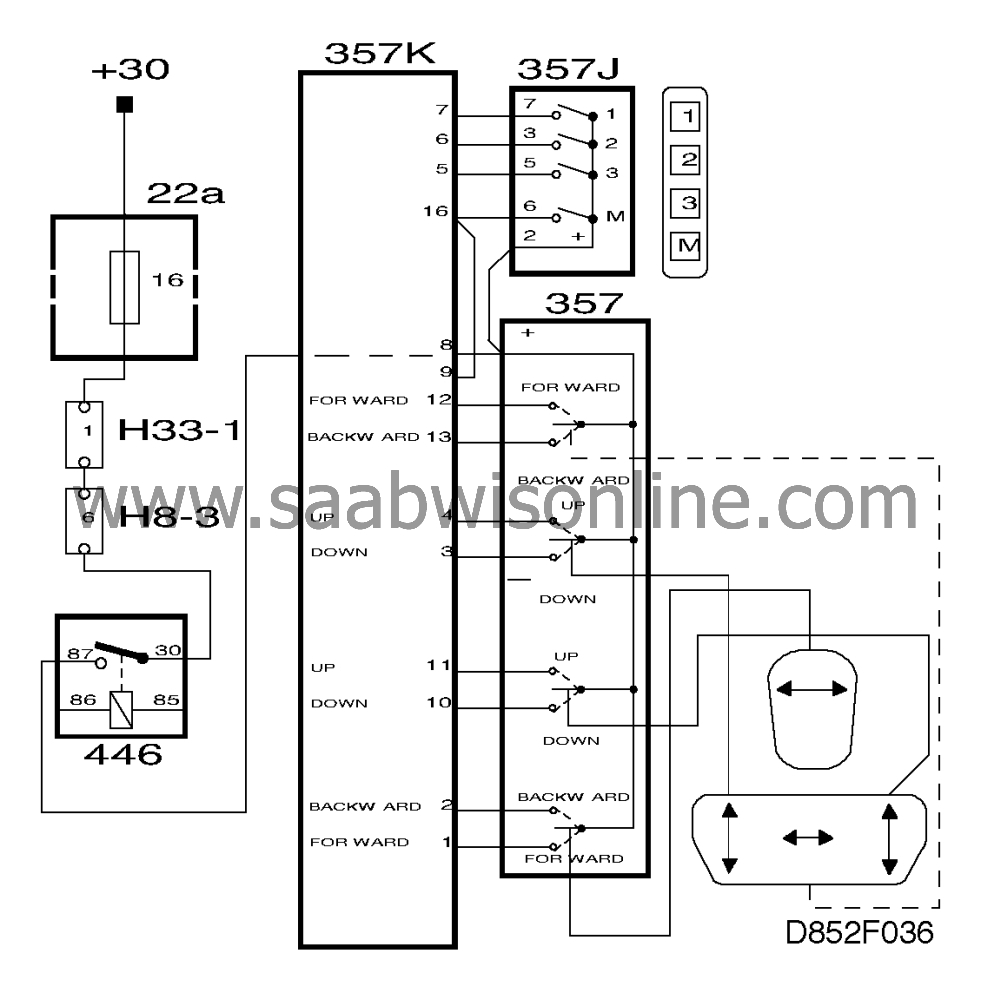
pin 1 - backrest upright 2 - backrest recline 3 - front down 4 - front up 10 - rear down 11 - rear up 12 - seat forwards 13 - seat rearwards
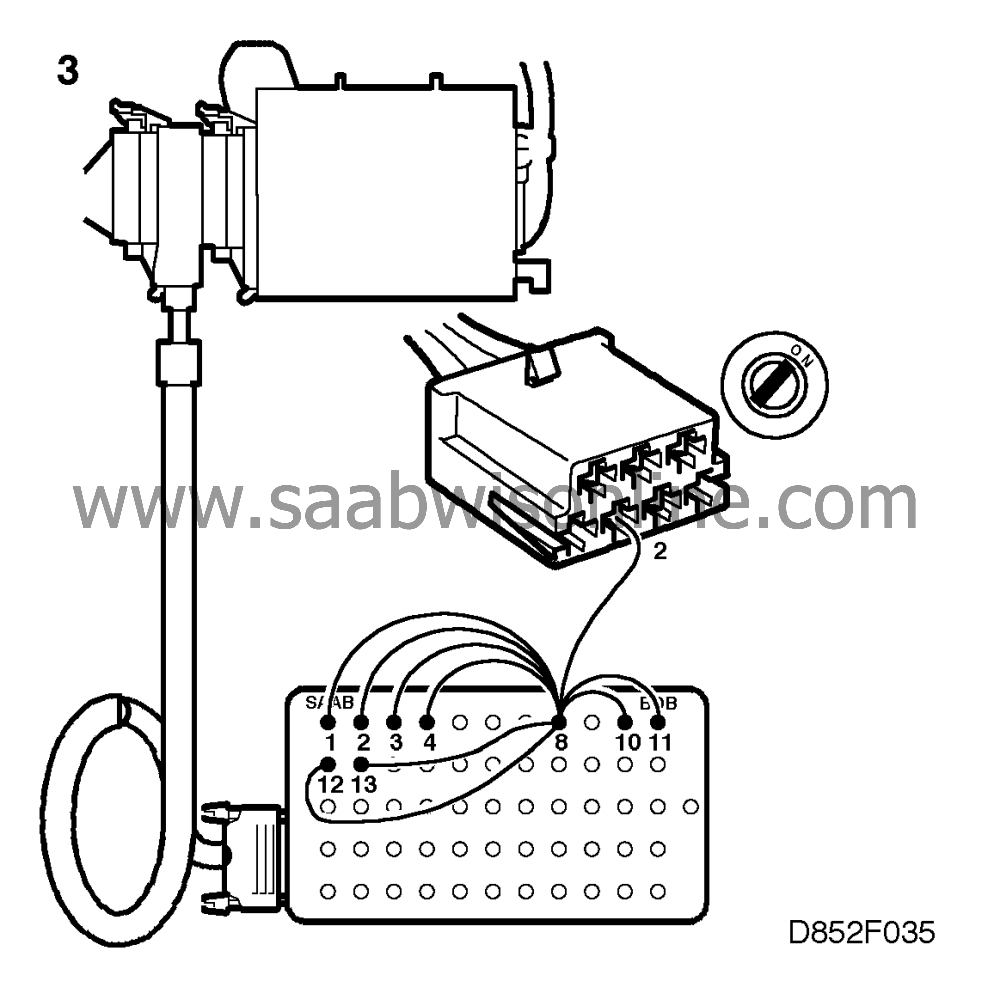
If the seat moves as desired, change the pushbutton assembly or the switch assembly.
|
|
4.
|
If the seat does not move, check the wiring between the switch and the control module for continuity/shorting.
|
|
5.
|
Turn to page 852-55, "Before control module replacement".
|