Premature deterioration of fuelpump
|
MODIFICATION INSTRUCTION
|
|
Bulletin Nbr:
|
234-1725
|
|
Date:
...........
|
APRIL 1997
|
|
Market:
|
EXCL. USA, CA
|
|
|
Premature deterioration of fuel
pump
|
|
Service directive No. 10442
|
Cars in stock should be rectified before delivery.
Cars already delivered must be rectified next time they are brought to the workshop for
service or repairs.
All M97 900 Turbo cars in the following chassis-number range:
V2000333-V2005994 (3-/5-d)
V7000087-V7000944 (Convertible)
The fuel pump spindle should be carbide coated. However, on some pumps that
have been delivered, this coating is missing. As a result, the life of the pump is shortened,
especially under adverse conditions, such as caused by poor-quality fuel, excessively hard
driving and high temperatures.
The remedy is to fit a new pump.
88 22 017 Fuel pump and ’O’ ring
Start by checking box C2 on the modification identity plate. If there is
no mark in the box, proceed as follows.
 Warning
|
|
Because work on the fuel system is involved in changing the fuel pump, the following
points must be observed:
|
|
•
|
Ensure that there is good ventilation. If an approved
ventilation system for extracting fuel vapour is available, it should be used.
|
|
•
|
Wear protective gloves. Prolonged exposure of the hands to fuel can cause
irritation of the skin.
|
|
•
|
Ensure that a class BE fire extinguisher is on hand. Be alert to the danger of
sparks, e.g. on circuit breaking, short-circuiting etc.
|
|
•
|
Absolutely No Smoking.
|
|
•
|
Release the pressure in the fuel system by opening the nipple on the fuel rail.
Use a paper towel or cloth to soak up any escaping fuel. Retighten the
nipple.
|
|
|
|
|
|
|
1.
|
Drive the car onto a lift. Position the
right rear support as far out as possible so that it will not obstruct the work.
|
|
2.
|
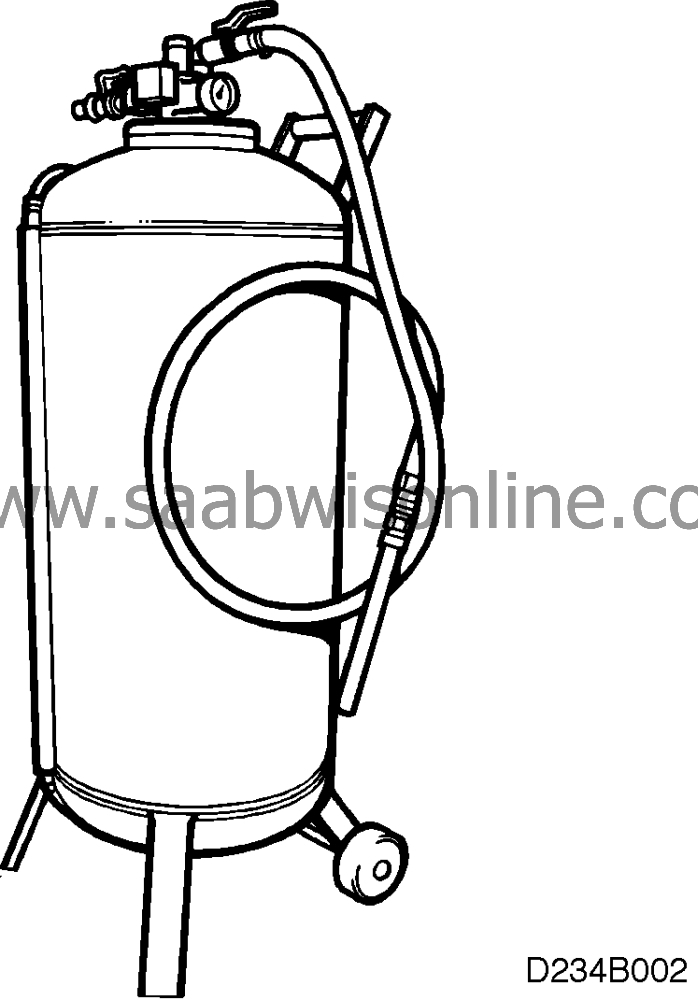
Drain the fuel tank via the filler pipe, using the tank-draining unit.
|
Important
|
|
Always observe scrupulous cleanliness when working on the fuel system. Plug or blank
off openings to prevent ingress of dirt into the system.
|
|
|
Raise the car.
|
|
3.
|
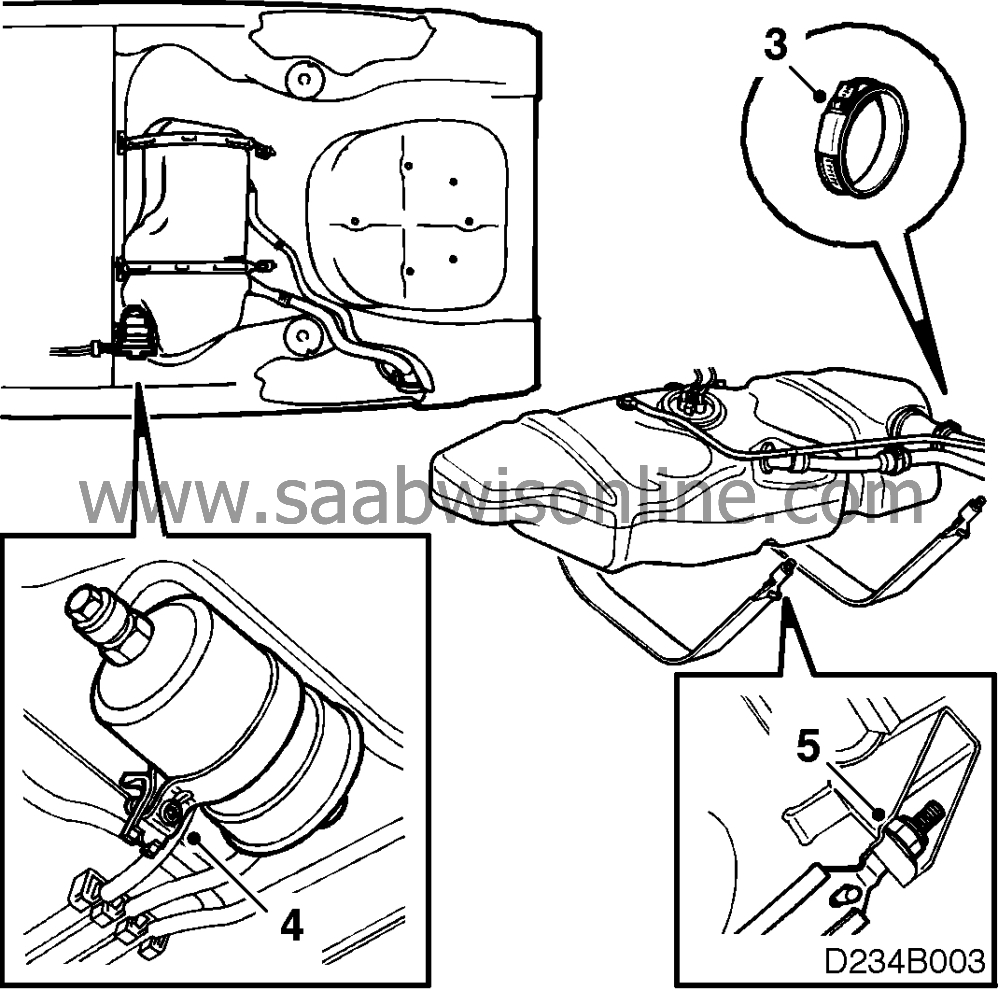
Disconnect the rubber hoses from the tank and plug the tank openings. Use
special tool 83 94 777.
|
|
4.
|
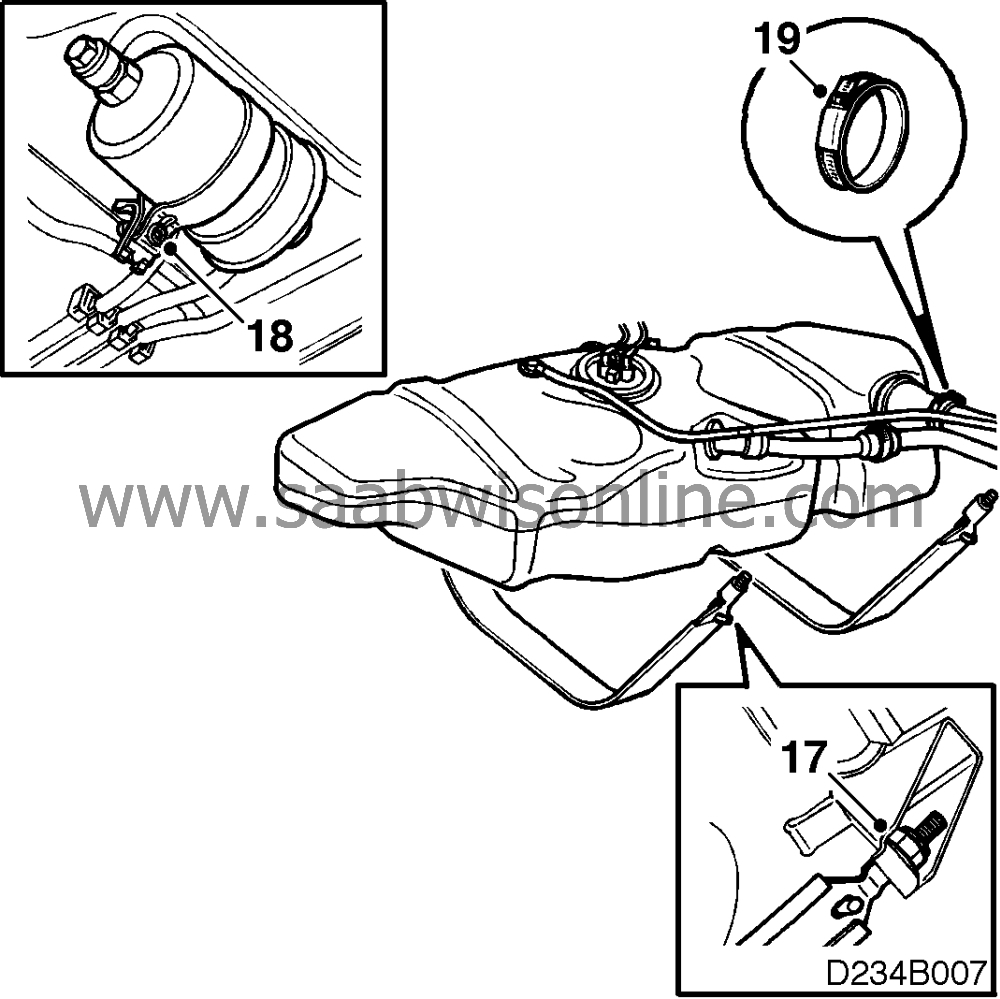
Undo the clamp securing the fuel filter.
|
|
5.
|
Support the tank by means of a pillar lift. Undo the nuts on the tank straps and
unhook the straps.
|
|
6.
|
Carefully lower the tank, RH side first, until the top becomes
visible.
|
Important
|
|
Detach the fuel lines from the clips on the tank and car body to prevent their being
pinched or fracturing.
|
|
|
|
|
7.
|
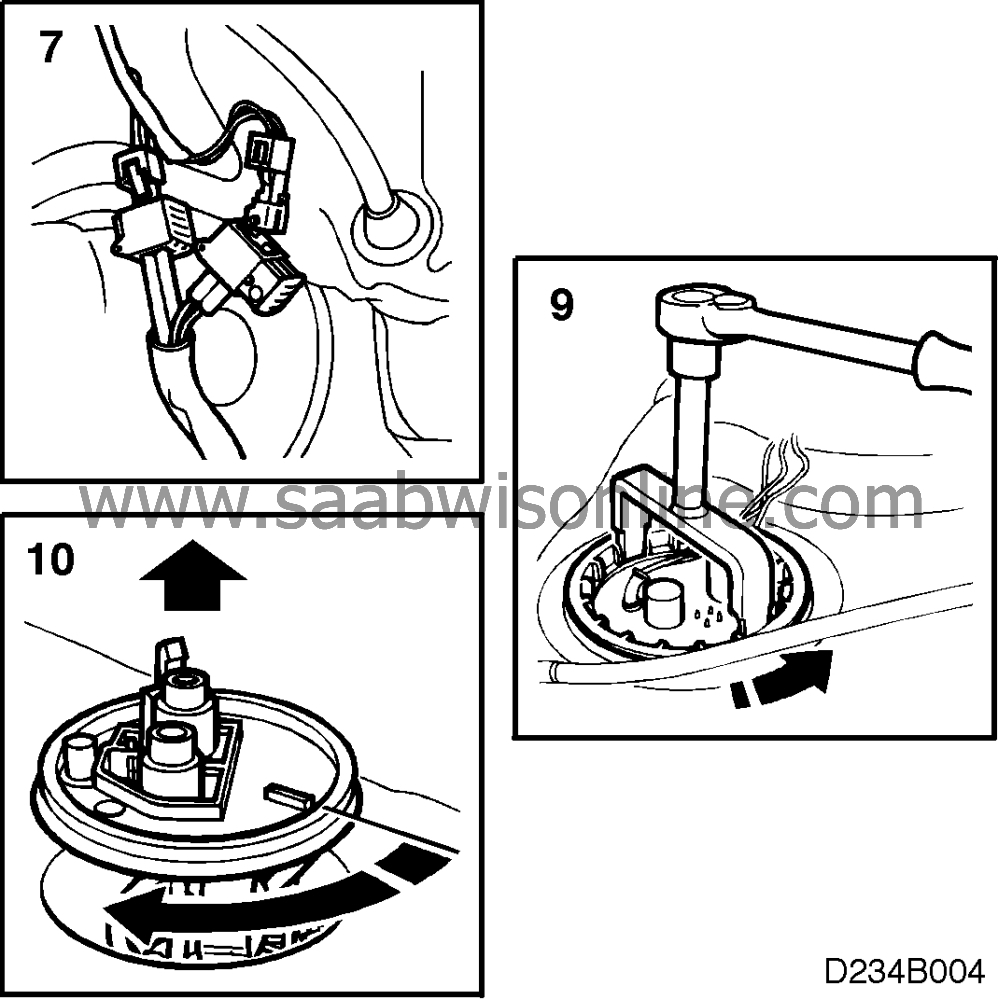
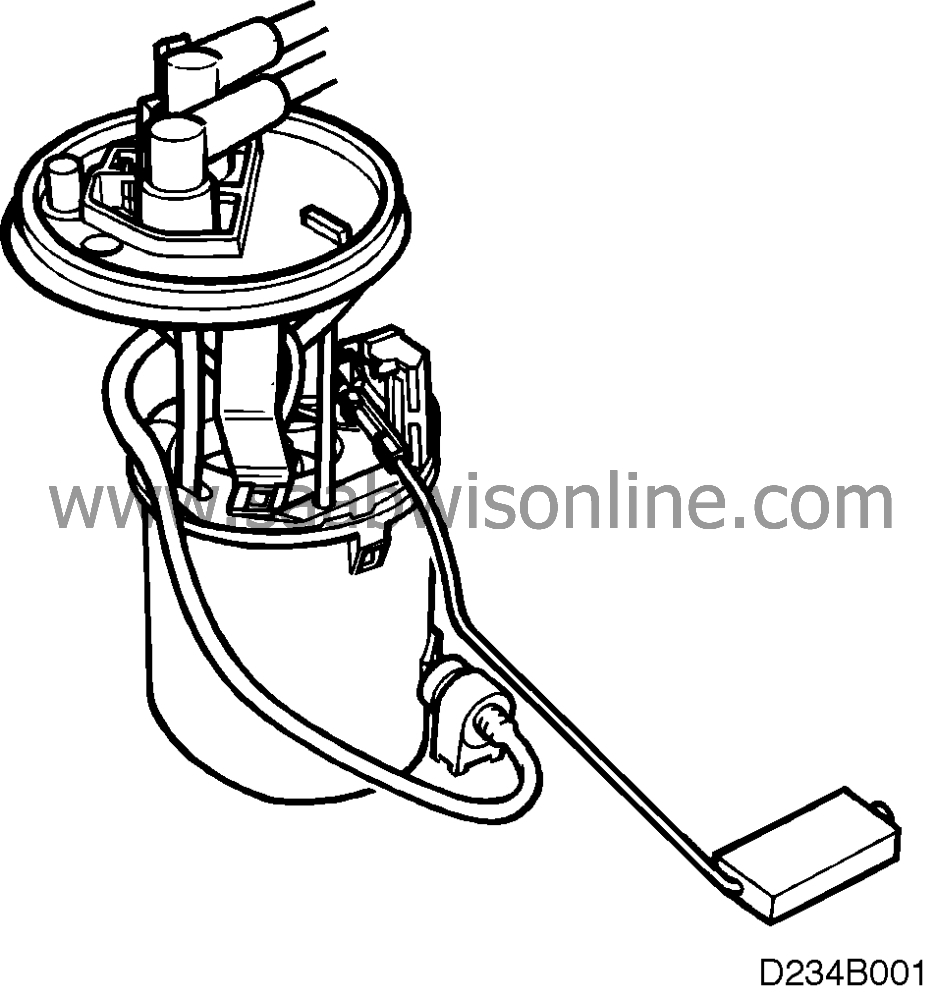
Unplug the two electrical connectors from the fuel pump.
|
|
8.
|
Disconnect the flow and return lines from the pump and lower the tank to a
convenient height for working.
|
|
9.
|
Using tool 83 94 462, remove the screw top from the pump.
|
|
10.
|
Raise the pump and position the top about 50 mm above the tank. Rotate the
pump about 80° clockwise and carefully remove it.
|
|
11.
|
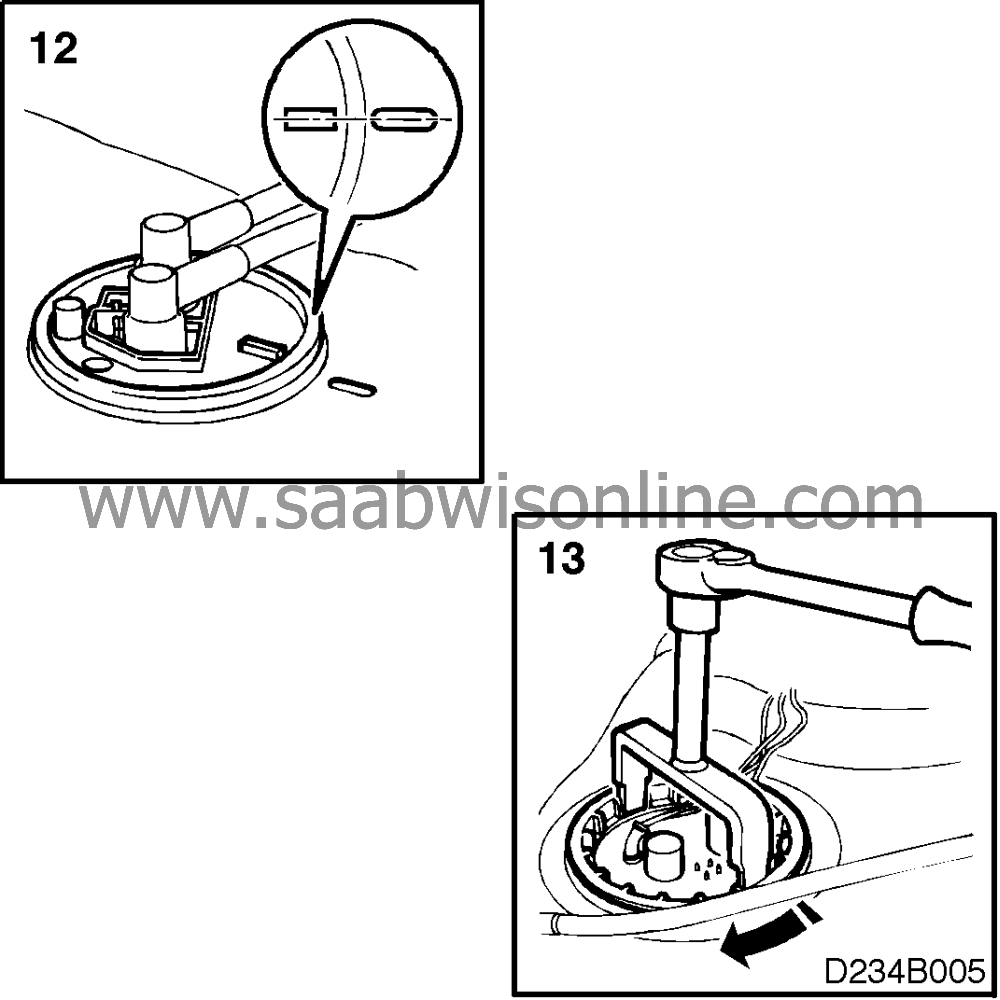
Fit a new ’O’ ring in the groove in the tank.
|
|
12.
|
Carefully insert the new pump into position. Check that the marks on the tank
and the pump are lined up.
|
|
13.
|
Fit the screw top.
|
Important
|
|
Inspect the fuel-line ’O’ rings and replace as
necessary.
|
|
|
|
|
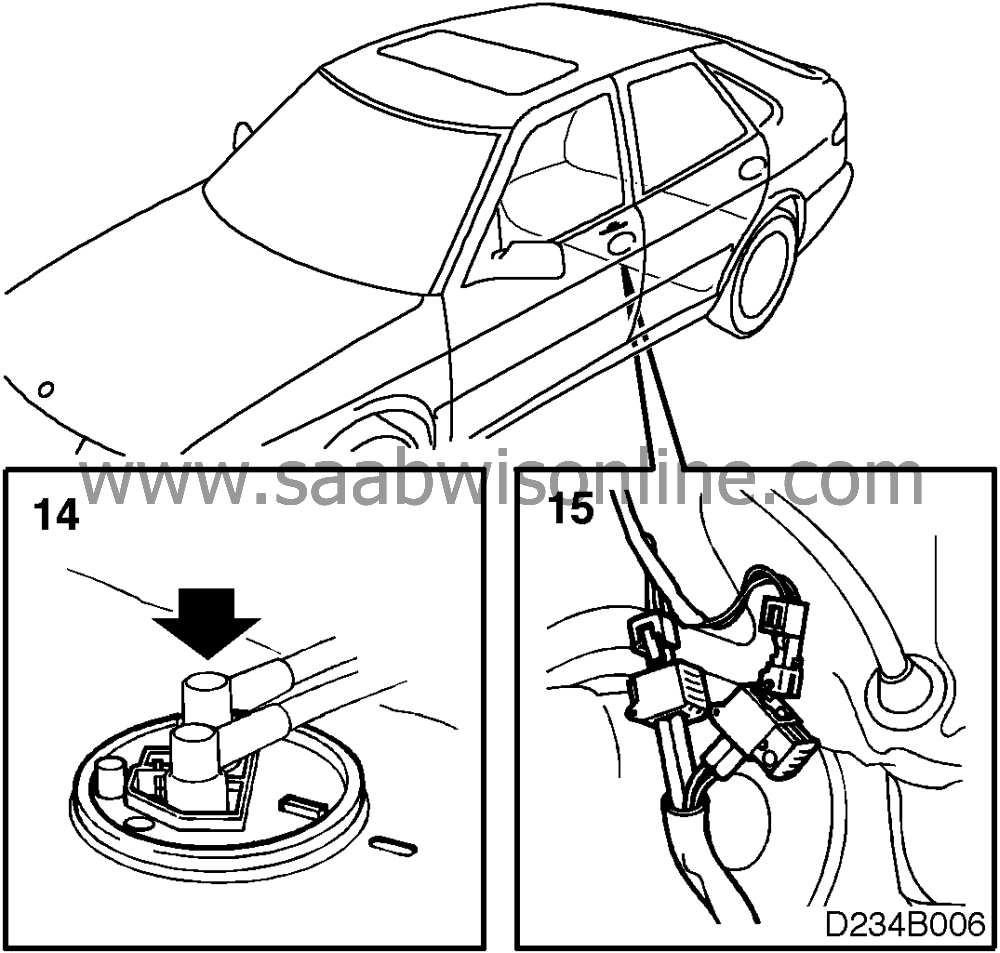
14.
|
Support the tank by means of a pillar lift. Raise the tank and connect the flow
and return lines to the pump.
|
|
15.
|
Plug in the two connectors.
|
|
16.
|
Carefully raise the tank into position.
|
Important
|
|
Take care not to pinch or fracture the fuel lines.
|
|
|
Press the fuel lines into the clips on the tank and car body.
|
|
17.
|
Hook on the tank straps and tighten the nuts.
|
|
18.
|
Fit the clamp for the fuel filter.
|
|
19.
|
Remove the plugs from the tank and reconnect the rubber hoses.
|
|
20.
|
Lower the car. Refill the tank with the same quantity of fuel as that drained
off.
|
|
Marking the modification identity plate
|
After completion of the work, mark box C2 of the modification identity
plate: put a “7” in the box if done by the importer or an “8” if done
by a dealer.
|
Standard-time information
|
See separate
information.


 Warning


