Transmission, fitting
| Transmission, fitting |
| 1. |
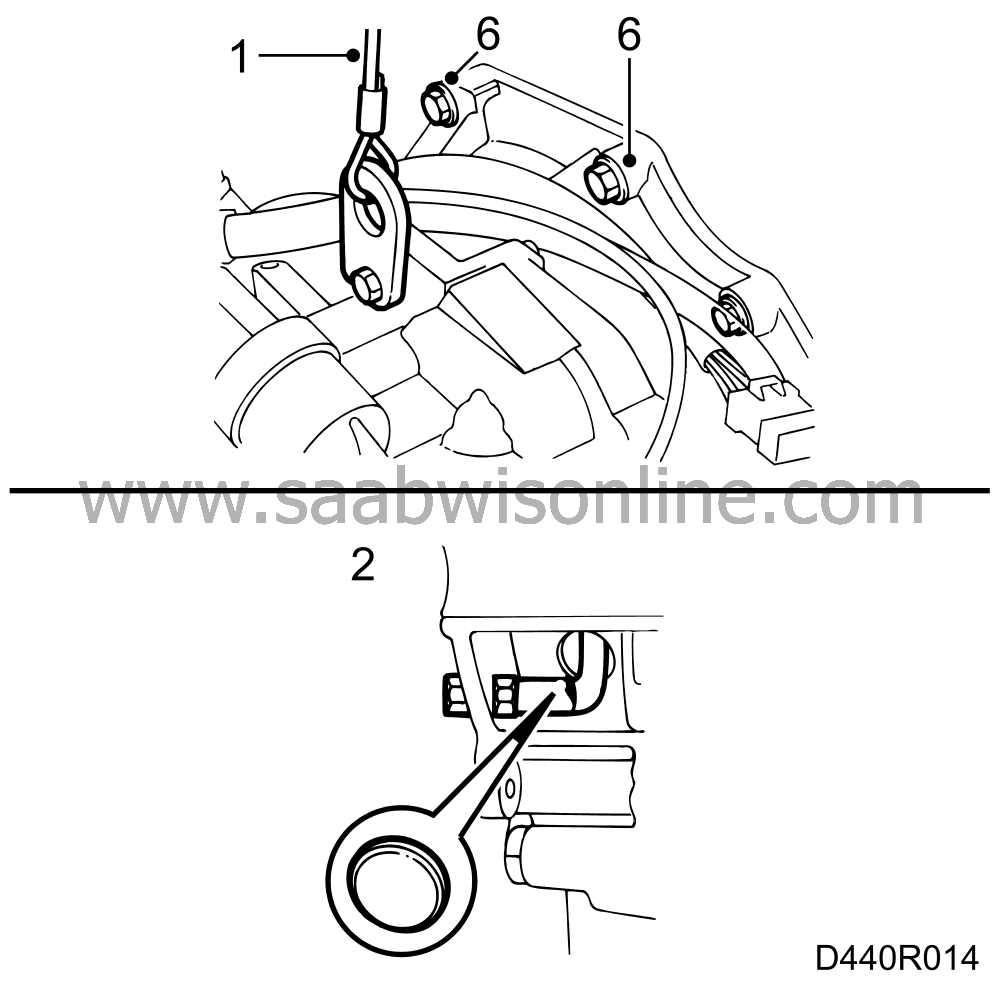
Attach the lifting eye and lifting wire to the transmission.
|
|
| 2. |
Fit the special tool to hold the torque converter in position while fitting the transmission.
6-cyl: special tool 87 92 285. 4-cyl: special tool 87 92 277. |
|
| 3. |
Position the transmission under the car.
|
|
| 4. |
Attach the lifting wire to the transmission and hoist.
Note
|
|||||||
| 5. |
Lift the transmission into place.
|
|
| 6. |
6-cyl:
Screw in 2 of the 3 upper retaining bolts.
4-cyl:
Screw in the 3 upper retaining bolts.
Tightening torque: 75 Nm (55 lbf ft). |
|
| 7. |
Detach the lifting wire from the hoist and transmission.
|
|
| 8. |
Lift up the engine and transmission by means of the lifting beam.
|
|
| 9. |
Raise the car.
|
|
| 10. |
6-cyl:
Screw in the last of the three upper retaining bolts.
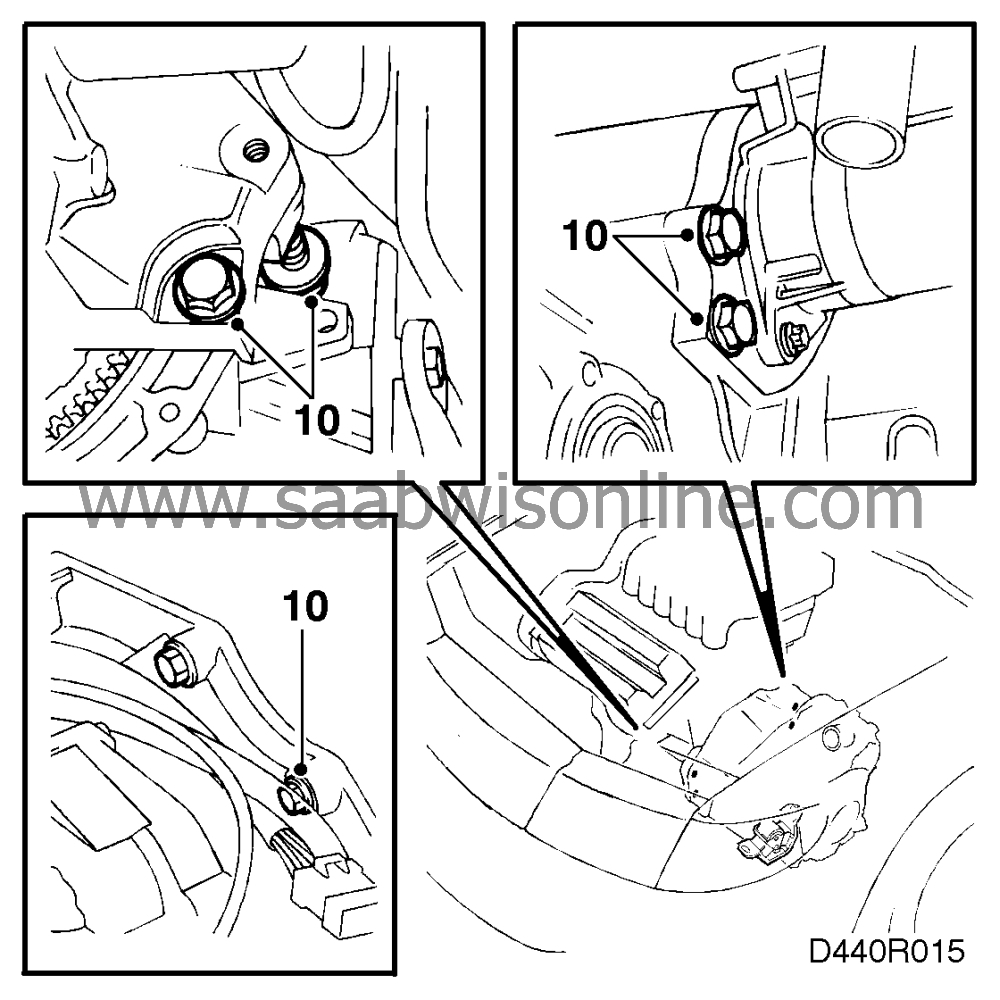
Tightening torque: 75 Nm (55 lbf ft). Screw in the lower retaining bolts securing the transmission to the engine. |
|
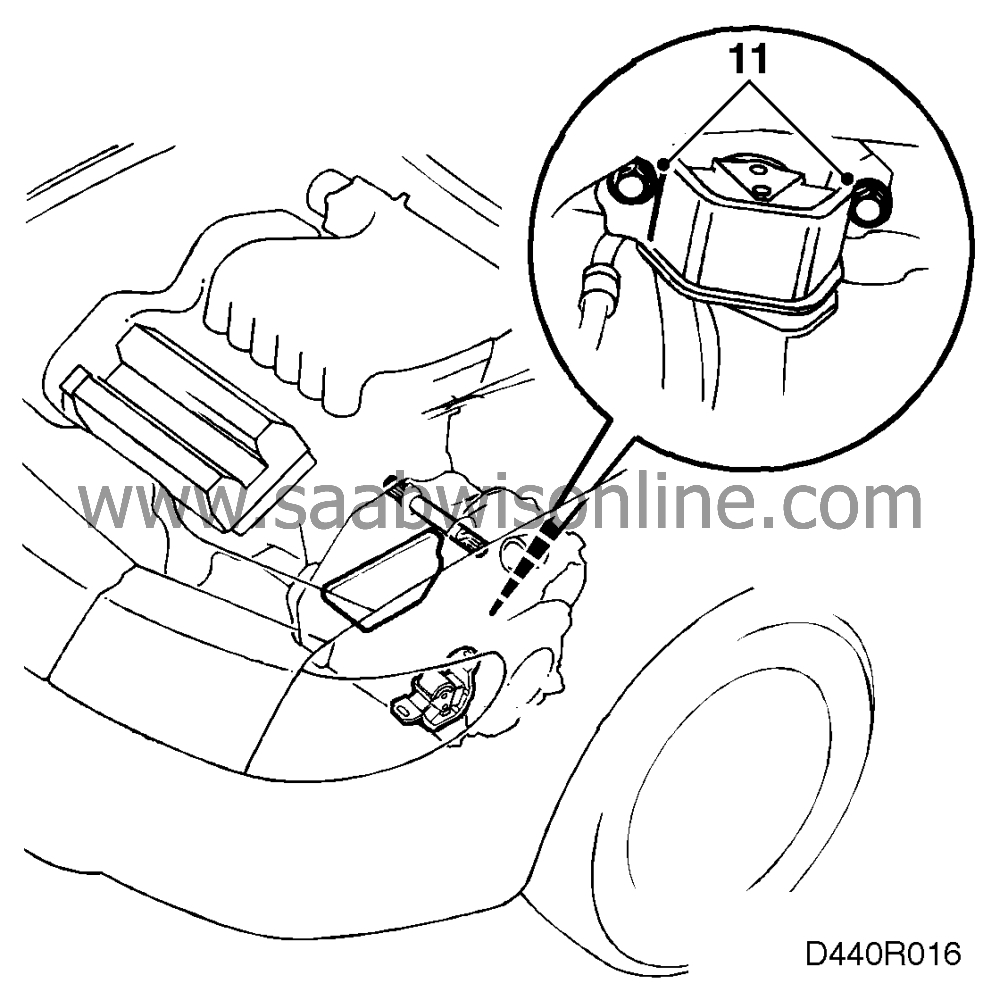
| 11. |
Screw the front engine mount in place.
|
|
| 13. |
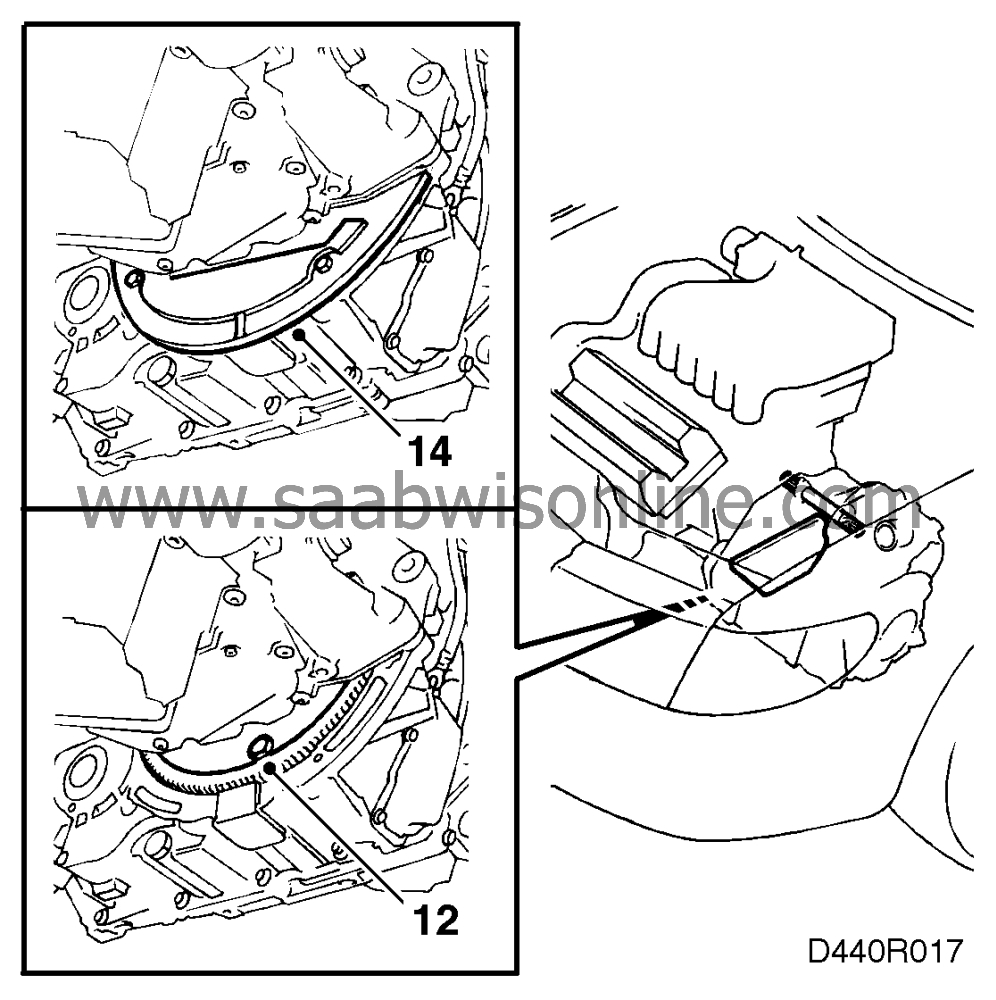
Fit the five remaining bolts securing the torque converter to the driver plate.
60 Nm (44 lbf ft) (4-cyl.). Note
|
|||||||
| 14. |
Fit the splash plate (secured with 2 bolts).
Tightening torque: 7 Nm (5 lbf ft). |
|
| 15. |
Fit the intermediate shaft to the right-hand drive shaft.

6 cyl. The intermediate shaft is secured with 2 bolts. 4 cyl. Drive the bush back into the generator bolt's bracket on the intermediate shaft's bracket. Mount the bracket on the engine. Swing the generator down and fit the lower generator bolt. Note
|
|||||||
| 16. |
Fit the right-hand drive shaft to the intermediate shaft (splined connection).

|
|
| 17. |
Fit the left-hand drive shaft (splined connection).
Note
|
|||||||
| 18. |
After replacement of the transmission, the cooling circuit must be cleaned. See
 .
.
|
|
| 19. |
Attach the inlet and outlet hoses for the transmission fluid cooling. Make sure they do not rest on the subframe.
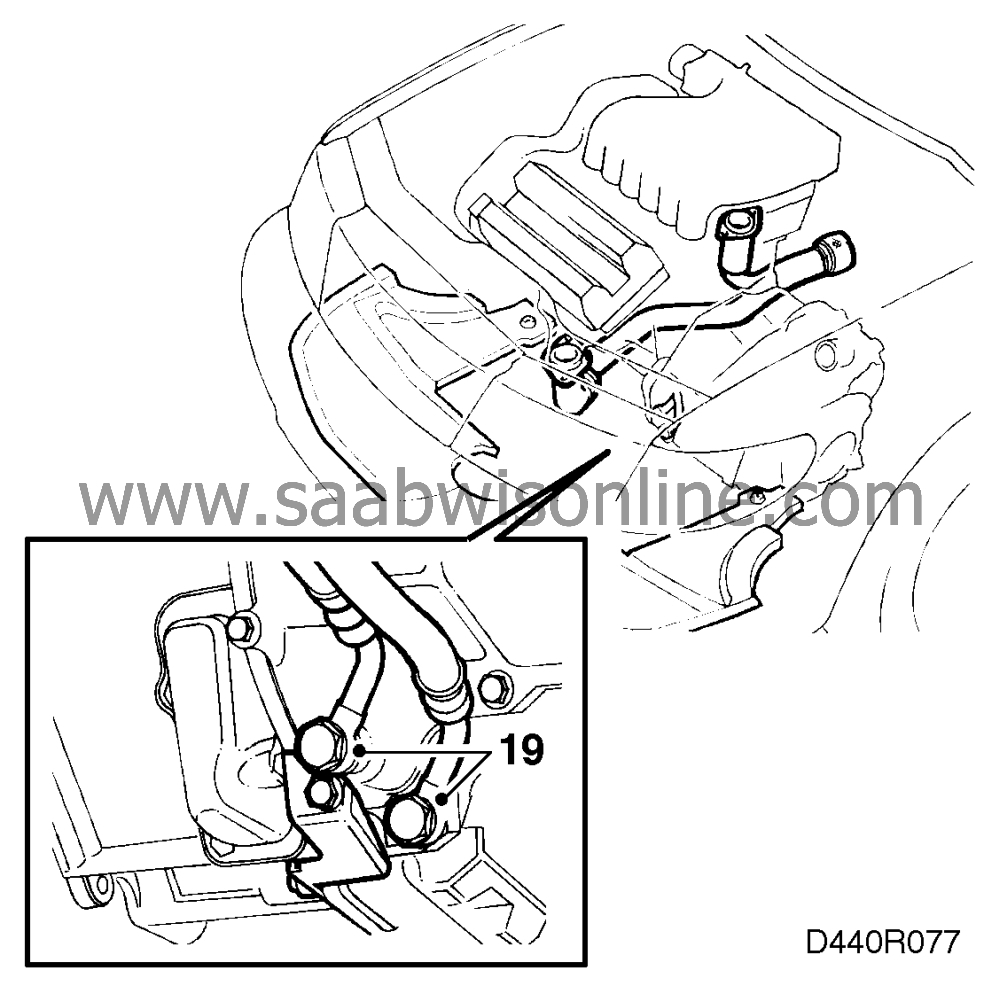
Tightening torque 22 Nm (16 lbf ft) |
|
| 20. |
Fit the subframe.
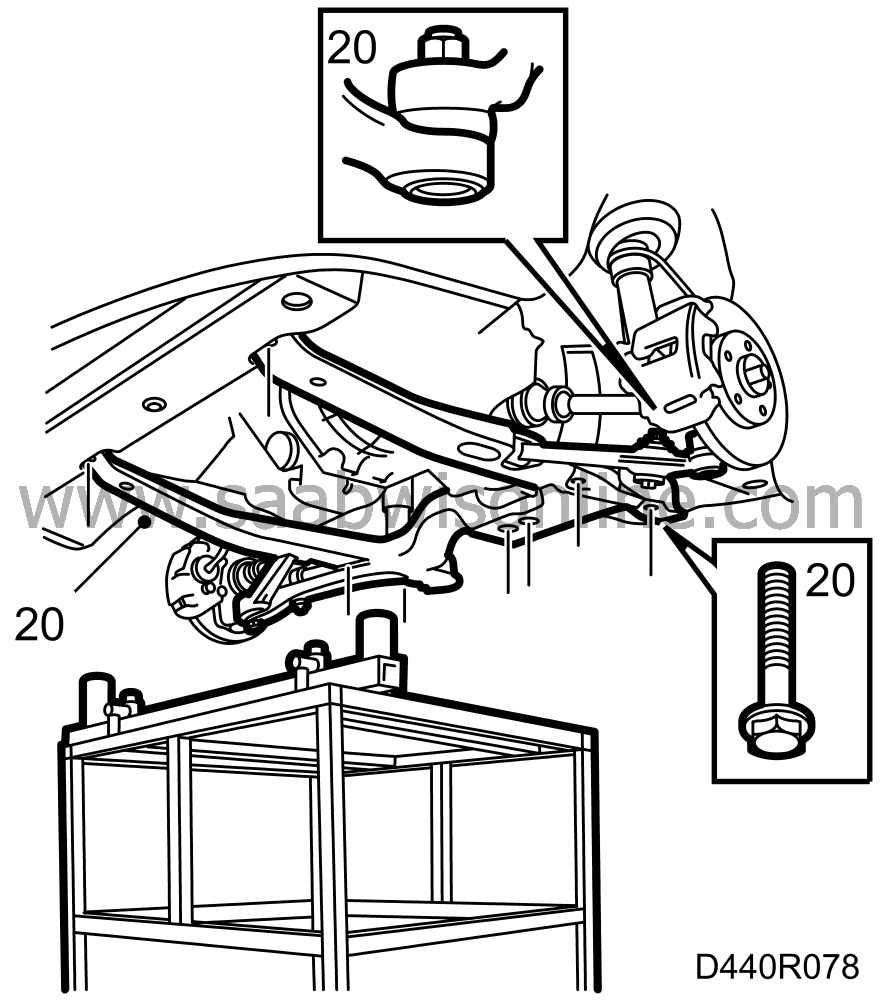
|
|
| • |
Position the subframe on the lifting table and raise the subframe until it is about 1-2 cm from the car.
|
| • |
Fit the nuts on the end pieces.
|
| • |
Raise the subframe fully.
|
| • |
Fit the other retaining bolts and tighten the nuts on the end pieces.
|
| • |
Note
|
|||||||
| • |
Lower the lifting table and remove same.
|
| 21. |
Fit the front section of the exhaust pipe.

|
|
| 22. |
Fit the oxygen sensor cable in its lower bracket.
6-cyl: 2 oxygen sensors. 4-cyl: 1 oxygen sensor. |
|
| 23. |
Fit the air deflectors and cover in the front right-hand wheel housing.
|
|
| 24. |
Fit the front wheels.
120 Nm (89 lbf ft) light alloy wheels. |
|
| 25. |
Lower the car to the floor.
|
|
| 26. |
Remove the holder and lifting beam.
|
|
| 27. |
Plug in the oxygen sensors' connectors.
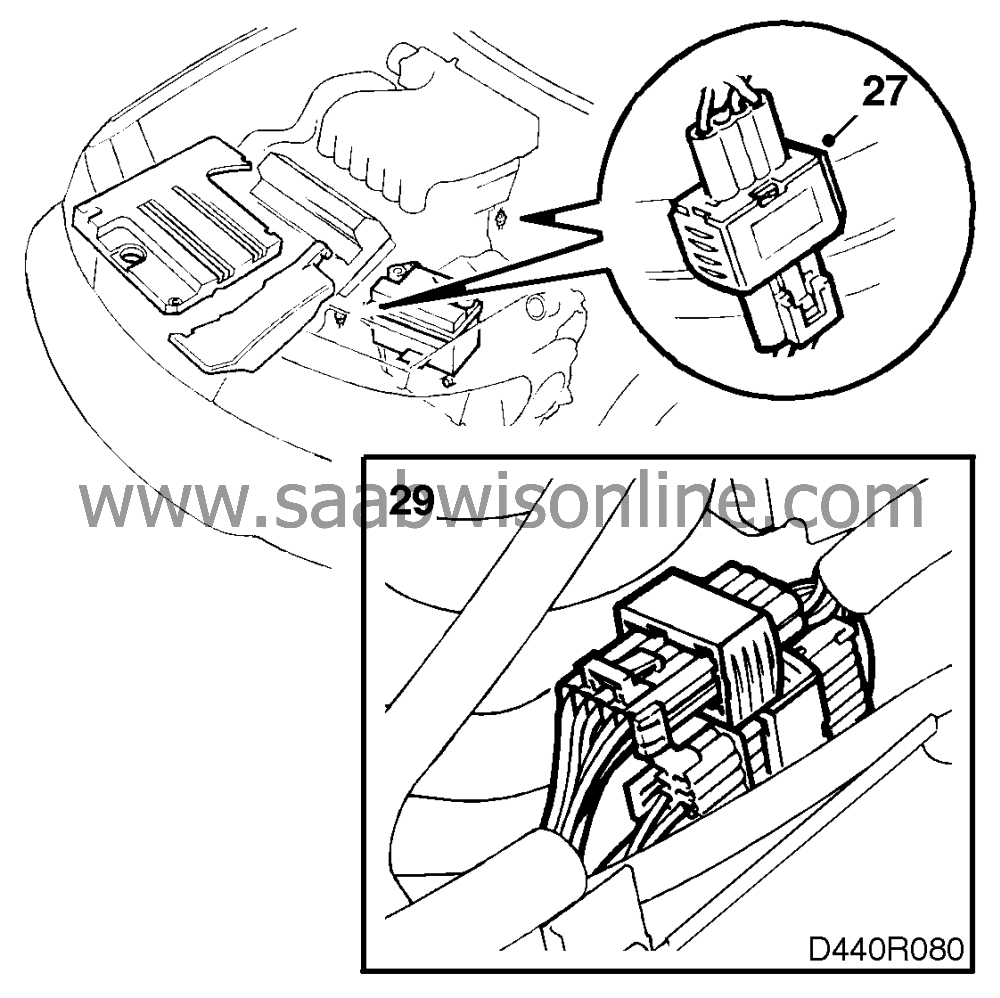
6-cyl: 4 oxygen sensors. 4-cyl: 2 oxygen sensors. |
|
| 28. |
Fasten the oxygen sensor cable in its upper bracket (front of engine).
|
|
| - |
Note
|
|||||||
| 29. |
Plug in the transmission's electrical connectors (located on a bracket behind the battery).
|
|
| 30. |
Secure the leads to the automatic transmission.
|
|
| 31. |
Fit the selector lever wire by first fastening it to the selector lever arm on the transmission and then to the wire bracket on the transmission.

|
|
| 32. |
Connect the breather hose.
|
|
| 33. |
Mount the dipstick with tube in the transmission and secure with a retaining bolt.
6-cyl: Secure to the stud for the selector lever arm. 4-cyl: Secure to the crankcase cover. |
|
| 34. |
Fit the cable to the sleeve with clips.
|
|
| 35. |
Connect the battery's negative cable to the grounding point on the valve housing.
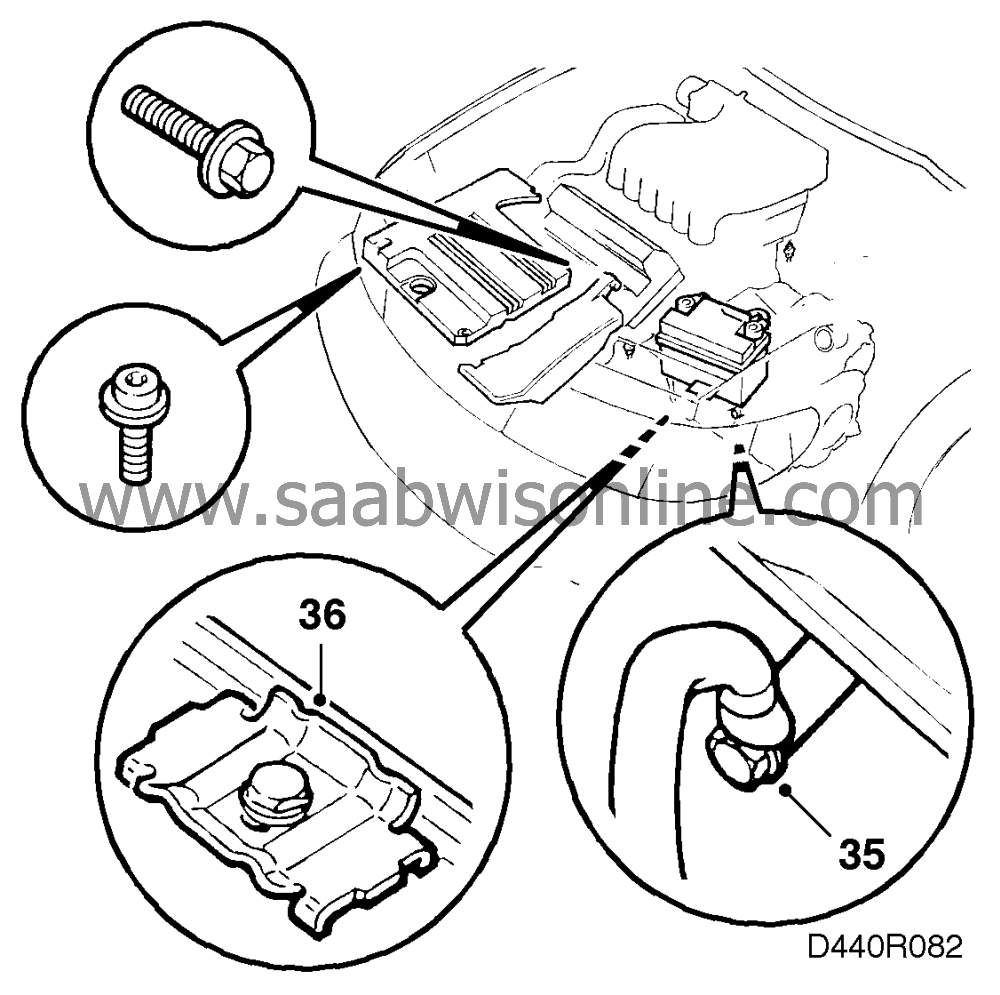
|
|
| 36. |
Fit the battery.
|
|
| 37. |
Fill up with transmission fluid.
|
|
| 38. |
Check the gear-shifting play and, if necessary, adjust the position of the selector lever. See .
|
|
| 39. |
Drive the car on test at varying engine loads and speeds for 5 minutes and obtain readouts of any diagnostic trouble codes that are generated.
|
|

