Constant-velocity joint: V6 and four-cylinderengines
|
|
Constant-velocity joint: V6 and four-cylinder
engines
|
|
Cleaning in connection with replacement of rubber gaiter on CV
joint
|

|
1.
|
Make sure that the shaft and
gaiter are clean. Clamp the drive shaft in a vice.
|
|
2.
|
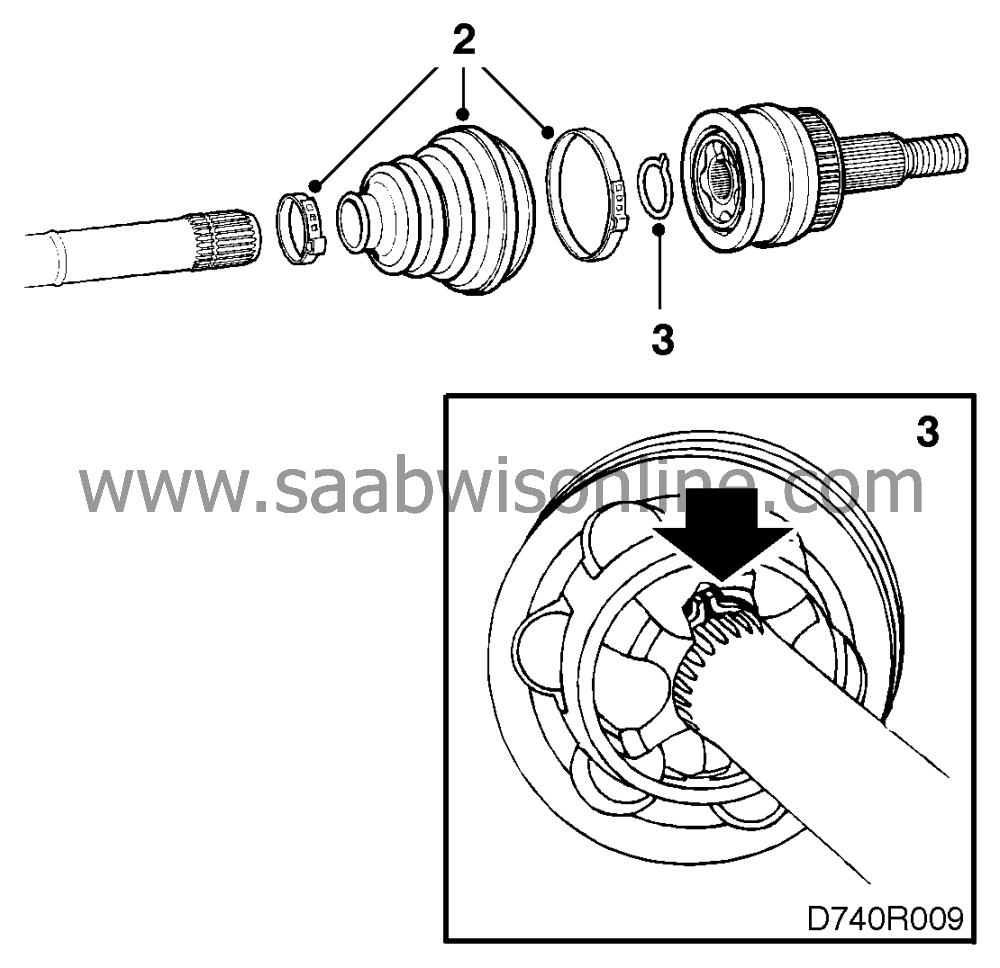
Undo the gaiter clips on the constant-velocity joint and slide the
rubber gaiter along the shaft.
Remove all grease from the constant-velocity joint.
|
|
3.
|
Open the circlip and tap the constant-velocity joint off the shaft,
using a hammer and brass drift.
|
|
4.
|
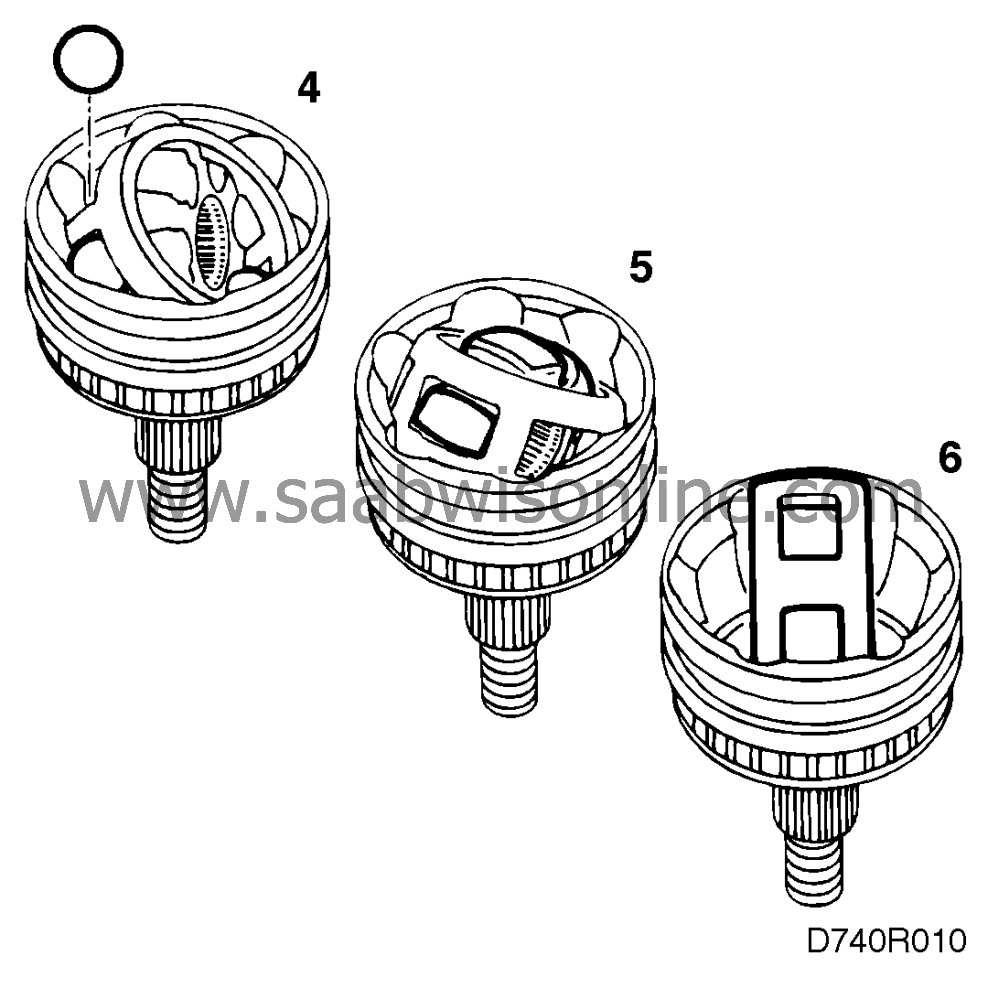
Rotate the bearing to allow removal of the steel balls.

|
|
5.
|
Rotate the inner cage for the steel balls to permit its removal from the outer race.
|
|
6.
|
Lift out the outer race.
|
|
7.
|
Wipe the balls and other parts clean.
|

|
1.
|
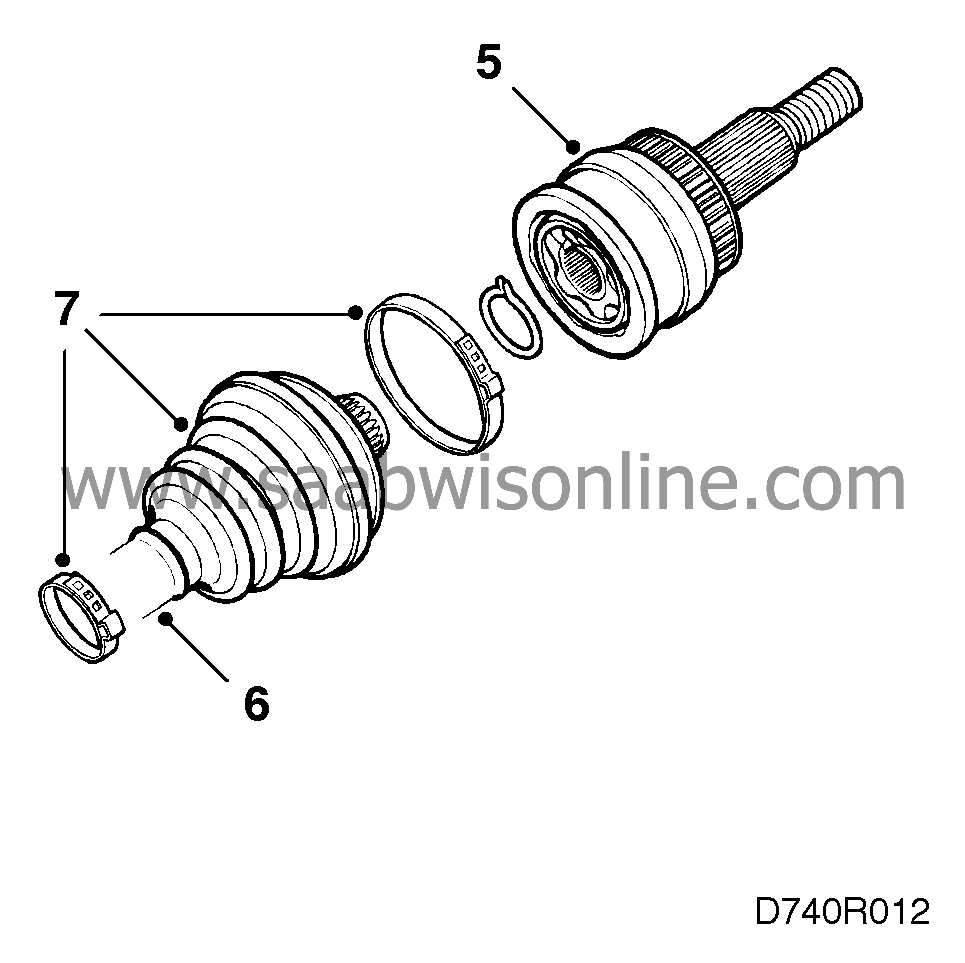
Fit a new rubber gaiter on the
shaft.
|
|
2.
|
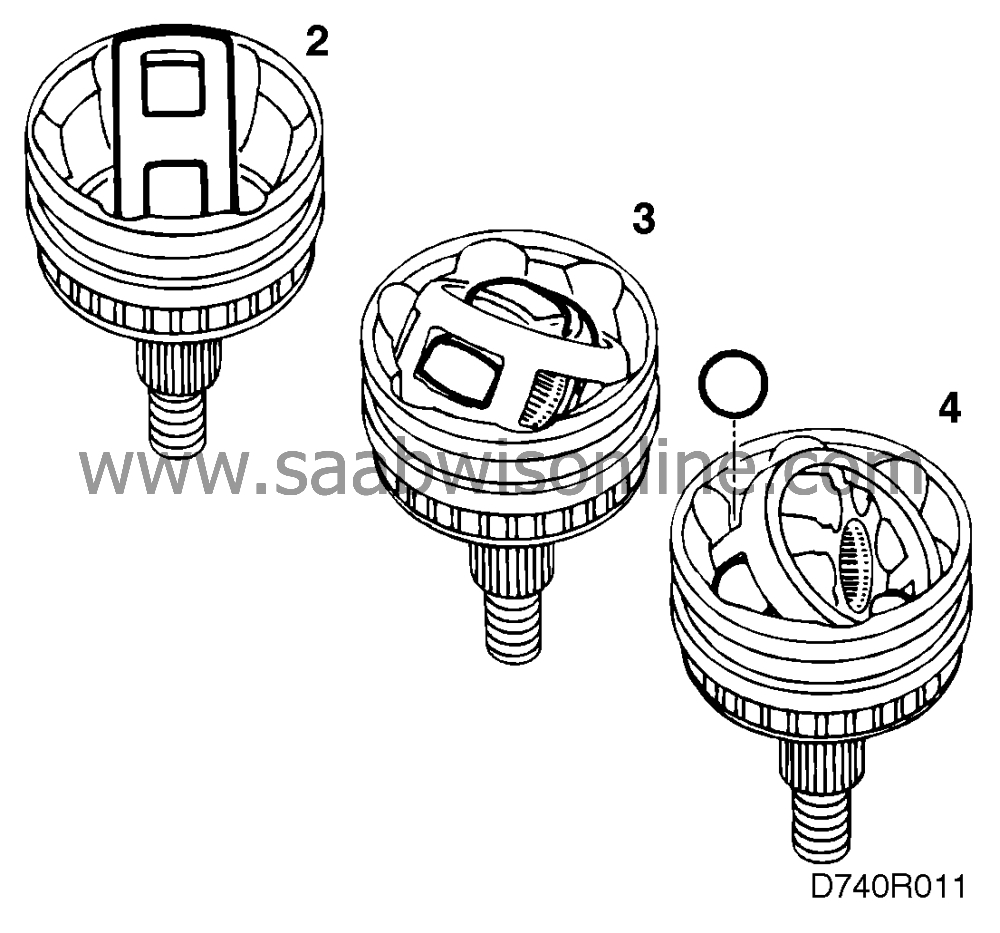
Position the outer race in the joint.
|
|
3.
|
Fit the inner cage in the outer race and rotate it so that the steel balls can be
inserted.
|
|
4.
|
Press each ball into place.
|
|
5.
|
Pack the constant-velocity joint with 80 grammes of fresh Molycote
Rapid G VN24612C grease or the equivalent.

|
|
6.
|
Press the drive shaft into the constant-velocity joint.
|
|
7.
|
Position the new rubber gaiter correctly and secure it with new
retaining clips.
|


