B pillar, three-door body
| B pillar, three-door body |
| 1. |
The side panel should already have been removed.
|
|
| 2. |
Cut away the damaged part of the outer panel of the B pillar, see
 Joints. Avoid cutting in the underlying metalwork.

|
|
| 3. |
Cut the B pillar away from the inner side panel.
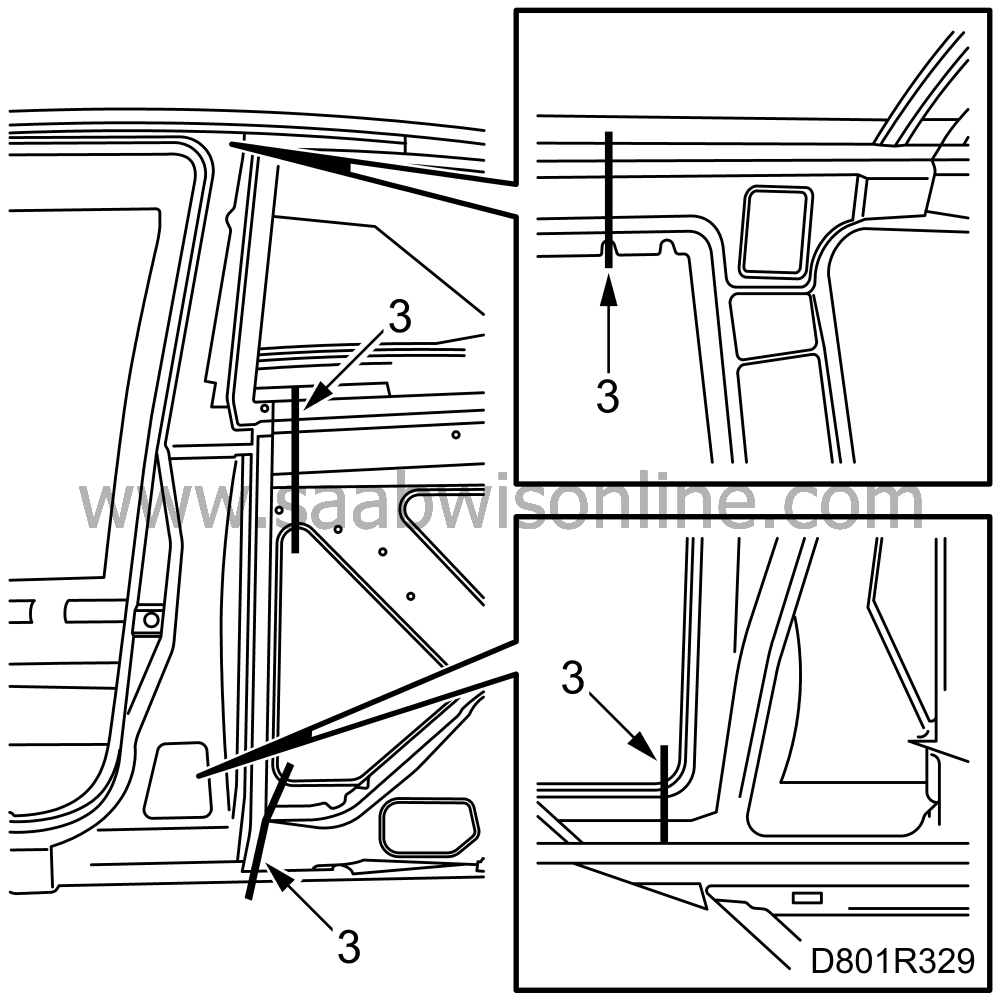
|
|
| 4. |
Drill out the spot welds securing the reinforcement in front of the wheel housing.
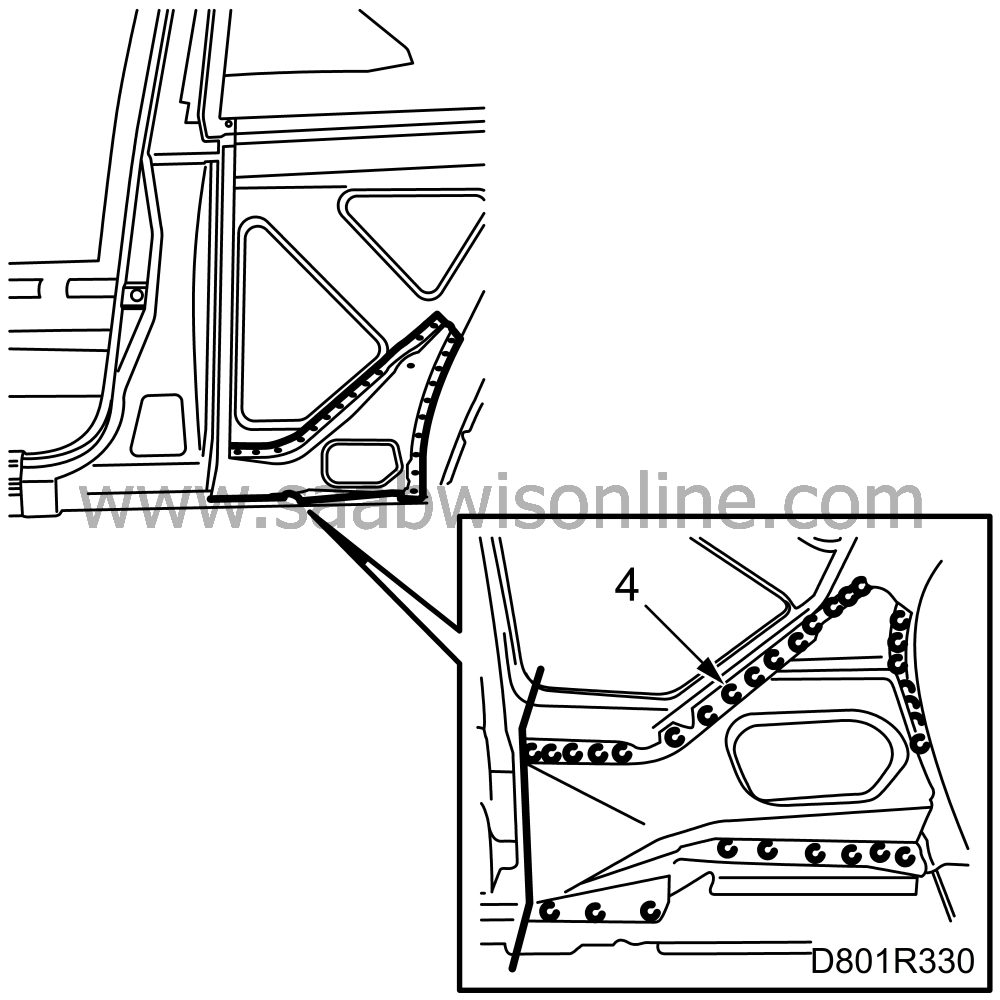
|
|
| 5. |
Grind down the welds in the lower section of the inside of the B pillar.
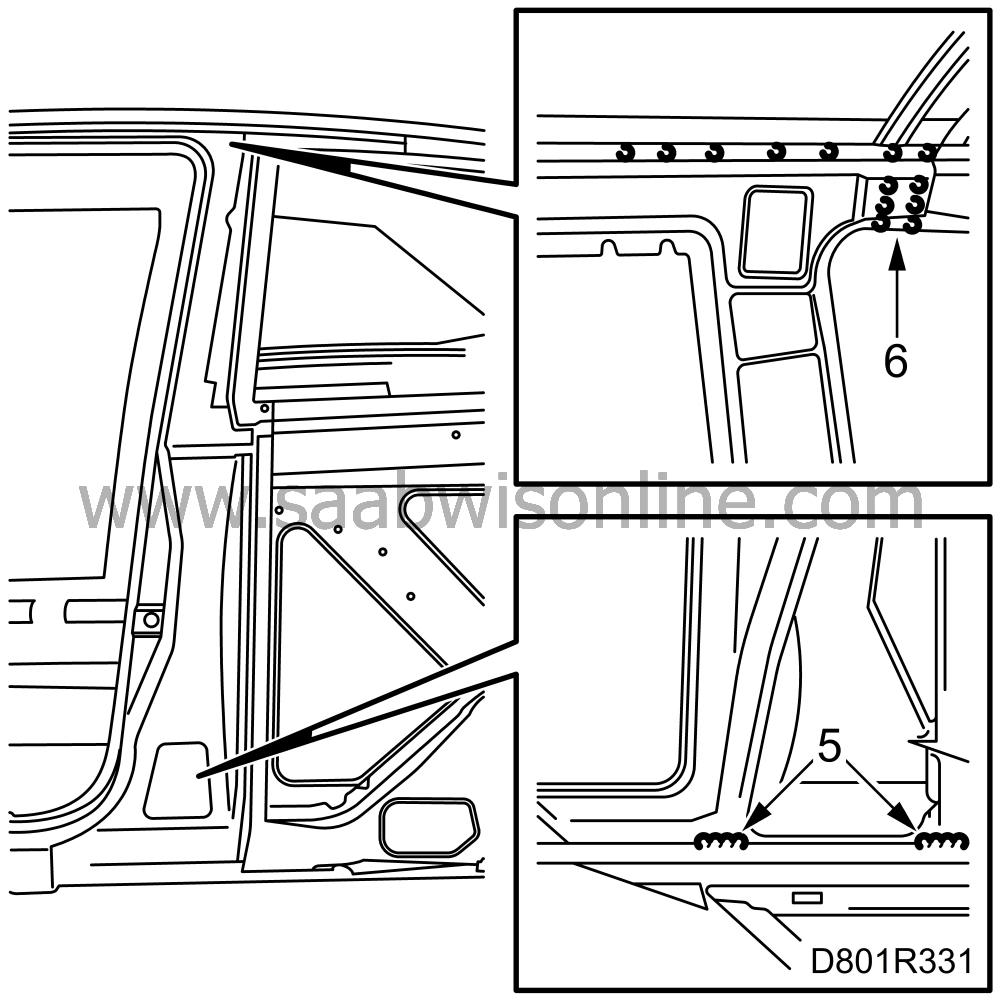
|
|
| 6. |
Drill out the spot welds on the inside of the B pillar at the top.
|
|
| 7. |
Knock loose the B-pillar and align any damaged metalwork.
|
|
| 8. |
Position the new inner part for the B pillar and fix it with a few welding clamps.
|
|
| 9. |
Cut through the B-pillar's inner part and the inner side panel simultaneously so that the two panels can be welded edge-to-edge.

|
|
| 10. |
Remove the inner part and drill holes for plug welding at the top.
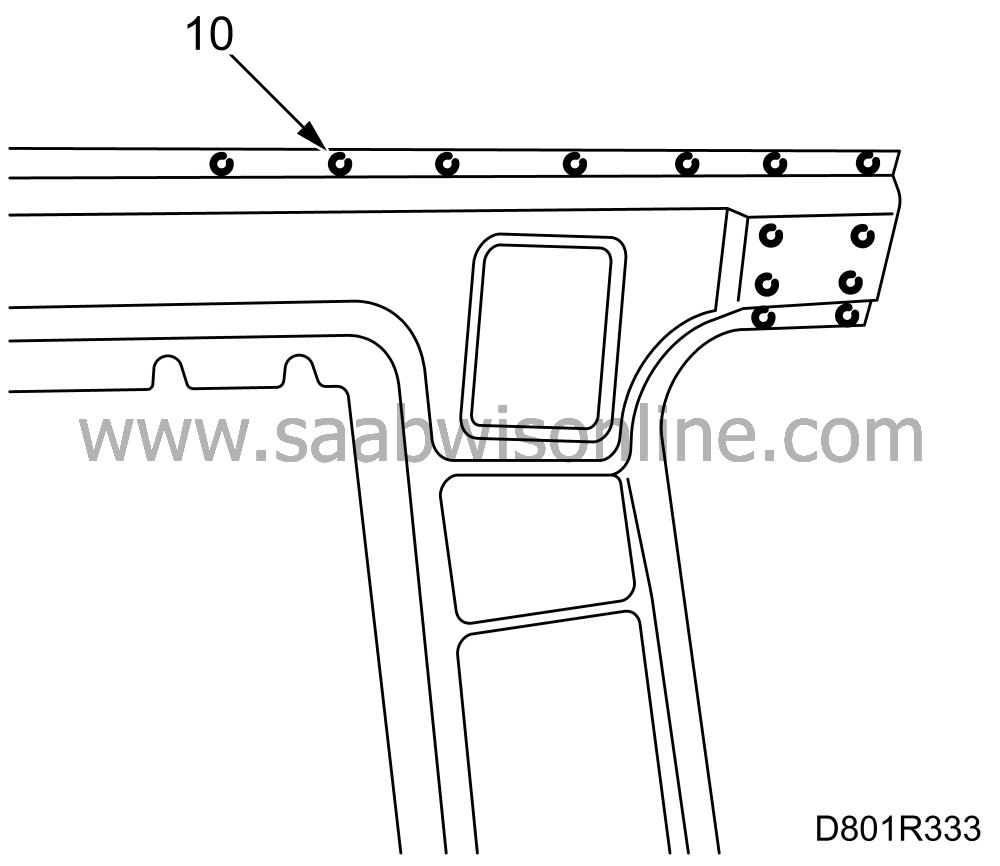
|
|
| 11. |
Use a grinder to clean the areas on the inner part, the B- pillar's new reinforcement component and the body that are to be welded.
|
|
| 12. |
Apply welding primer to the surfaces to be spot welded or plug welded. Use Teroson Zinkspray.
|
|
| 13. |
Position the B-pillar's inner part and reinforcement component and fix them with welding clamps.
|
|
| 14. |
Fix the inner part and reinforcement component with a couple of tack welds.
|
|
| 15. |
Cut the outer part of the B pillar roughly to size so that it will overlap the joint by about three centimetres.
|
|
| 16. |
Position the outer part and fix it with a few welding clamps.
|
|
| 17. |
Fix the outer panel with a couple of tack welds.
|
|
| 18. |
Position the door and side panel and check their fit.
|
|
| 19. |
Remove the side panel, B pillar outer panel and reinforcement.
|
|
| 20. |
Weld the joint between the B-pillar's inner part and the inner side panel.

|
|
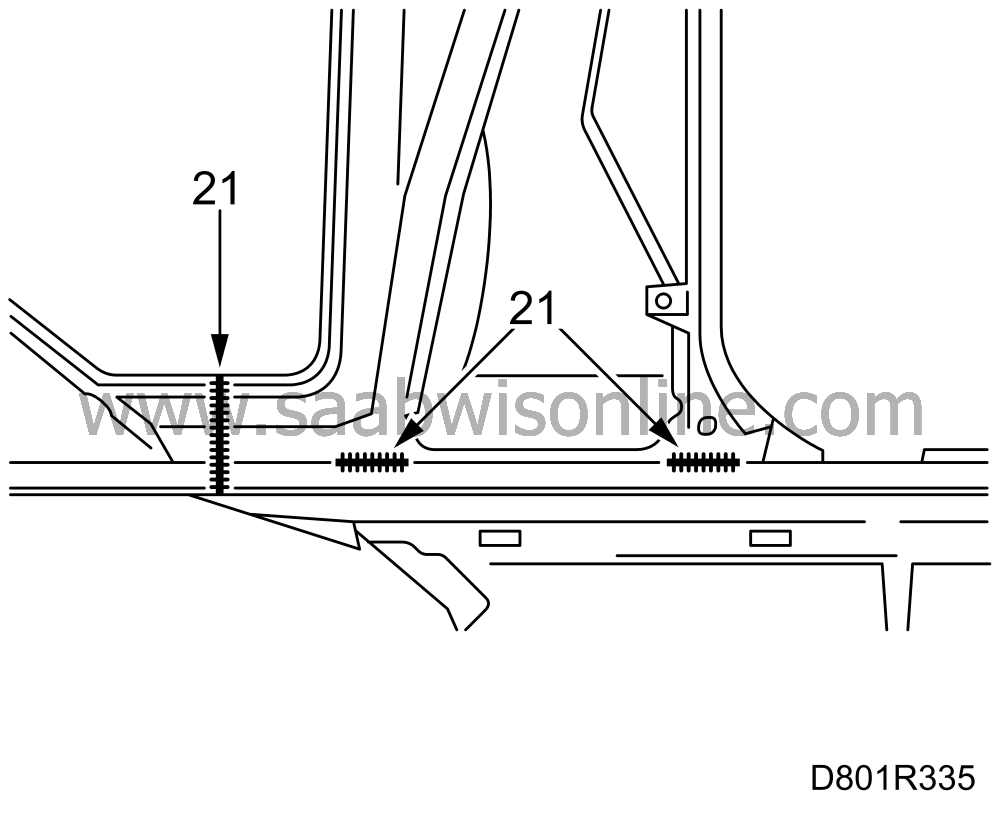
| 21. |
Weld the lower end of the inner part to the sill.
|
|
| 22. |
Drill holes for plug welding in the reinforcement component that is to be welded in place in front of the wheel housing.
|
||||||||||
| 23. |
Use a grinder to clean the areas on the reinforcement and body that are to be welded.
|
|
| 24. |
Apply welding primer to the surfaces which are to be spot welded or plug welded. Use Teroson Zinkspray.
|
|
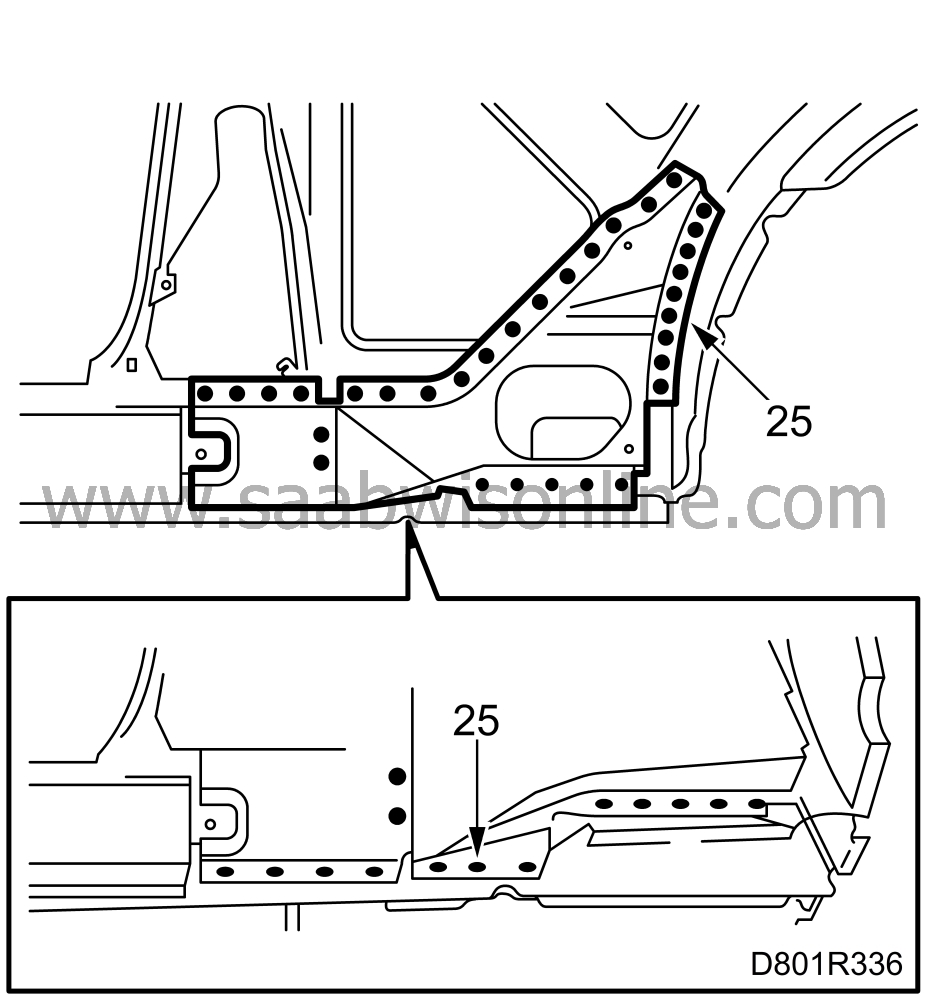
| 25. |
Position the reinforcement and spot-weld and plug-weld it in place.
|
|
| 26. |
Position the B-pillar's reinforcement and fix it with a few welding clamps.
|
|
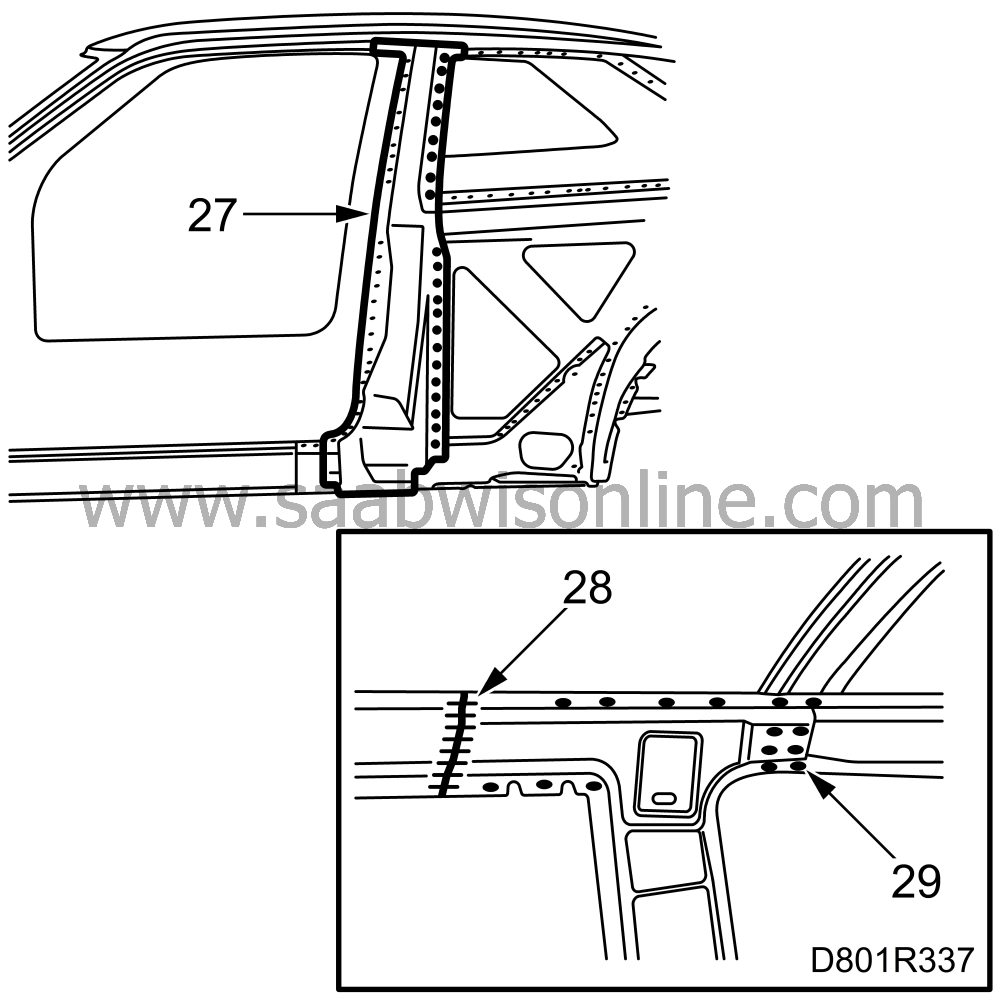
| 27. |
Spot weld the reinforcement in place.
|
|
| 28. |
Weld the joint at the top on the inside of the inner part of the B pillar.
|
|
| 29. |
Plug weld the upper end of the inner part of the B pillar.
|
|
| 30. |
Position the B-pillar's outer panel and fix it with a few welding clamps.
|
|
| 31. |
Fit the door and side panel in place and check their fit.
|
|
| 32. |
Cut through the B-pillar outer panel and the door frame outer panel at the same time so that the joints can be welded edge-to-edge.
|
|
| 33. |
Use a grinder to clean the areas on the B-pillar's outer panel and body that are to be welded.
|
|
| 34. |
Apply welding primer to the surfaces which are to be spot welded. Use Teroson Zinkspray.
|
|
| 35. |
Remove the side panel.
|
|
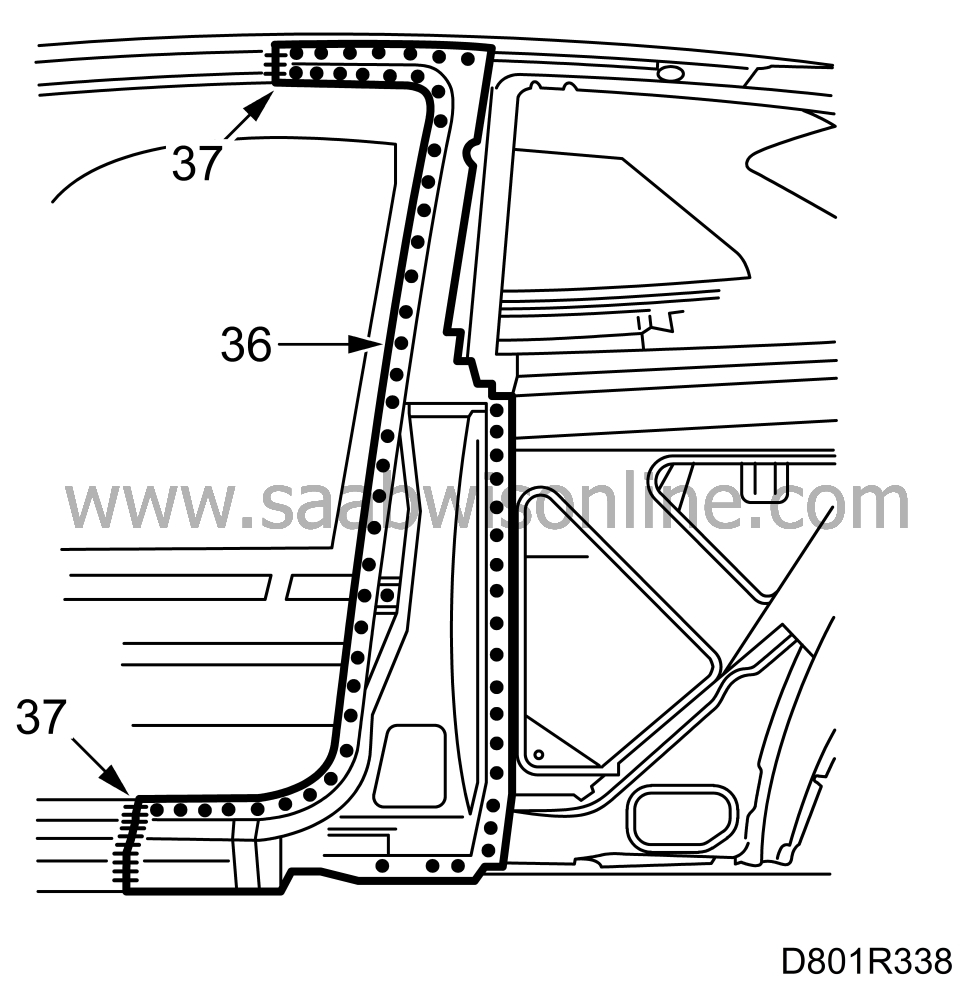
| 36. |
Spot weld the outer panel in place.
|
|
| 37. |
Weld the joints between the B pillar's outer panel and the door frame.
|
|
| 38. |
Wash off surplus welding primer. Welding primer makes for poorer adhesion of paint, filler and sealant.
|
|
| 39. |
Apply primer to all surfaces that have been ground clean. Use Standox 1K Füllprimer.
|
|
| 40. |
Fit the side panel.
|
|


