Adjusting the fifth bow locking arrangement
|
|
Adjusting the fifth bow locking arrangement
|
|
1.
|
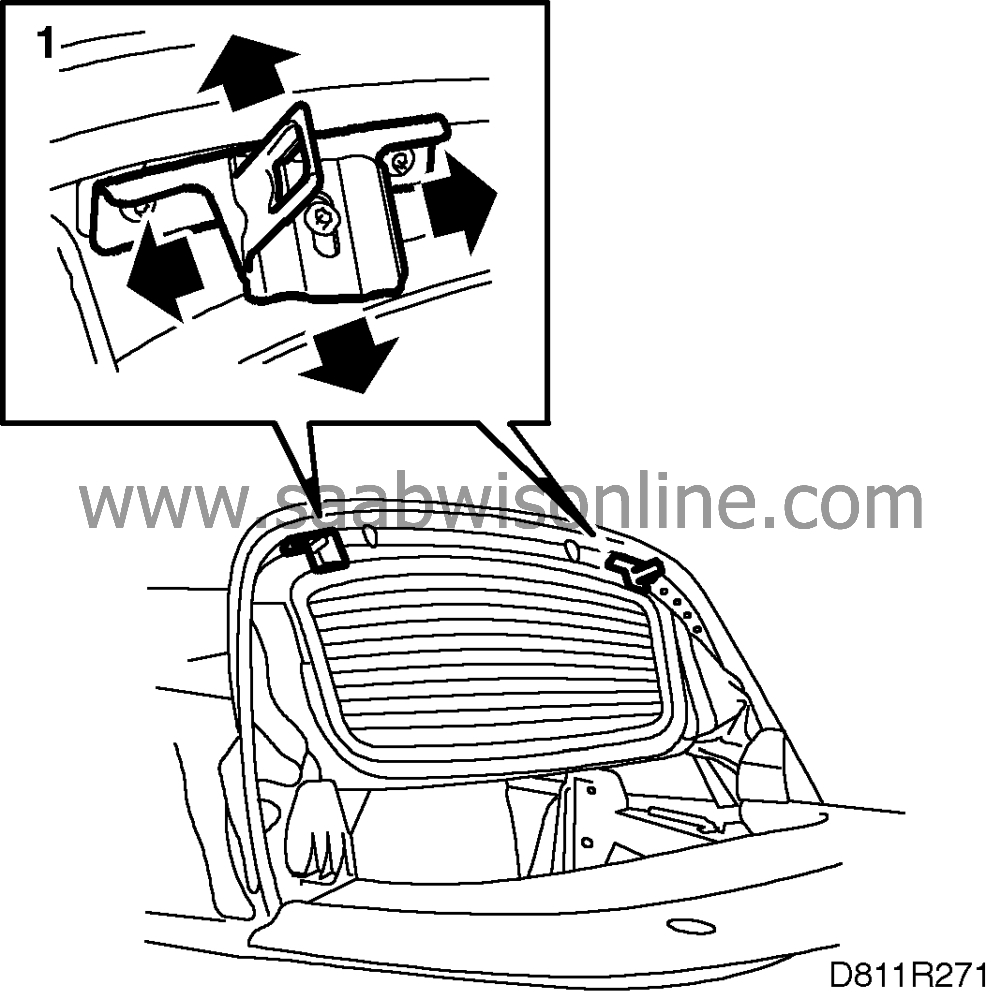
Undo the screws securing the latch fittings.
|
|
2.
|
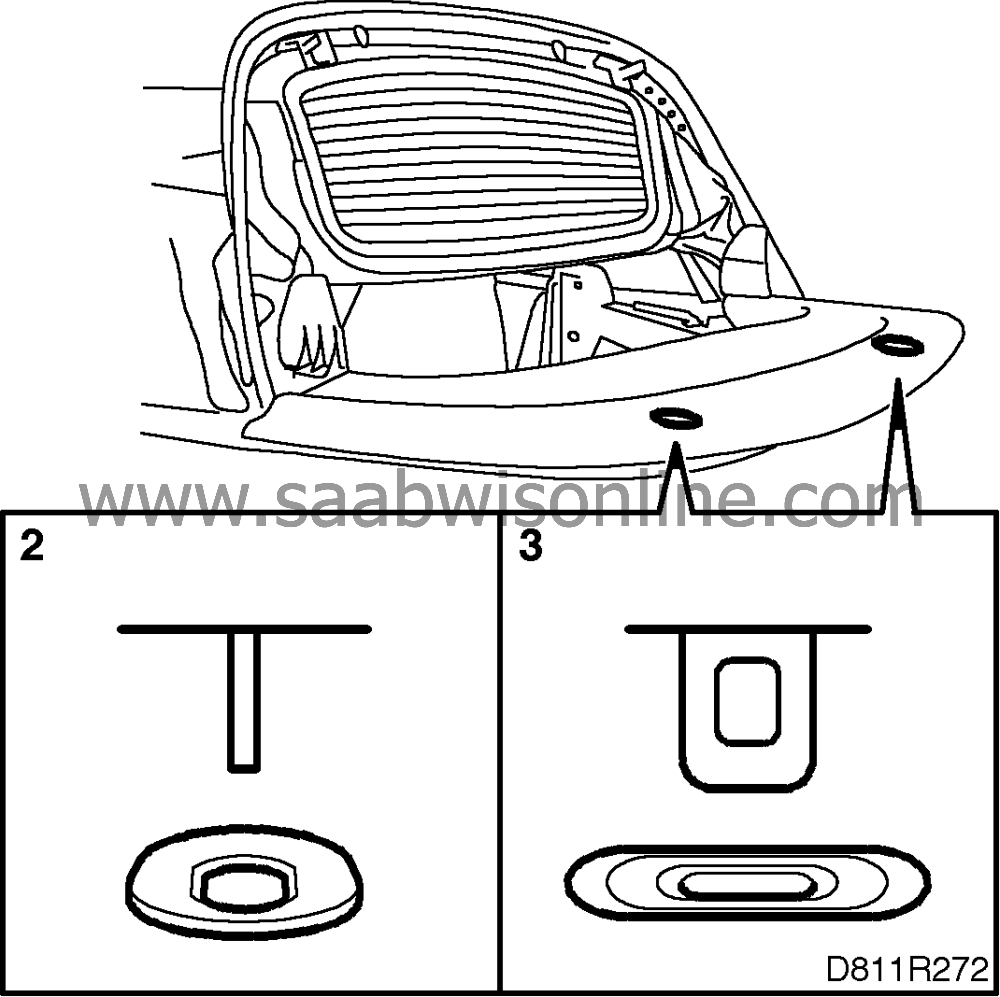
Lower the fifth bow and adjust the latch fittings sideways so that they are centred in the holes in the soft top cover.
|
|
3.
|
Then adjust the latch fittings lengthways so that they centre on the
latch lock tabs
.
|
|
4.
|
Raise the fifth bow and tighten the screws securing the latch fittings.
|
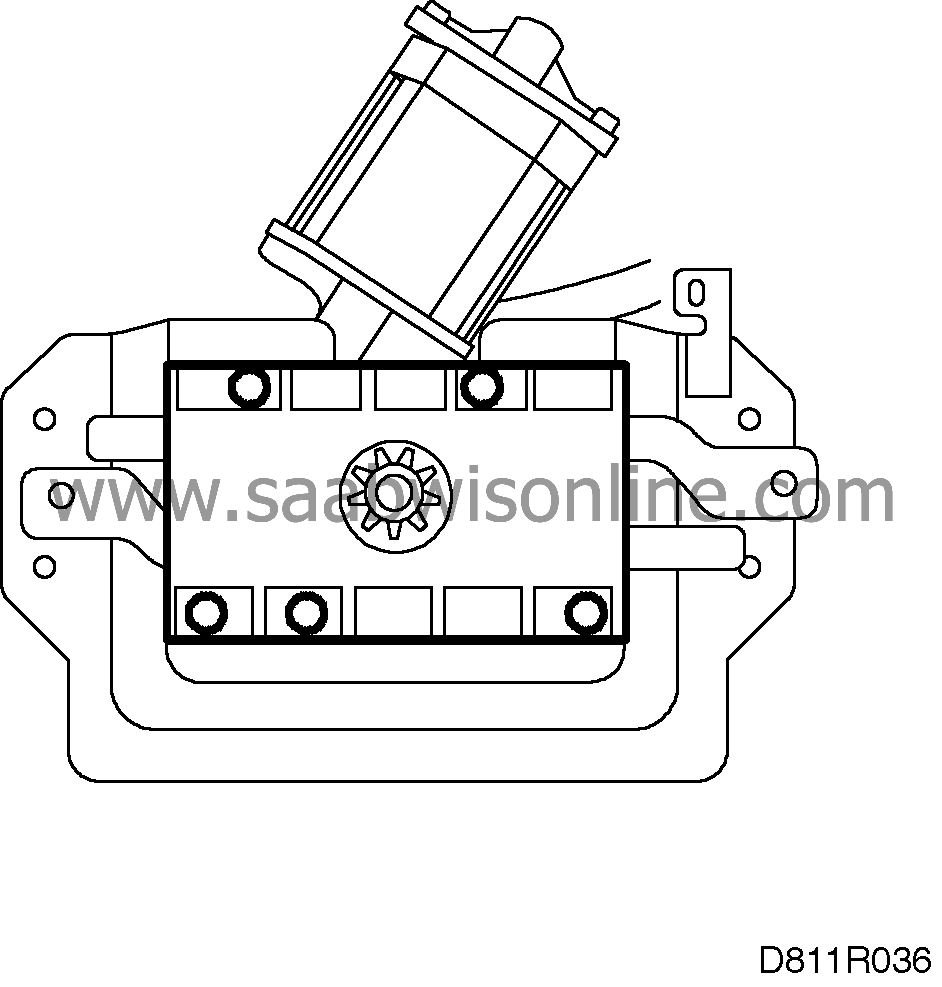
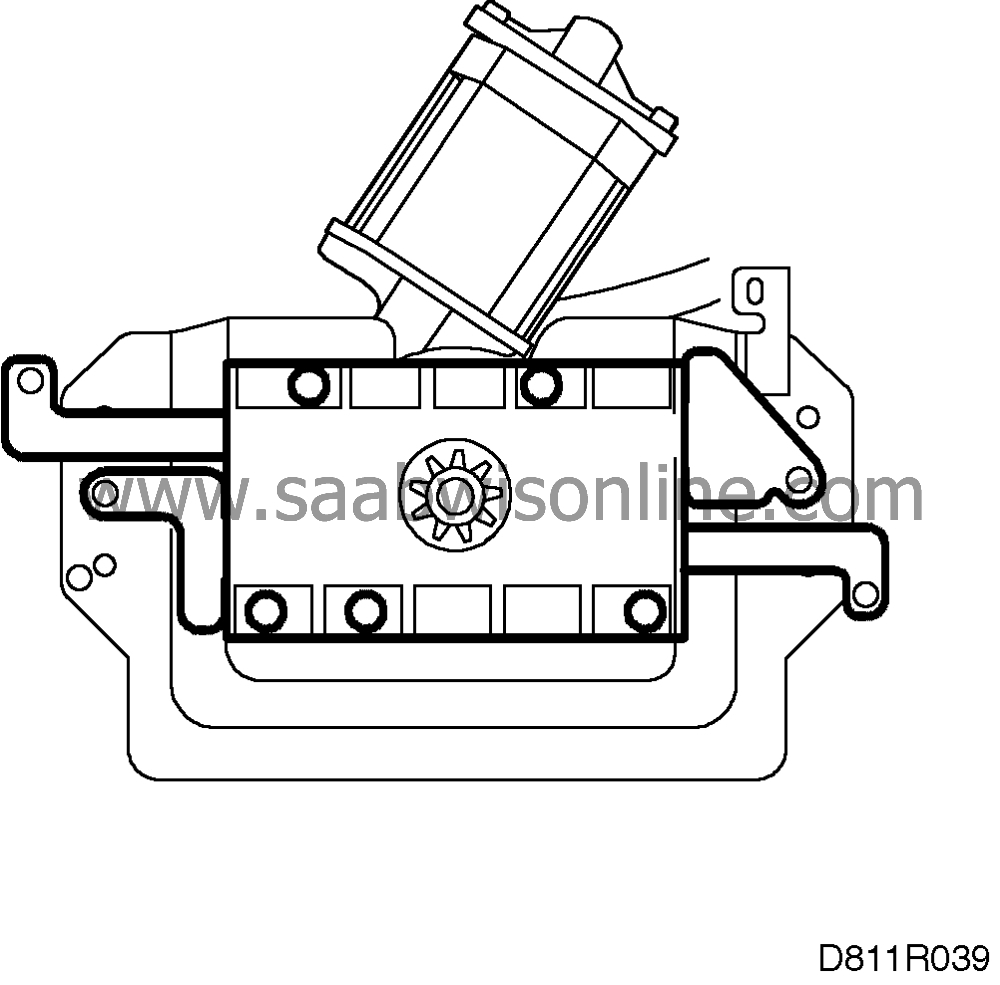
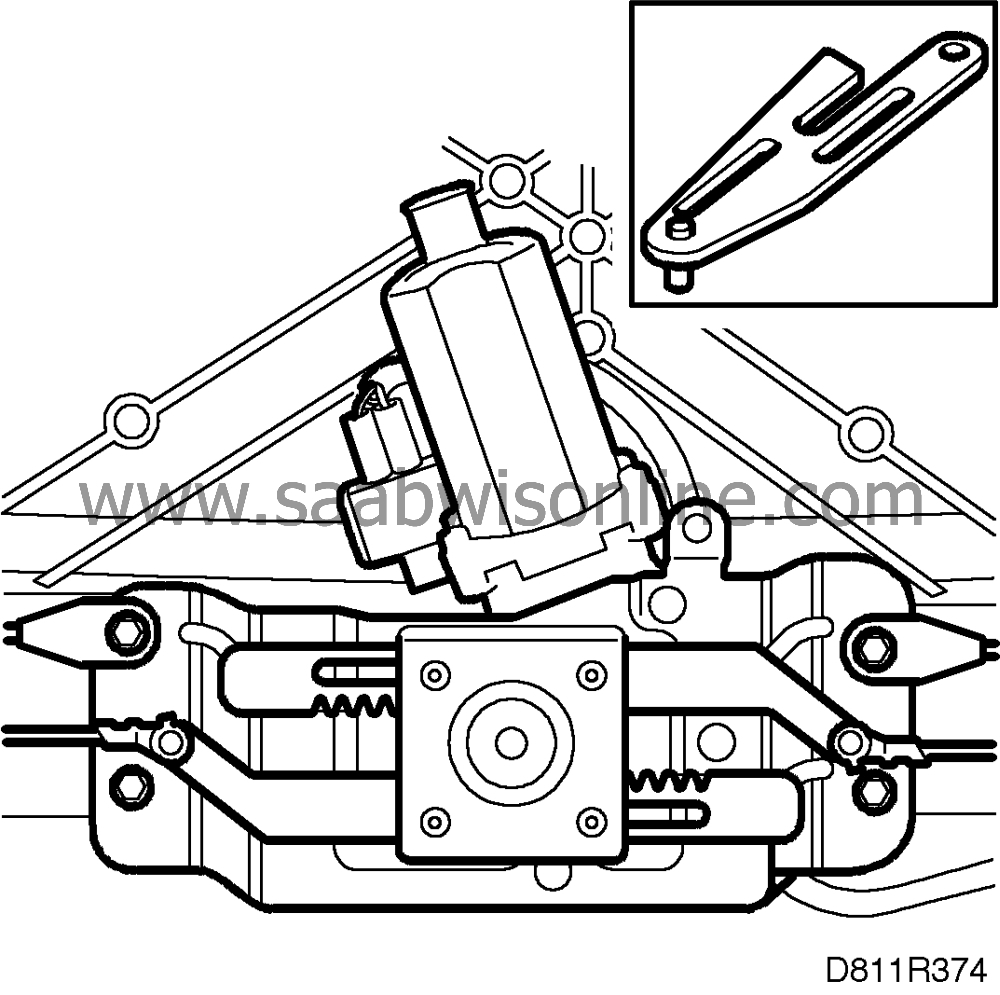
There are four different versions of the fifth bow latch motor. Before being adjusted, the version fitted in the car must be known.
|
1.
|
Older version.
|
|
2.
|
Older version with new ratchets.
|
|
3.
|
New version with modified latch.
|
|
4.
|
New version with new latch. This version is
not
adjustable from VIN V7010306.

|
|
Older version of fifth bow latch motor (Cars up to and including VIN V7000047)
|
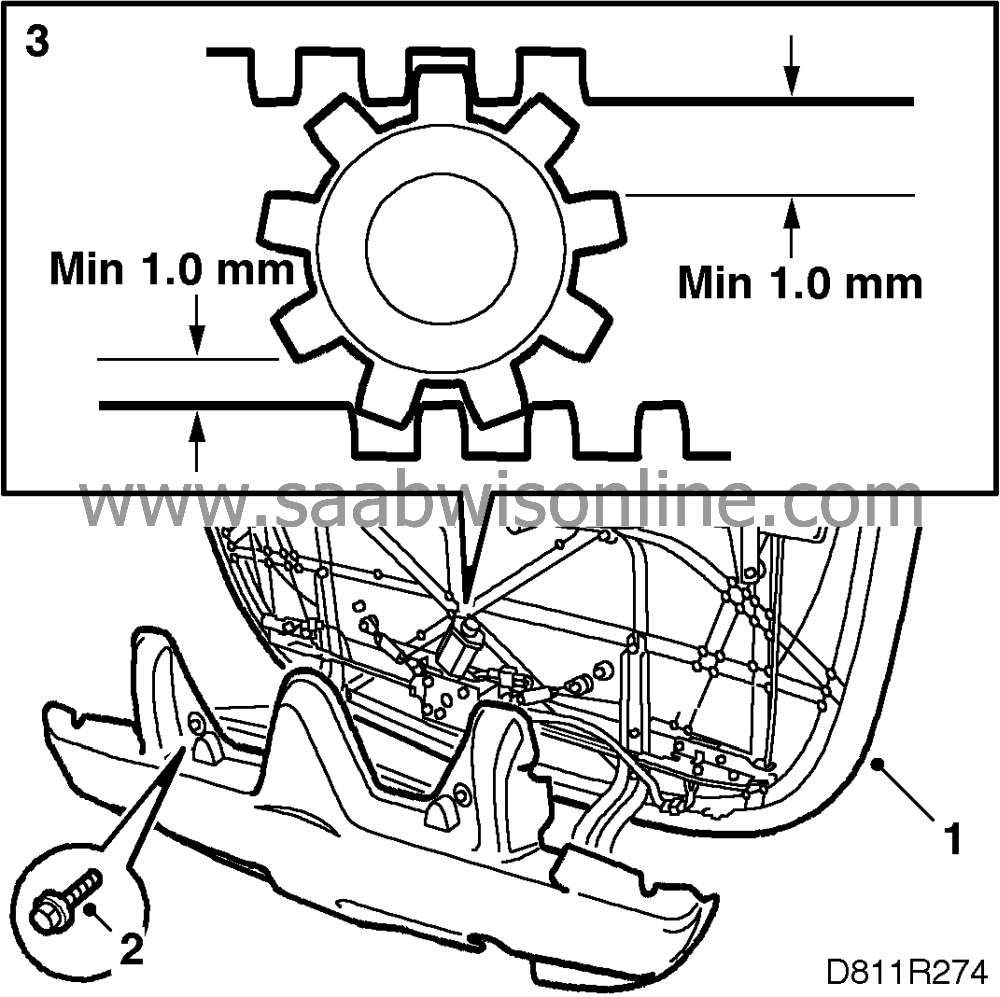
Remove the cover and make sure the latch motor is the older version.
Check

|
1.
|
Operate the soft top so that it is completely raised together with the fifth bow and soft top cover. The rotating covers on the soft top cover should be completely closed.
|
|
2.
|
Make sure the screws for the latch motor and the locking mechanism for the fifth bow are tightened securely.
Tightening torque 10 Nm (7.4 lbf ft)
|
|
3.
|
With a 1 mm feeler gauge, make sure that there is clearance between the last gear tooth and the flat part of the upper and lower ratchets.
If there is no clearance, continue with step 4.
If the clearance is correct, continue with step 13.
Adjustment
Both sides must be adjusted if the clearance is incorrect.
|
|
4.
|
Operate the fifth bow latch motor to half open position with the diagnostic tool, command:
“TSAS”
“ACTIVATE”
“#5 BOW LATCH MOTOR”
“UP”
|
|
5.
|
Undo the locking rods by removing the pins in the locking mechanism.
|
Important
|
|
This function cannot be performed unless the control module has previously been changed in accordance with SI 812-1566.
|
|
|
|
|
6.
|
Operate the fifth bow latch motor one full cycle with the diagnostic tool, command:
“TSAS”
“ACTIVATE”
“#5 BOW LATCH MOTOR”
“DOWN”
Make sure the latch motor is completely in its locked position.
|
|
7.
|
Remove all the extra locking nuts (if fitted) from the locking rods.
|
|
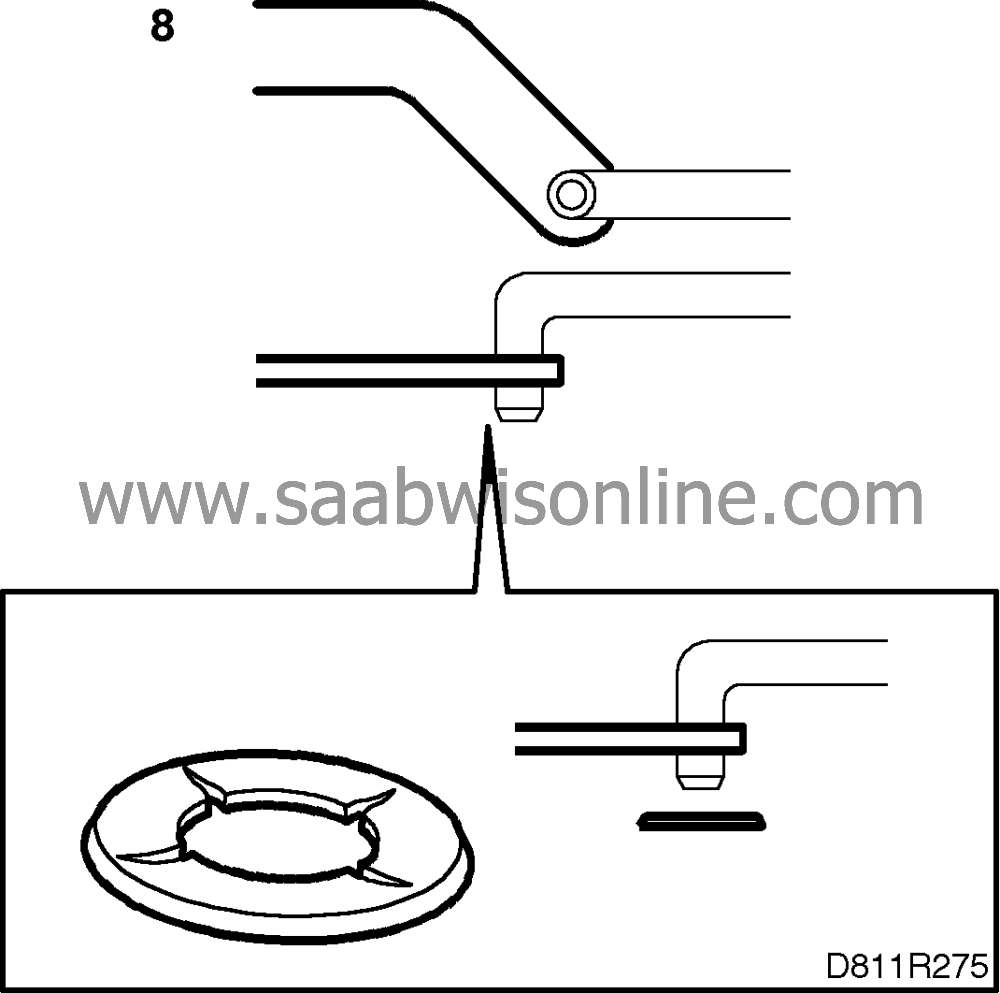
8.
|
Press the locking mechanisms towards the motor so that they reach the stop position.
|
|
9.
|
Unscrew the locking rods so that the pin can be fitted easily.
|
|
10.
|
Remove the pin and screw in the locking rods five full turns.
|
|
11.
|
Operate the fifth bow latch motor to half open position with the diagnostic tool, command:
“TSAS”
“ACTIVATE”
“#5 BOW LATCH MOTOR”
“UP”
Fit the locking rods in the locking mechanisms with the pin.
|
|
12.
|
Operate the fifth bow latch motor to its closed positions with the diagnostic tool, command:
“TSAS”
“ACTIVATE”
“#5 BOW LATCH MOTOR”
“DOWN”
Return to step 3 and re-check
|
|
13.
|
Operate the fifth bow latch motor to its open position with the diagnostic tool, command:
“TSAS”
“ACTIVATE”
“#5 BOW LATCH MOTOR”
“UP”
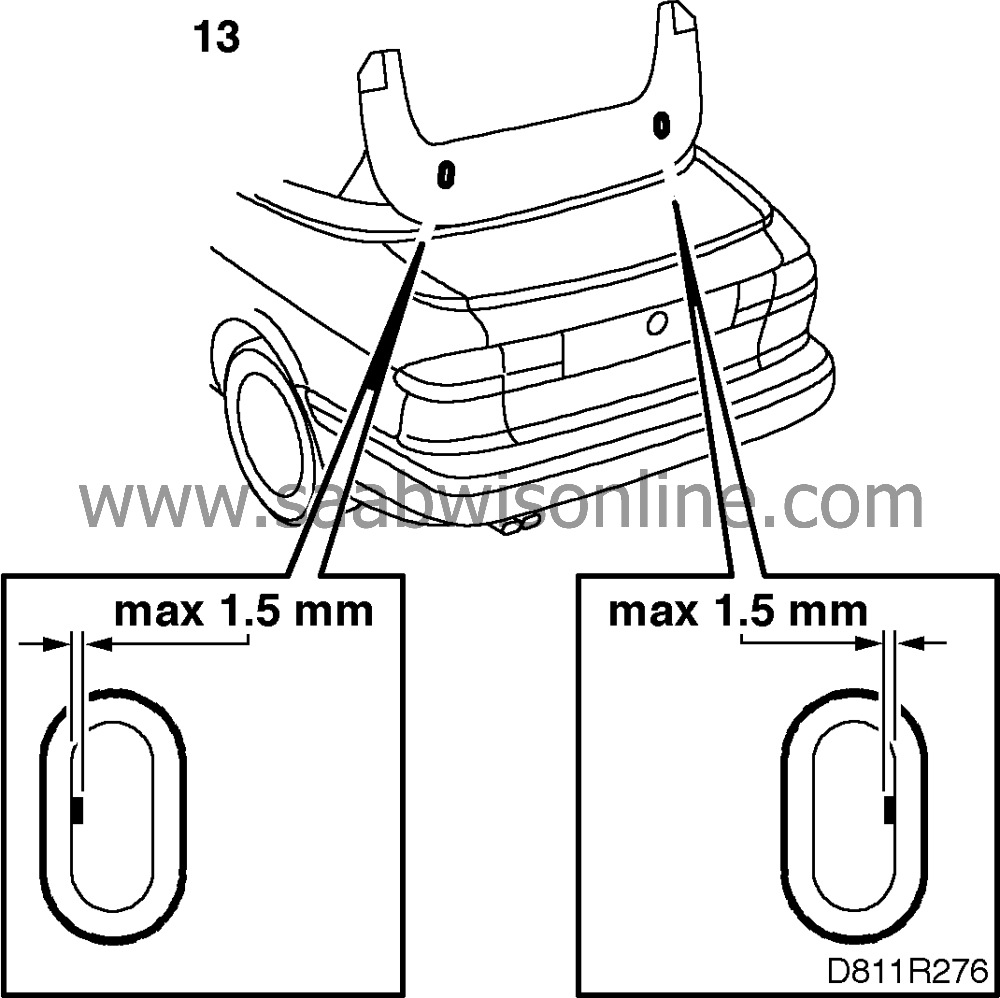
Stand behind the car and look through the hole in the fifth bow latch. Max. 1.5 mm of the lock tab should be visible.
|
|
14.
|
If more than 1.5 mm of the lock tab is visible, return to step 6 and extend the locking rods slightly. Most important, however, is that the clearance in step 3 is correct.
If steps 3 and 14 cannot be achieved together, the fifth bow latch fitting must be adjusted as described in A Latch fittings.
|
|
15.
|
Terminate diagnostic communication and clear diagnostic trouble codes.
|
|
17.
|
Operate the soft top and check its function.
|
|
Older versions of fifth bow latch motor with new ratchets. (Cars within VIN interval V7000047 - V7010305)
|

Remove the cover and make sure the latch motor is the older version with new ratchets.
|
1.
|
Operate the soft top so that the fifth bow and soft top cover are completely raised.
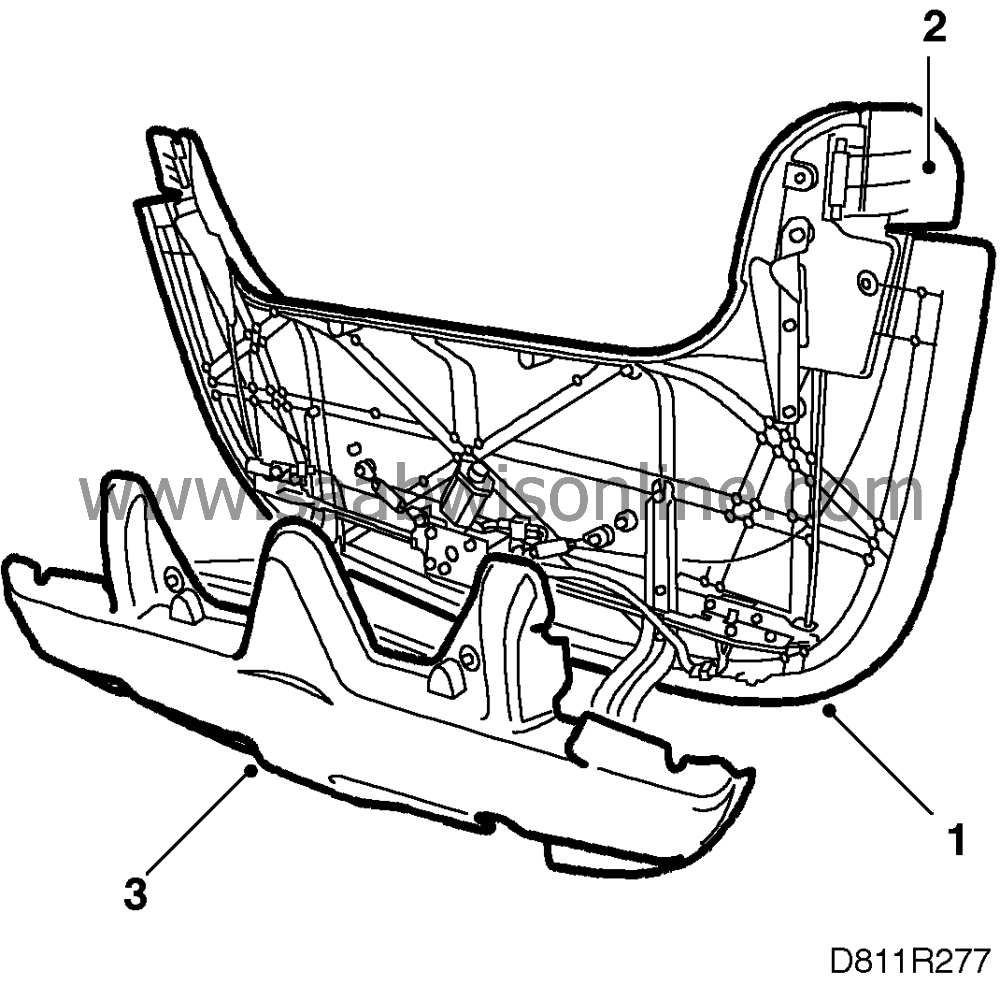
|
|
2.
|
Connect the diagnostic tool and operate the fifth bow latch motor to half open position (the rotating covers on the soft top cover are in half open position) with the diagnostic tool command:
“TSAS”
“ACTIVATE”
“#5 BOW LATCH MOTOR”
“UP”
|
Important
|
|
This function cannot be performed unless the control module has previously been changed in accordance with SI 812-1566.
|
|
|
|
|
4.
|
Remove the locking rods.
|
|
5.
|
Operate the fifth bow latch motor to closed position with the diagnostic tool, command:
“DOWN”
|
|
6.
|
Adjust the length of the locking rods so the distance between the centre of the locking pin hole and the end of the rod is
285
mm.
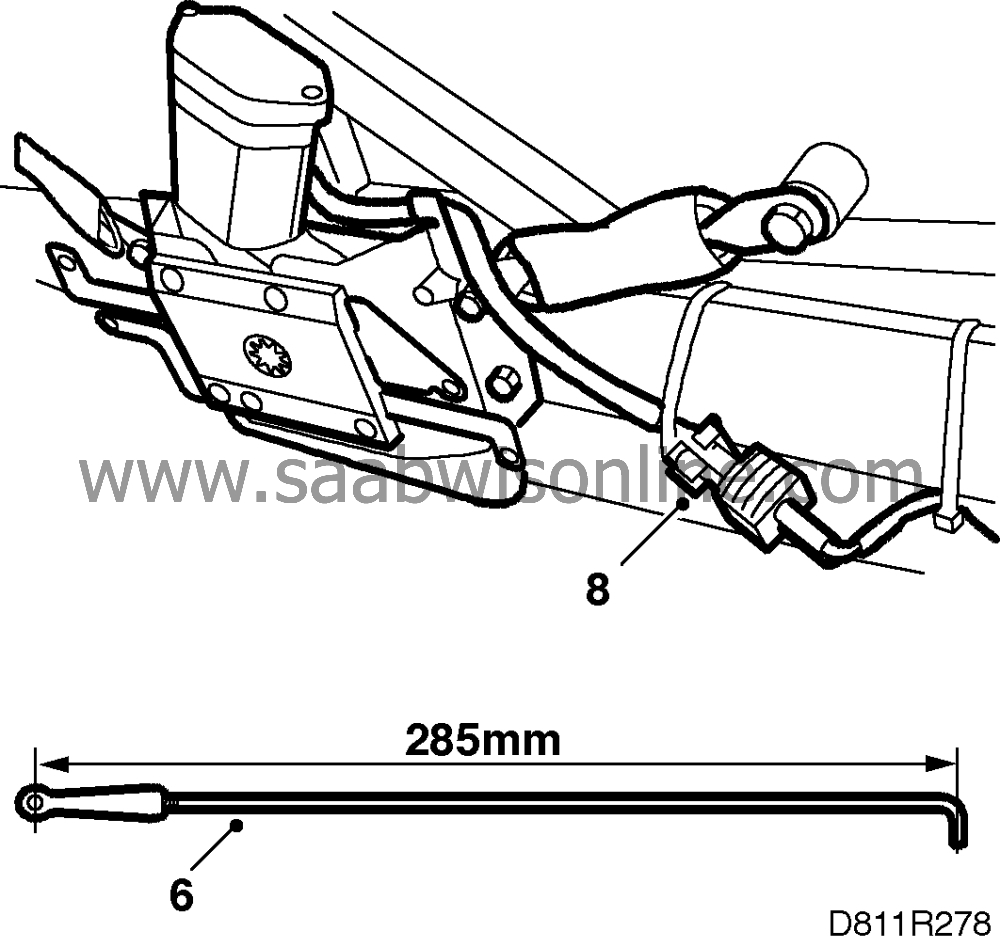
|
|
7.
|
Fit both locking rods, using the new lock washers.
|
|
8.
|
Plug in the connector and fit a new cable tie.
|
|
9.
|
Operate the fifth bow latch motor to its open position with the diagnostic tool, command:

“TSAS”
“ACTIVATE”
“#5 BOW LATCH MOTOR”
“UP”
Stand behind the car and look through the hole in the fifth bow latch. Max. 1.5 mm of the lock tab should be visible.
|
|
10.
|
If more than 1.5 mm of the lock tab is visible, return to step 5 and extend the locking rods slightly.
|
|
11.
|
Terminate diagnostic communication and clear diagnostic trouble codes.
|
|
13.
|
Operate the soft top and check its function.
|
|
New version of fifth bow latch motor with modified latch. (Cars on which MI 811-1758, SI 811-1759 rev.2 and MI 811-1760 have been carried out)
|

Remove the cover and make sure the latch motor is the new version with modified latches.
|
1.
|
Operate the soft top so that the fifth bow and soft top cover are completely raised.

|
|
2.
|
Connect the diagnostic tool and operate the fifth bow latch motor to half open position (the rotating covers on the soft top cover are in half open position) with the diagnostic tool command:
“TSAS”
“ACTIVATE”
“#5 BOW LATCH MOTOR”
“UP”
|
Important
|
|
This function cannot be performed unless the control module has previously been changed in accordance with SI 812-1566.
|
|
|
|
|
3.
|
Remove the cover.
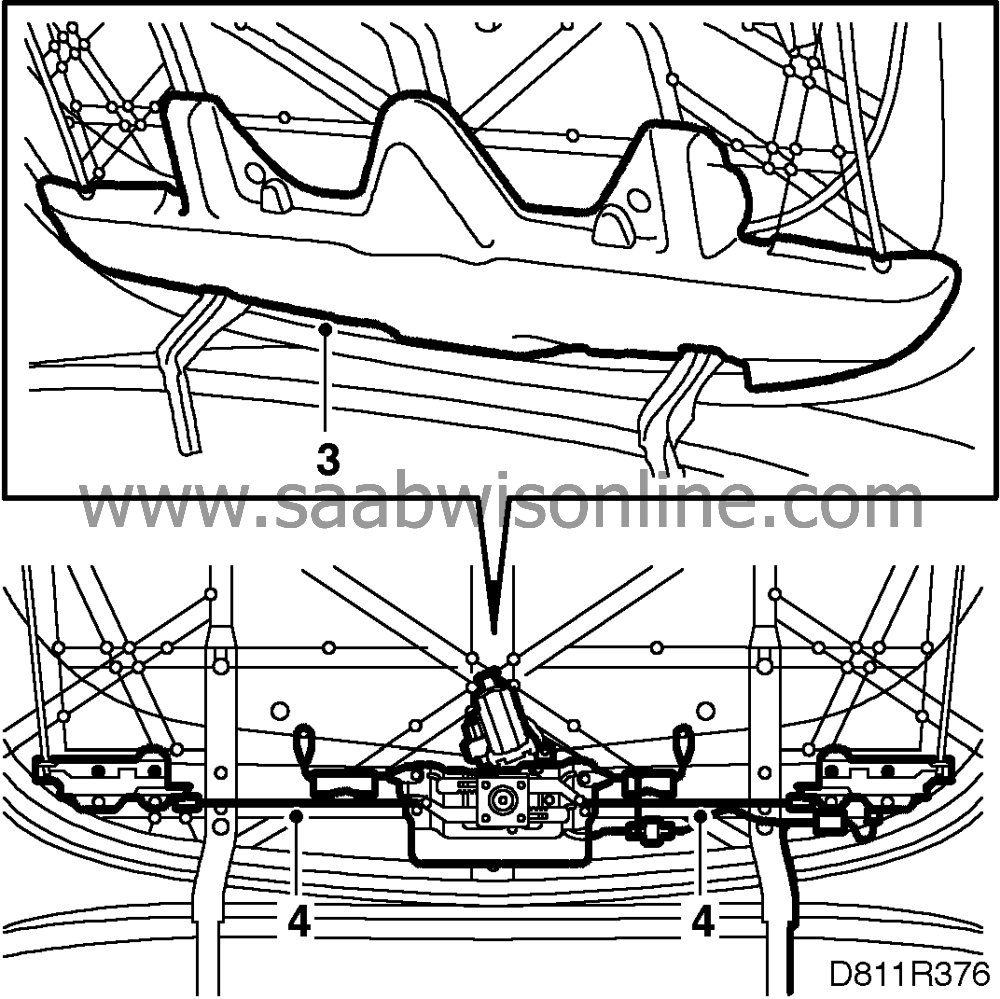
|
|
4.
|
Remove the locking rods.
|
|
5.
|
Adjust the length of the locking rods so the distance between the centre of the locking pin hole and the centre of the other end of the rod is
288
mm.
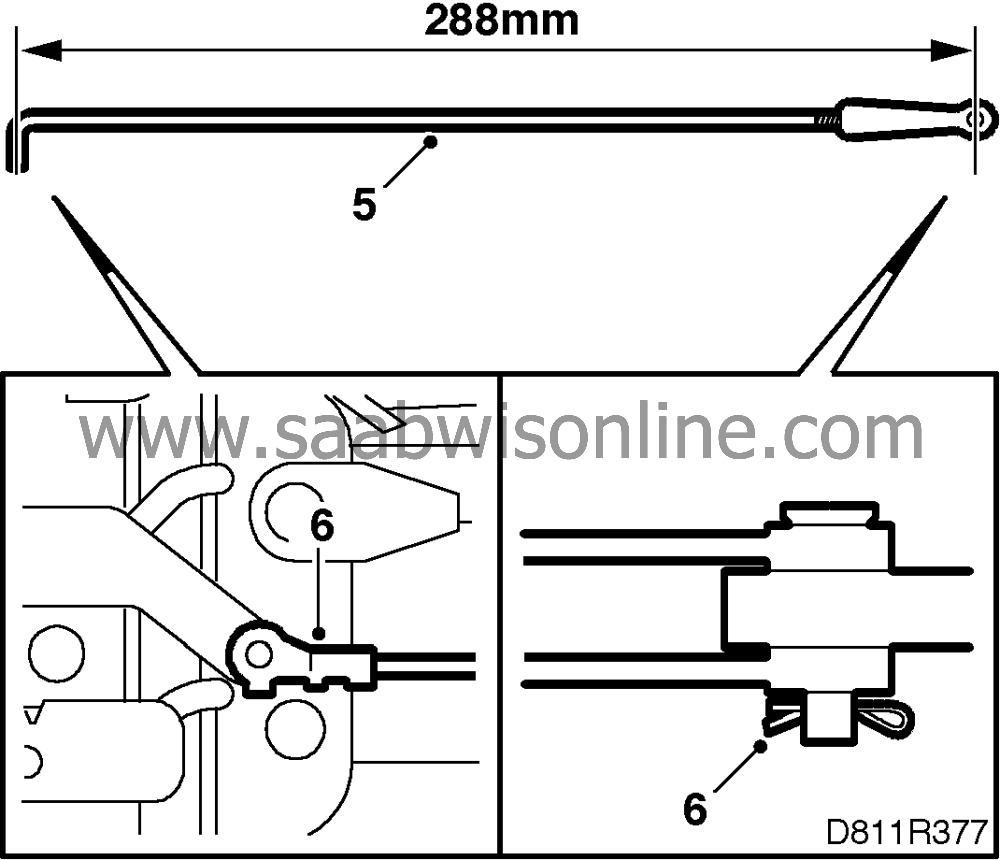
|
|
6.
|
Fit the new locking rods. Use the old lock washers as well as the new ones.
|
|
7.
|
Operate the fifth bow latch motor to open position (rotating covers on the soft top are in open position) with the diagnostic tool, command:
“TSAS”
“ACTIVATE”
“#5 BOW LATCH MOTOR”
“UP”
|
|
8.
|
Inspect the lock tab in the oval hole for the fifth bow latch. Max. 1.5 mm of the tab should be visible.
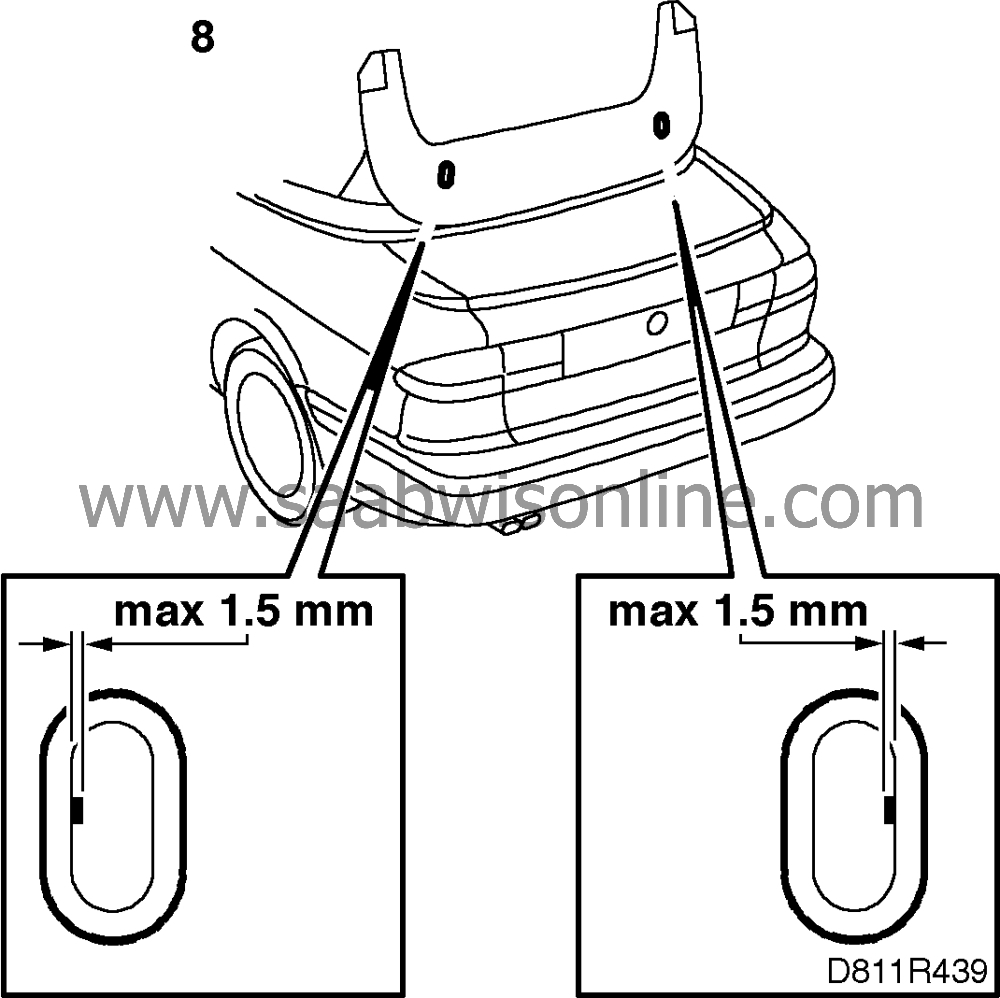
If the adjustment is incorrect and more than 1.5 mm of the lock tab is visible, continue with steps 11, 12 and 13.
|
|
9.
|
Operate the fifth bow latch motor to its closed positions with the diagnostic tool, command:
“TSAS”
“ACTIVATE”
“#5 BOW LATCH MOTOR”
“DOWN”
|
|
10.
|
Adjust the locking rods by unscrewing them so that they become longer.
|
|
11.
|
Repeat steps 9 and 10. Then terminate communications and clear any diagnostic trouble codes. Remove the diagnostic tool.
|
|
12.
|
Operate the soft top up and down 3 times. Check its function.
|
|
13.
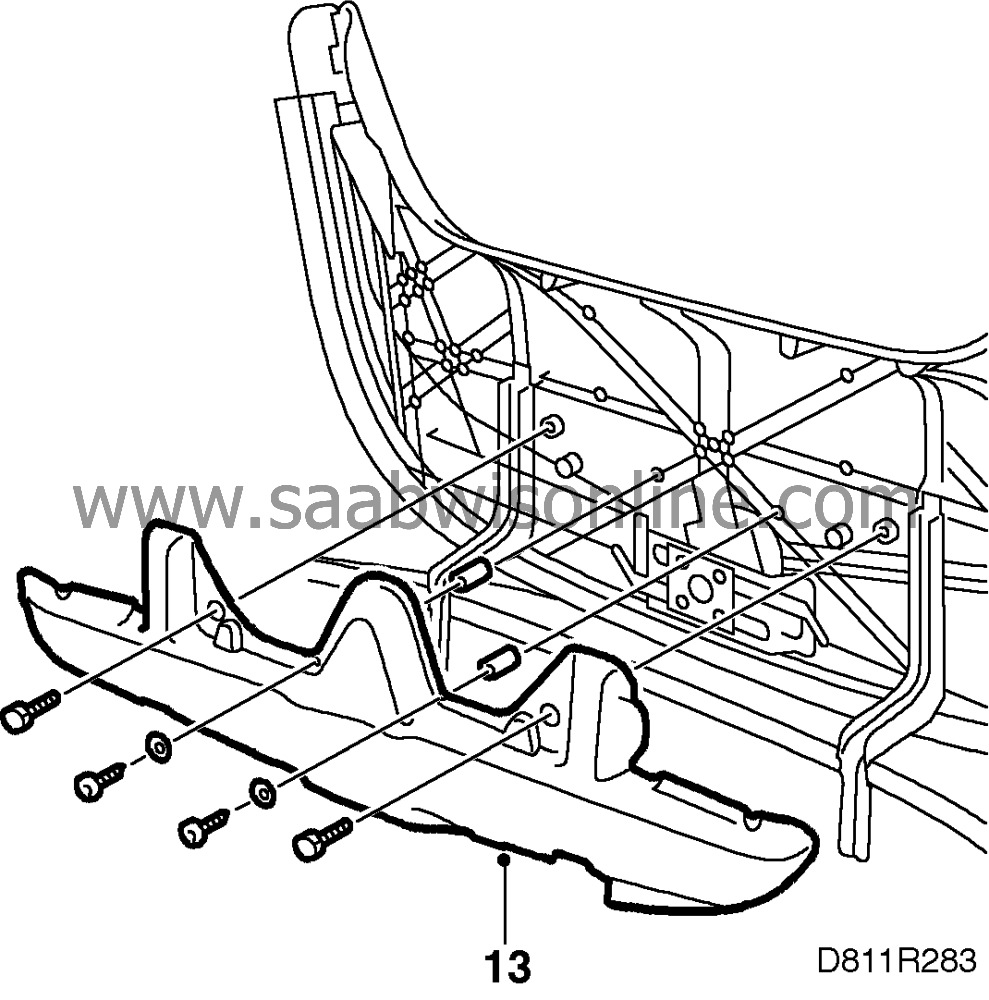
|
Fit the cover.
|
|
New version of fifth bow latch motor with new latches. (Cars from VIN V7010306)
|

Remove the cover and make sure the latch motor is the new version with new latches.
This version is
not
adjustable.


