Floor console
| Floor console |
| To remove |

| 1. |
Apply the handbrake.
|
|
| 2. |
Remove the ignition switch cover plate by first loosening the front
part of the left-hand side and then loosening the rear edge of the
plate. Finally, unhook the front edge.
|
|
| 3. |
Unplug the connector for the ignition switch lighting.
|
|
| 4. |
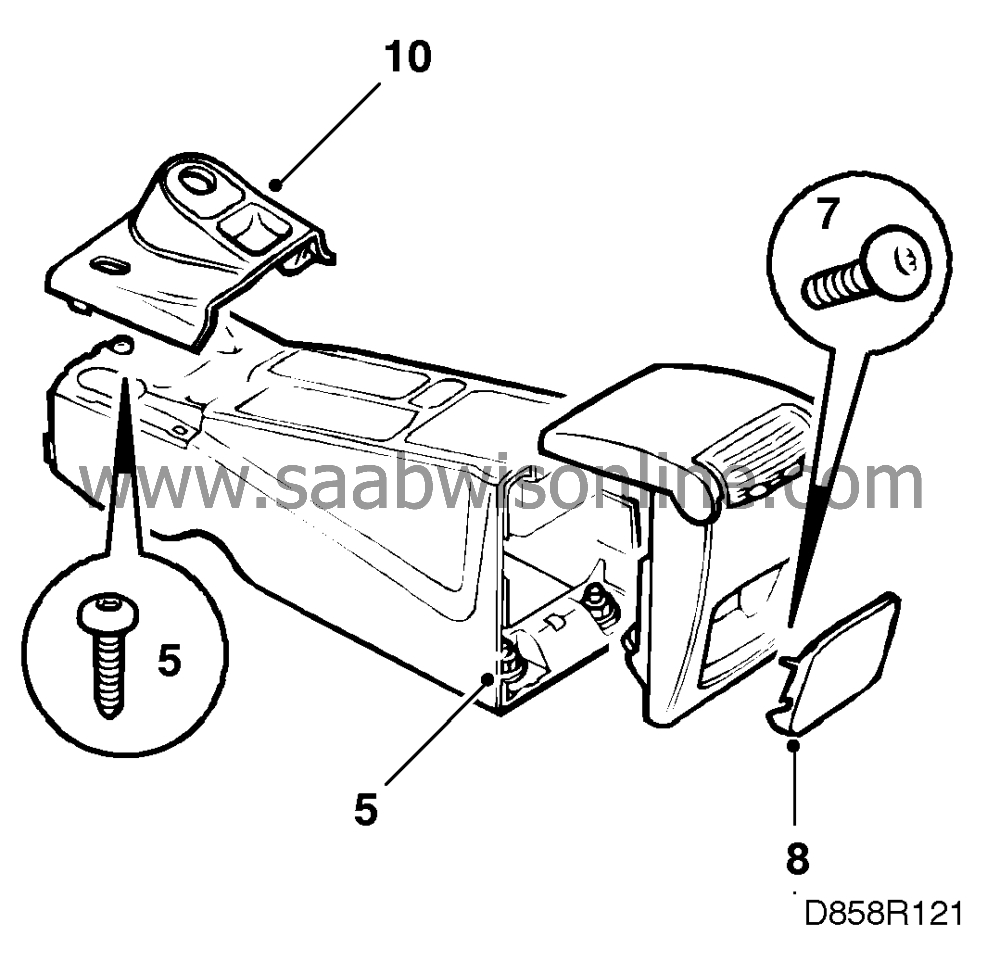
Undo the floor console retaining screws.
|
|
| 5. |
Remove the rear ashtray/cover plate.
|
|
| 6. |
Remove the rear casing.
|
|
| 7. |
Remove the floor console retaining nuts.
|
|
| 8. |
Detach the floor console by pulling it straight to the rear and
lifting it up slightly.
|
|
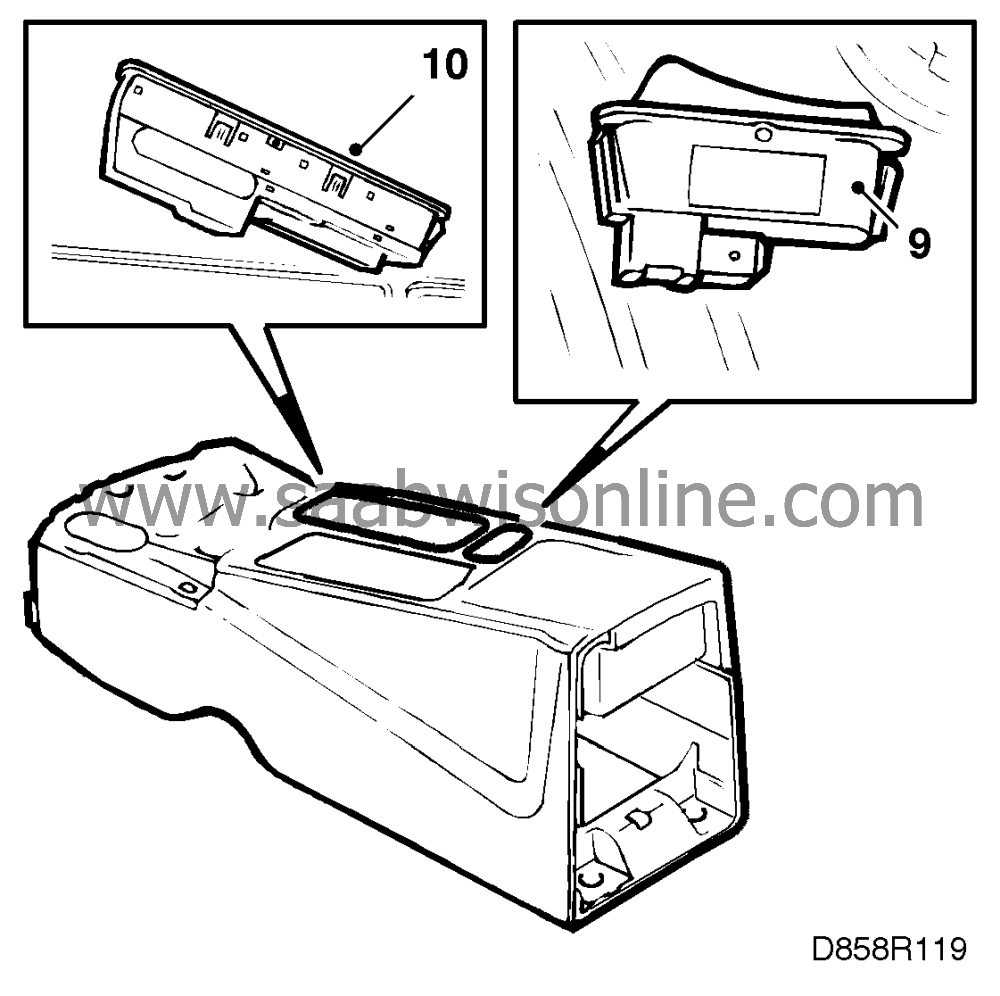
| 9. |
Remove the interior lighting switch by means of a screwdriver,
pressing it up from underneath. Pull the switch straight up. It is
secured by clips. Unplug the switch connector.
|
|
| 10. |
Remove the window lift module by loosening the front edge (snap
fastener). Unplug the window lift module connector.
|
|
| 11. |
Lift out floor console.
|
|
| To fit |
| Note | ||
|
The centre console must be fitted before you fit the floor console. |
| 1. |
Pass the floor console over the
handbrake lever. Do not press the
console into place but just let it rest loosely in position.
|
|
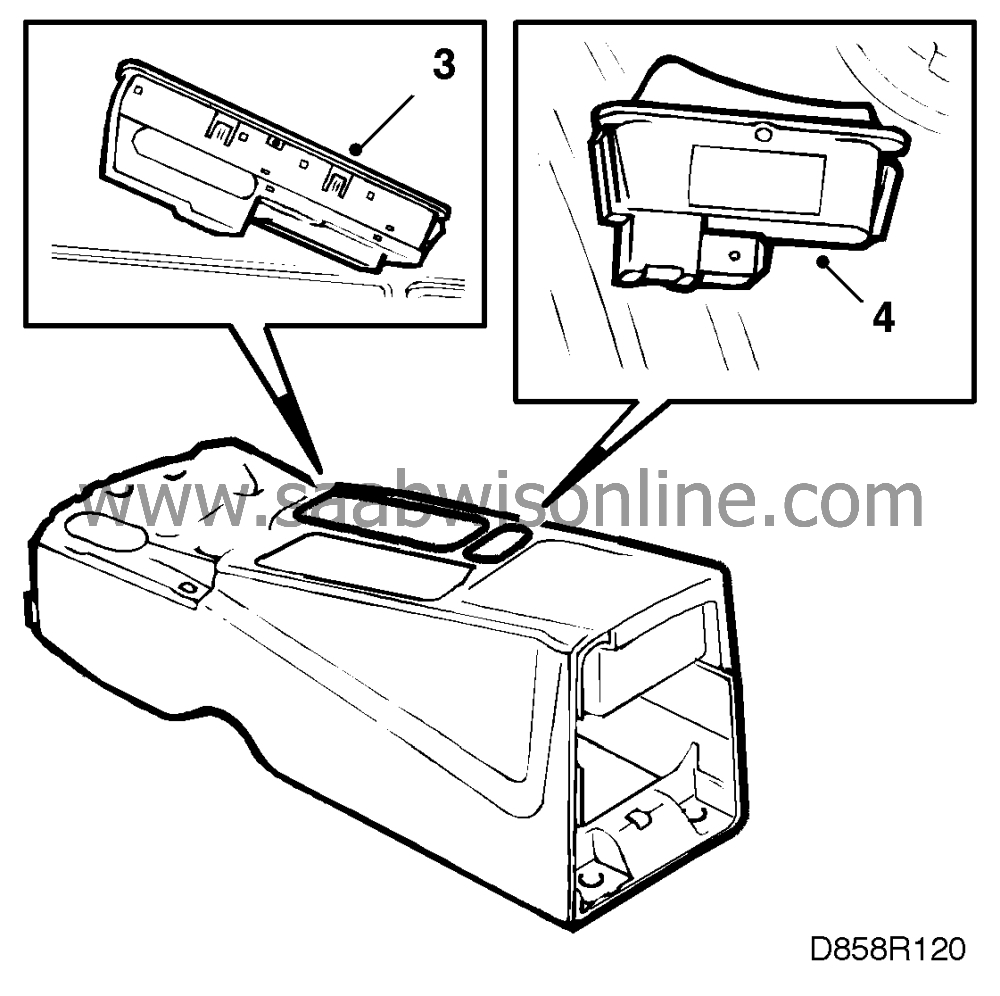
| 2. |
Pass the connector for the window lift module and interior lighting
through the hole for the respective unit.
|
|
| 3. |
Plug in the window lift module connector and fit the module in
place.
|
|
| 4. |
Plug in the interior lighting connector and refit the switch.
|
|
| 5. |
Tighten the floor console retaining screws and retaining nuts.
|
|
| 6. |
Fit the rear casing in place, making sure that the air duct
connects properly to the air vent.
|
|
| 7. |
Screw the module firmly in place.
|
|
| 8. |
Refit the ashtray/cover plate.
|
|
| 9. |
Plug in the ignition switch lighting connector.
|
|
| 10. |
Refit the ignition switch cover
plate.
|
|
This project is supported by memberships and donations. If you use this site, please consider Joining SCNA and/or making a donation.
Our Friends
