Fuel filler pipe
| Fuel filler pipe |
|
||||||||||||||||||||||
| To remove |
| 1. |
Open the tank hatch.

|
|
| 2. |
Raise the car.
|
|
| 3. |
Detach the quick-release coupling on the purge line to the filler pipe with tool 83 95 261.
|
|
| 4. |
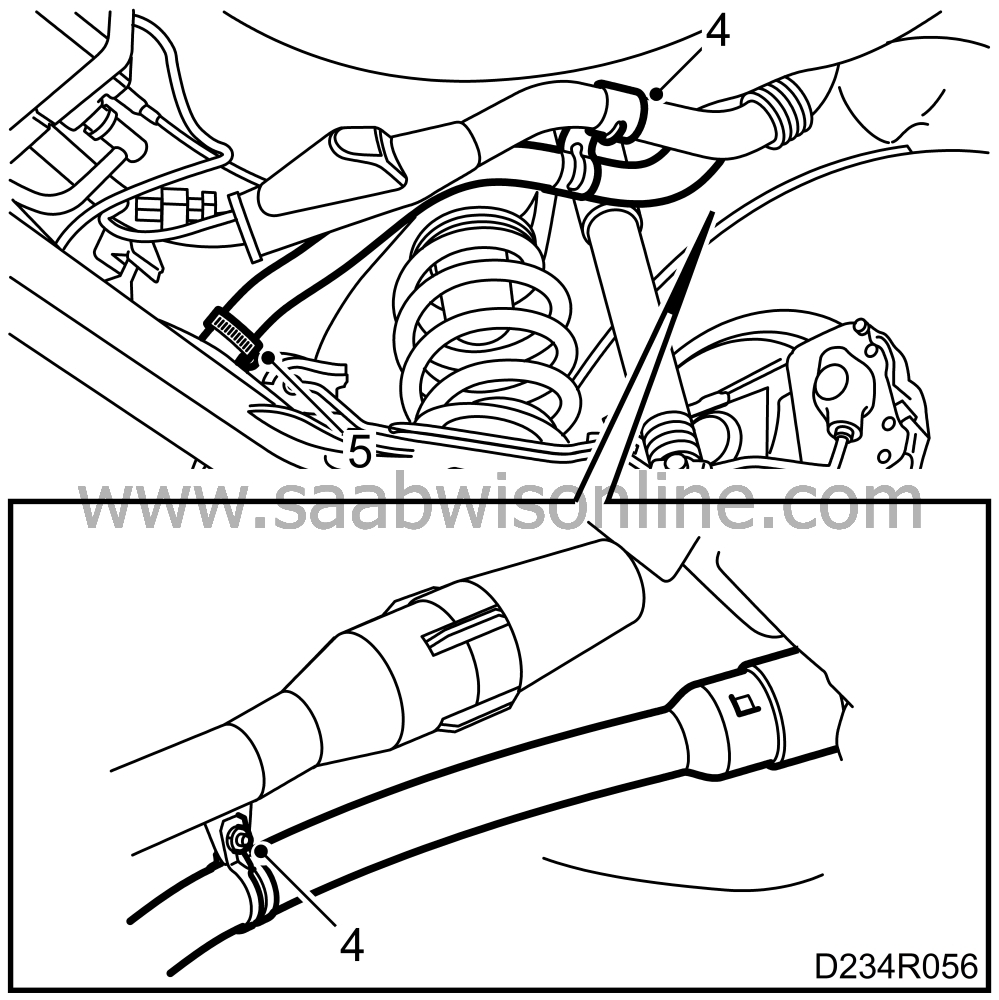
Undo the clamps securing the filler pipe and vent pipe. Remove the clamp on the filler pipe.
|
||||||||||
| 5. |
Detach the filler pipe from the tank.
|
|||||||
| 6. |
Lift out the pipe from the filler opening on the rear wing.
|
|
| To fit |

| 1. |
Insert the pipe into the filler opening on the rear wing. Apply a thin coat of petroleum jelly on the upper part of the filler pipe to make it easier to fit.
|
|
| 2. |
Fit a
new
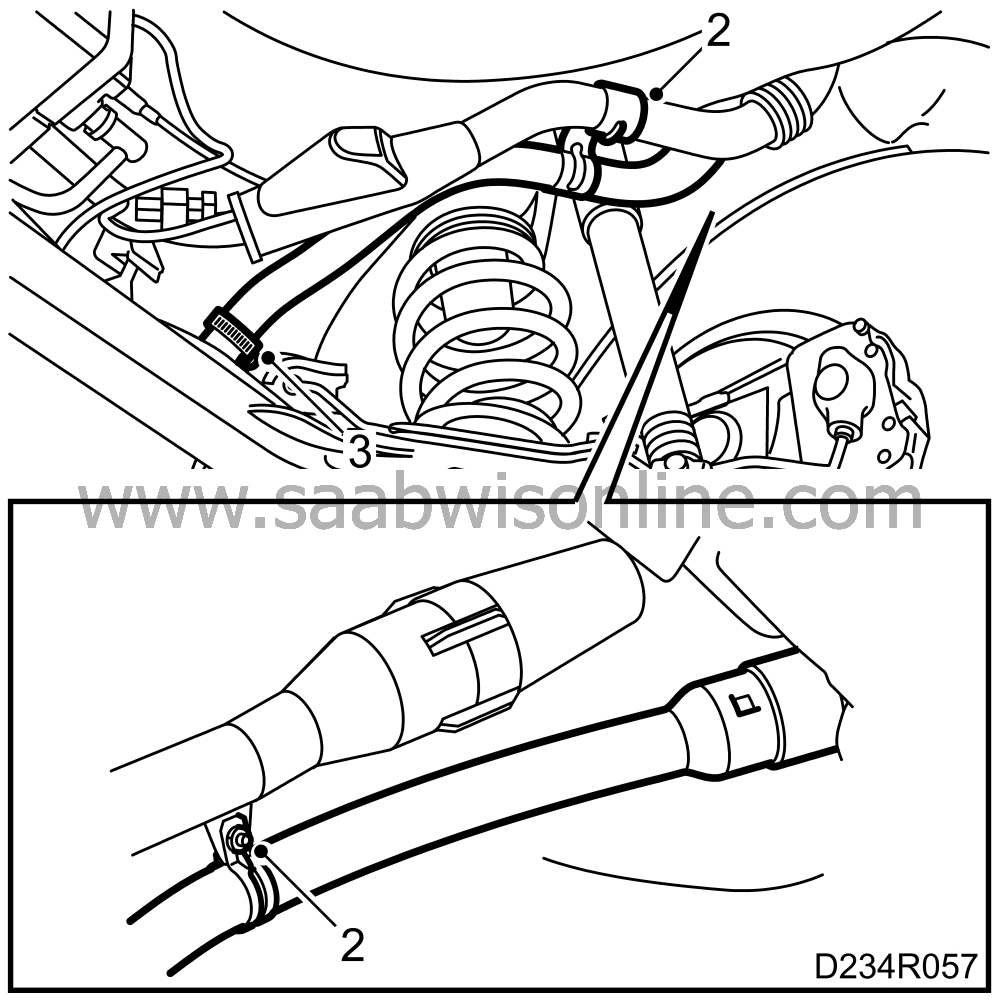
hose to the filler pipe. Connect the pipe to the hose. Position the pipes and tighten the clamps.
Tightening torques plastic screw 1.8 Nm (1.3 lbf ft) hose clamps 2.0 Nm (1.4 lbf ft) |
|||||||||||||||||||
| 3. |
Tighten the hose clamps on the hose between the tank and the filler pipe.
|
|
| 4. |
Fit the filler pipe purge line.
|
|
| 5. |
Lower the car to the floor.
|
|
| 6. |
Make sure the filler pipe is positioned correctly in the opening.
|
|
| 7. |
Tighten the filler cap and close the hatch.
|
|

 Warning

