Testing for continuity/shorting
|
|
Testing for continuity/shorting
|
|
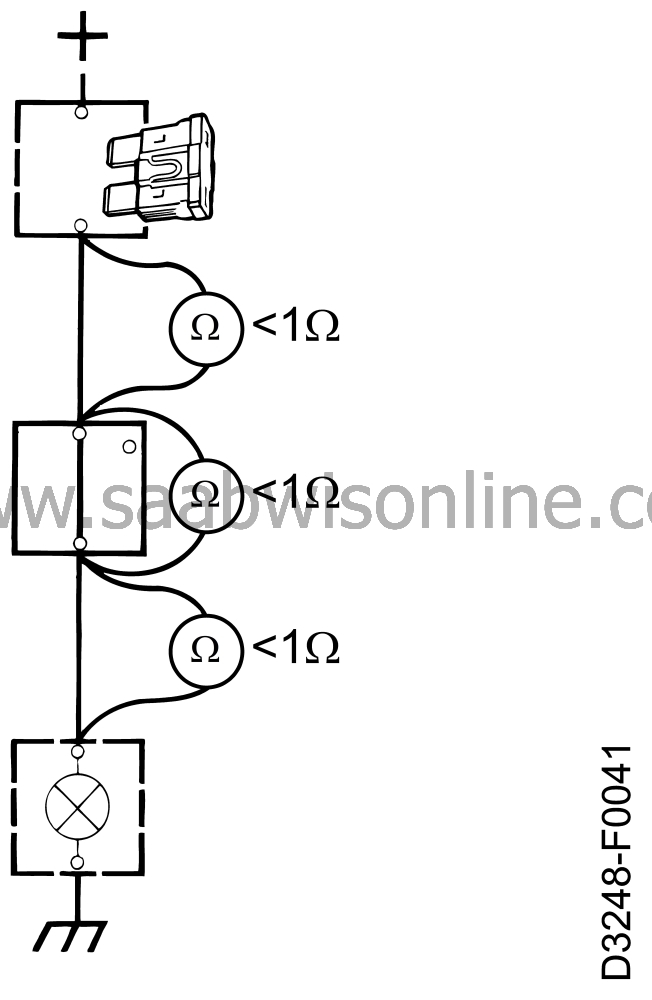
Testing for continuity (Resistance measurement)
|
|
1.
|
Make sure that the component
or cable to be checked is not
live.
|
|
2.
|
With the instrument set to measure resistance, connect the test leads to each
end of the component or cable to be checked. In the wiring, the resistance should normally be
less than 1 ohm. For components, the specified resistance should be obtained as a reading.
|
|
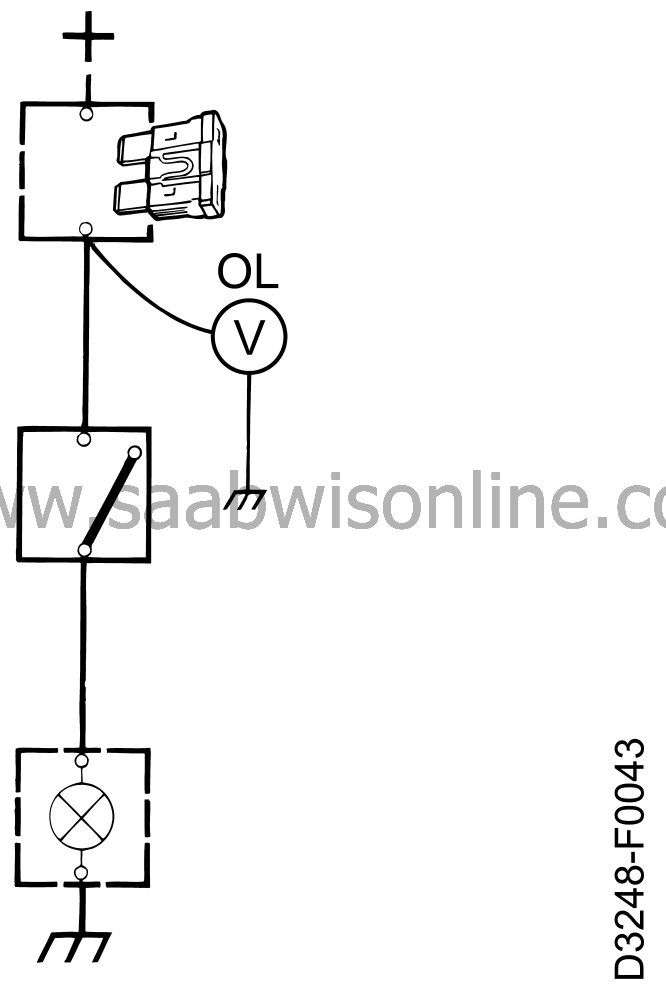
Testing for continuity (Voltage measurement)
|

|
1.
|
Connect up the load, if any.
|
|
2.
|
With the instrument set to measure voltage, connect the black
test lead to a good ground and the red test lead to the
wiring side (positive).
|
|
3.
|
At the output of a control module or switch: take readings in
the direction away from the component and proceed
successively out towards the load. When the voltage reading
drops to zero you have just passed the break in continuity.
|
|
4.
|
At the input of a control module or load: take readings from
the power source and proceed successively in towards the
control module or load. When the voltage reading drops to
zero you have just passed the break in continuity.
|
|
Shorting to ground (Resistance measurement)
|

|
1.
|
Make sure that the cable to be
checked is not live and that
the load, if any, is disconnected.
|
|
2.
|
With the instrument set to measure resistance, connect one of
the test leads to the load side of the cable and the other
test lead to a good ground.
|
|
3.
|
Carefully move the wiring about while checking the instrument
to see whether it shows infinite resistance (OL) the whole
time.
|


