Transmission, removal
| Transmission, removal |
Note
| Note | ||
|
Protect the front wings. |
| 1. |
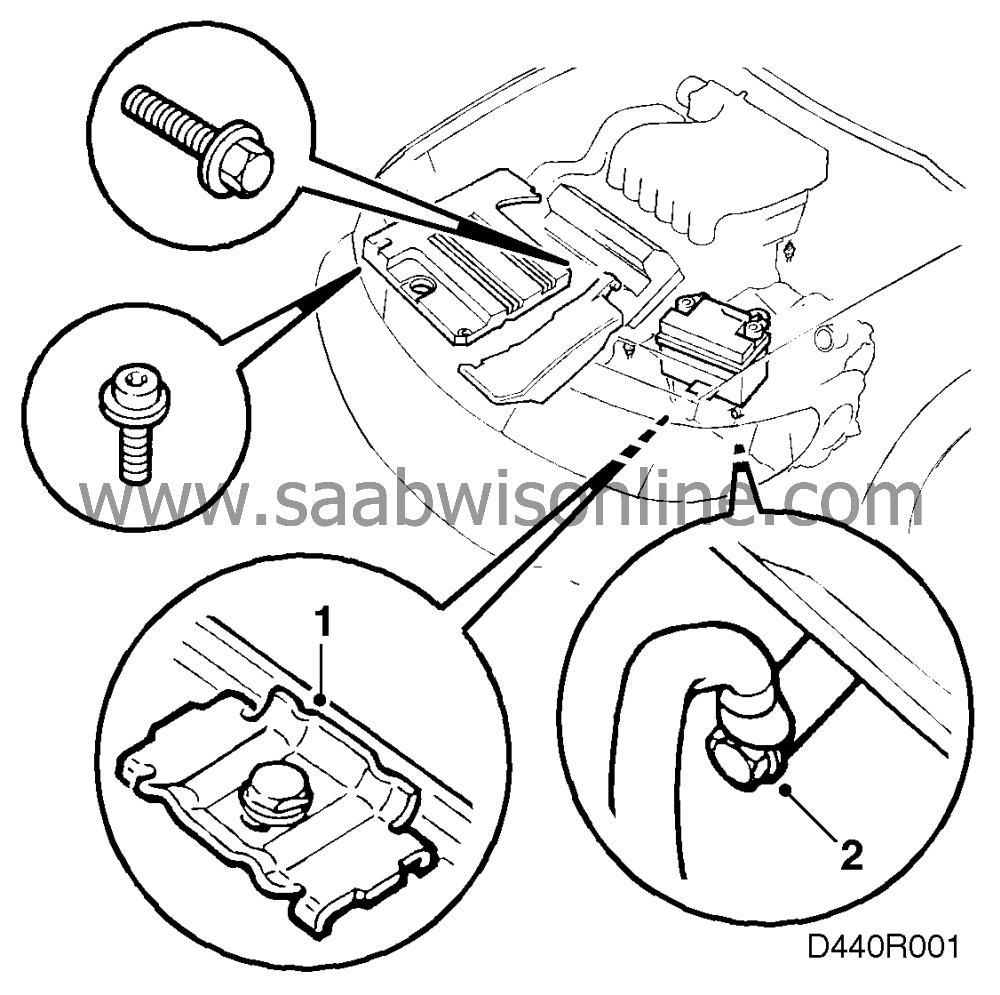
Remove the battery.
|
|
| 2. |
Undo the battery negative lead on the gearbox.
|
|
| 3. |
4-cyl:
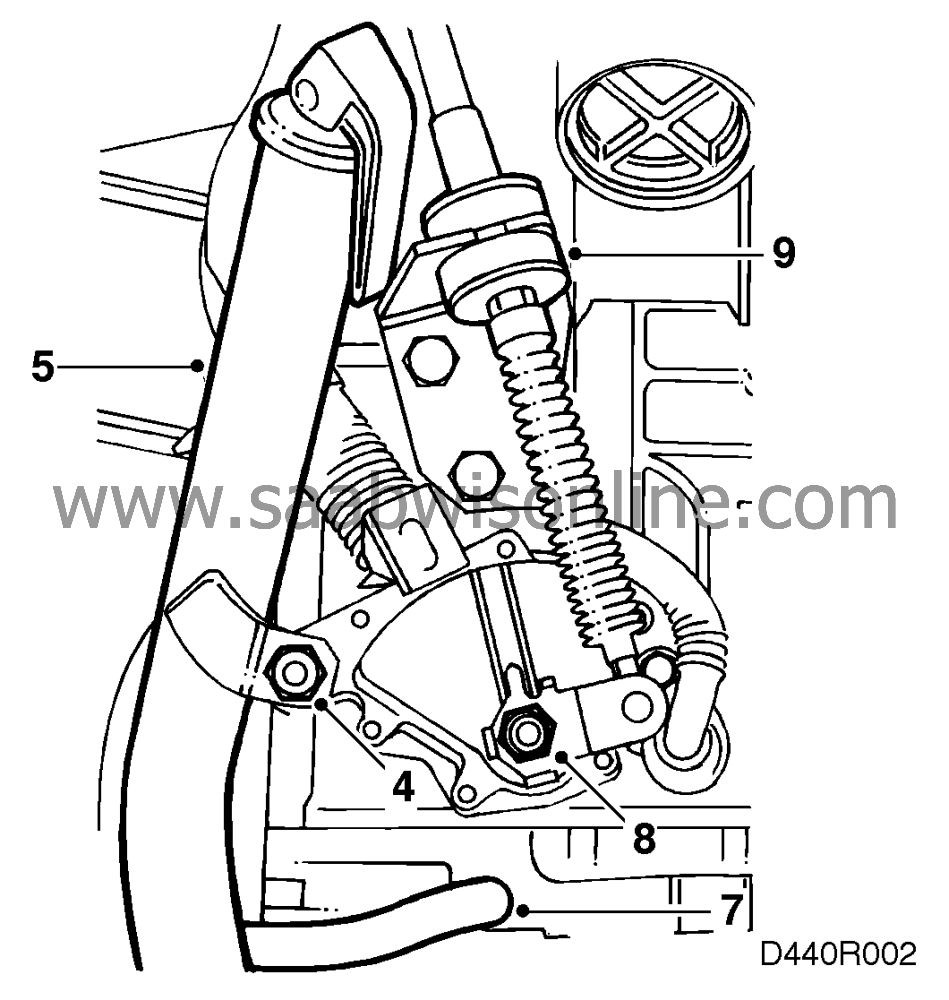
Remove the cable bracket on the dipstick.
|
|
| 4. |
Remove the dipstick retaining screw.
|
|
| 5. |
Pull the dipstick and sleeve straight up.
|
|
| 6. |
Plug the hole for the dipstick in the gearbox.
|
|
| 7. |
Remove the breather hose from the gearbox.
|
|
| 8. |
Remove the selector lever arm from the transmission.
|
|
| 9. |
Remove the cable from the bracket on the transmission and bend the cable aside.
|
|
| 10. |
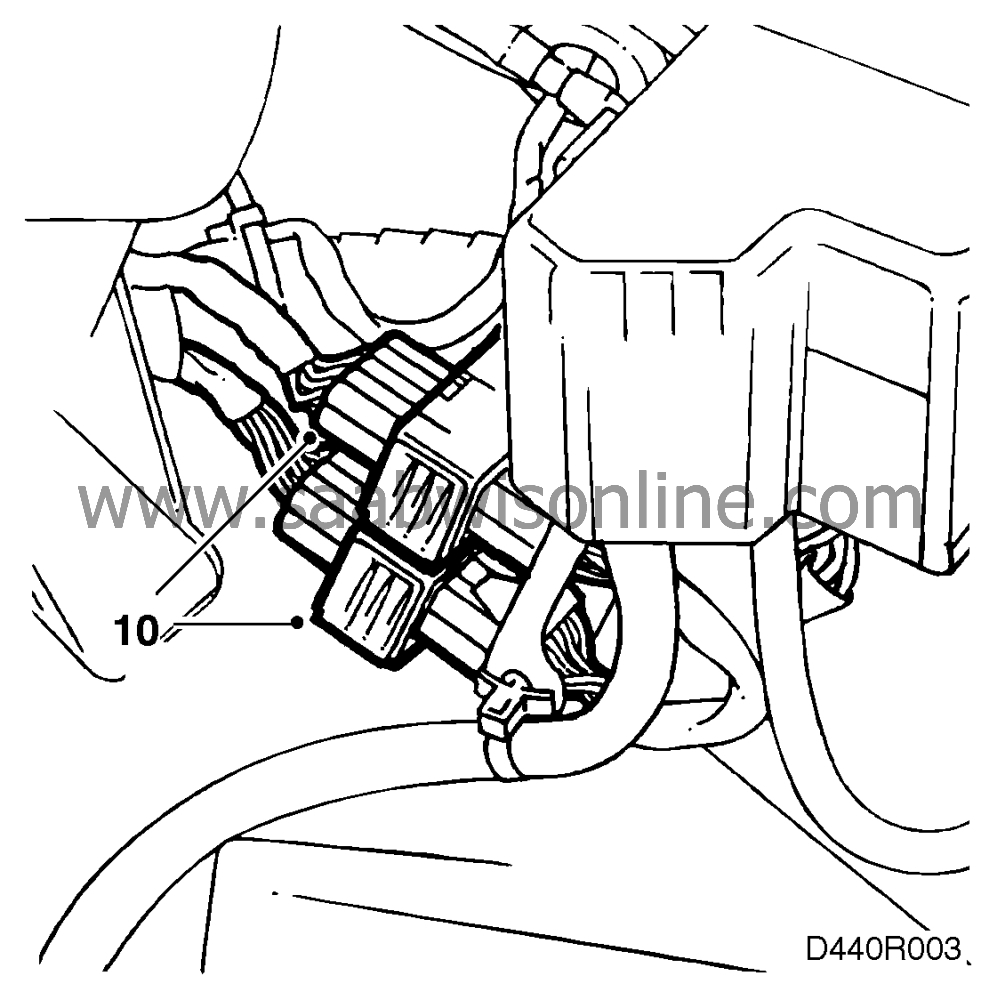
Unplug the electrical connectors for the transmission.
|
|
| 11. |
Undo the clamps securing the cables to the transmission.
|
|
| 12. |
4-cyl:
Remove the engine's air cleaner housing.
|
|
| 13. |
Remove the rubber bushes in the engine's lifting eye.
6-cyl:
2 lifting eyes.
4-cyl:
1 lifting eye.
|
|
| 14. |
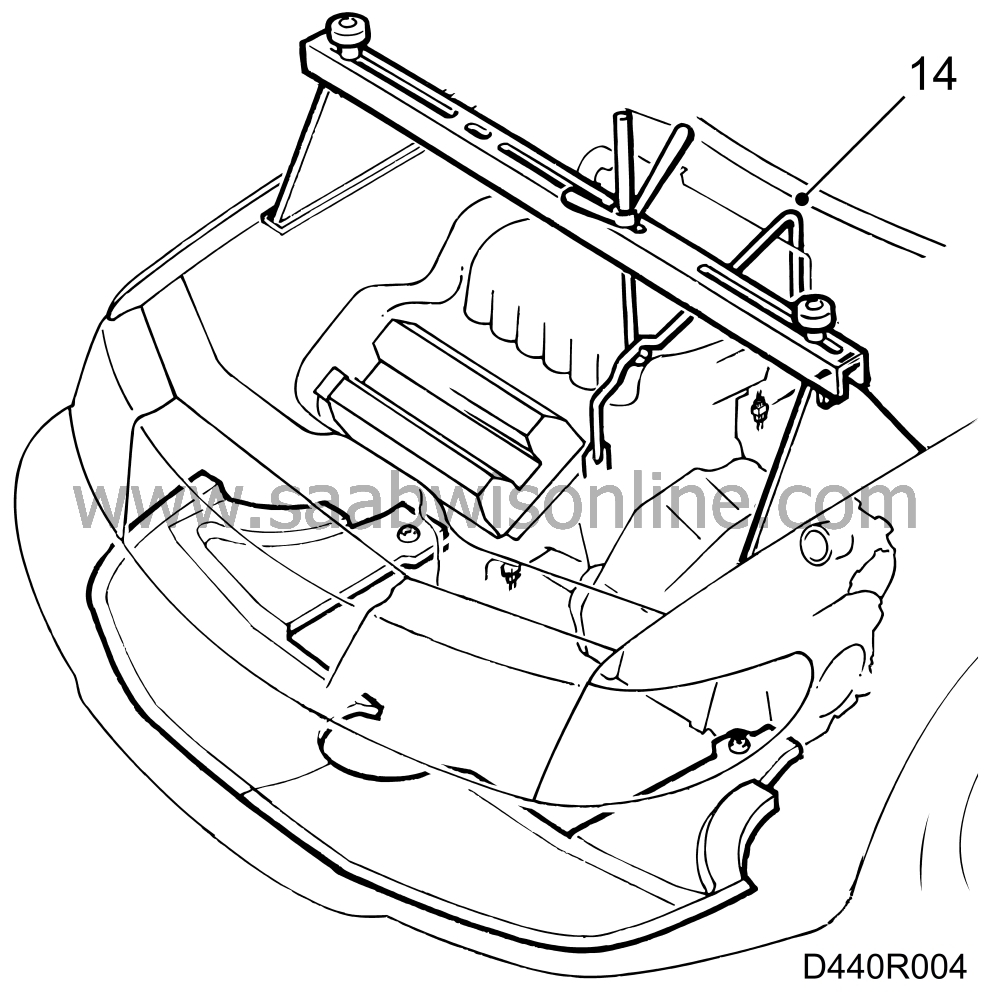
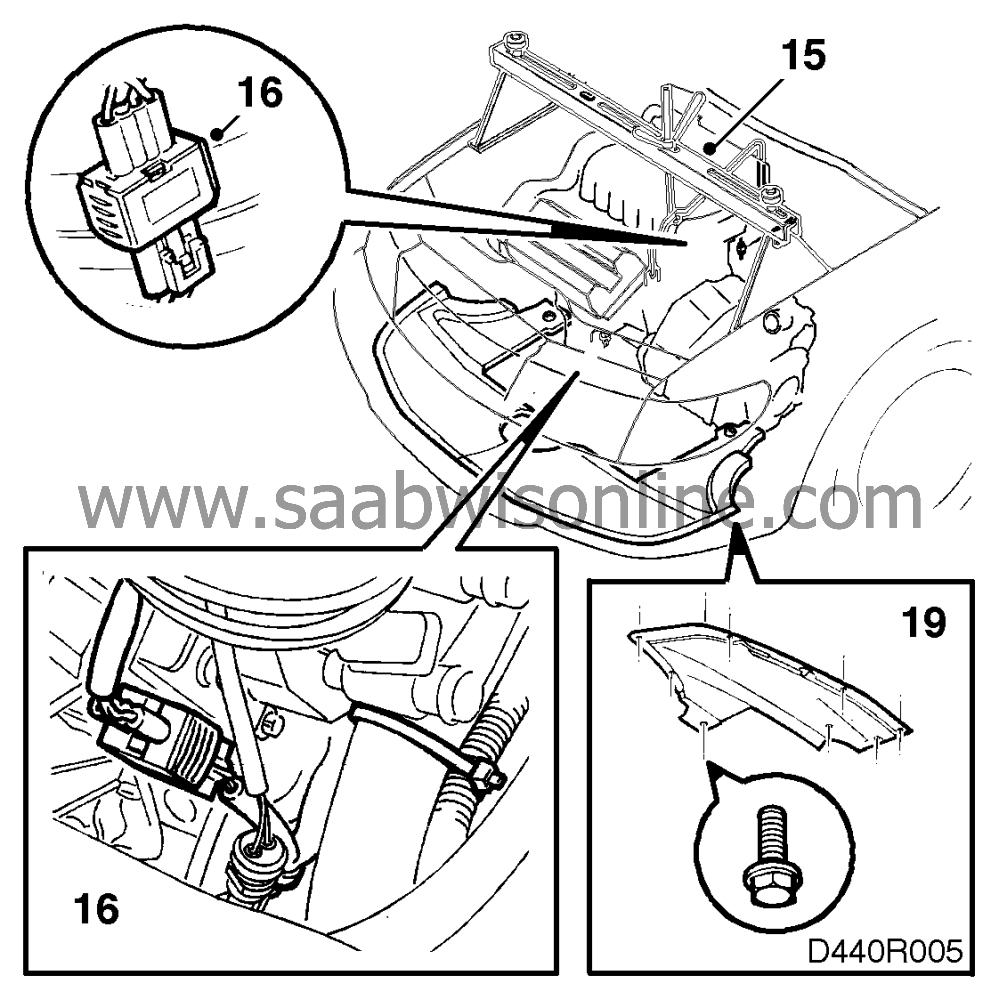
Fit the lifting beam, part No. 83 94 850, into position.
Note
Place suitable protective pads or the like under the feet of the lifting beam to avoid damaging the paintwork. |
||||||||||
| 15. |
6-cyl:
Hook holder 83 95 287 to the engine's two lifting eyes, connect the lifting beam to the lifting sling and tighten it.
|
|
| 16. |
Unplug the oxygen sensor connectors.
6-cyl:
4-cyl: 4 oxygen sensors. 2 oxygen sensors. |
|
| 17. |
Raise the car.
|
|
| 18. |
Remove the left-hand and right-hand front wheels.
|
|
| 19. |
Remove the air deflectors and the cover in the right-hand front wheel housing, secured by means of three screws.
|
|
| 20. |
4-cyl:
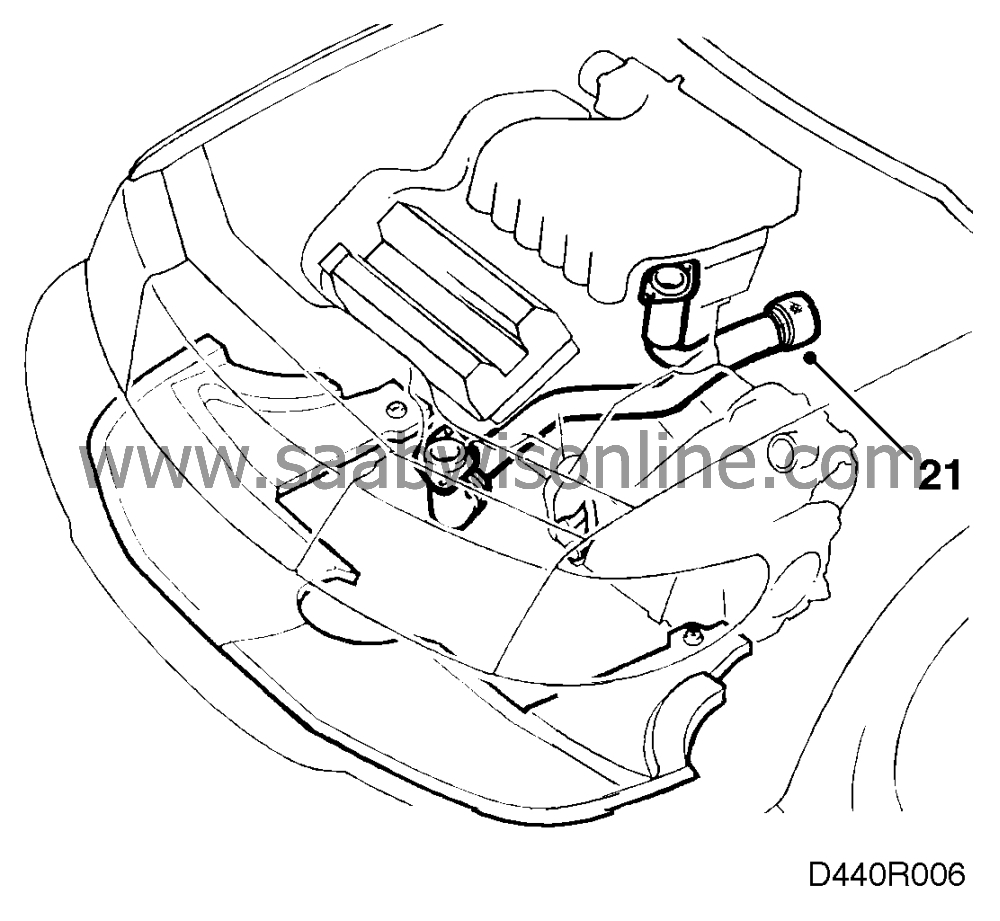
Remove the bracket for the oxygen sensor cable from the front of the engine.
|
|
| 21. |
Remove the front section of the exhaust pipe.
|
|
| 22. |
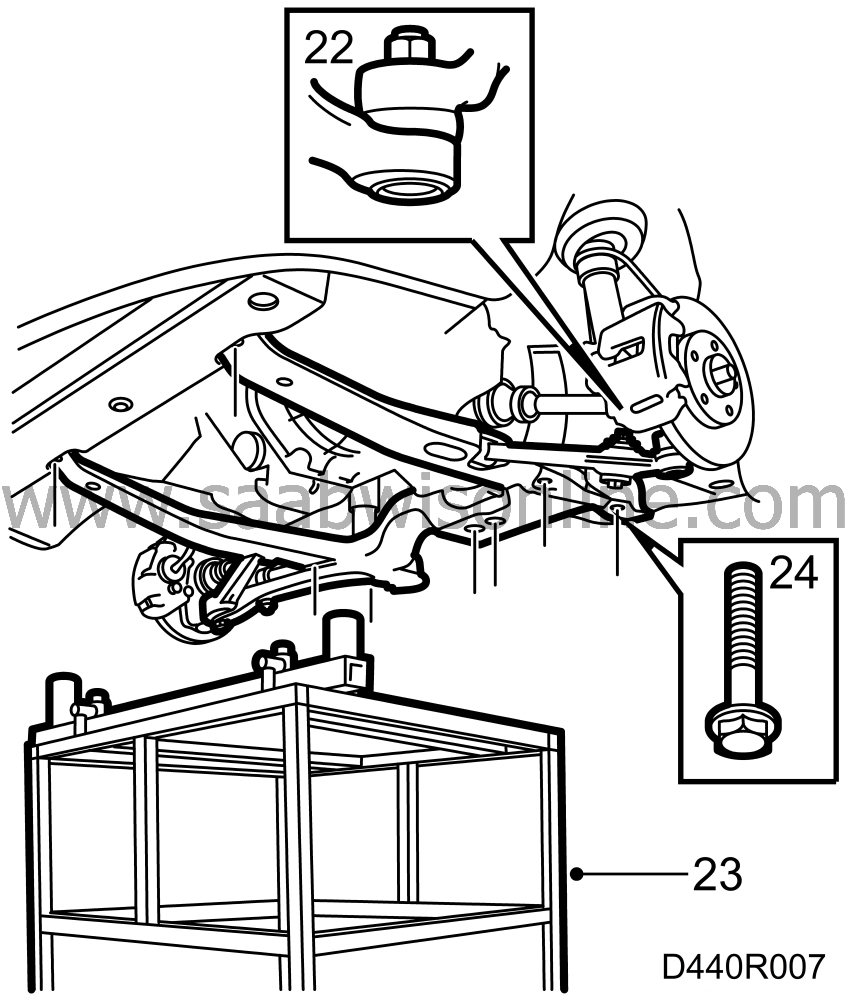
Undo the nuts securing the end pieces of the steering swivel members and remove the two subframe brackets from the engine.
|
|
| 23. |
Position a lifting table under the subframe so that the supports on the lifting table are directly below the front engine mounts and transmission.
|
|
| 24. |
Remove the 6 remaining subframe retaining screws.
|
|
| 25. |
Lower the lifting table about 2 cm.
|
|
| 26. |
Detach the suspension arms from the end pieces of the steering swivel members and lower away the subframe.
Note
|
|||||||
| 27. |
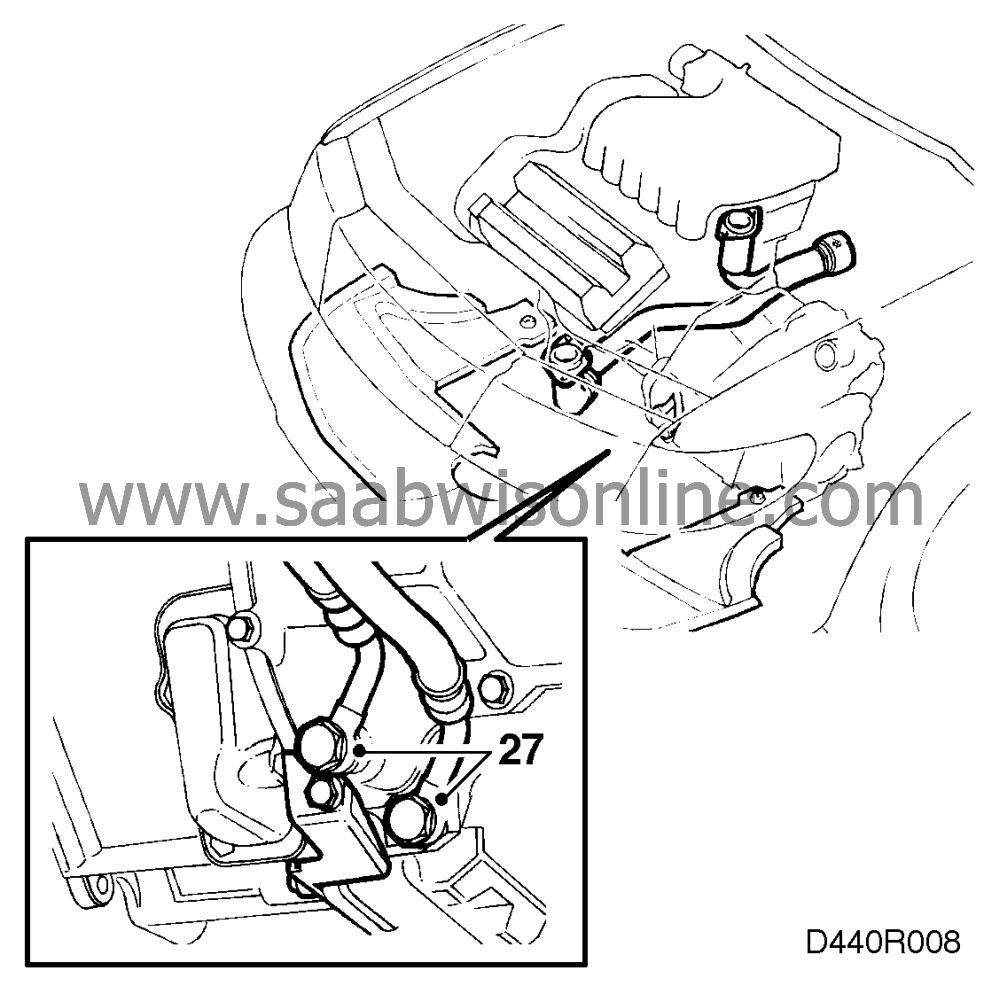
Disconnect the inlet and outlet hoses from the fluid cooler.
Note
|
||||||||||
| 28. |
Plug the inlet and outlet holes in the transmission. Also plug the hoses and turn them upwards.
|
|
| 30. |
Secure the drive shaft to the car body so that it will not hang down and be damaged when the car is lowered to the ground.

|
|
| 31. |
Separate the right-hand drive shaft at the intermediate shaft's mounting point on the engine, using tool 89 96 654.
Note
|
|||||||
| 32. |
Remove the intermediate shaft's bracket on the engine.
|
|
| • |
6-cylinder engine |
| • |
Remove the bracket's 2 retaining bolts and carefully drive the shaft out of the bracket.
|
| • |
4-cylinder engine |
| • |
Remove the lower generator bolt.
|
| • |
Remove the bracket's 3 retaining bolts.
|
| • |
Swing the generator upwards.
|
| • |
Prise out the bracket to free the 2 locating dowels.
|
| • |
Withdraw the intermediate shaft and attendant bracket.
|
| 33. |
Plug its inlet hole with a plastic plug.
|
|
| 34. |
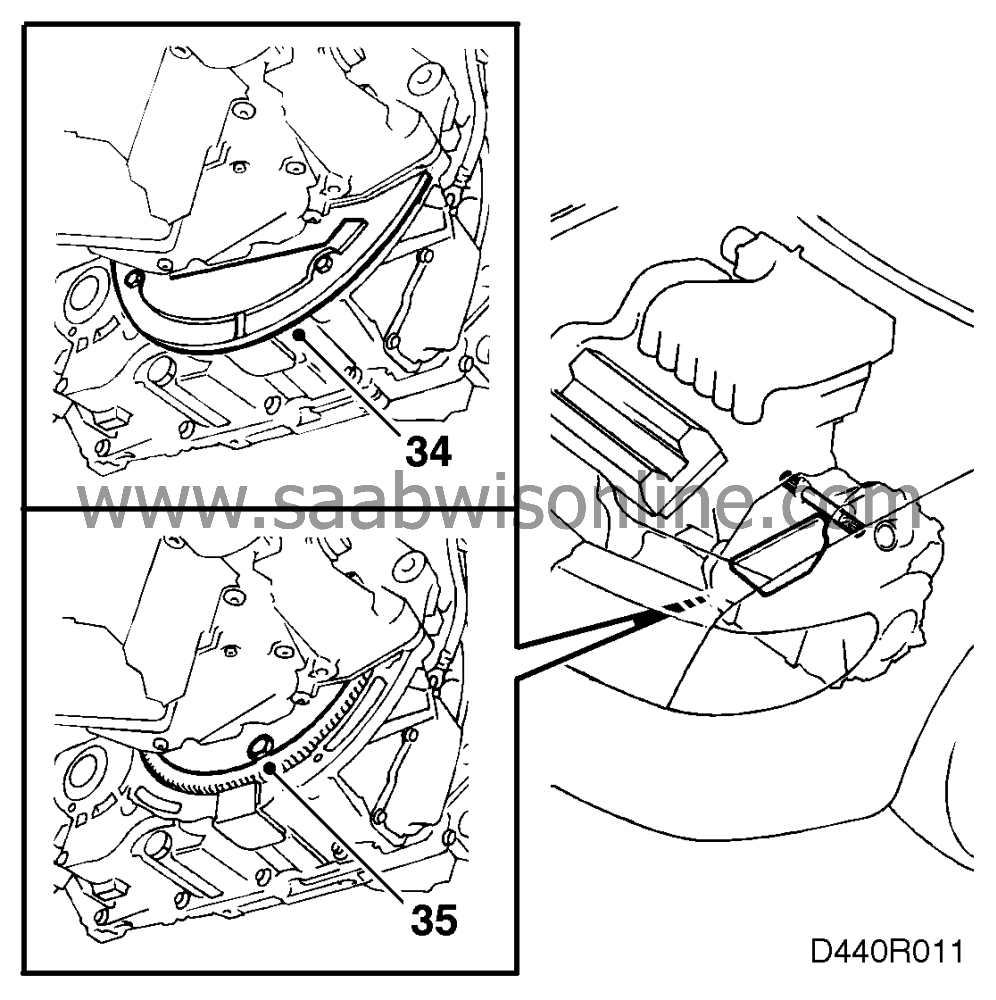
Remove the splash plate (secured to the transmission by 2 screws) to expose the torque converter's attachment to the drive plate.
|
|
| 35. |
Remove the six bolts securing the torque converter to the drive plate.
Note
|
|||||||
| 36. |
Fit a special tool to hold the torque converter in position while removing the transmission.
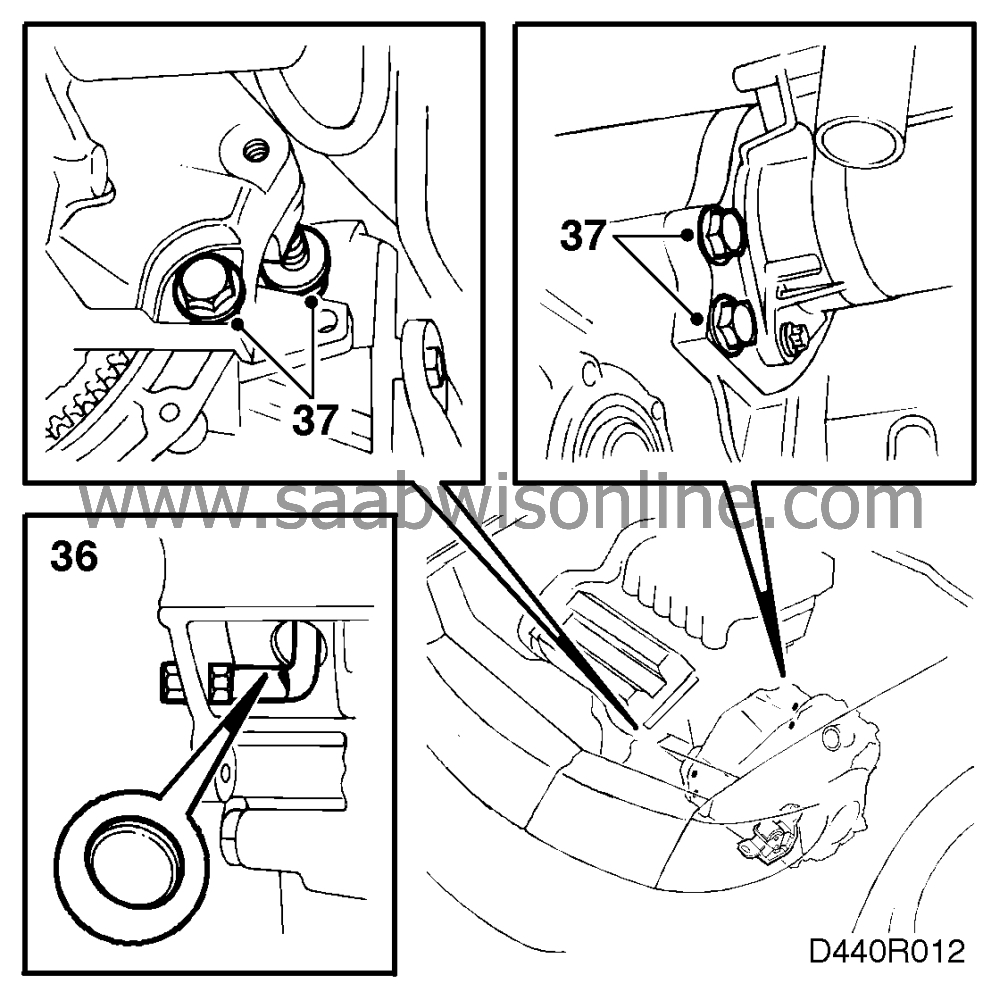
6-cyl: special tool 87 92 285. 4-cyl: special tool 87 92 277. Some transmissions are not provided with the hole for fitting the tool. It will then be necessary to drill a hole, using a 5 mm drill bit, and cut an M6 thread in it. See SI 104-1586 for dimensions. |
|
| 37. |
Remove the lower retaining bolts securing the transmission to the bottom of the engine.
6-cyl:
4 bolts.
4-cyl:
2 bolts.
|
|
| 38. |
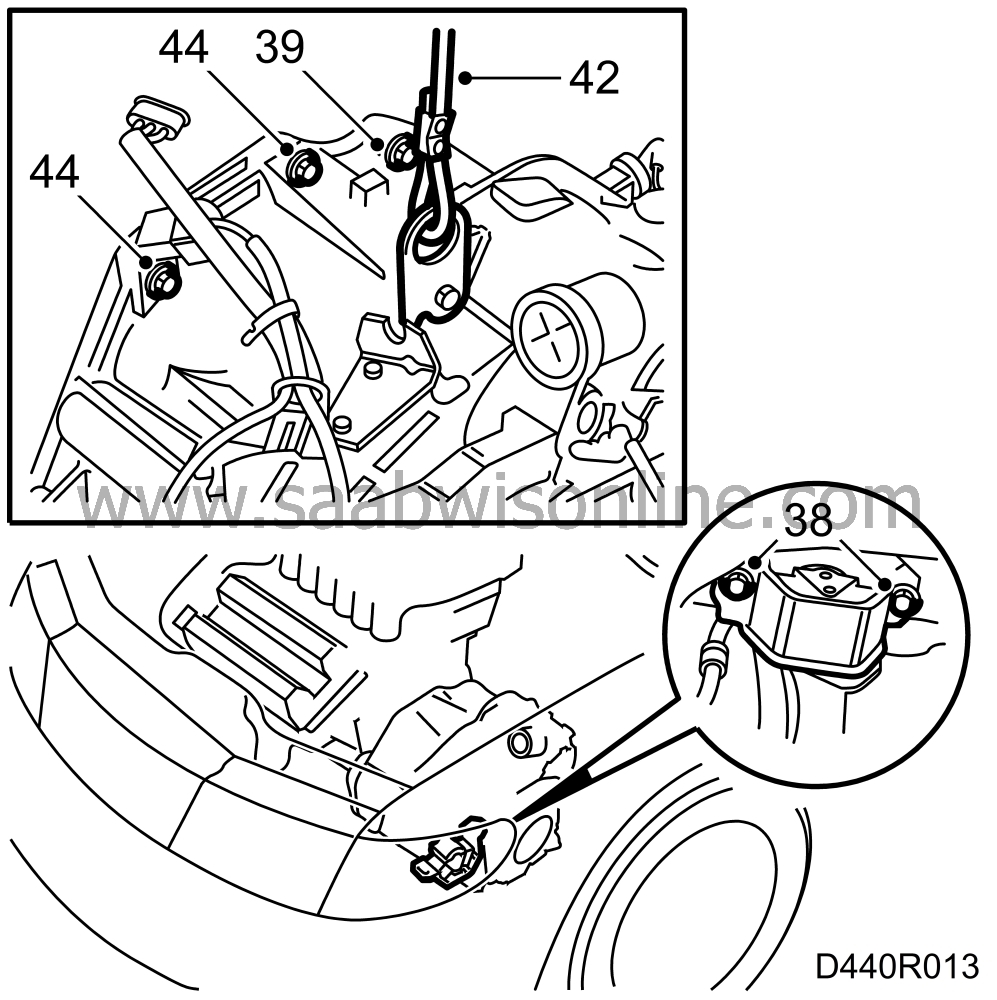
Remove the retaining bolts for the front engine mounting.
|
|
| 39. |
Remove the rearmost of the 3 upper retaining bolts.
|
|
| 40. |
Lower the car to the floor.
|
|
| 41. |
Lower the engine and transmission by means of the lifting beam until there is a clearance of about 10 cm between the car body and the front transmission mount. The clearance can be observed from the left-hand front wheel housing.
|
|
| 42. |
Fasten lifting wire 87 92 442 to the transmission's rear securing hole and attach the wire to a hoist.
|
|
| 43. |
Pull the wire taut by means of the hoist.
|
|
| 44. |
Remove the 2 remaining upper retaining bolts.
|
|
| 45. |
Remove the transmission from the engine by carefully inching it loose and lowering it.
|
|
| 46. |
Detach the wire from the hoist, raise the car and withdraw the automatic transmission.
|
|
| 47. |
Remove the lifting wire from the automatic transmission.
|
|
| 48. |
Remove the tool holding the torque converter in position.
In connection with transmission replacement:
Transfer the tool to the old transmission.
|
|


