Windscreen member microswitch/latch fittings
| Windscreen member microswitch/latch fittings |
| To remove |
The following description applies to removing the left-hand microswitch. The right-hand microswitch is removed in the same way.
| 1. |
Lower the soft top.
|
|
| 2. |
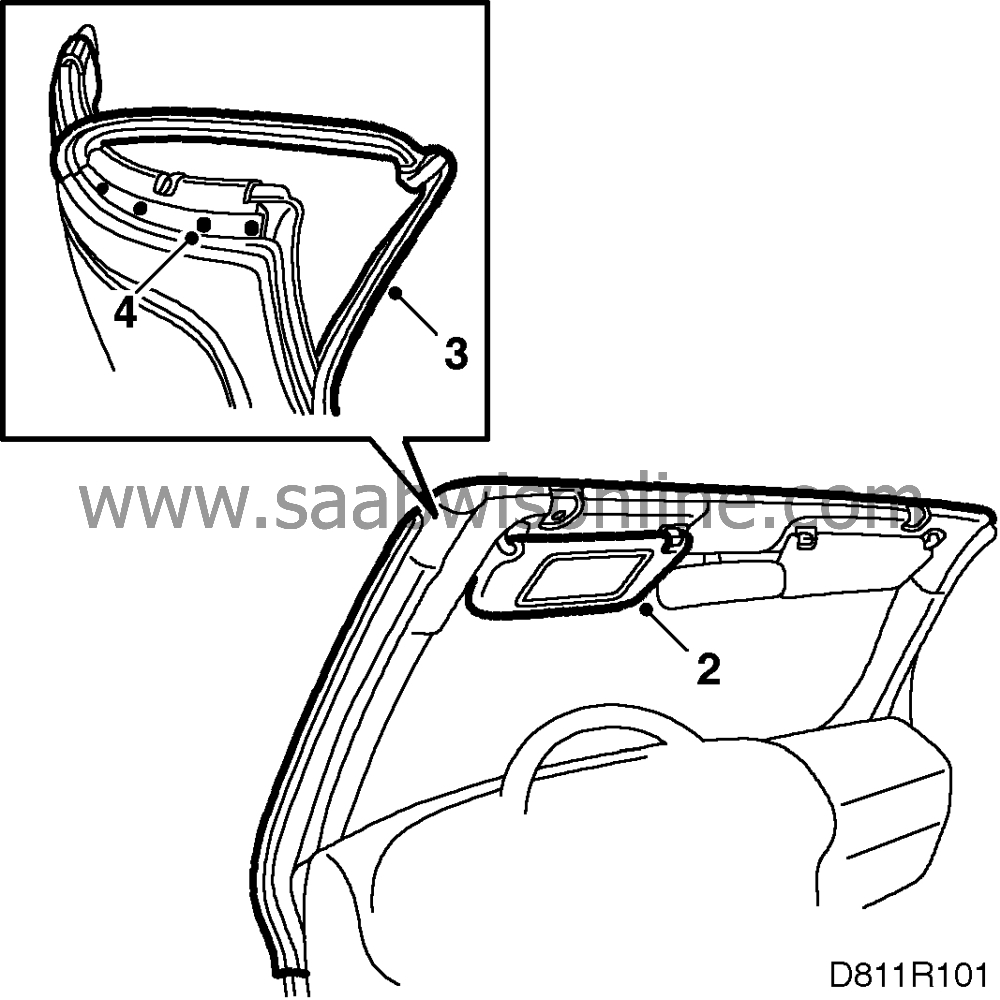
Remove the sun visor and sun visor support.

|
|
| 3. |
Loosen the windscreen frame seal to access the screws securing the upper part of the windscreen frame cover.
|
|
| 4. |
Remove the screws.
|
|
| 5. |
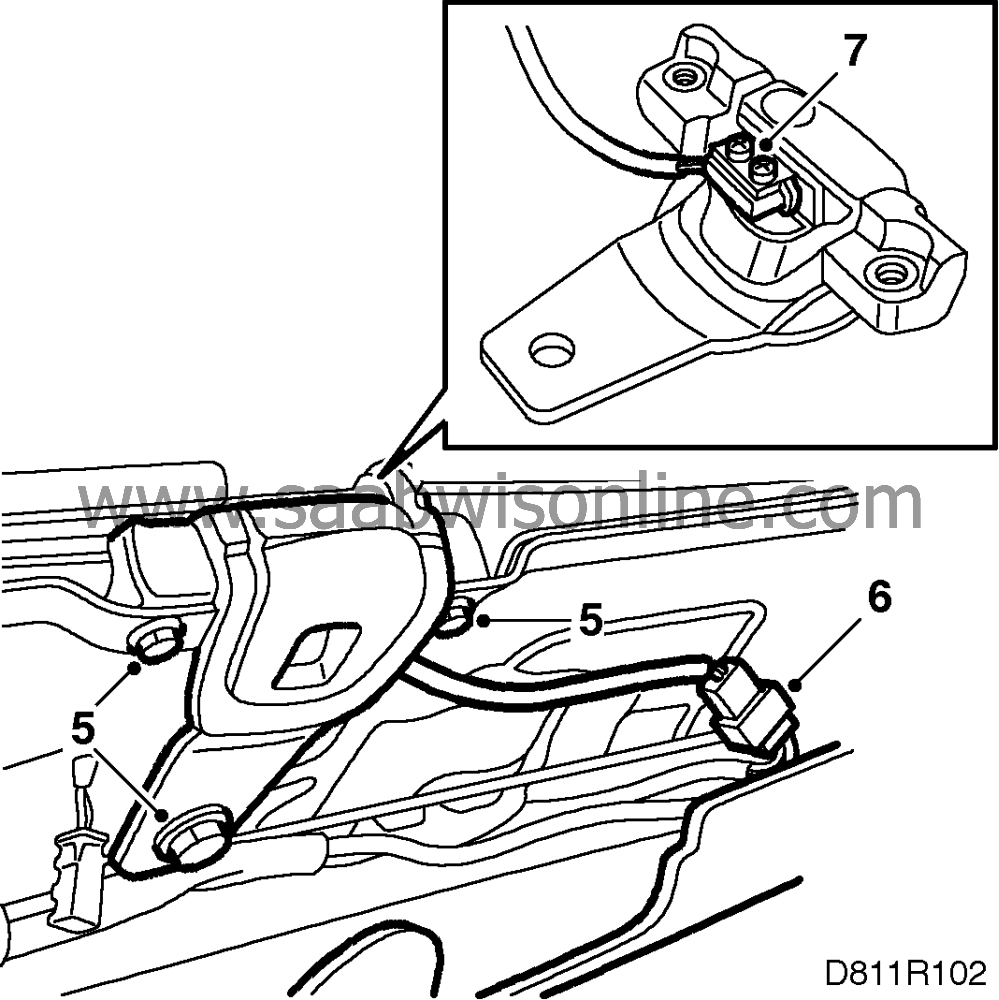
Pull down the lower part of the windscreen frame cover slightly and remove the screws securing the latch fitting.

|
|
| 6. |
Unplug the connector and remove the latch fitting.
|
|
| 7. |
Remove the screws securing the microswitch and lift it away.
|
|
| To fit |

| 1. |
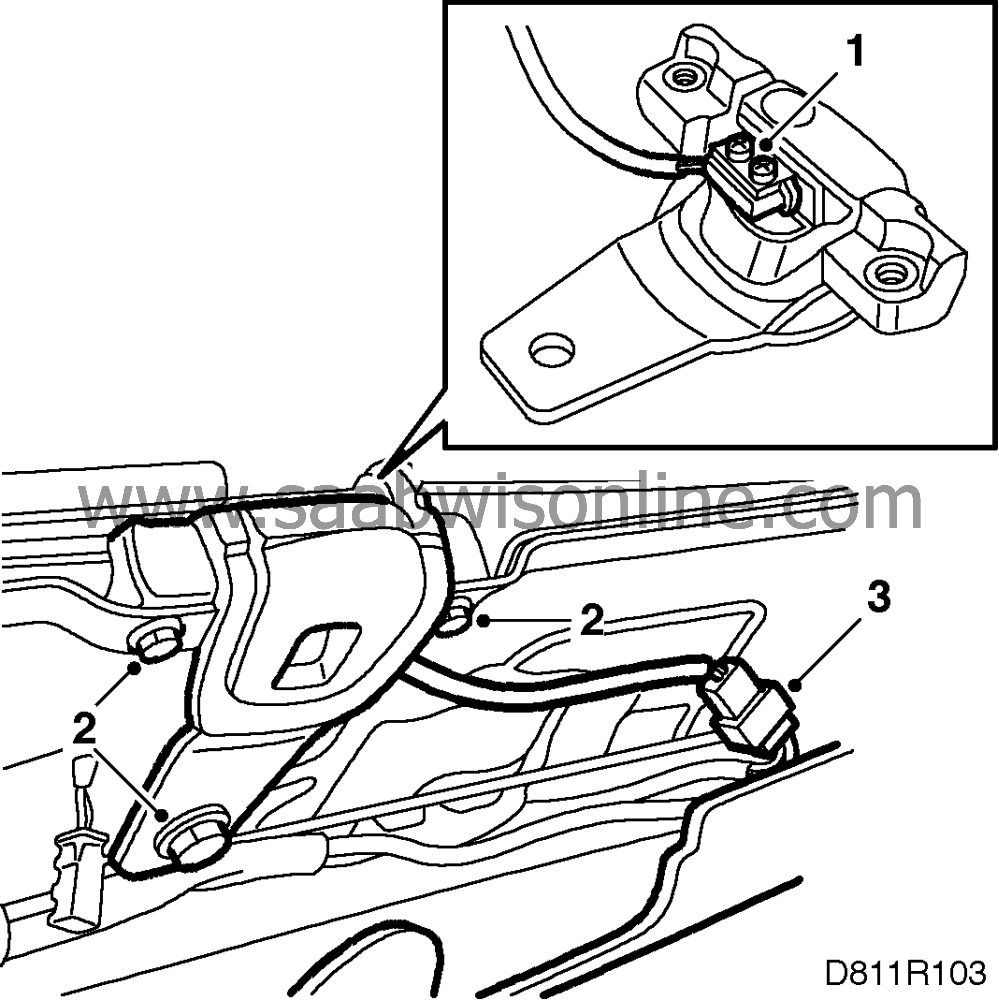
Put the microswitch in place on the latch fitting and tighten the screws.
Tightening torque: Max. 1 Nm (0.75 lbf ft) |
|
| 2. |
Put the latch fitting in place on the windscreen frame and tighten the screws.
|
|
| 3. |
Plug in the connector.
|
|
| 4. |
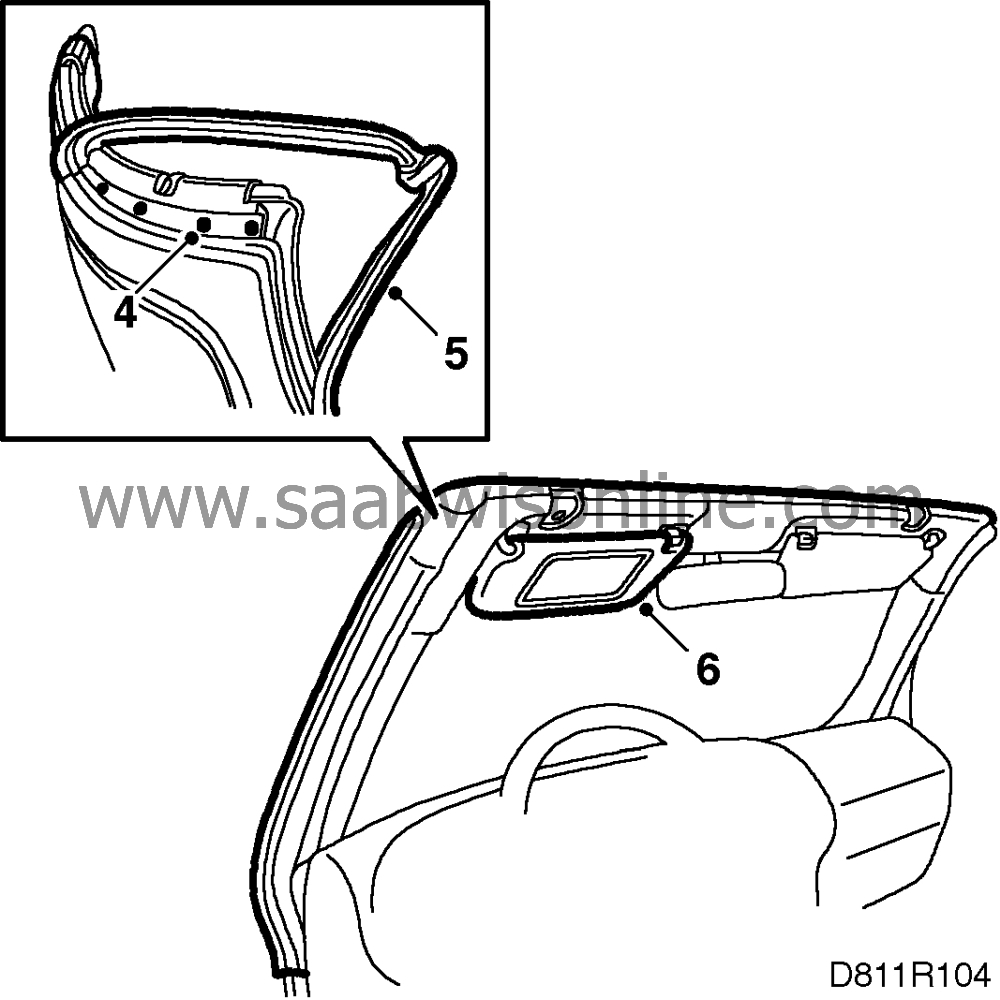
Position the upper part of the windscreen frame cover with the lower part and then tighten the screws securing the upper part.

|
|
| 5. |
Put back the windscreen frame seal. The corner of the seal must be glued. See

Use only soap solution to aid fitting the seal. |
|
| 6. |
Put back the sun visor and sun visor support.
|
|
| 7. |
Connect the diagnostic tool and clear any diagnostic trouble codes.
|
|


