Pistons
| Pistons |
| 1. |
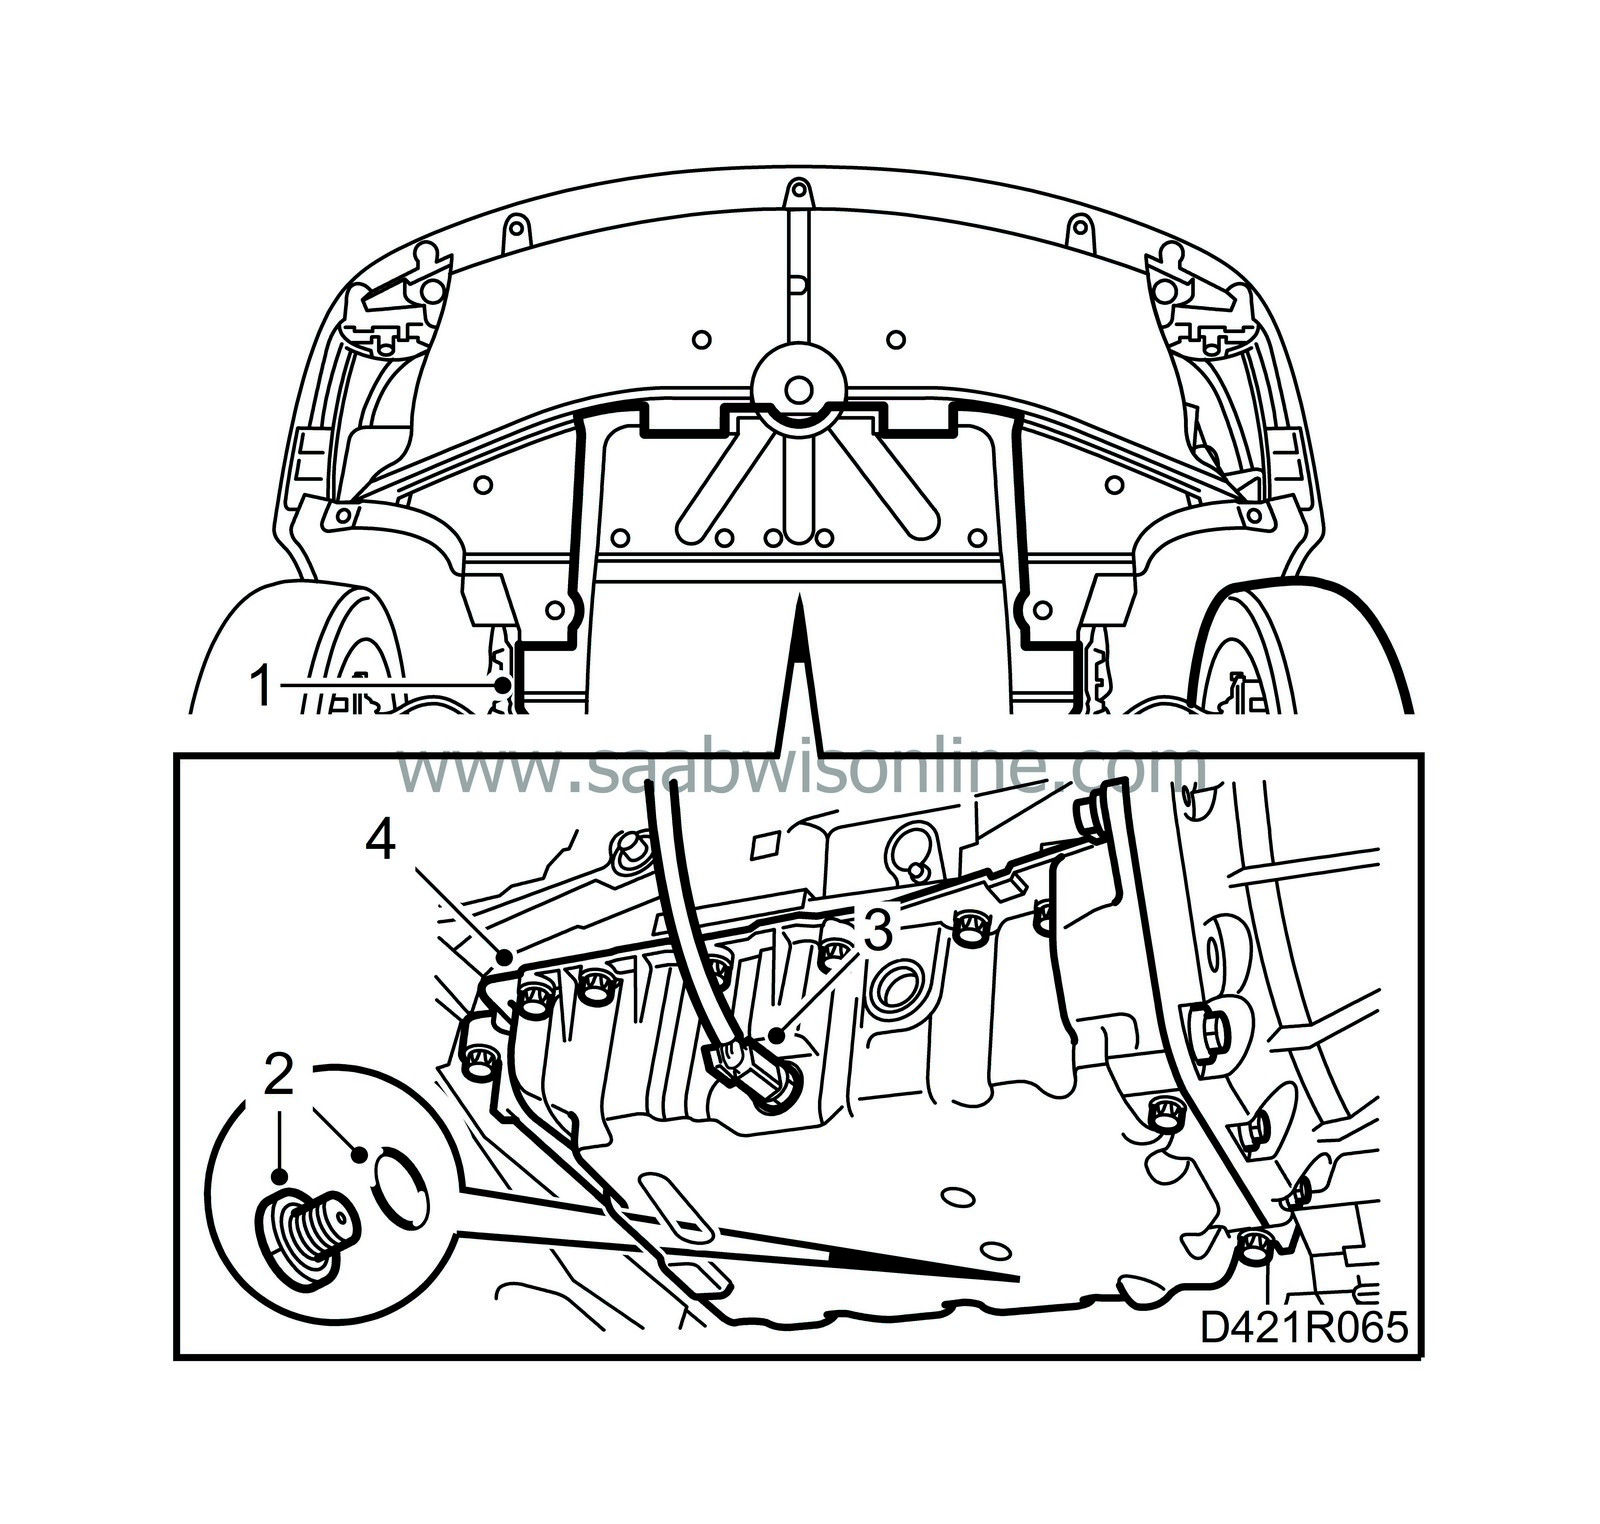
Remove the lower engine cover.
|
|
| 2. |
Place a receptacle under the engine and drain the engine oil.
|
|
| 3. |
Disconnect the engine oil temperature sensor.
|
|
| 4. |
Dismantle the oil sump. Clean away dropping oil.
|
||||||||||
| 5. |
Remove the cylinder head, see
 .
.
|
|
| 6. |
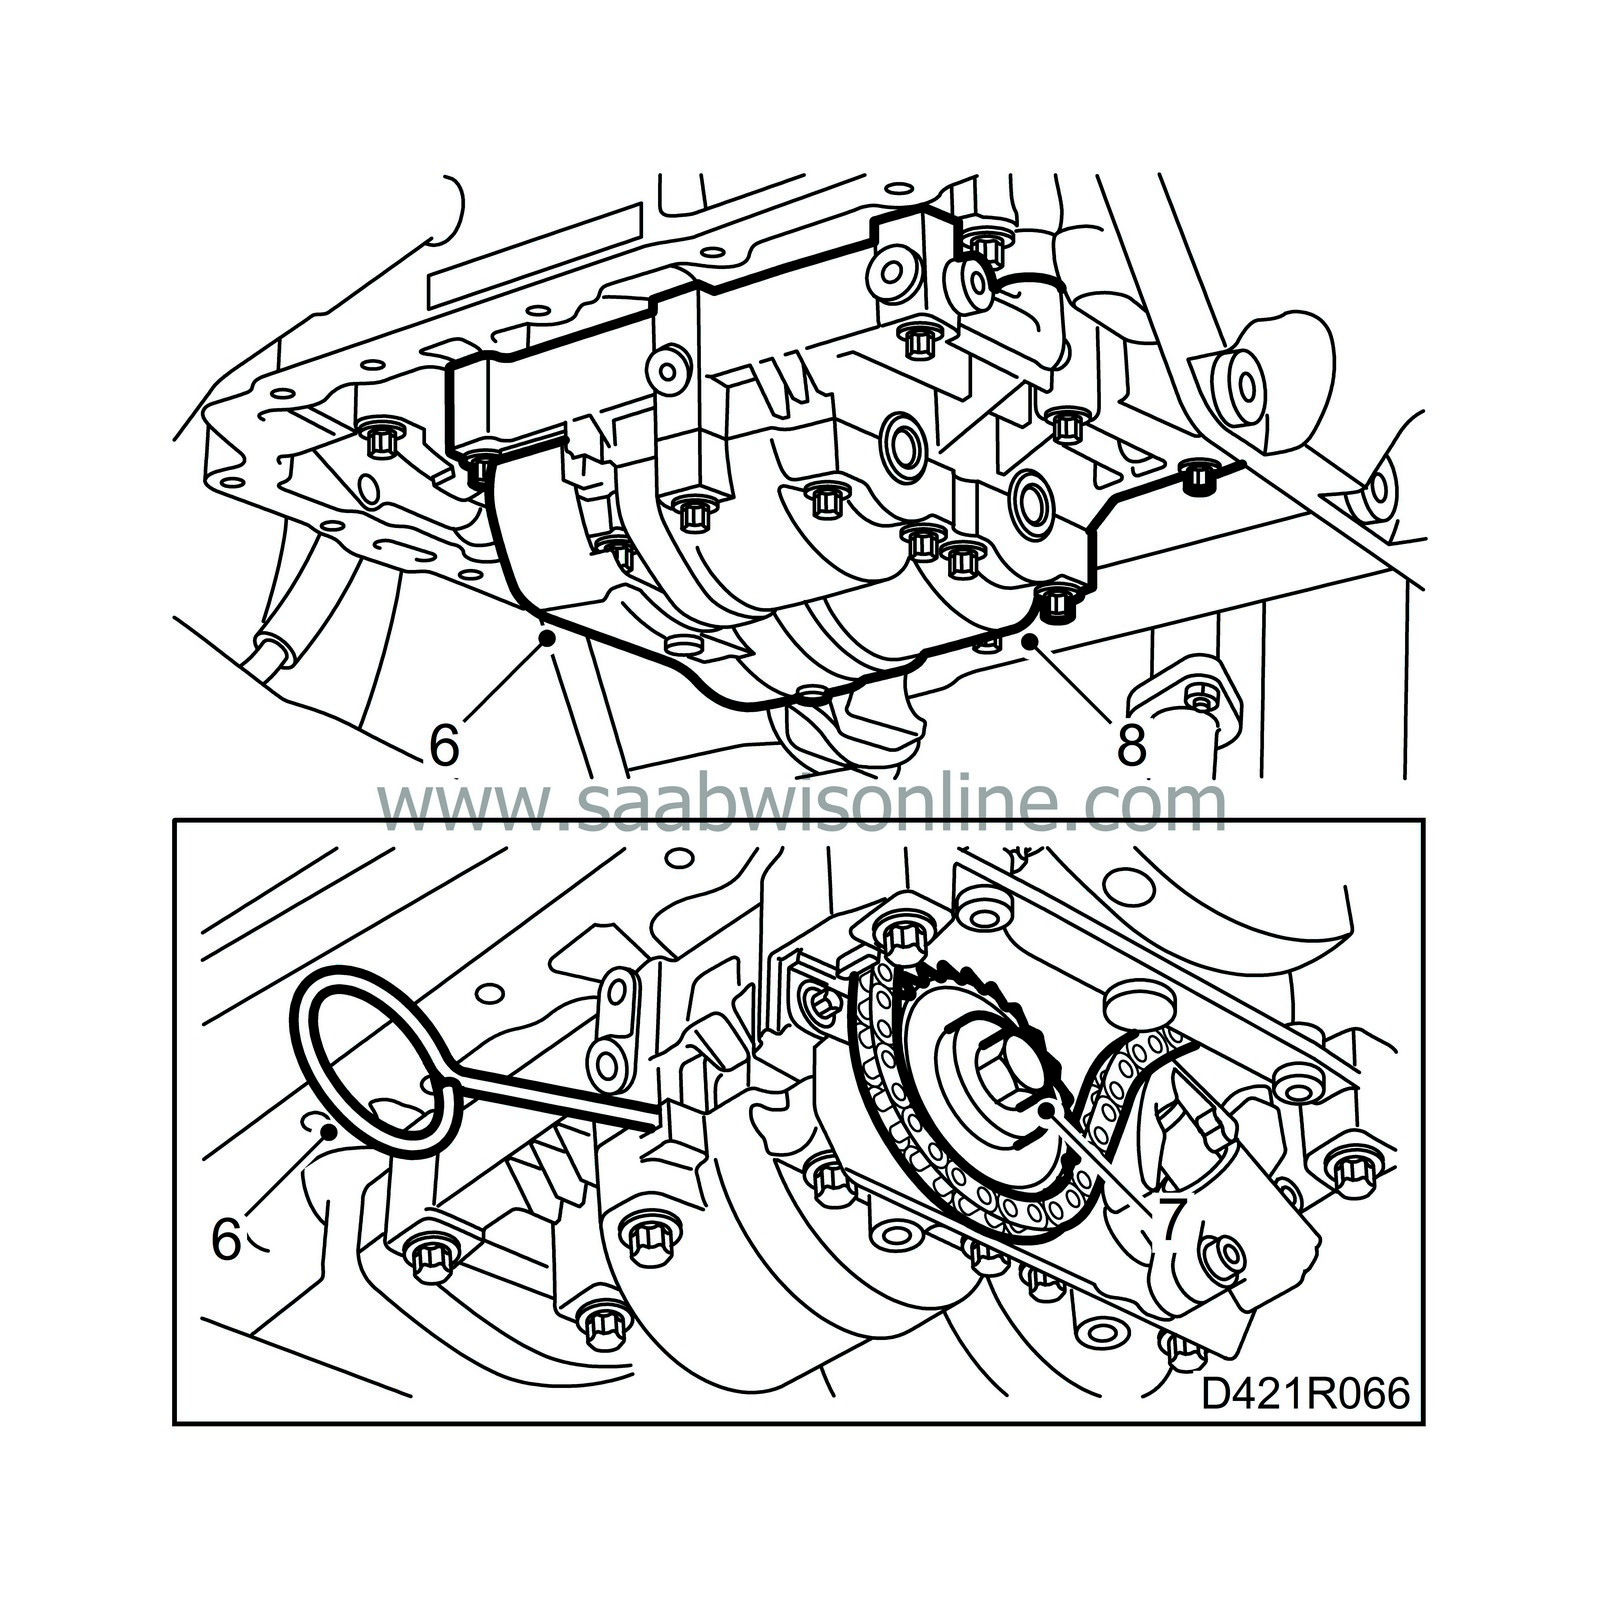
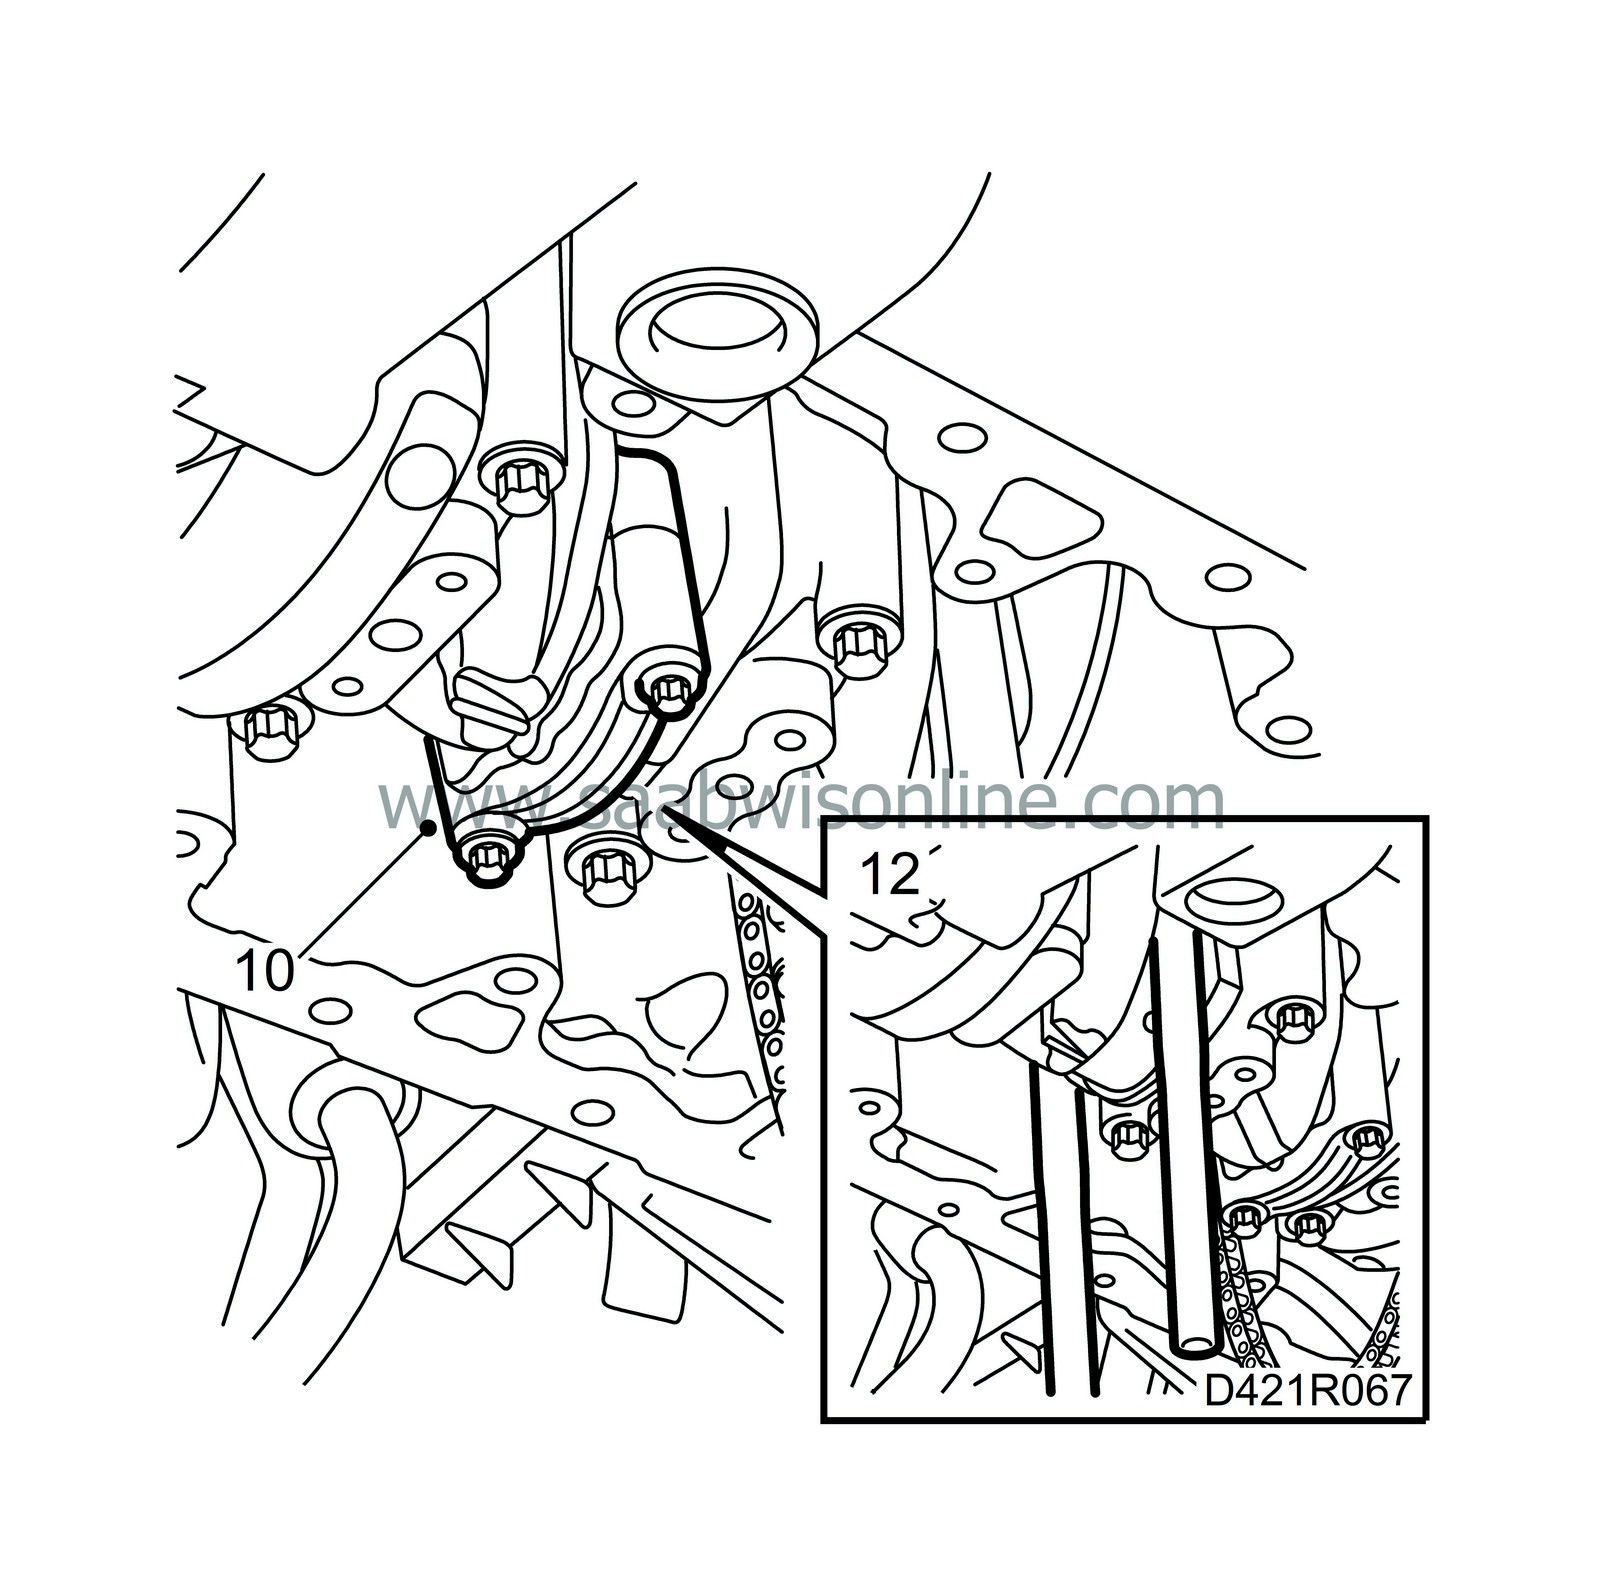
Lock the balancer shafts with tool 83 95 469 and remove the cover over the balancer shaft chain transmission.
|
|
| 7. |
Push back and lock the balancer shaft chain tensioner and remove the sprocket from the balancer shaft.
|
|
| 8. |
Undo the 7 outer bolts and dismantle the balancer shafts as one unit.
|
|
| 9. |
Mark the big-end bearing caps to facilitate refitting.
|
||||||||||
| 11. |
Remove any burrs or carbon deposits from the tops of the cylinders.
|
|
| 12. |
Screw the bolts into the connecting rods and fit protective sleeve 75 19 531 onto the studs. Slide the pistons carefully out of the cylinders. Note the marks on the pistons and connecting rods so that they can be refitted in their original locations. Fit the bearing shells and caps loosely on the connecting rods so that they do not get mixed up.
|
|
| 13. |
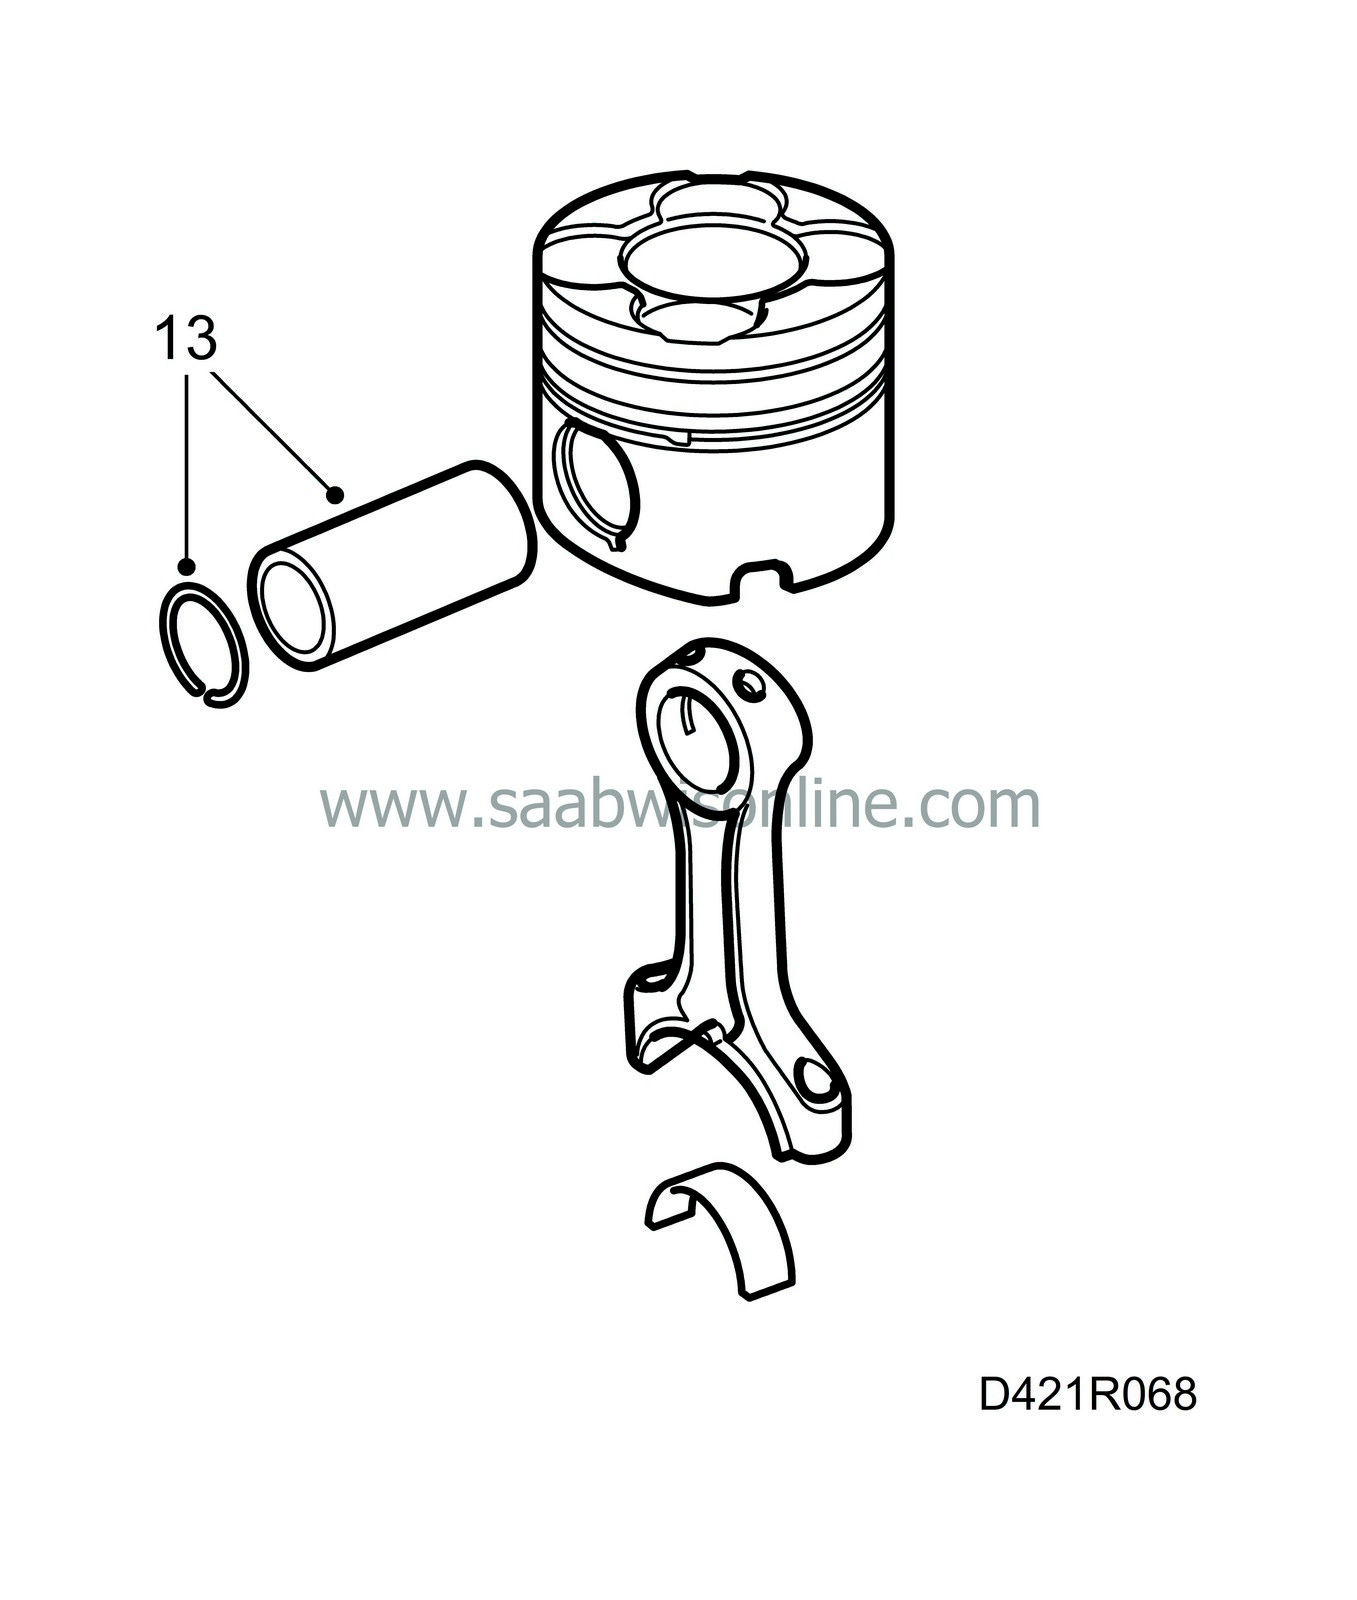
Note how the connecting rods and pistons are fitted (the heel on the connecting rod must point in the opposite direction to the one on the top of the piston). Remove the gudgeon pin circlip and press out the gudgeon pin by hand.
|
|
| To fit |
| 1. |
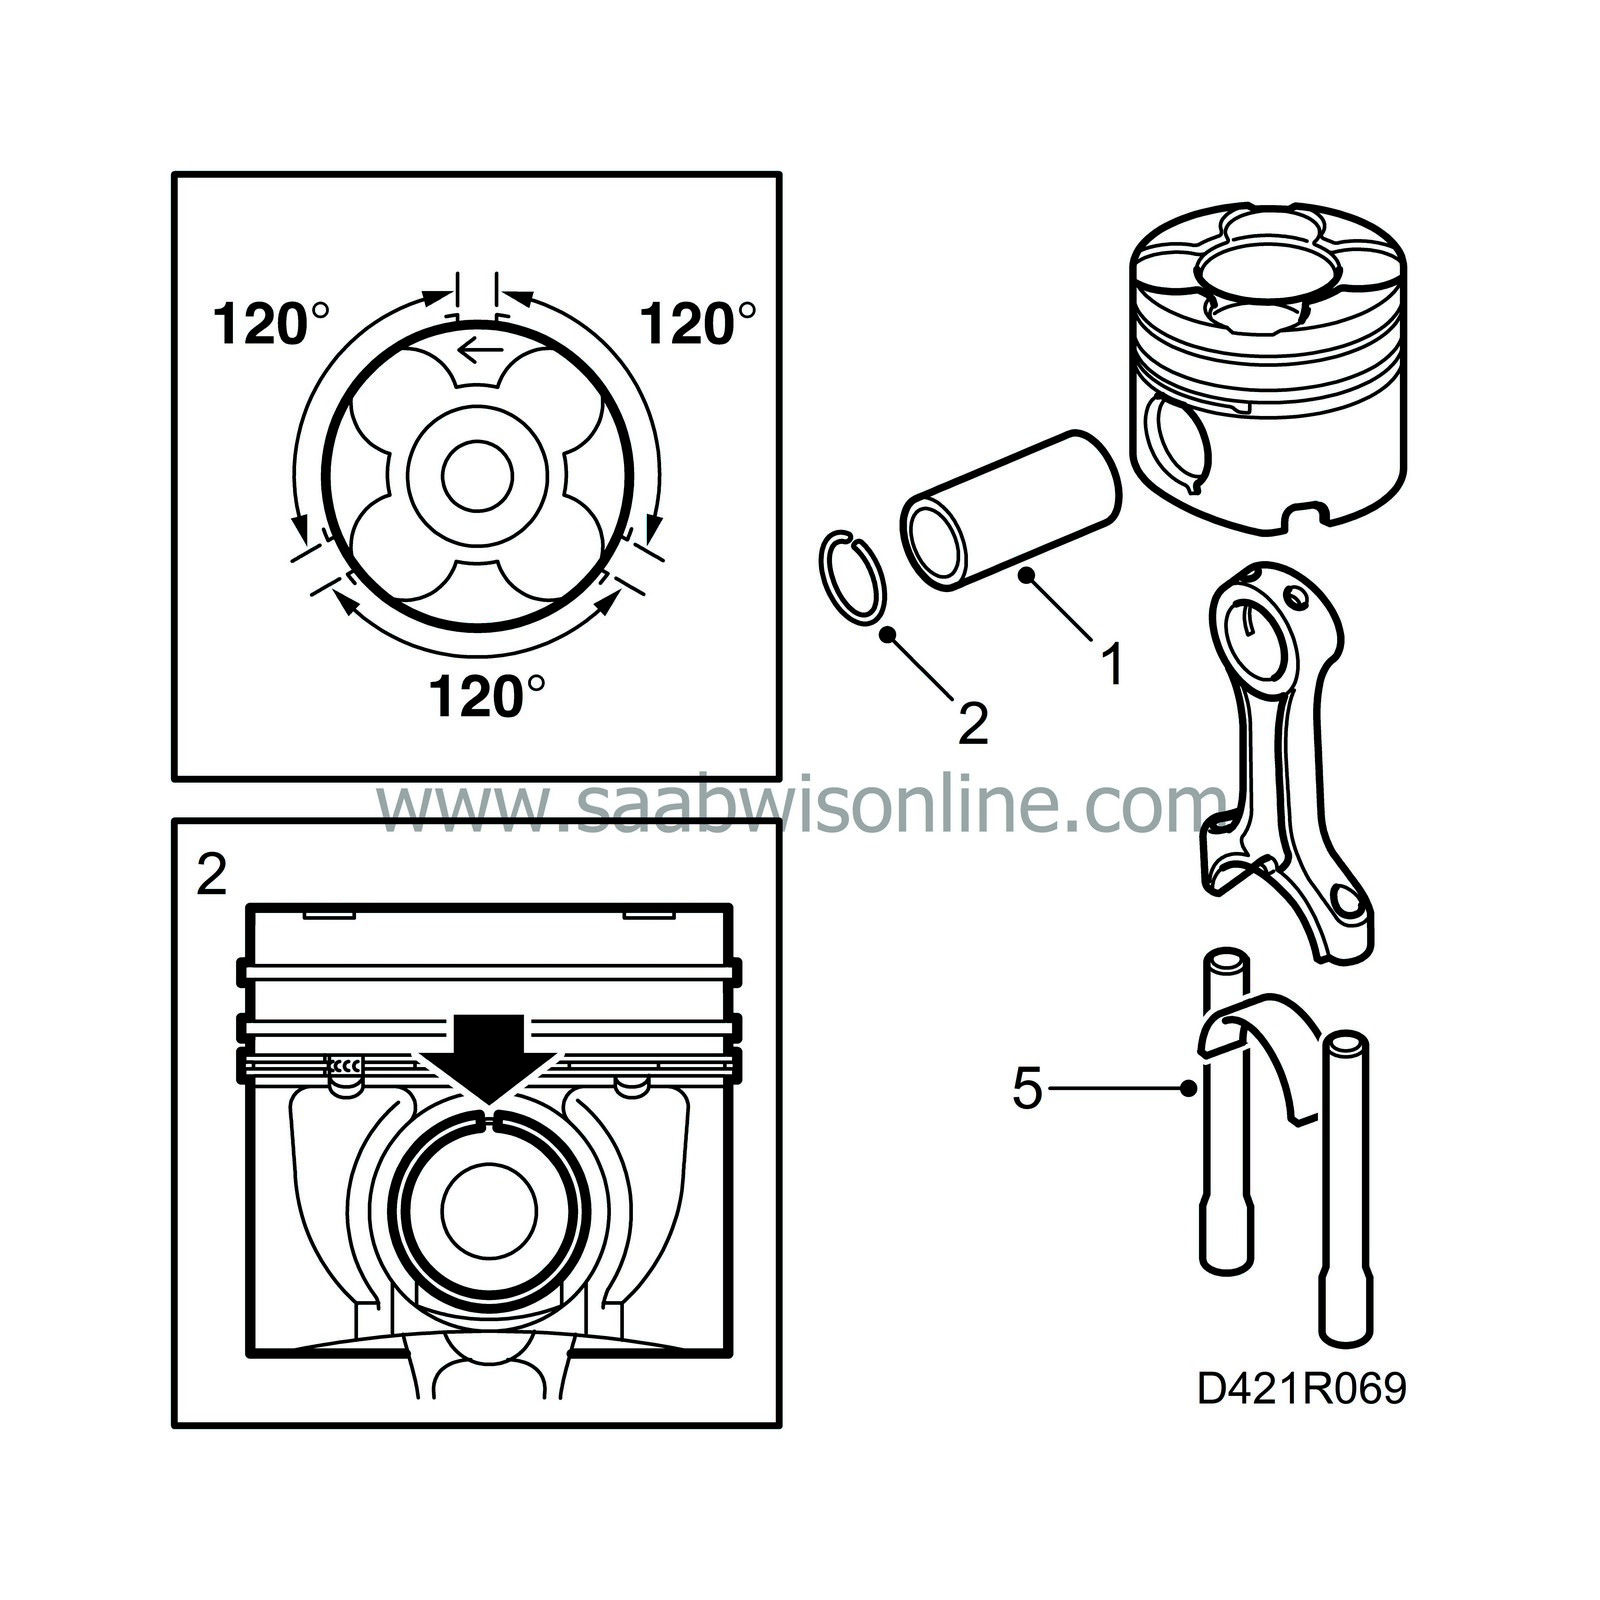
Lubricate the gudgeon pin with engine oil and press it into the piston and connecting rod by hand. Make sure the arrow on the piston and the heel on the connecting rod are pointing away from each other.
|
|
| 2. |
Fit the gudgeon pin circlip.
|
|||||||||
| 3. |
Make sure the piston ring working gaps are displaced 120°.
|
|
| 4. |
Lubricate the piston rings and the cylinders with engine oil.
|
|
| 5. |
Screw in the bolts in the connecting rods and press protective sleeve 75 19 531 onto the bolt heads to facilitate fitting.
|
|
| 6. |
Turn the crankshaft so that the relevant crank web is at its highest position.
|
|
| 7. |
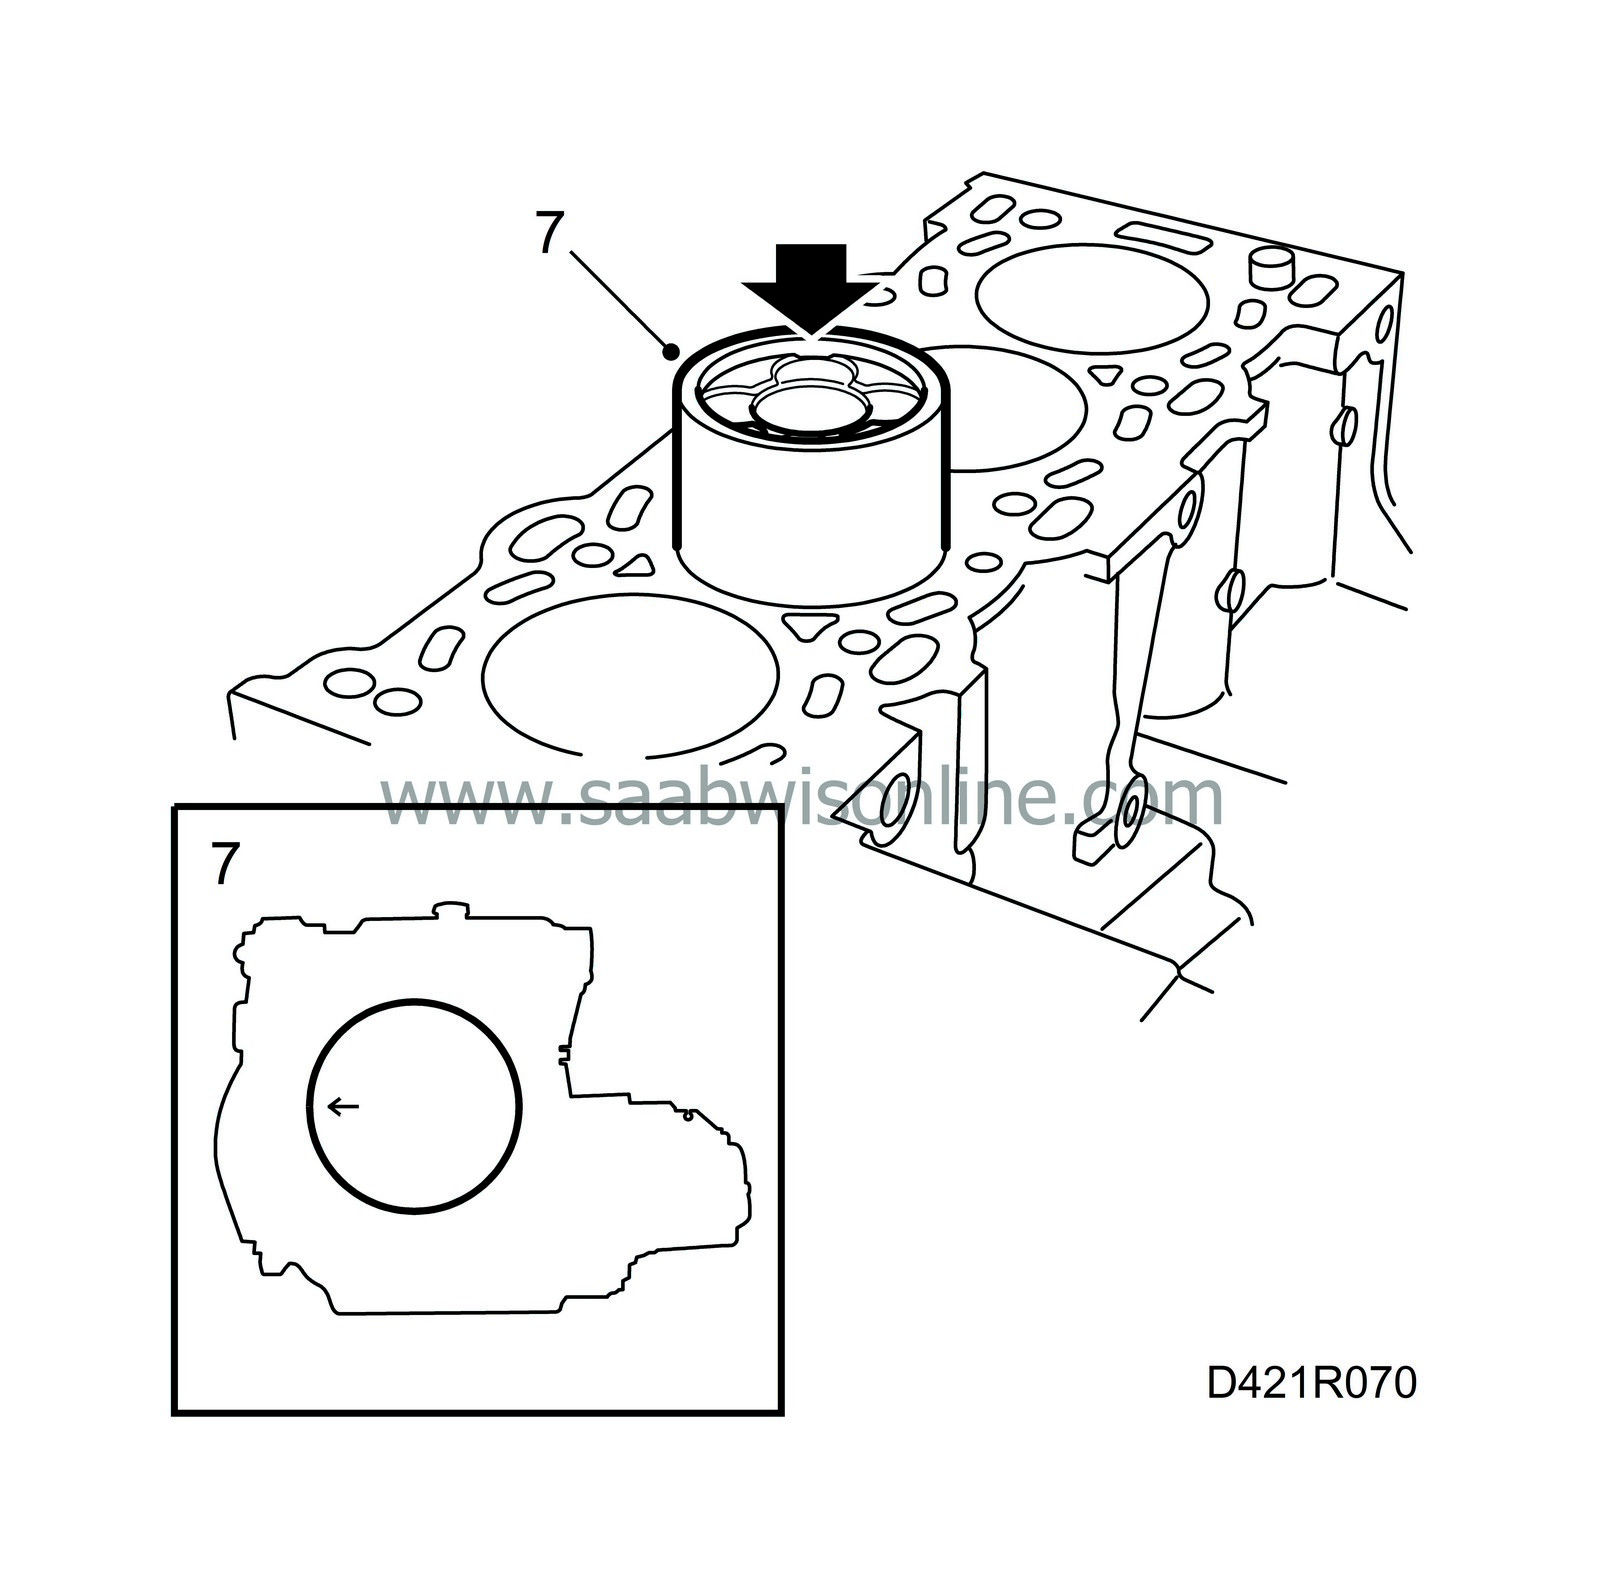
Fit the piston. The arrow on the top of the piston must be pointing towards the transmission side.
|
|
| 8. |
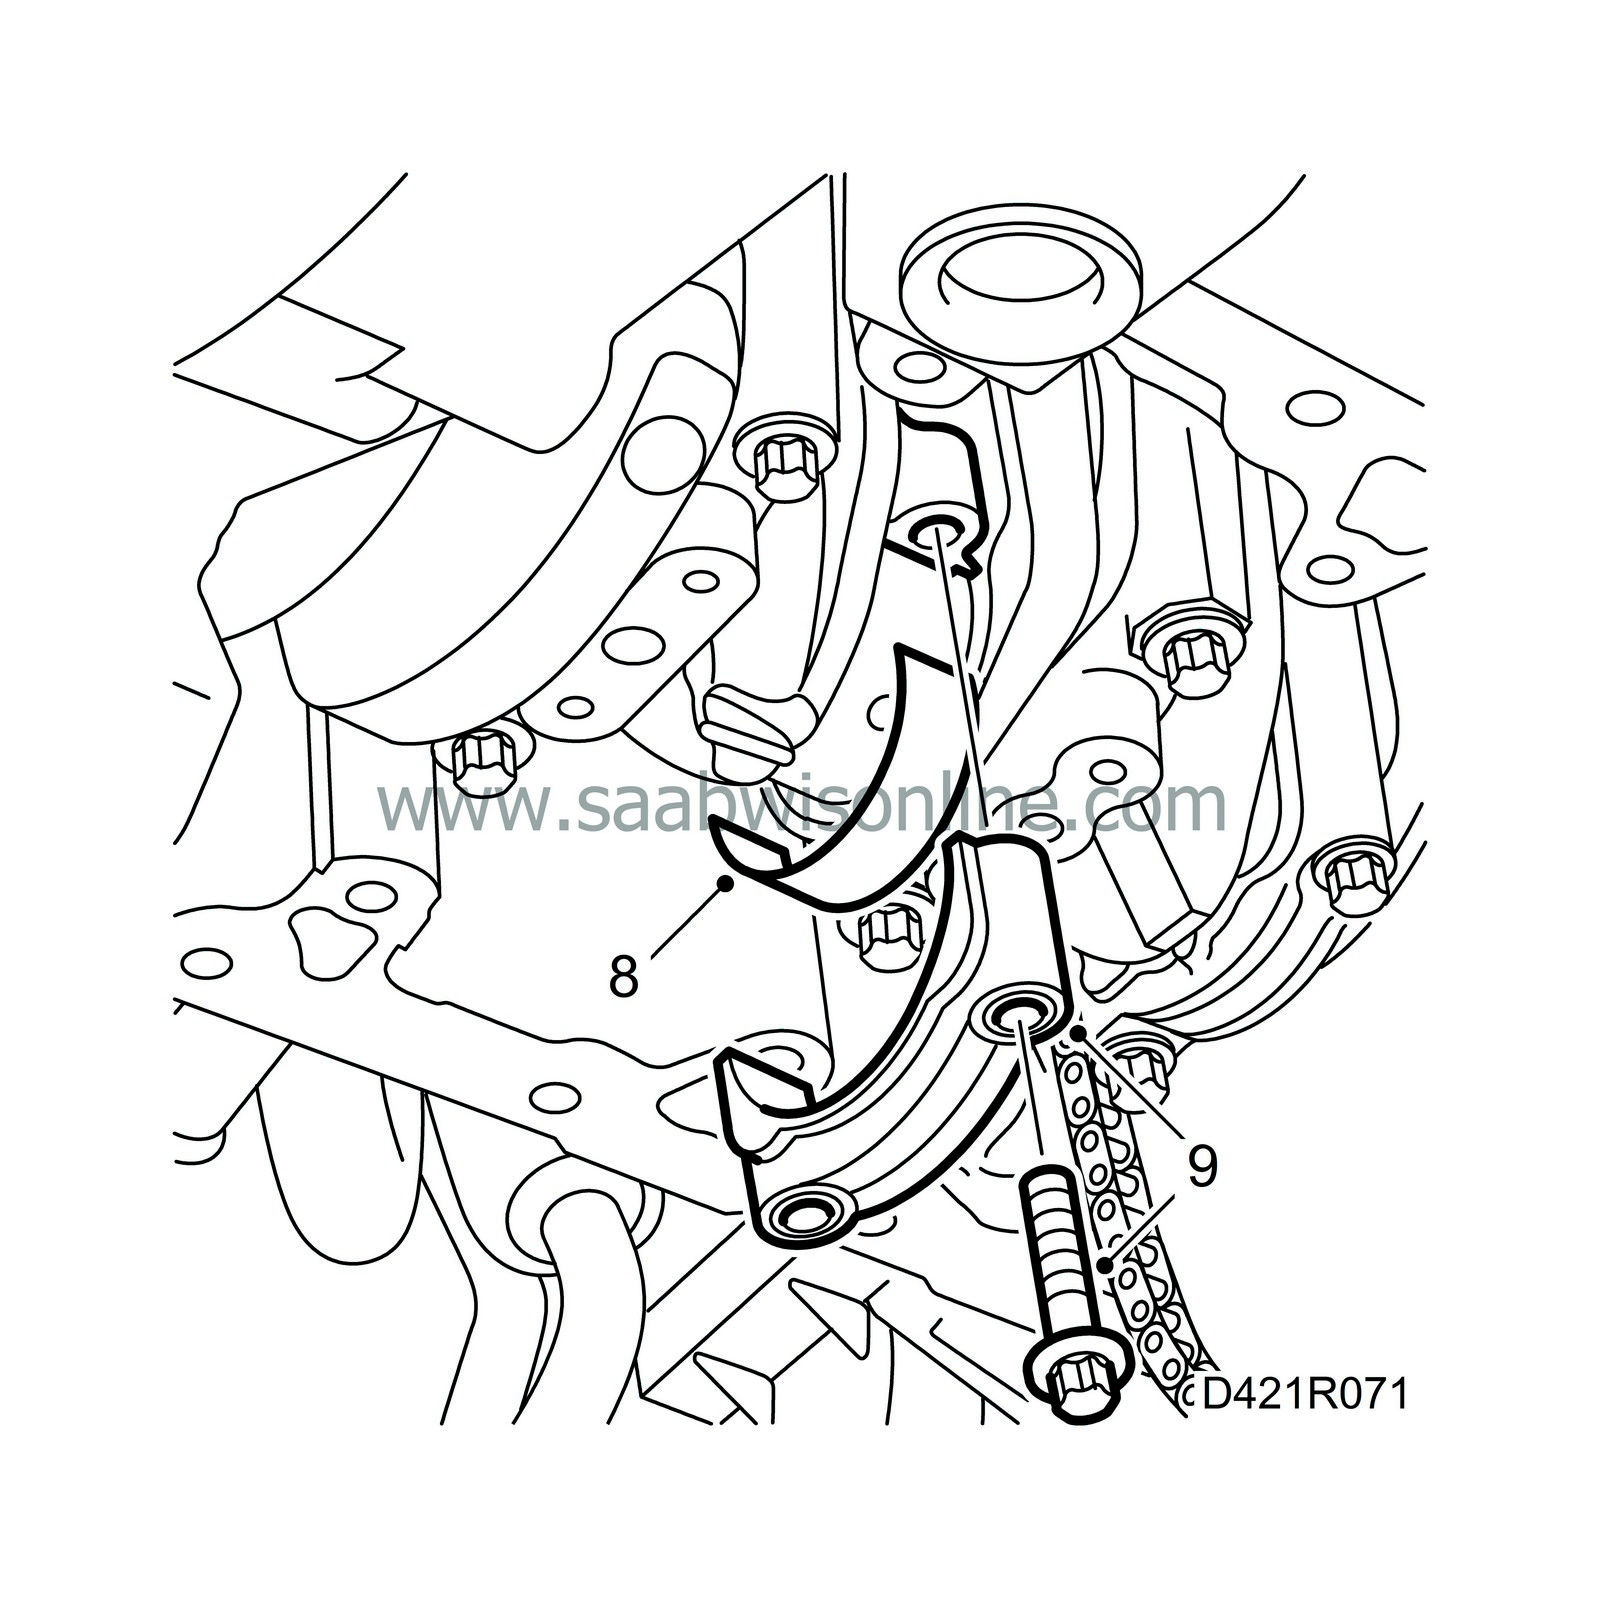
Lubricate the bearing halves with engine oil and lay them in their respective positions in the connecting rods and caps.
|
|
| 9. |
Observe the position in which the connecting rod caps are fitted (the heel on the cap pointing towards the flywheel) and fit them with new bolts.
Tightening torque: 35 Nm (26 lbf ft) + 45°. |
||||||||||
| 10. |
Fit the balancer shaft unit.
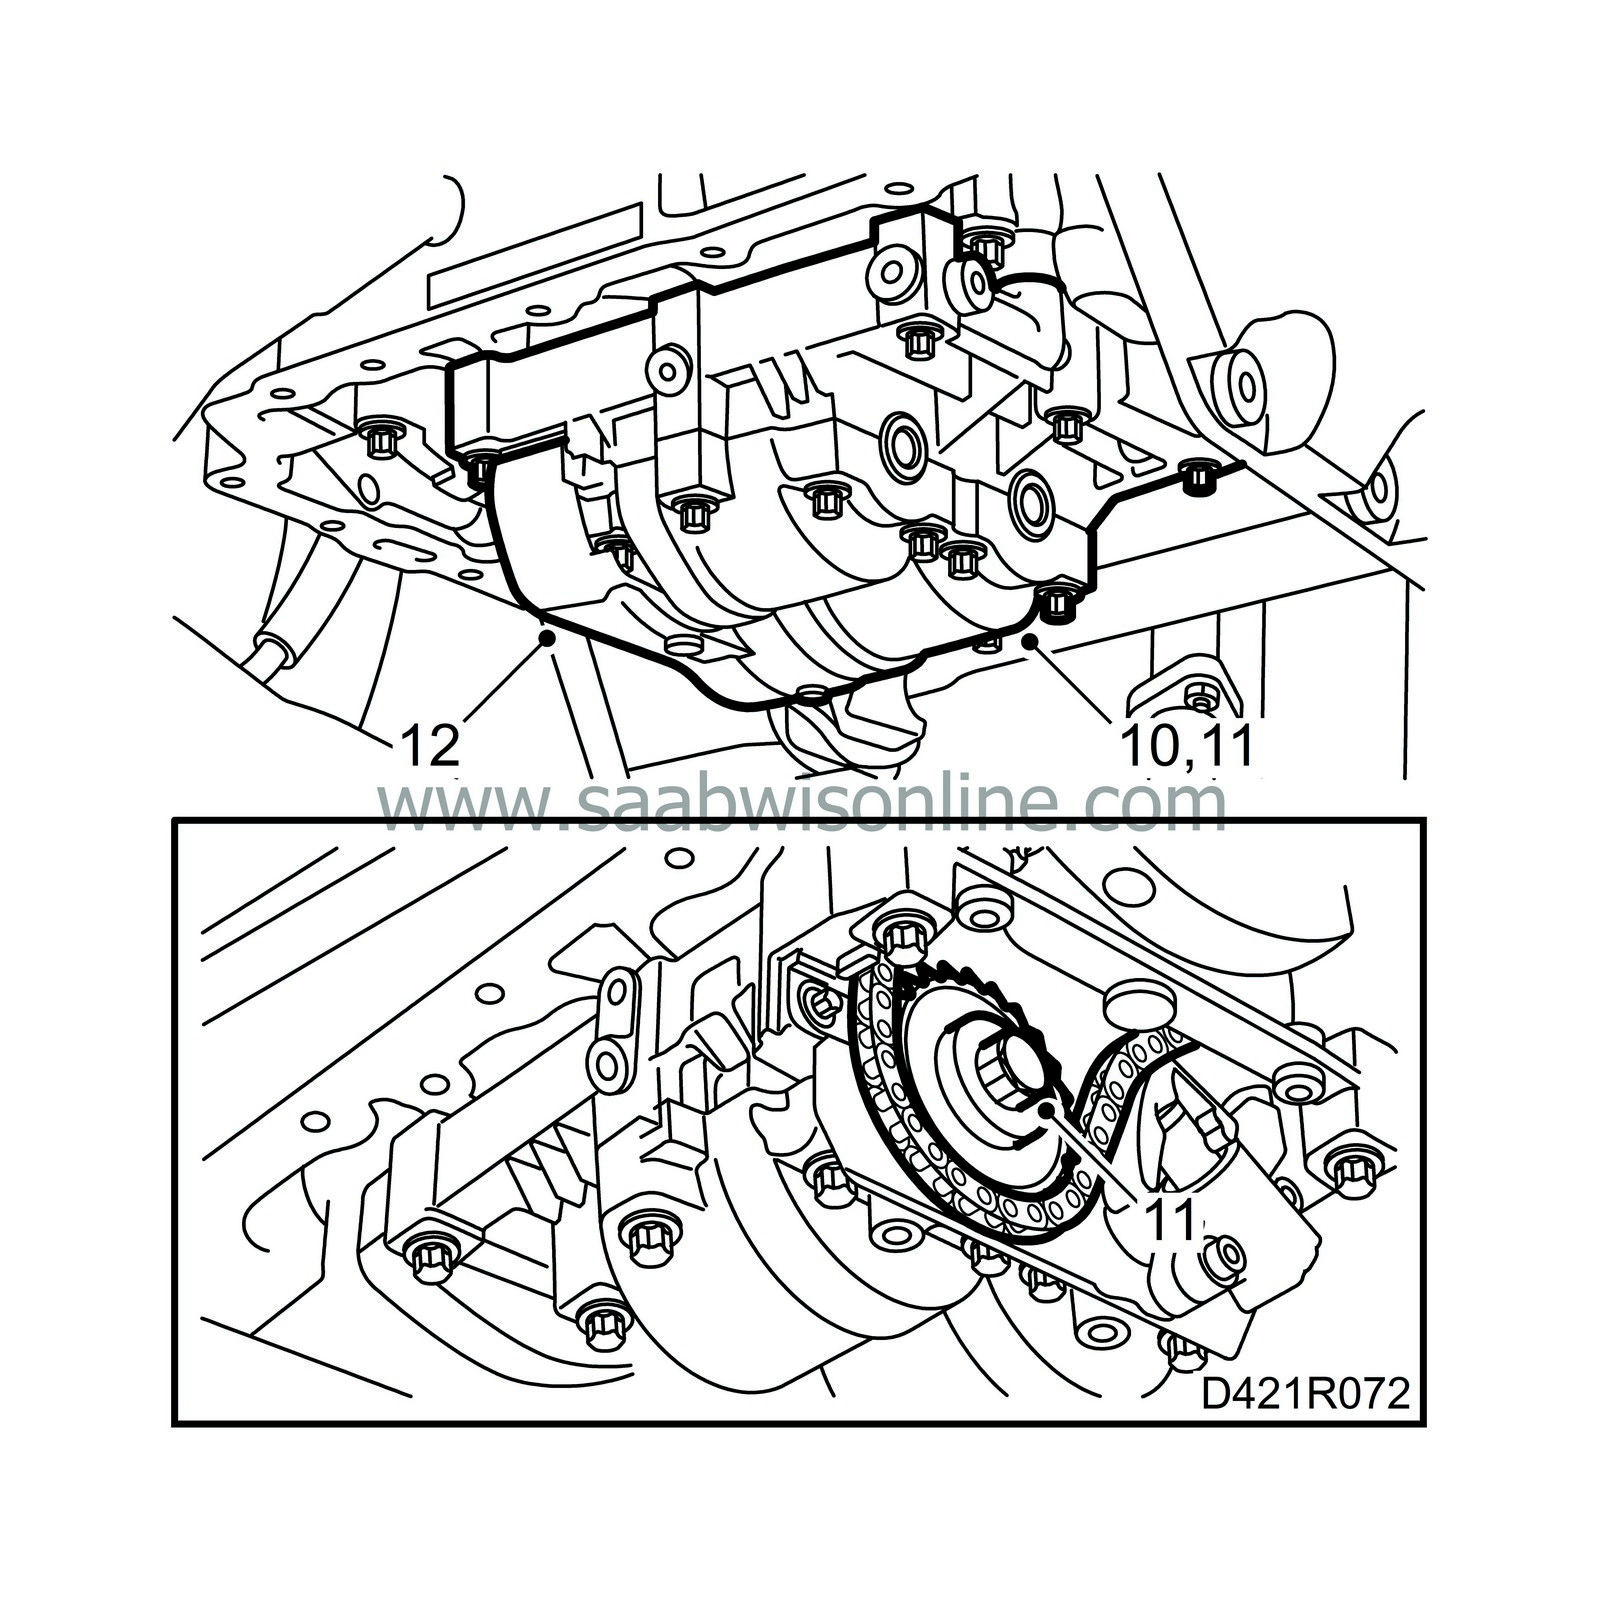
Tightening torque: 20 Nm (15 lbf ft). |
|
| 11. |
Position the sprocket on the balancer shaft and tighten the bolt.
Tightening torque: 90 Nm (66.5 lbf ft). + 30°. |
|
| 12. |
Release the chain tensioner and fit the cover.
|
|
| 13. |
Fit the cylinder head, see

|
|
| 14. |
Check that there are no impurities or other foreign matter in the sump and clean the sealing surfaces with benzene.
|
|
| 15. |
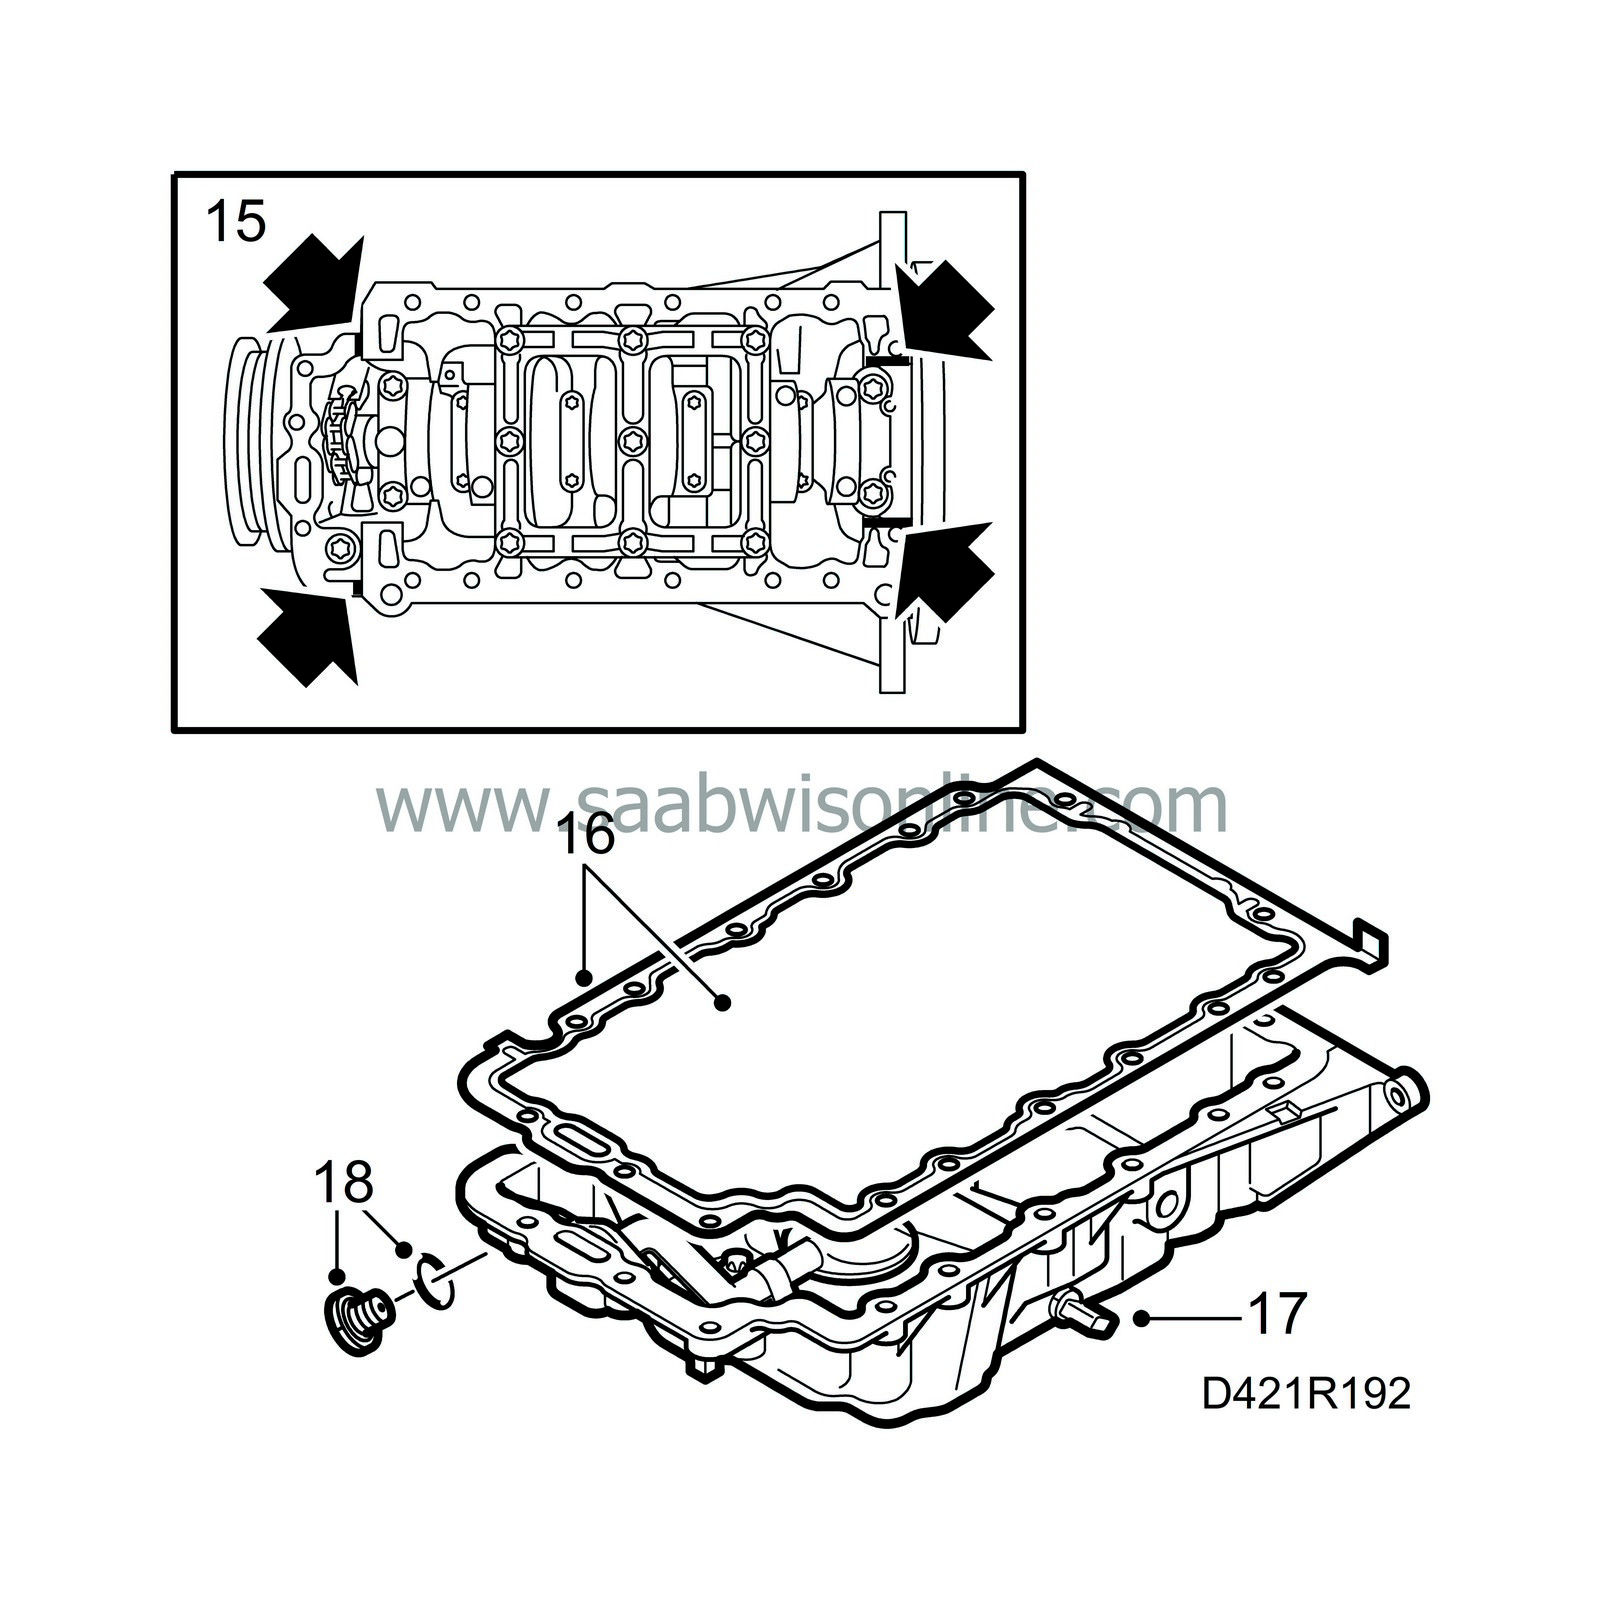
Apply sealing compound 87 81 841 to the mating surfaces, see illustration.
|
|
| 16. |
Position the oil sump on the gearbox and fit it with new gaskets.
Tightening order: 1 Tighten all bolts by hand. 2 Tighten the bolts in the cylinder block and timing cover: 20 Nm (15 lbf ft) 3 Tighten the bolts in the gearbox: - 20 Nm (15 lbf ft) (M8) - 40 Nm (30 lbf ft) (M10) |
|
| 17. |
Connect the engine oil temperature sensor.
|
|
| 18. |
Refit the oil plug with a new seal.
Tightening torque: 18 Nm (13 lbf ft). |
|
| 19. |
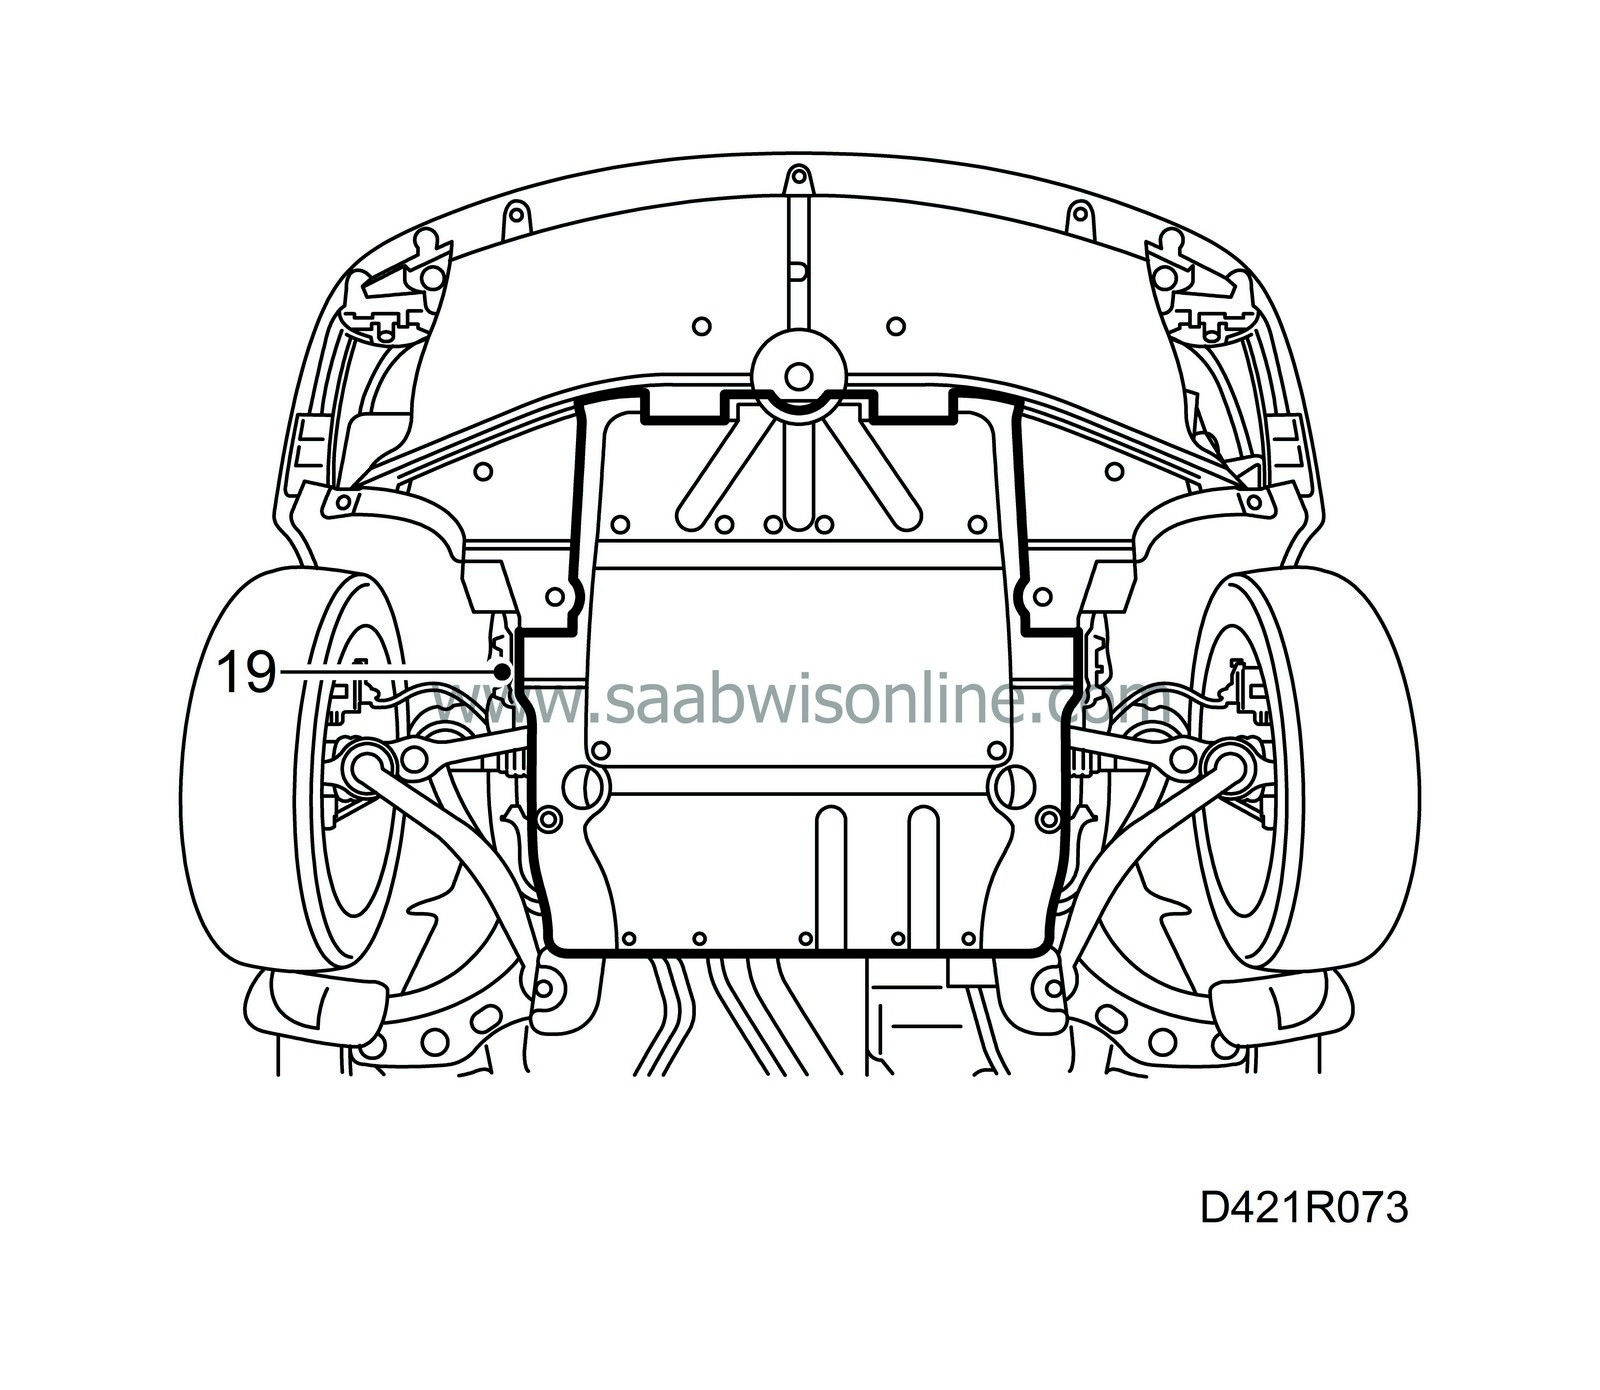
Fit the lower engine cover.
|
|
| 20. |
Fill with engine oil as specified, see
 .
.
|
|

 Warning

