Valve timing, checking
| Valve timing, checking |
| 1. |
Place the car on a lift, put covers over the wings and detach the negative cable from the battery.
|
|
| 2. |
Remove the air cleaner with mass air flow sensor and hoses from the turbocharger and camshaft cover.
|
|
| 3. |
Remove the engine cover.
|
|
| 4. |
Remove the turbo delivery pipe (2 bolts under the wiring harness).

|
|
| 5. |
Remove the wiring harness channel from the cylinder head and disconnect the fuel lines from the camshaft cover.
|
|
| 6. |
Remove the camshaft cover.
|
|
| 7. |
Detach the vacuum hose to the brake servo and the vacuum hose connected to the bottom of the vacuum pump.
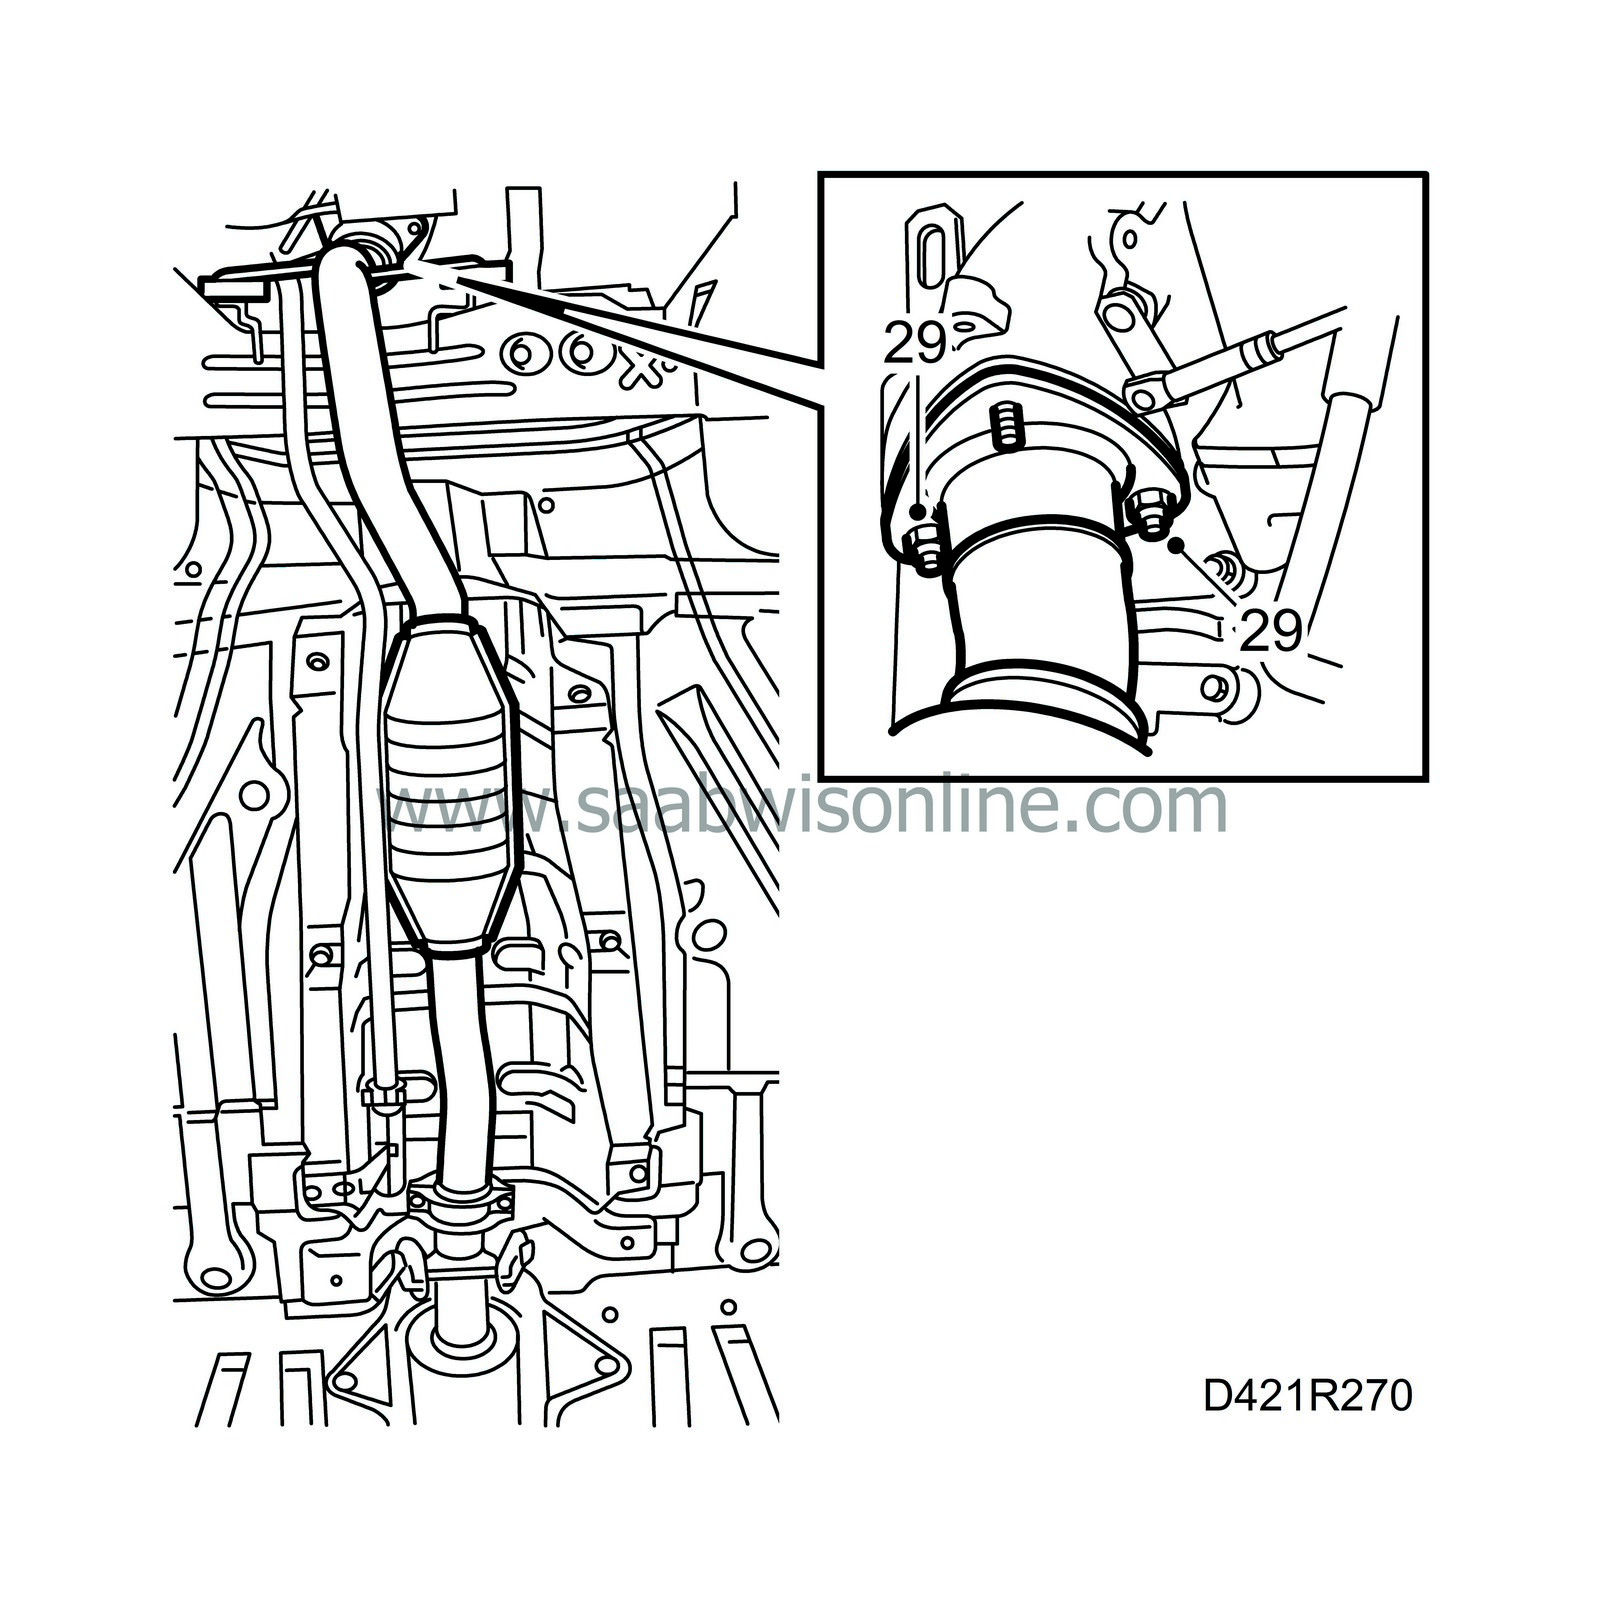
|
|
| 8. |
Undo the four vacuum pump retaining bolts and carefully lift away the vacuum pump and its adapter.
|
||||||||||
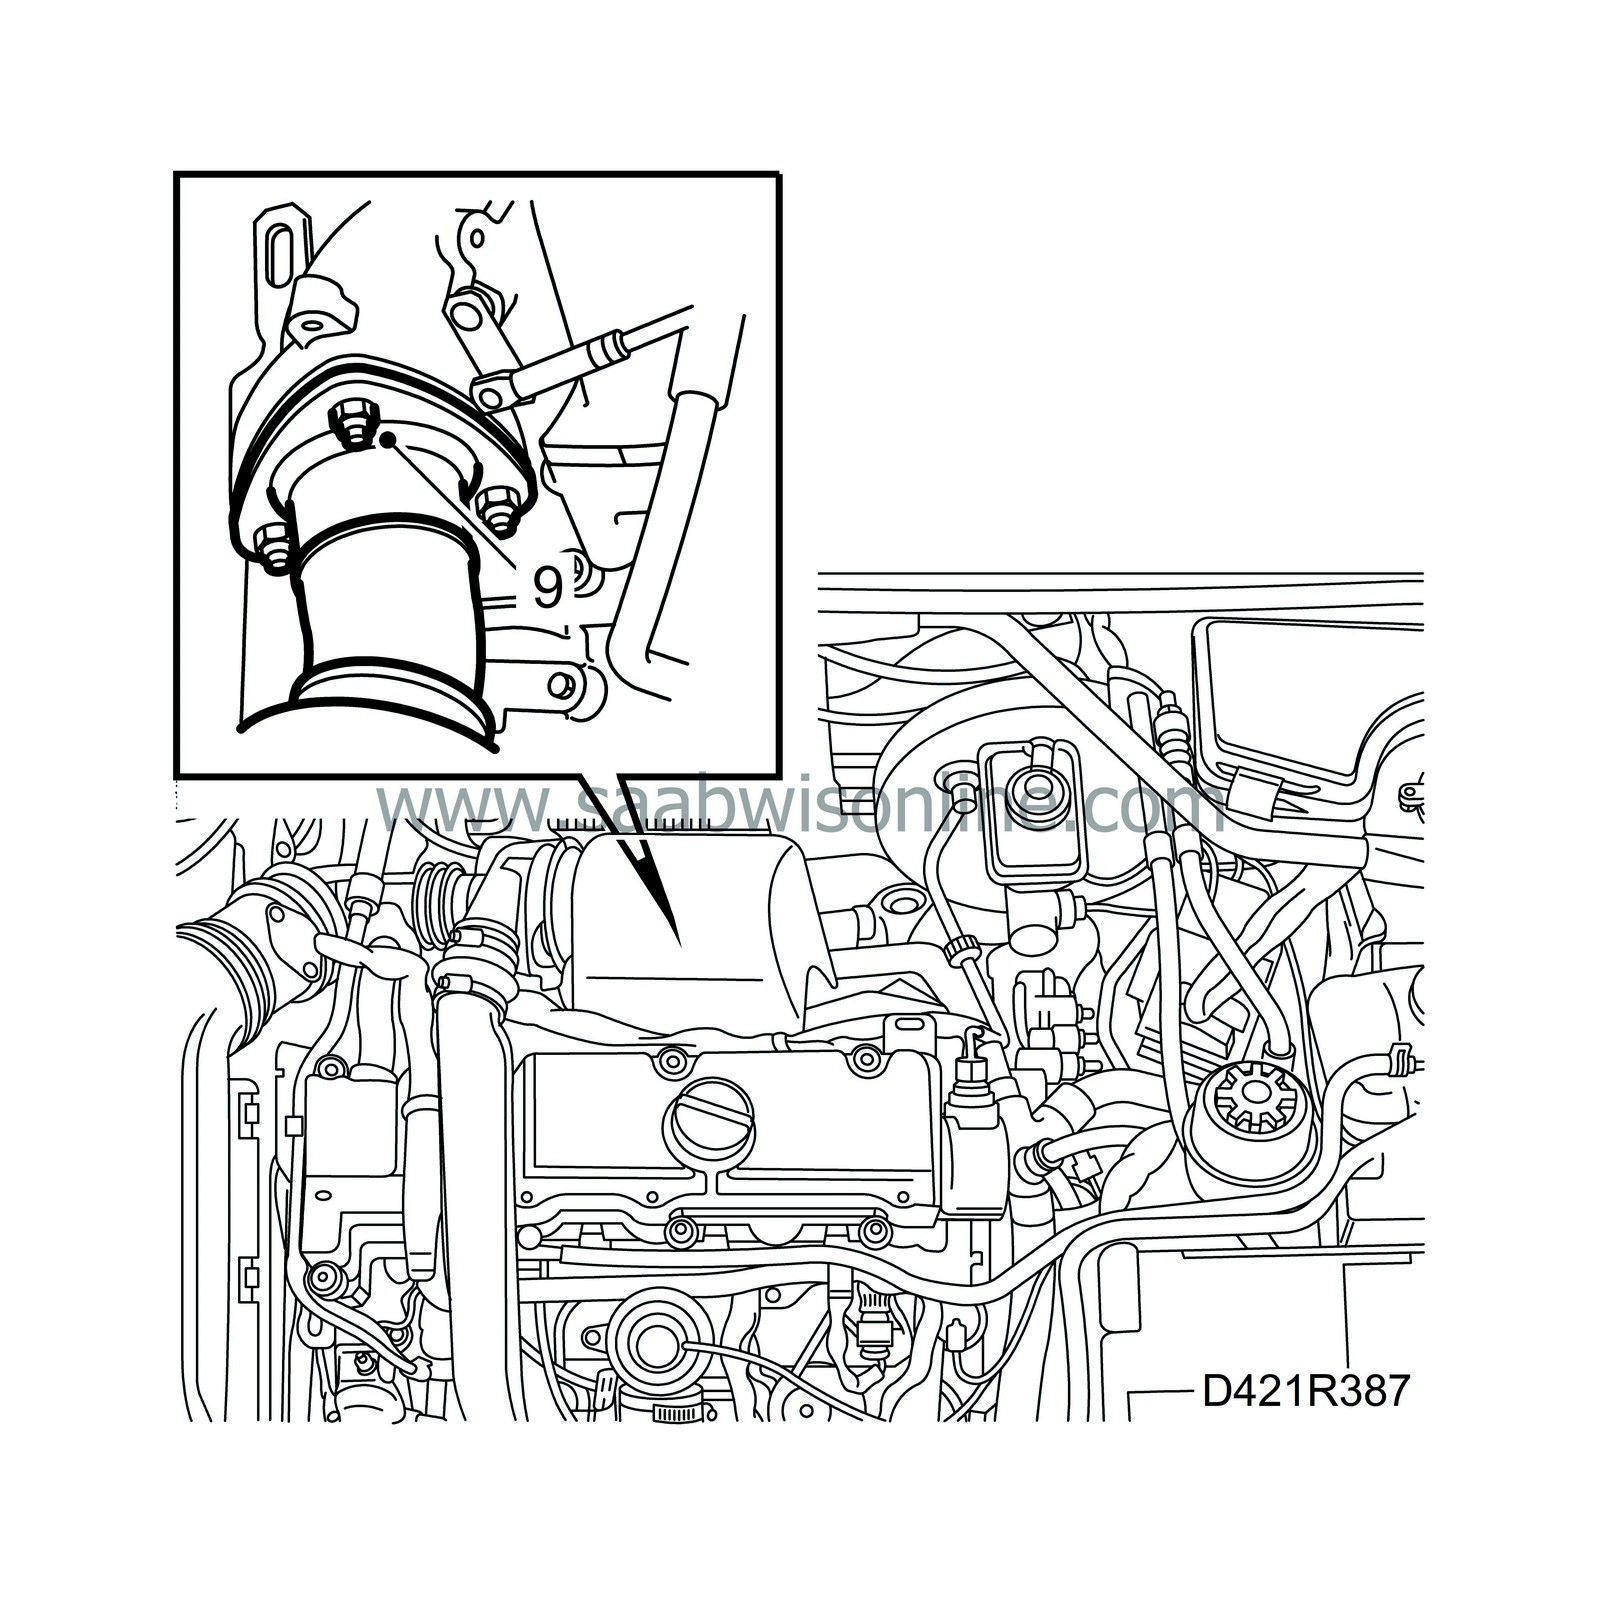
| 9. |
Remove the rear nut from the front exhaust pipe connection to the turbocharger.
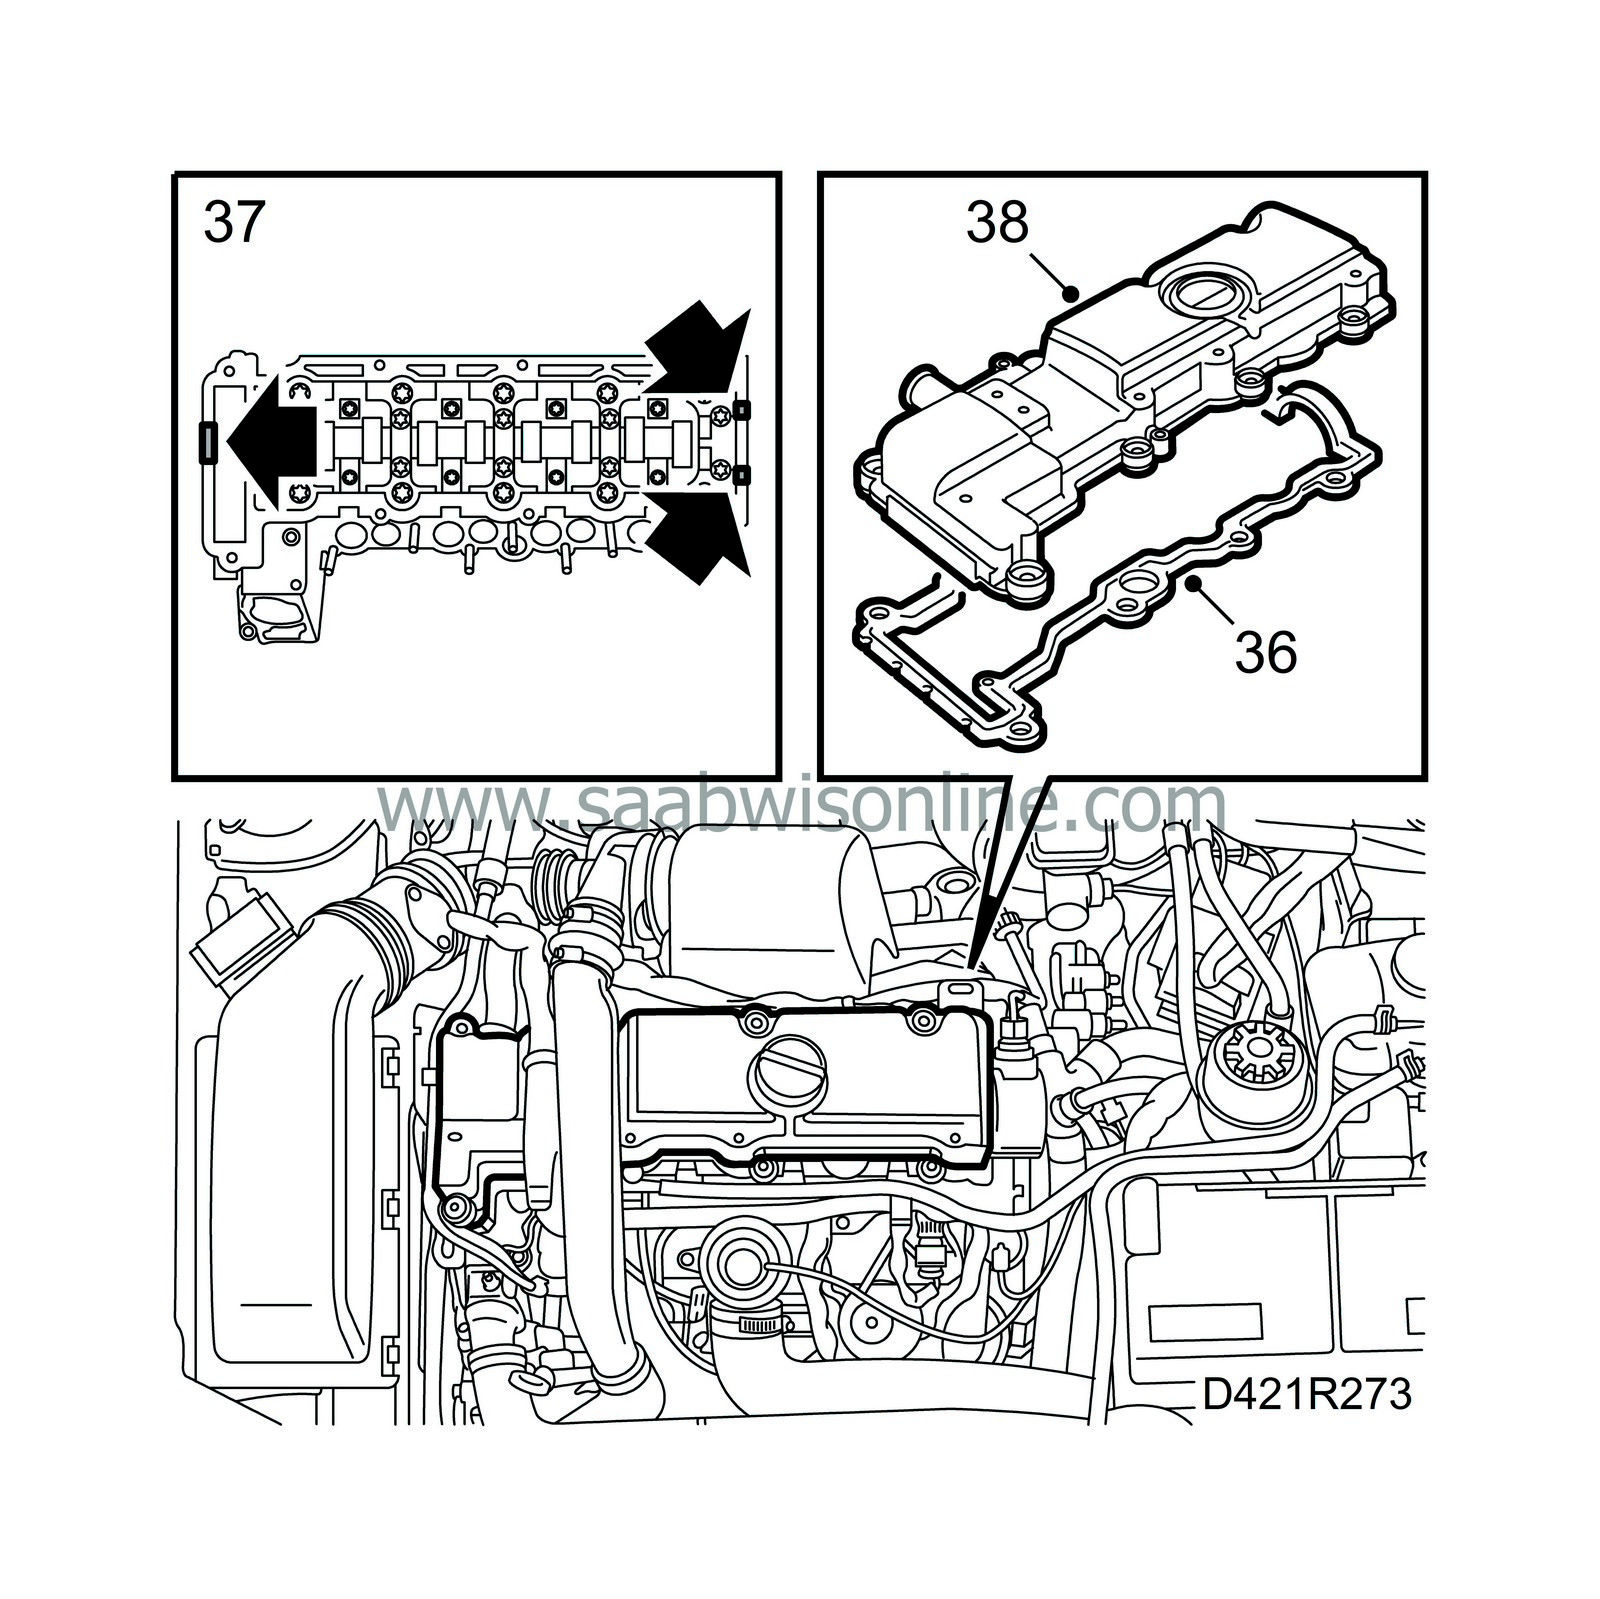
|
|
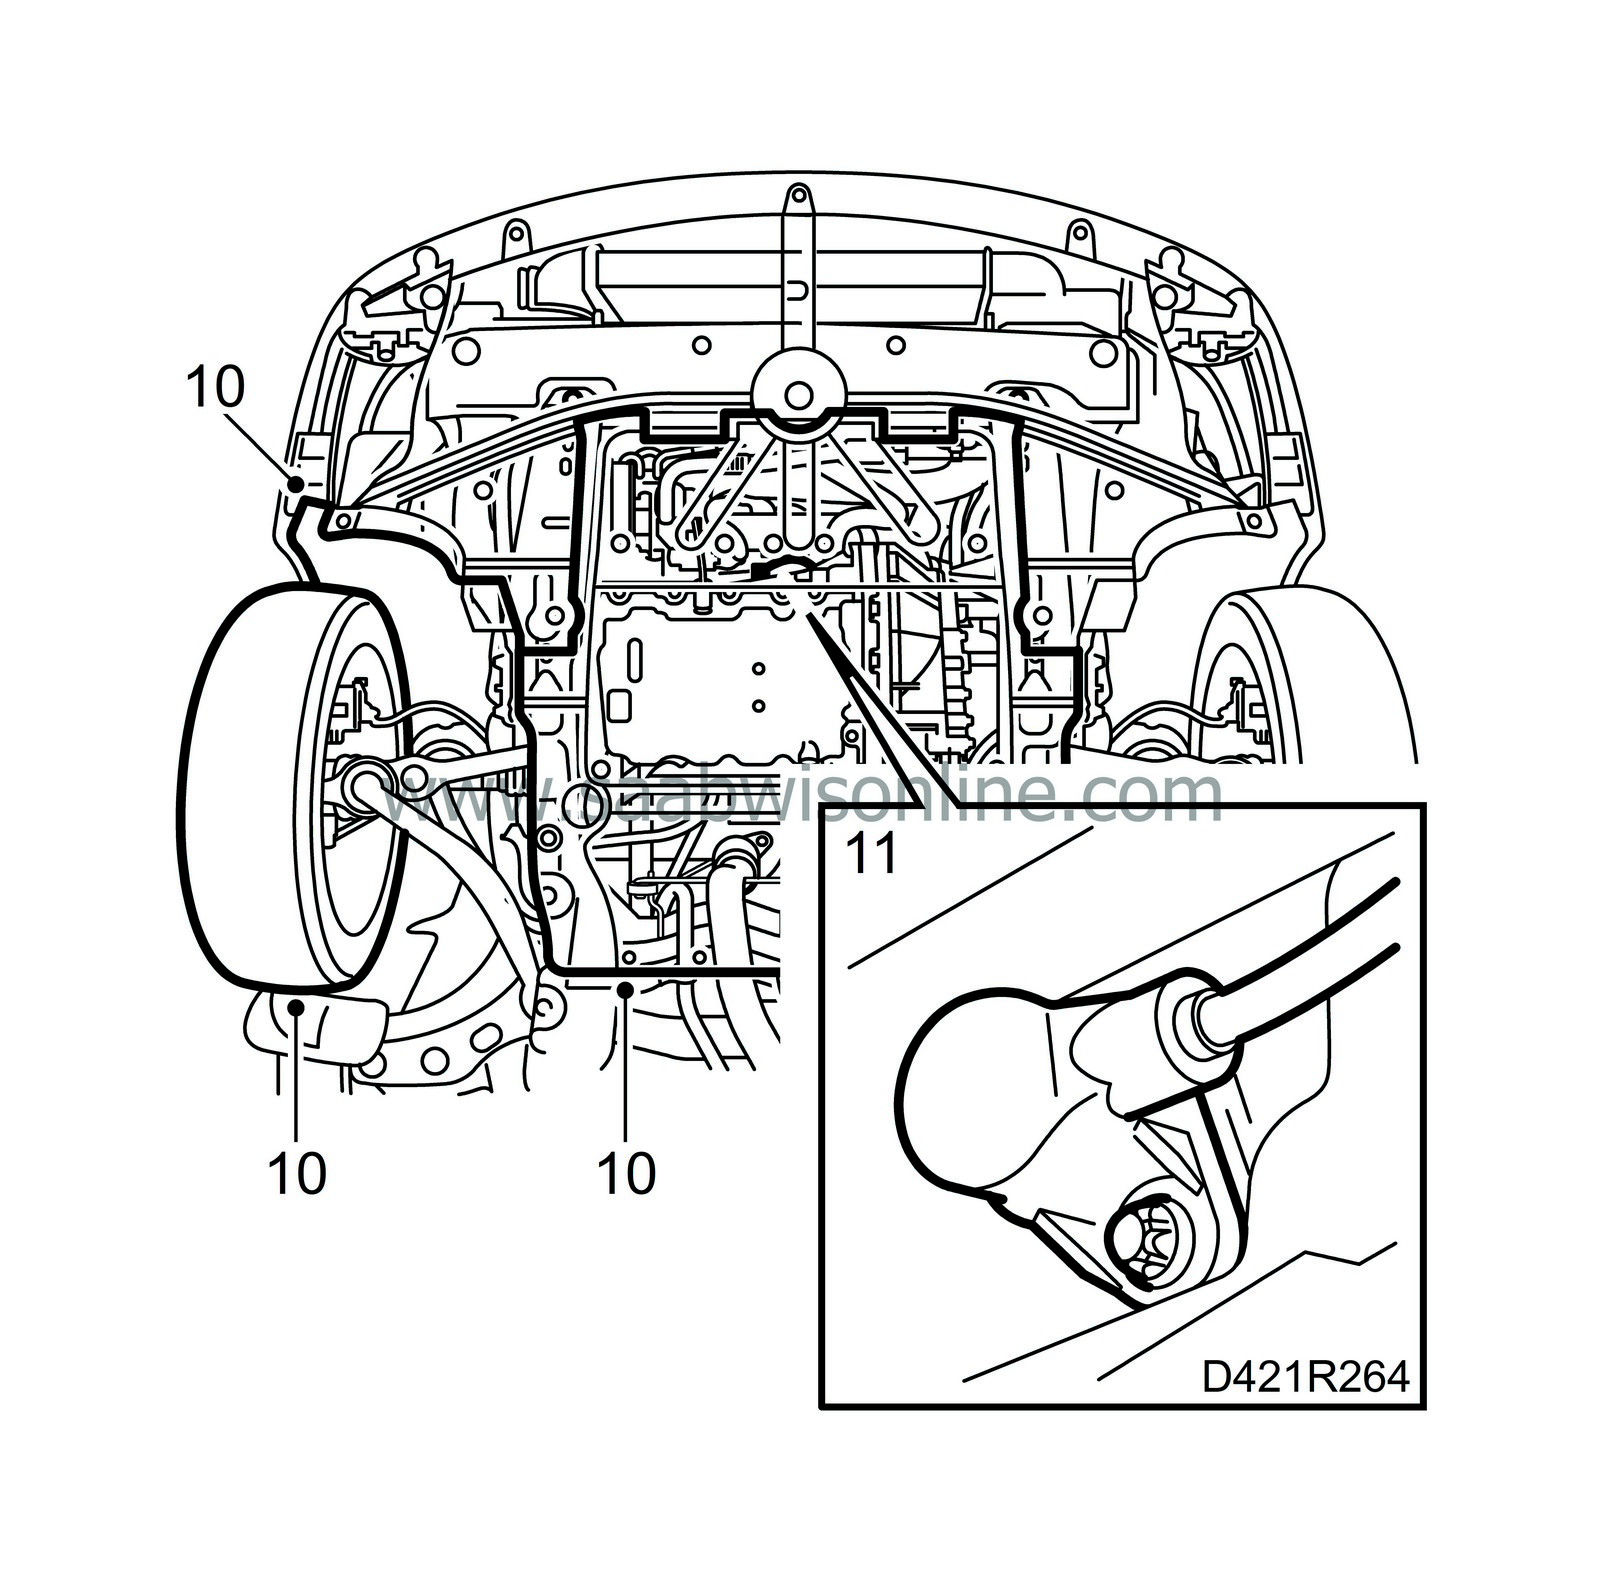
| 10. |
Raise the car, remove the lower engine cover, the cover in the right-hand wheel housing and the front right wheel.
|
|
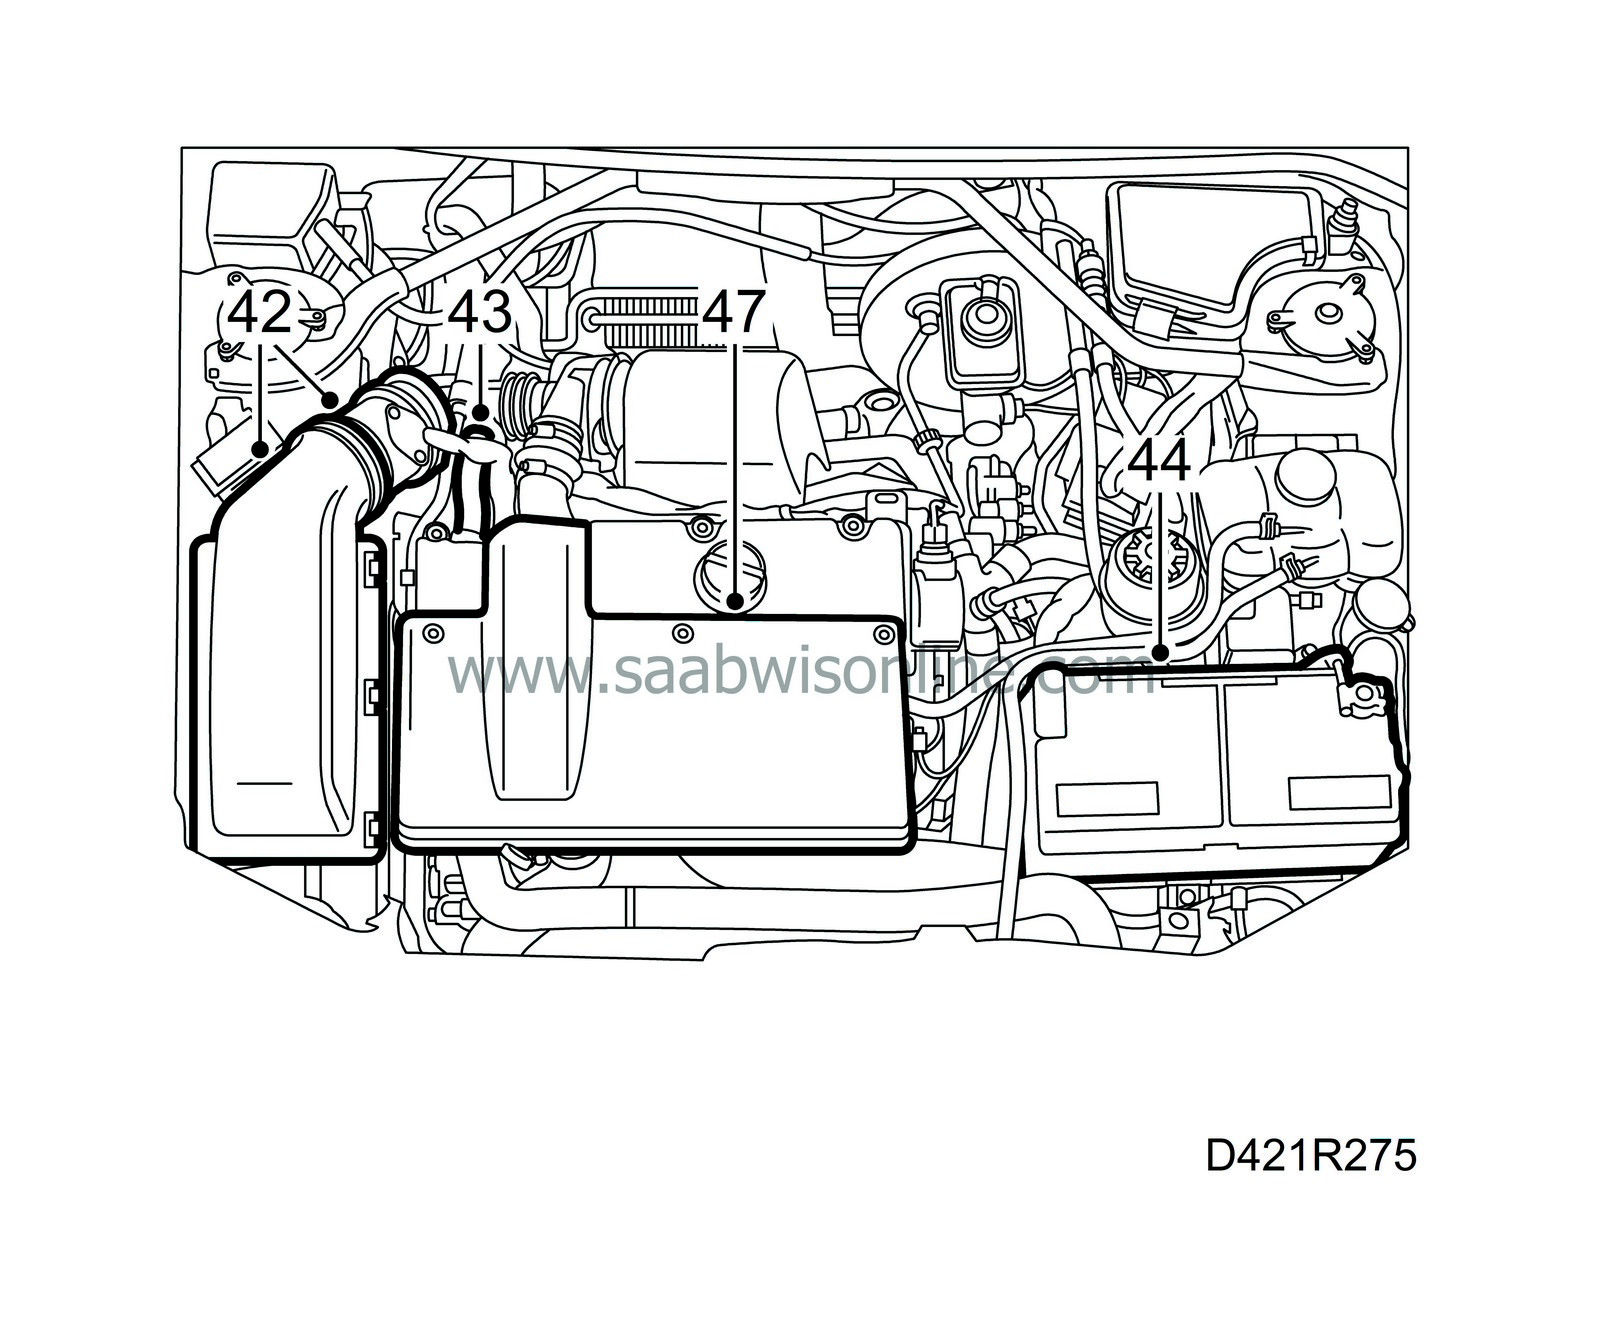
| 11. |
Remove the crankshaft position sensor with O-ring and detach the temperature sensor from the oil sump.
|
|
| 12. |
Relieve the tension on the belt tensioner by turning it anticlockwise (towards the rear of the car) with a 19 mm spanner and lift off the belt.

|
|
| 13. |
Remove the belt tensioner.
|
|
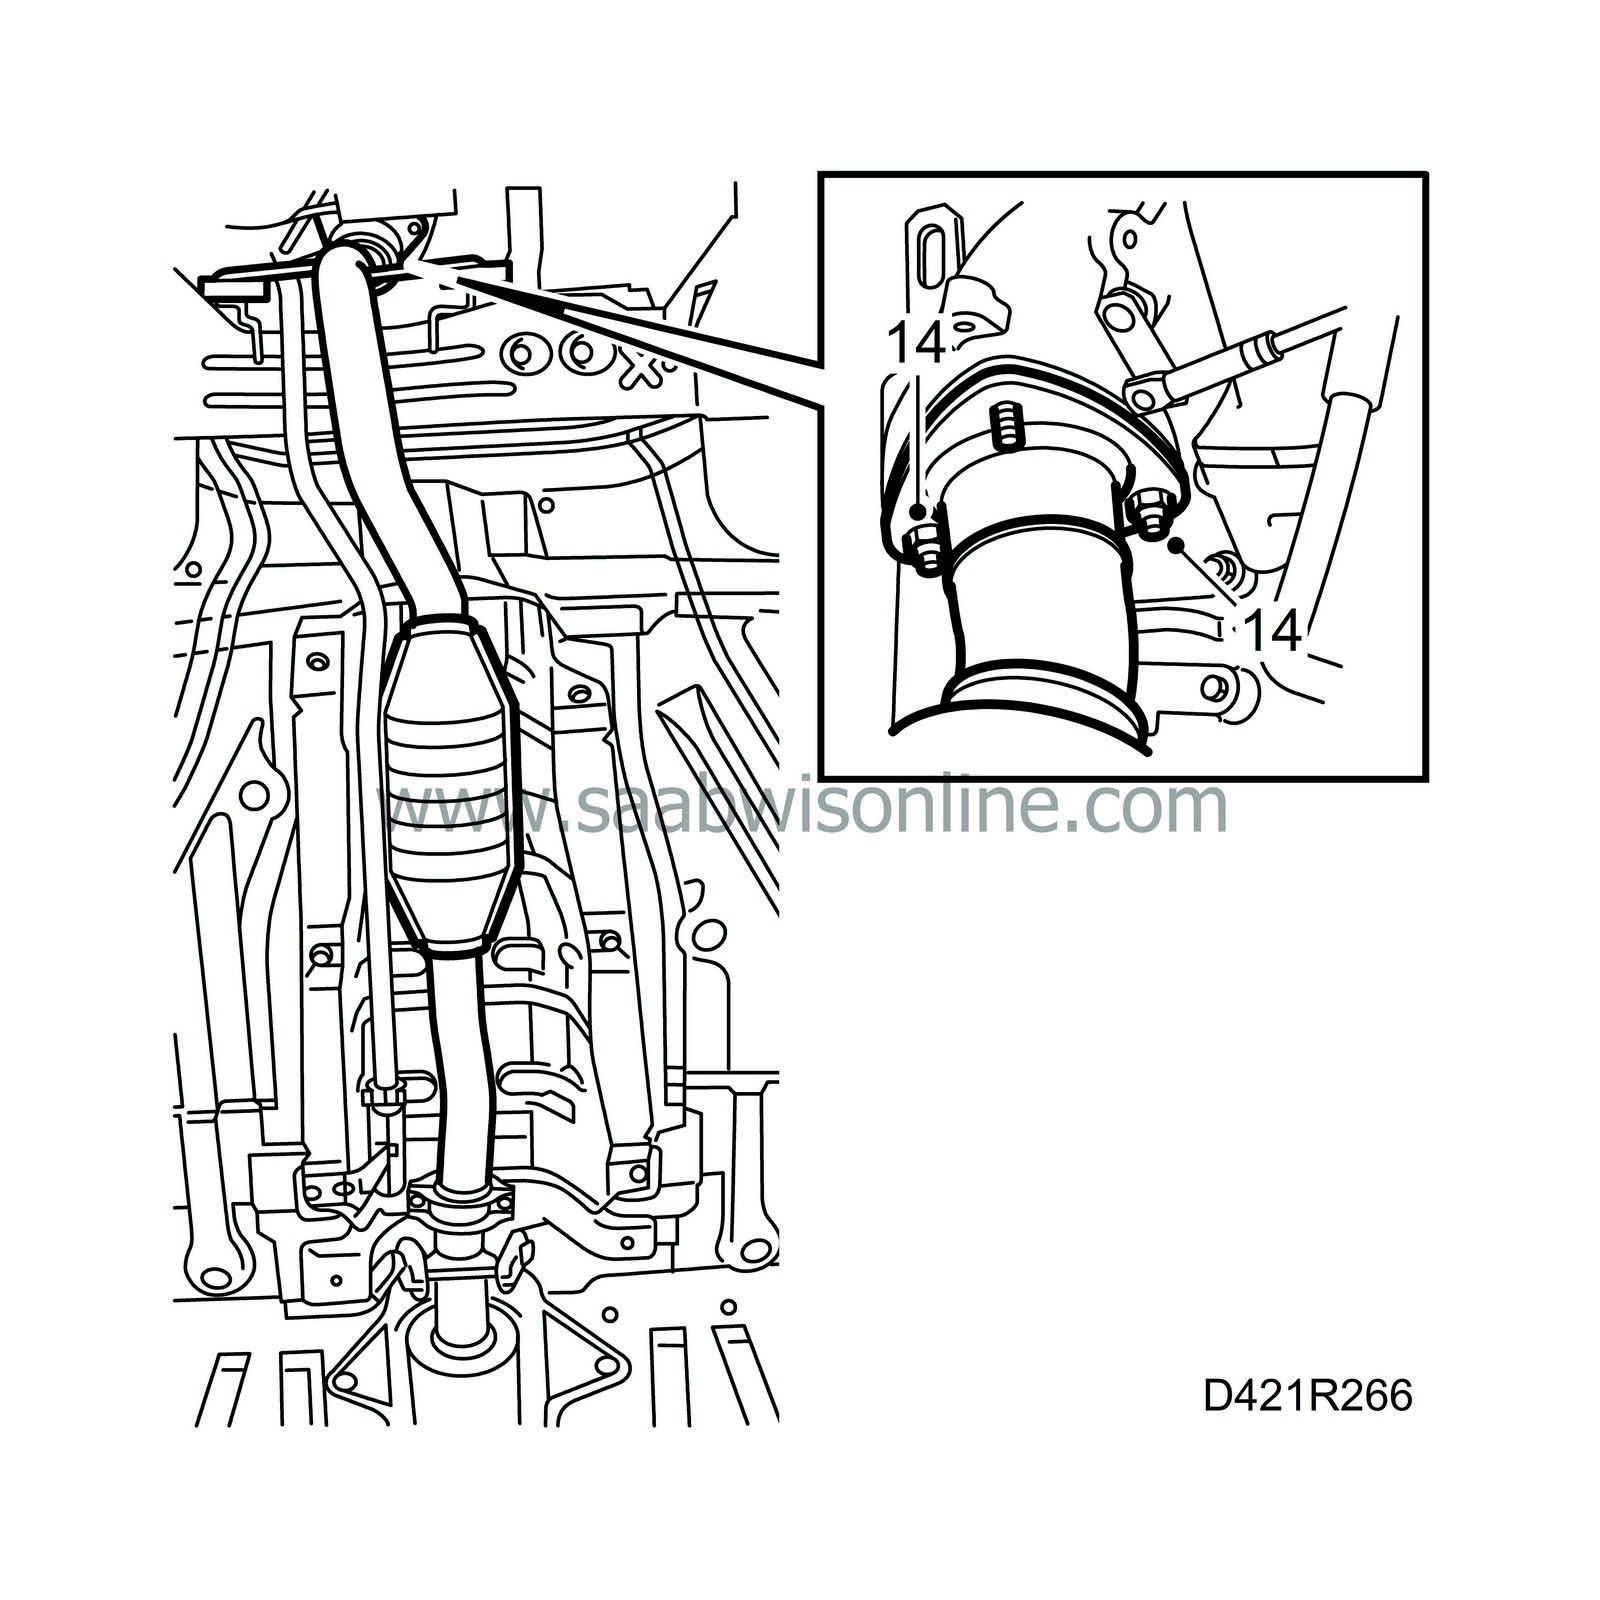
| 14. |
Remove the front part of the exhaust pipe from the turbocharger.
|
|
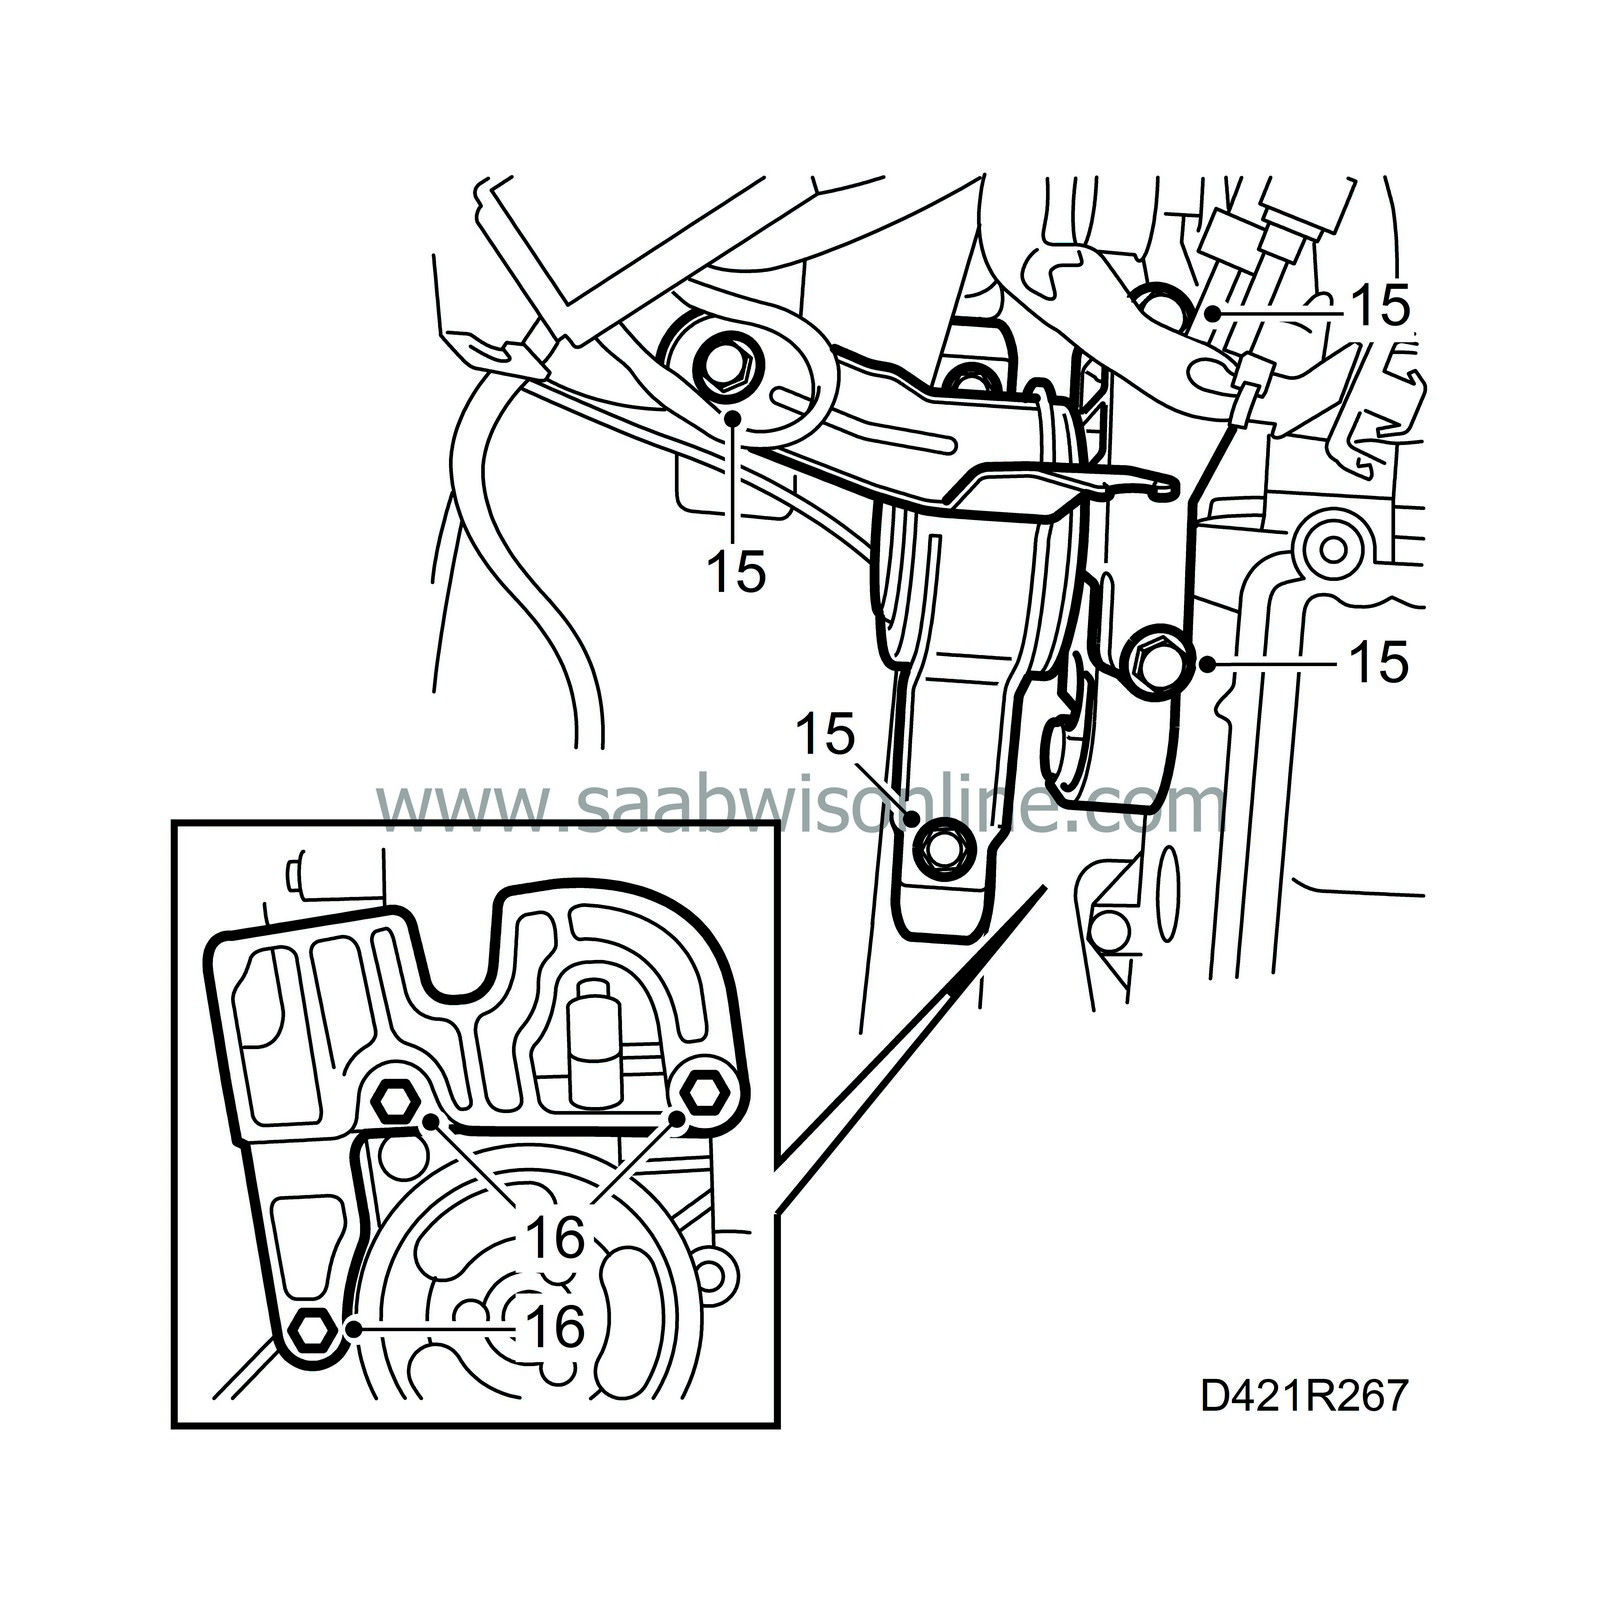
| 15. |
Place a jack with wood block under the oil sump, raise the engine until the weight has been taken off the right-hand engine mounting and remove the right-hand engine mounting.
|
|
| 16. |
Remove the engine mounting (the bottom bolt does not need to be removed completely) and raised the engine it bit higher.
|
||||||||||
| 17. |
Remove the bolts on the cover, carefully insert a spatula behind the cover and prise it off.

|
||||||||||
| 18. |
Turn the crankshaft with the centre bolt on the pulley two revolutions until it reaches the mark for top dead centre in cylinder 1. Make sure both cams for cylinder 1 point upwards.
|
|
| 19. |
Position inspection gauge 83 95 352 inside the hole for the crankshaft position sensor. Press the tool inwards slightly at the same time as the crankshaft is turned to the zero mark. The tool will then enter a recess in the crankshaft and secure it.
|
|
| 20. |
Make sure the marks on the crankshaft pulley and the timing cover are aligned. The arrow on the single cam chain sprocket on the fuel distribution pump must also be aligned with the recess in the pump.
|
|
| 21. |
Position fuel pump setting tool 83 95 337 in the recess in the fuel distribution pump. If the tool does not fit, the engine valve timing requires adjusting, see
 .
.
|
|
| 22. |
Position inspection gauge 83 95 386 on the camshaft and cylinder head. If the gauge does not fit, the engine valve timing must be adjusted. See
 .
.
|
|
| 23. |
Remove all the inspection gauges.
|
|
| 24. |
Cover the opening in the timing cover with a lint-free cloth and remove any remains from the old gasket from the sealing surface. Clean also the sealing surface on the pump cover.
|
|
| 25. |
Apply a string of silicone sealant about 2 mm thick to the pump cover, remove the cloth from the timing cover and fit the pump cover.

Tightening torque: 6 Nm (4.5 lbf ft). |
|
| 26. |
Fit the right-hand engine mounting bracket on the engine and tighten the engine mounting on the engine.
Tightening torque: 47 Nm (35 lbf ft). Lower the engine and tighten the right-hand engine mounting on the body. Tightening torque: 47 Nm (35 lbf ft). |
|
| 27. |
Raise the car and fit the crankshaft position sensor with a new O-ring.
Tightening torque: 8 Nm (6 lbf ft). |
|
| 28. |
Apply Molycote 1000 to the studs on the turbocharger, position the front part of the exhaust pipe with a new gasket and mount new nuts.
|
|
| 29. |
Tighten the front exhaust pipe to the turbocharger.
Tightening torque: 25 Nm (18.5 lbf ft). |
|
| 30. |
Fit the belt tensioner, tightening the top bolt first.

Tightening torque: 42 Nm (31 lbf ft). Tighten the bottom bolt. Tightening torque: 23 Nm (17 lbf ft). |
|
| 31. |
Fit the multigroove V-belt on all the pulleys. Relieve the tension on the belt tensioner by turning it anticlockwise (towards the rear of the car) with a 19 mm spanner and fit the belt on its pulley. Make sure the belt is positioned correctly on all the pulleys.
|
|
| 32. |
Lower the car and tighten the remaining nuts between the turbocharger and the front exhaust pipe.

Tightening torque: 25 Nm (18.5 lbf ft). |
|
| 33. |
Fit a new gasket on the vacuum pump and fit the pump together with the adapter.
Tightening torque: 8 Nm (6 lbf ft). |
||||||||||
| 34. |
Connect the vacuum hose for the brake servo to the vacuum pump.
Tightening torque: 18 Nm (13 lbf ft). Connect the vacuum hose to the bottom of the vacuum pump. |
|
| 35. |
Clean any gasket remains from the sealing surfaces on the camshaft cover.
|
|
| 36. |
Position a new gasket on the camshaft cover. There are sleeves on the bolts on which the gasket fits.
|
|
| 37. |
Apply sealing compound 87 81 841 to the sealing surface, see illustration.
|
|
| 38. |
Position the transmission cover on the cylinder head and tighten the bolts.
Tightening torque: 8 Nm (6 lbf ft). |
|
| 39. |
Press the fuel lines back into their fastenings and fit the wiring harness channel on the cylinder head.

|
|
| 40. |
Connect the crankshaft position sensor and other components.
|
|
| 41. |
Refit the turbo delivery pipe.
|
|
| 42. |
Refit the air cleaner with mass air flow sensor and hoses.
|
|
| 43. |
Connect the crankcase ventilation hose to the camshaft cover.
|
|
| 44. |
Connect the negative cable to the battery.
|
|
| 45. |
Refit the engine cover.
|
|
| 46. |
Restore the engine bay to its original condition.
|
|
| 47. |
Adjust the clock in the car and press 5 times on the remote control lock/unlock button.
|
|


