Front wheel housing and front frame member
| Front wheel housing and front frame member |
| 1. |
Remove the door frame, see
Section of door frame, 3D
,
Door frame, 3D
or
Section of door frame, 5D
.
|
|
| 2. |
Position the car in an aligning bench and cross-measure if necessary.
|
|
| 3. |
Position a door opening support between the floor and roof so that the roof does not sag when the wheel housing is removed.
|
|
| 4. |
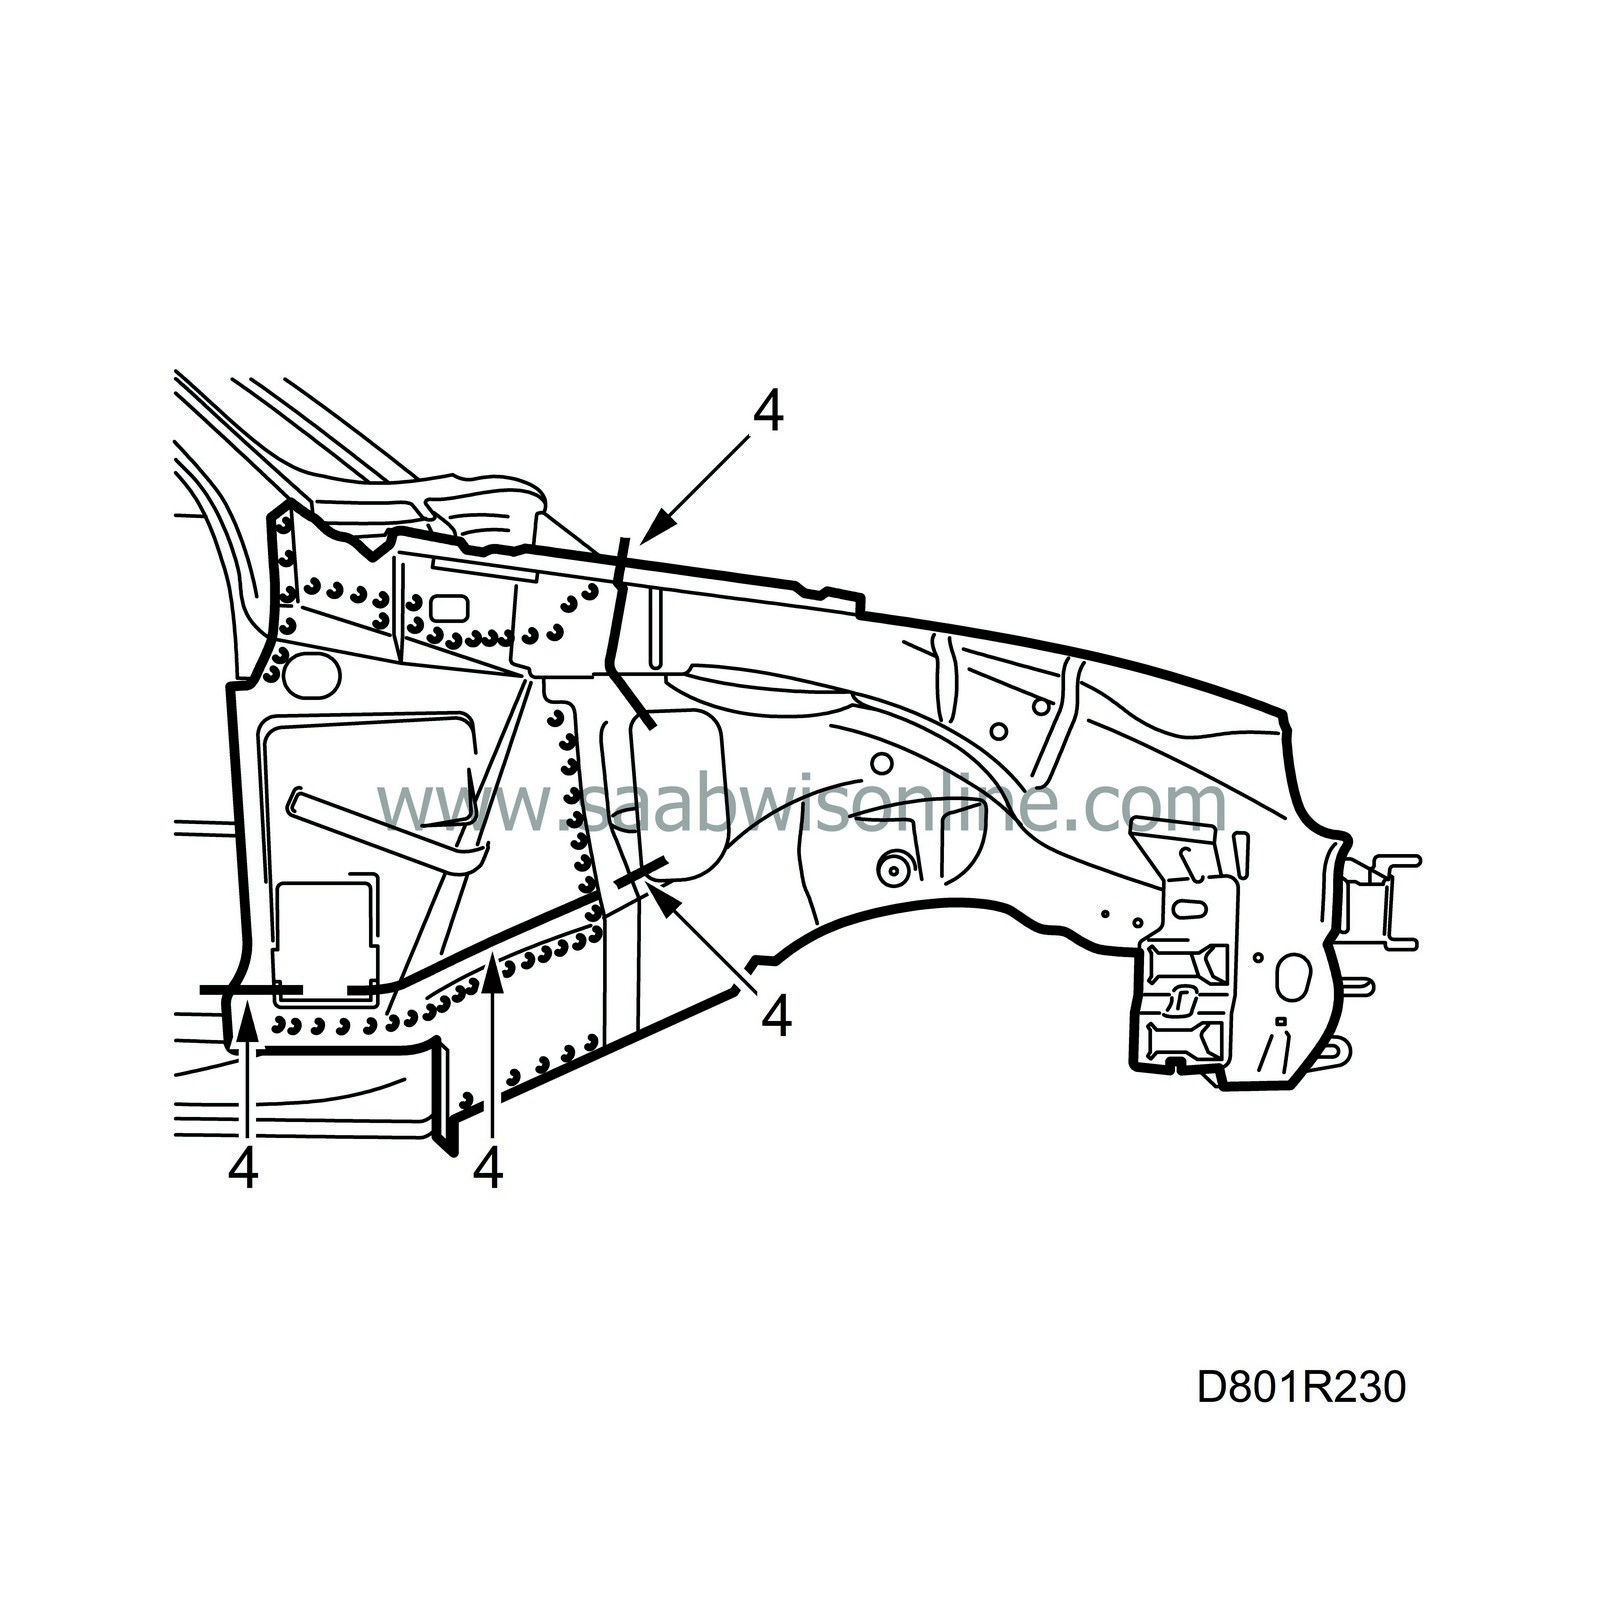
Cut the wheel housing so that the welding points are accessible with a spot-welder.
|
|
| 5. |
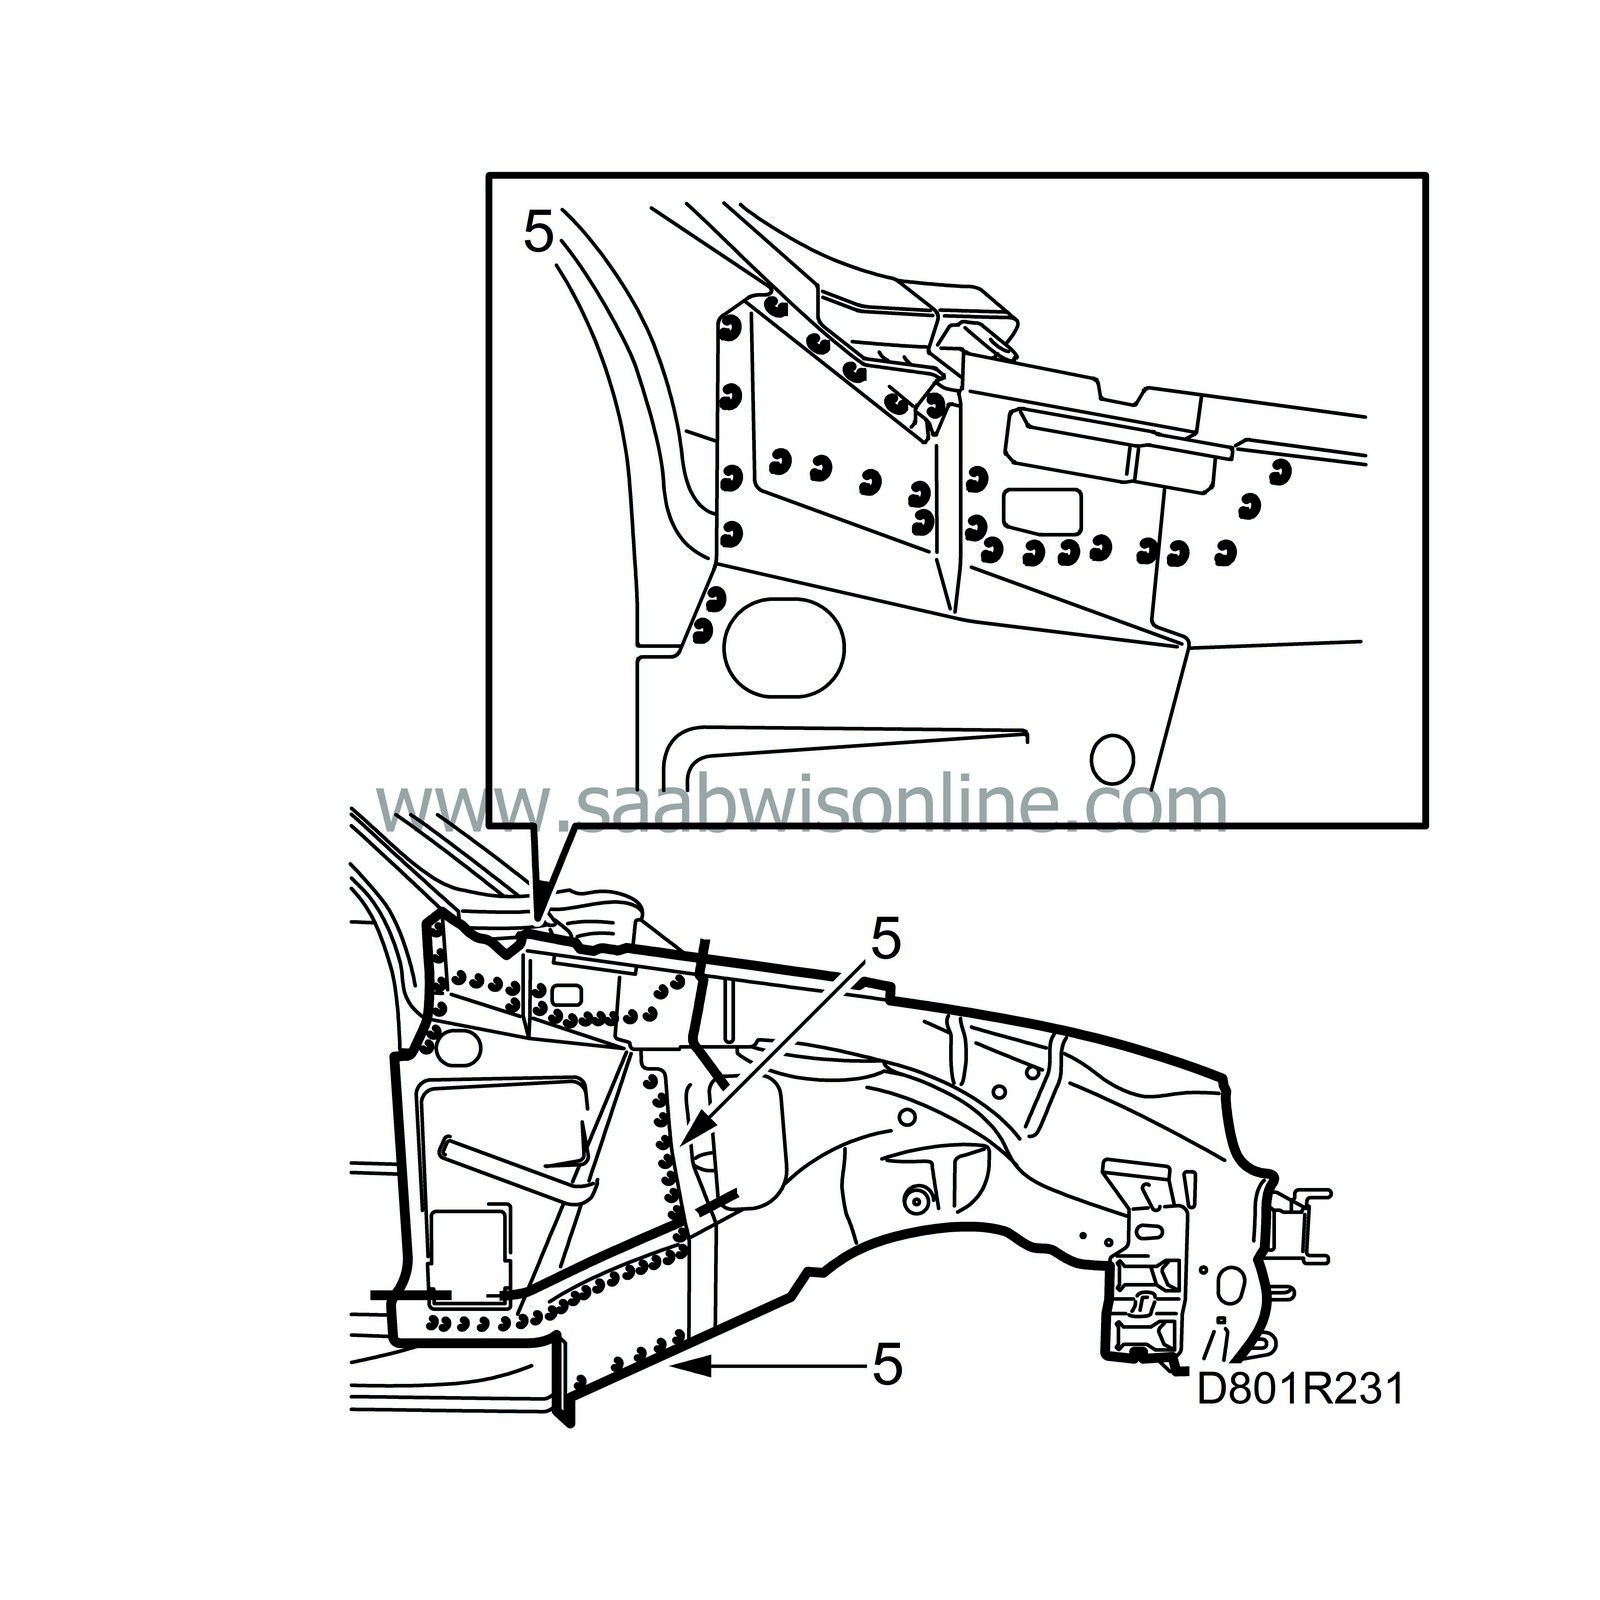
Drill out the spot-welds and tap loose the remaining sections of the wheel housing.
|
|
| 7. |
Drill out the welds that hold the frame member and the cut section of the crossmember. Drill through all panels, including the floor. Grind away the seam welds.

|
|
| 8. |
Remove the frame member and crossmember cut sections and align any sheet metal or panel damage.
|
|
| 9. |
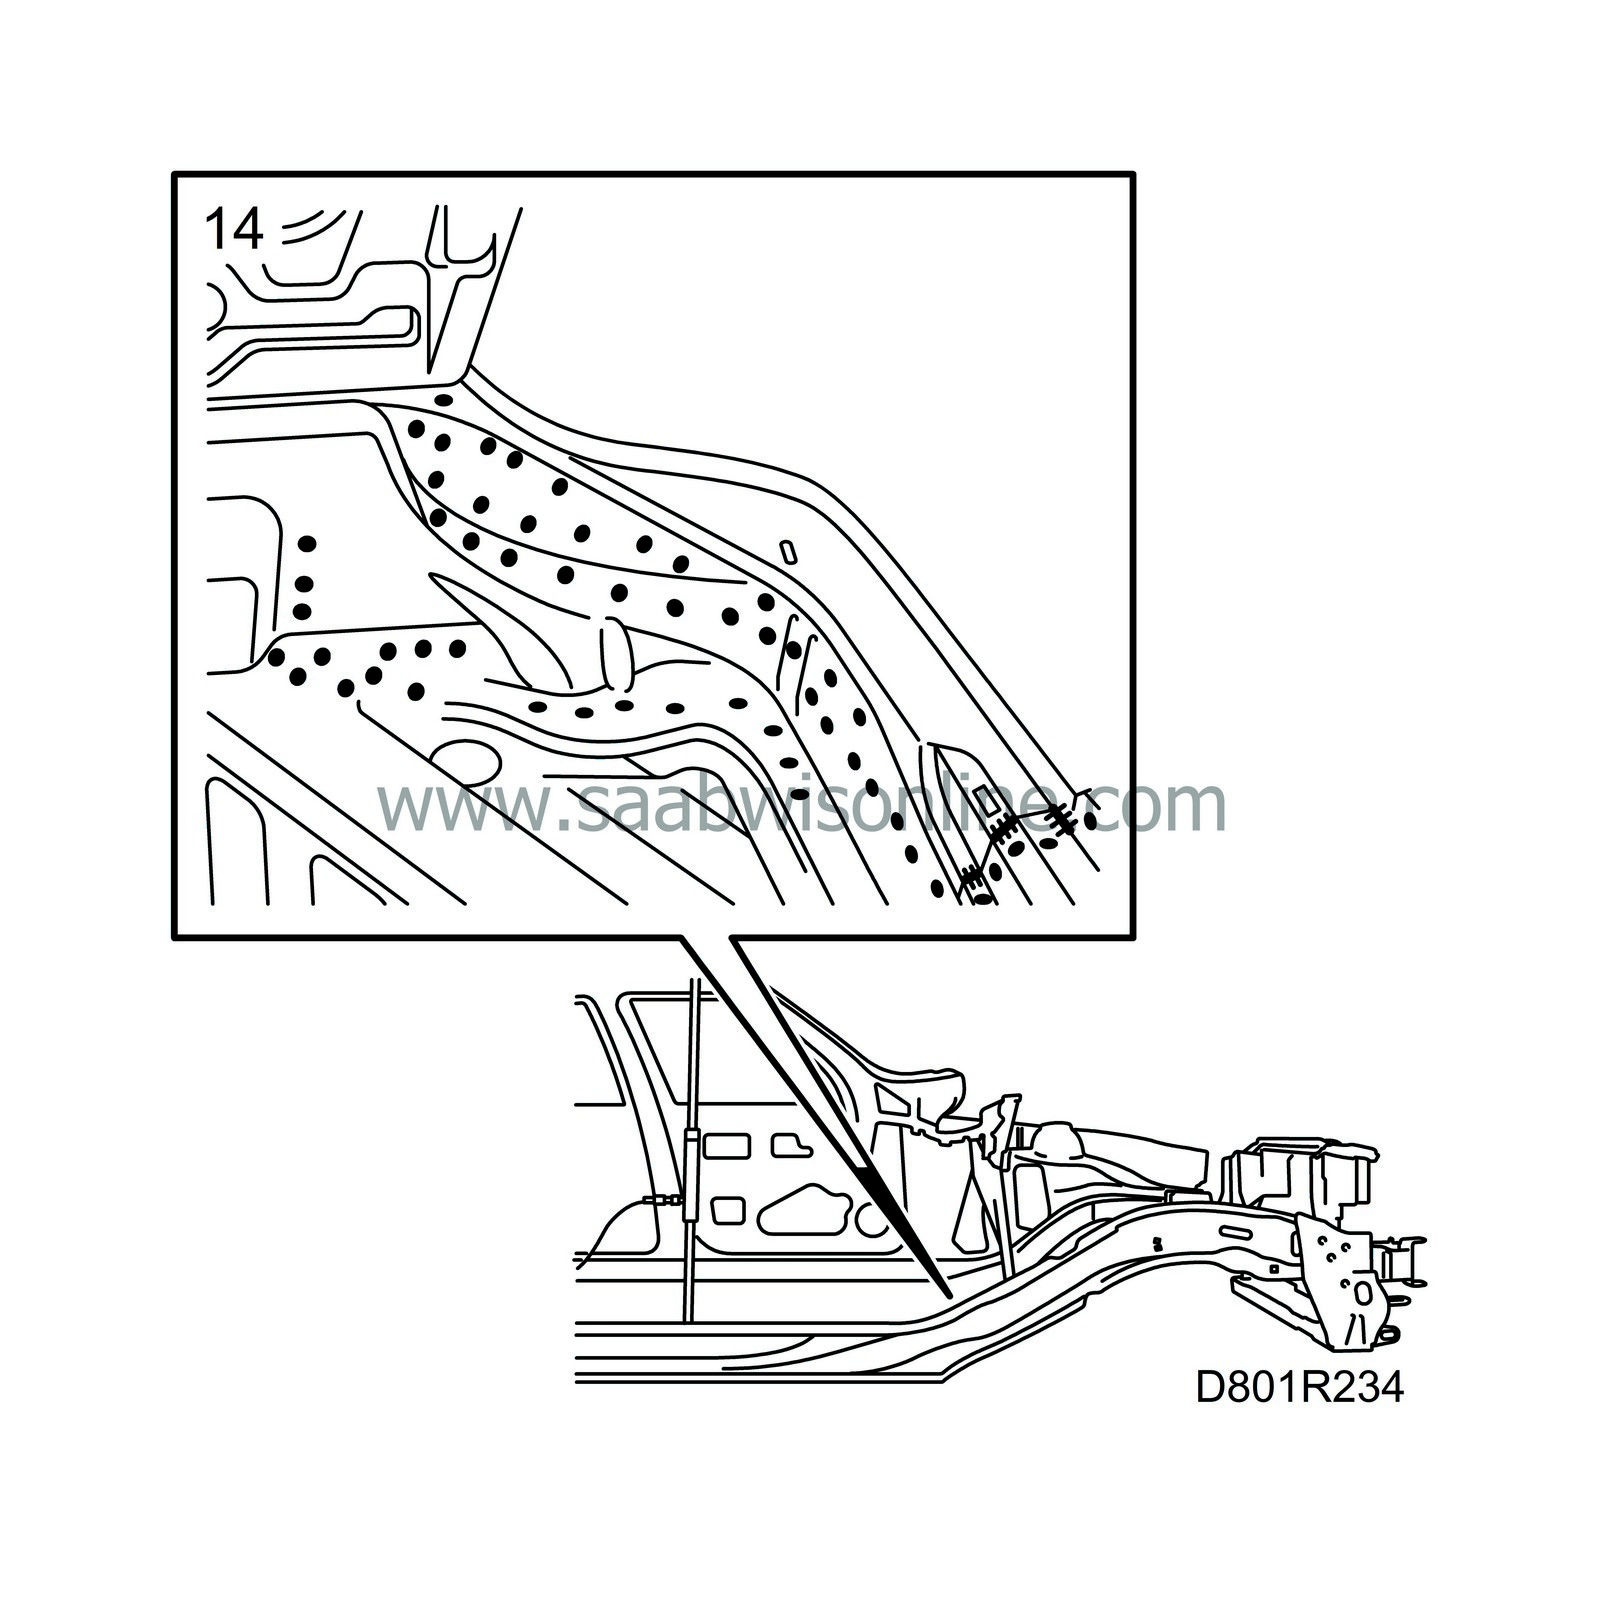
Drill holes in the body where the new frame member is to be welded.
|
|
| 10. |
Grind clean the surfaces on the to be welded on the frame member and body.
|
|
| 11. |
Remove grinding debris from the inside of the frame member, otherwise the risk for corrosion increases.
|
|
| 12. |
Apply welding primer on the surfaces to be plug-welded. Use Teroson Zinkspray.
|
|
| 13. |
Fit the frame member and fixate with a couple of welding clamps. Adjust the exact position using the aligning bench measuring system.
|
|
| 14. |
Plug and seam weld the frame member in place.
|
|
| 15. |
Cut the crossmember to size.

|
|
| 16. |
Fit the crossmember and fixate with a couple of welding clamps.
|
|
| 17. |
Remove the crossmember and drill holes for plug-welding in the crossmember.
|
|
| 18. |
Grind clean the surfaces to be welded on the crossmember and the body.
|
|
| 19. |
Apply welding primer on the surfaces to be plug-welded. Use Teroson Zinkspray.
|
|
| 20. |
Fit the crossmember and fixate with a couple of welding clamps.
|
|
| 21. |
Plug-weld the crossmember.
|
|
| 22. |
All-weld the joint on the crossmember.

|
|
| 23. |
Drill holes for plug-welding in the new wheel housing, where it is not possible to reach with a spot-welder.
|
|
| 24. |
Grind clean the surfaces to be welded on the body and in the new wheel housing.
|
|
| 25. |
Apply welding primer on the surfaces to be plug and spot-welded on the wheel housing and on the body. Use Teroson Zinkspray.
|
|
| 26. |
Fit the new wheel housing and fixate with a few welding clamps.
|
|
| 27. |
Measure in the wheel housing using the aligning bench measuring system.
|
|
| 28. |
Fasten the wheel housing with a couple of welds.
|
|
| 29. |
Fit the front wing and the bonnet, check the fit of the wheel housing.
|
|
| 30. |
Remove the front wing and bonnet.
|
|
| 31. |
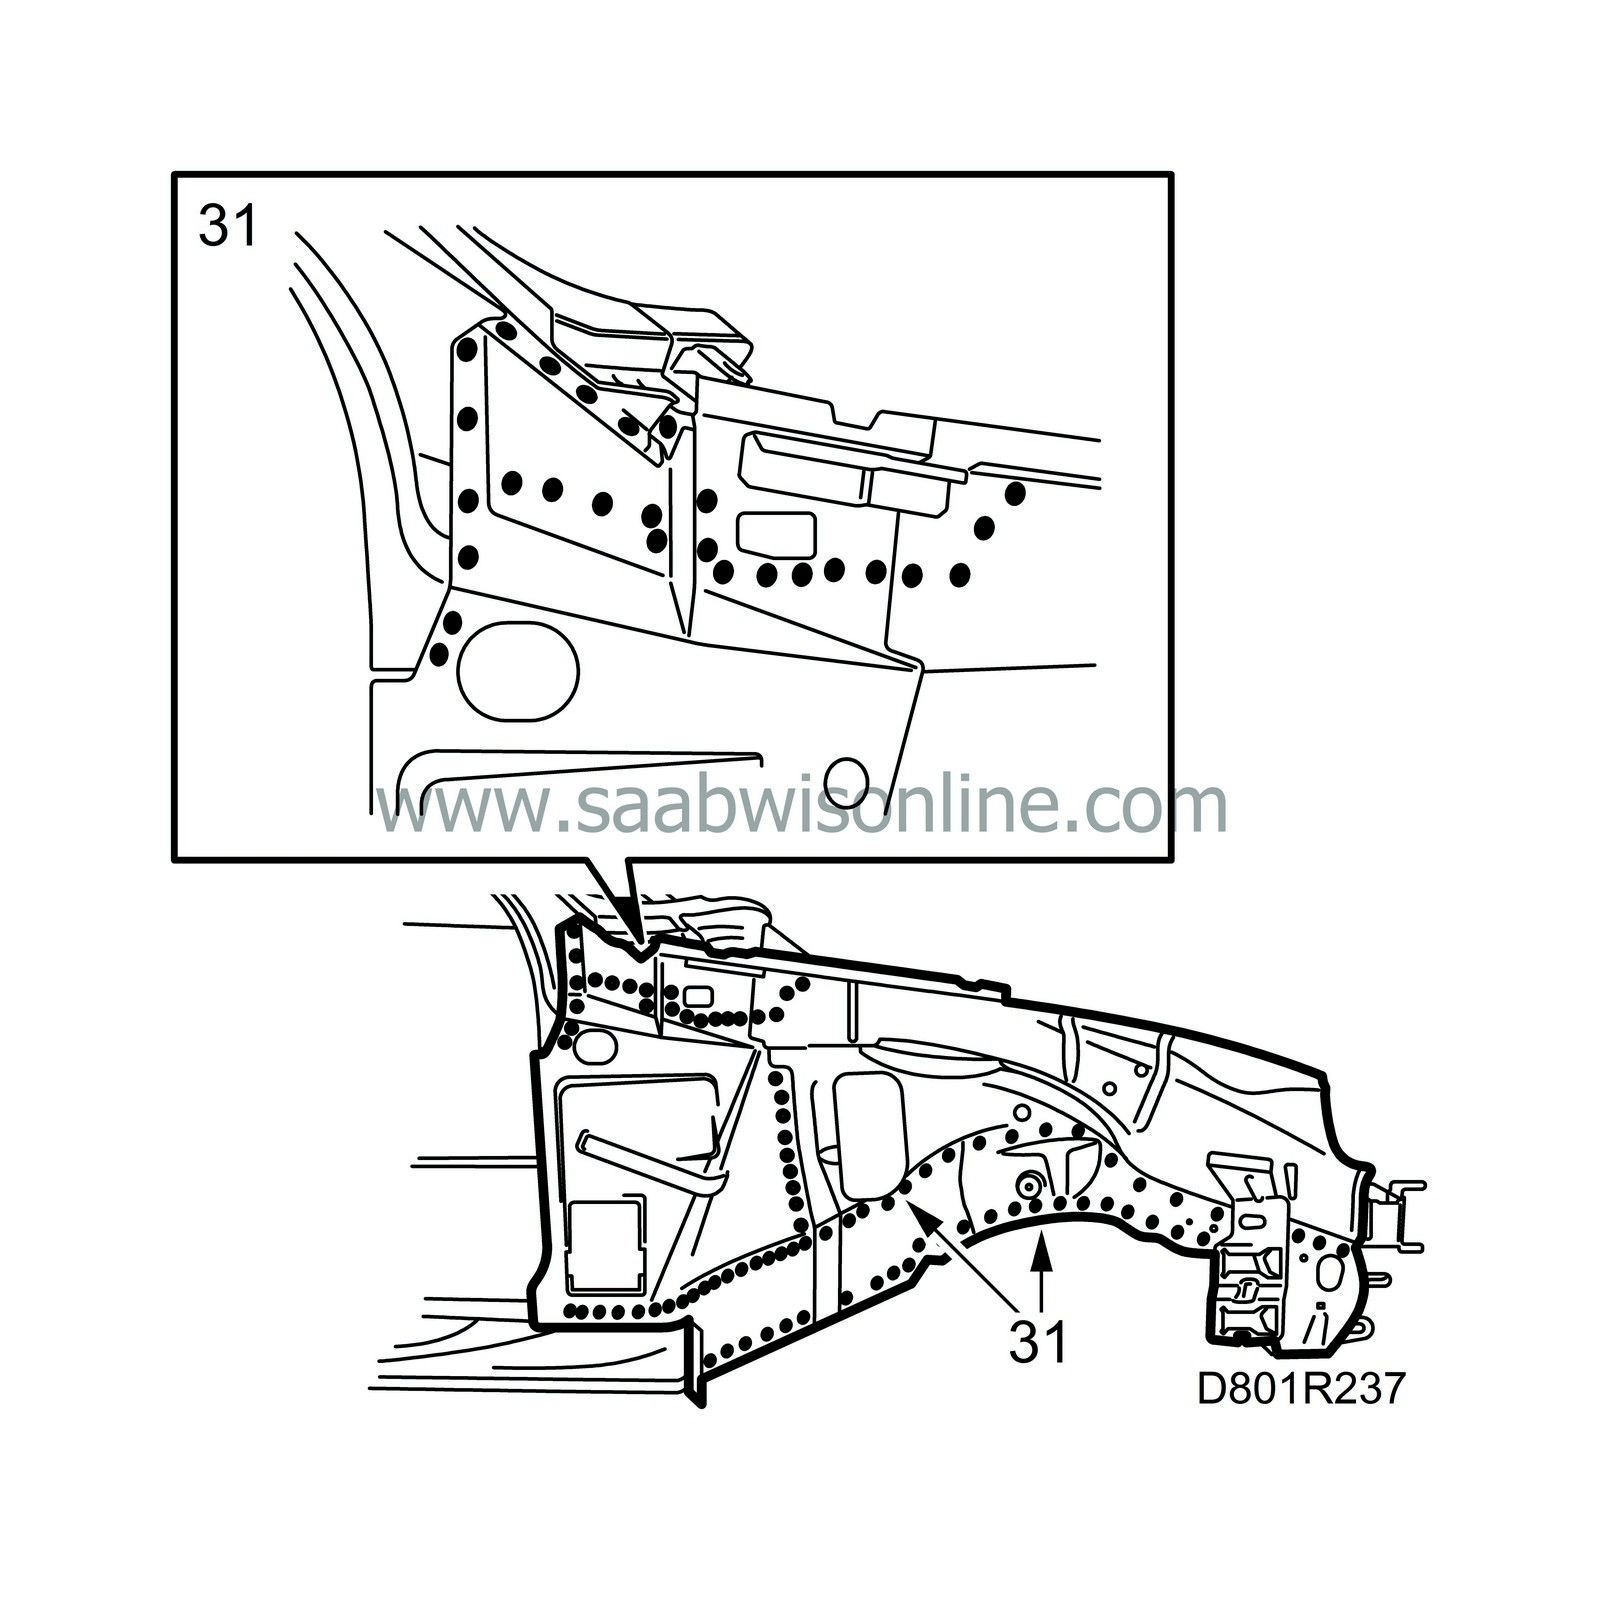
Spot and plug-weld the housing into place.
|
|
| 32. |
Grind the welds.
|
|
| 33. |
Grind clean the surfaces to be welded on the body and reinforcements that are to be fitted on the outside of the wheel housing.
|
|
| 34. |
Apply welding primer on the surfaces to be spot-welded. Use Teroson Zinkspray.
|
|
| 35. |
Weld on the reinforcement on the outside of the wheel housing.
|
|
| 36. |
Remove any remaining welding primer. Welding primer reduces adhesion of paint, filler and sealant.
|
|
| 37. |
Saab 9-3 Viggen:
The two lower studs in the wheel housing behind the front wheel should be cut to give clearance for the wheel. Cut them to a maximum length of 11 mm, measured from the body panel. Then use nuts, part no. 47 41 203, to fit the wing liner. Grind the nuts to a thickness of 8 mm. 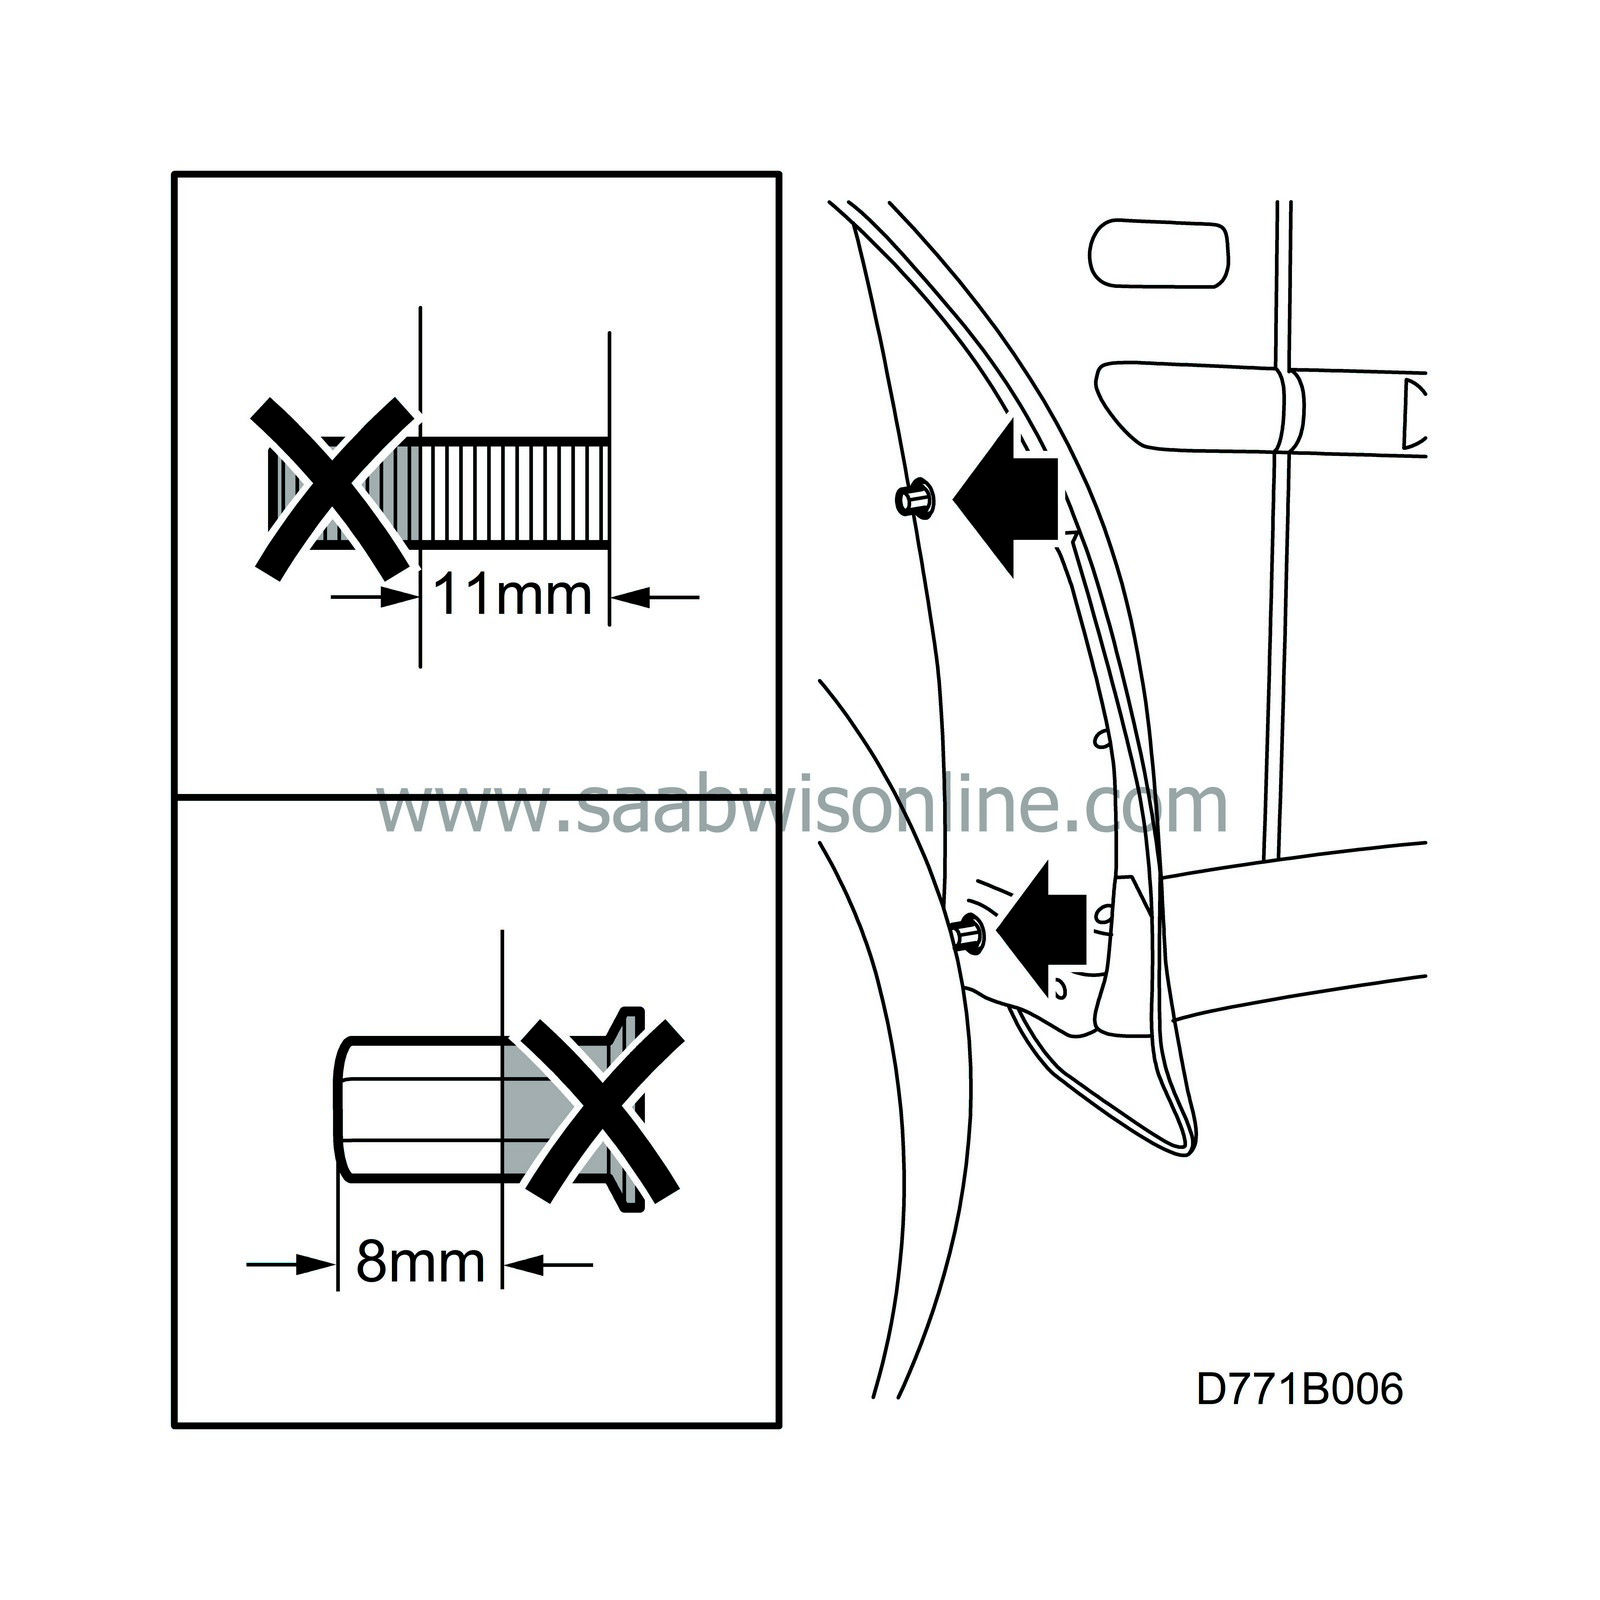
|
|
| 38. |
Apply primer to all ground surfaces. Use Standox 1K Primer.
|
|
| 39. |
Seal joints and sheet metal flanges with sealant. Use Terostat 1K-PUR.
|
|
| 40. |
Apply underbody sealant to the underside of the frame and crossmember. Use Terostat 9320.
|
|
| 41. |
Apply anti-corrosion agent to internal surfaces after painting. Use Terotex HV 400 or Mercasol 1.
|
|


