Checking the residual pressure, fuel delivery line
|
|
Checking the residual pressure, fuel delivery line
|
 Warning
|
|
Work involving checking residual pressure involves interference with the car fuel system. The following points should therefore be observed in connection with the procedure:
|
|
•
|
Ensure good ventilation! If there is approved ventilation for extraction of fuel fumes then this must be used.
|
|
•
|
Wear protective gloves! Prolonged exposure of the hands to fuel can cause irritation of the skin.
|
|
•
|
Have a fire extinguisher class BE at hand! Be aware of the risk for sparks, i.e. in connection with circuit breaking, short-circuiting, etc.
|
|
•
|
Absolutely No Smoking!
|
|
•
|
Wear protective glasses.
|
|
|
|
|
|
|
Important
|
|
Be particulary observant regardning cleanliness when working on the fuel system. Loss of function may occur due to very small particles. Prevent dirt and grime from entering the fuel system by cleaning the connections and plugging pipes and lines during disassembly. Use 82 92 948 Plugs, A/C system assembly. Keep components free from contaminants during storage.
|
|
|
|
1.
|
Remove the upper engine cover.
|
|
3.
|
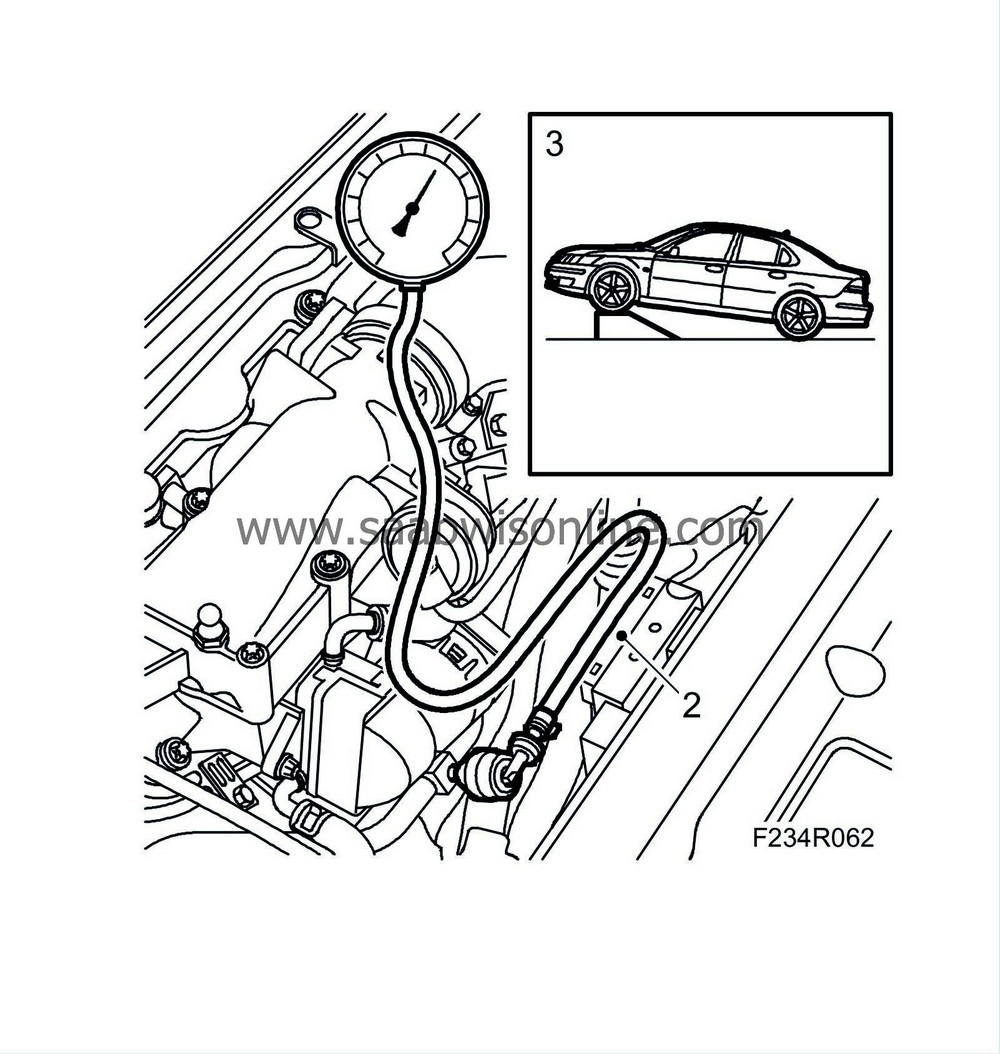
To detect a leak more quickly, lift the front of the car approx. 70 cm. Use axle stands.
 Warning
|
|
If incorrect lifting or attachment points are used, the car may be displaced or fall from its raised position, which may result in serious damage to the car or serious personal injury.
|
|
|
|
|
|
|
|
4.
|
Start the engine and let it run for several minutes. Check the fuel pressure while the engine is idling. The negative pressure should not be lower than -0.20 bar. Too low an underpressure can block the fuel filter or restrict the suction line.
|
|
5.
|
Stop the engine and read the pressure gauge, which due to the angle of the car and fuel quantity in the tank should indicate between -0.04 and -0.08 bar. Allow the car to remain like this for roughly 2 hours. The pressure reading should not change.
|
|
6.
|
A change in the pressure gauge reading indicates a leak. Check the following for leaks:

|
|
|
•
|
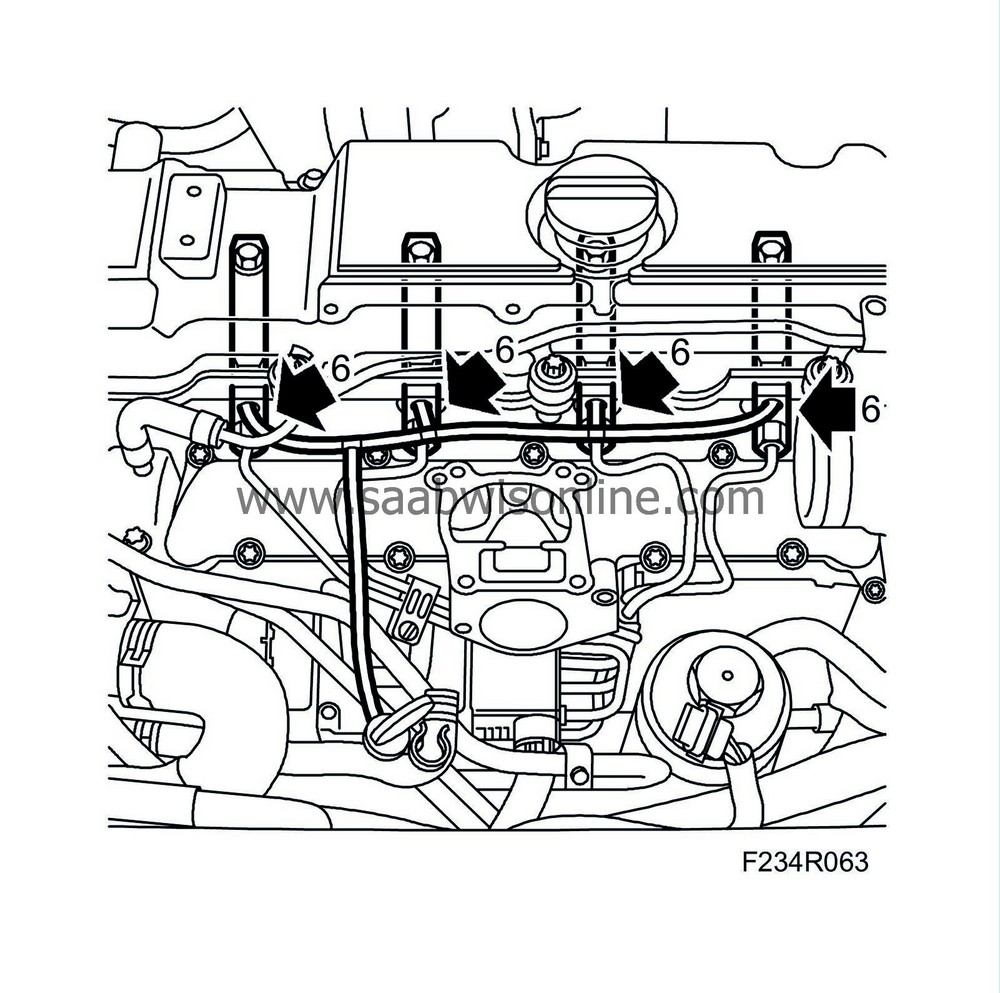
Fuel bridge return lines and T-pieces.
|
|
|
•
|
Seals between fuel bridges and injectors.
|
Rectify any leaks.
|
1.
|
Fuel bridge return lines and T-pieces.

|
|
|
1.a.
|
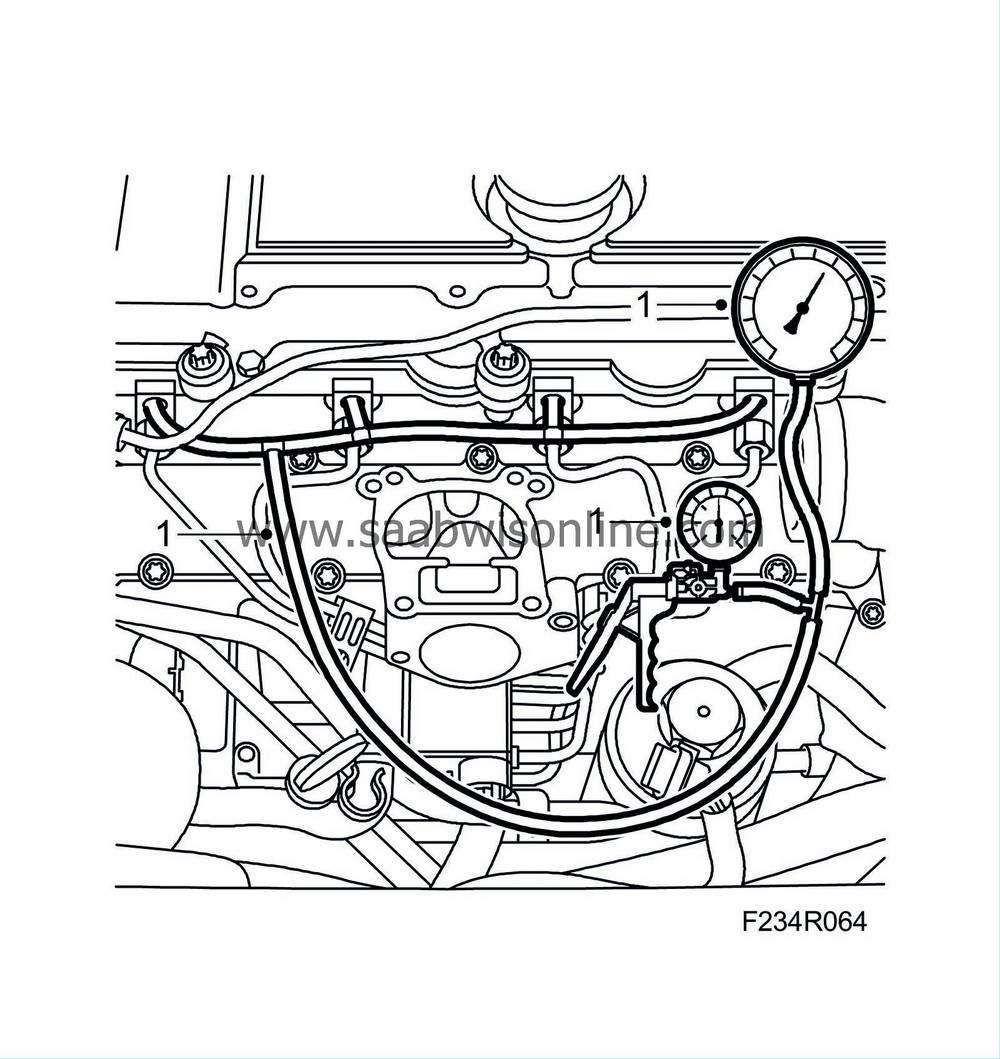
Disconnect the lower end (common) of the hose branch from the banjo nipple at the injection pump's fuel supply. Check the end of the hose for damage and cracks. Connect the hose to the
30 14 883 Pressure/vacuum pump
and
83 93 514 Boost pressure gauge
.
|
Important
|
|
First, check for leaks in the pressure/vacuum pump and hoses in order to avoid unreliable fault diagnosis results.
|
|
|
|
|
|
1.b.
|
Pump to achieve a negative pressure of -0.9 bar, wait approx. 10 minutes and check to see that the negative pressure is maintained.
|
|
2.
|
If a leak is detected, each individual return hose should be checked from its respective fuel bridge as follows:

|
|
|
2.a.
|
Remove the charge air pipe and plug the hoses.
|
|
|
2.b.
|
Undo the hoses with T-pieces from the fuel bridges.
|
Note
|
|
If black engine oil comes from the return hoses this implies that the seals between the injectors and fuel bridges leak. The reinforced rubber hoses in the branching for the return of excess fuel usually get damaged when removed due to sharp barbs on the plastic nipples. Therefore, change the hoses if they have been removed. Hose is available by the meter. Approximately 75 cm is required. The plastic nipples may also need changing.
|
|
|
|
2.c.
|
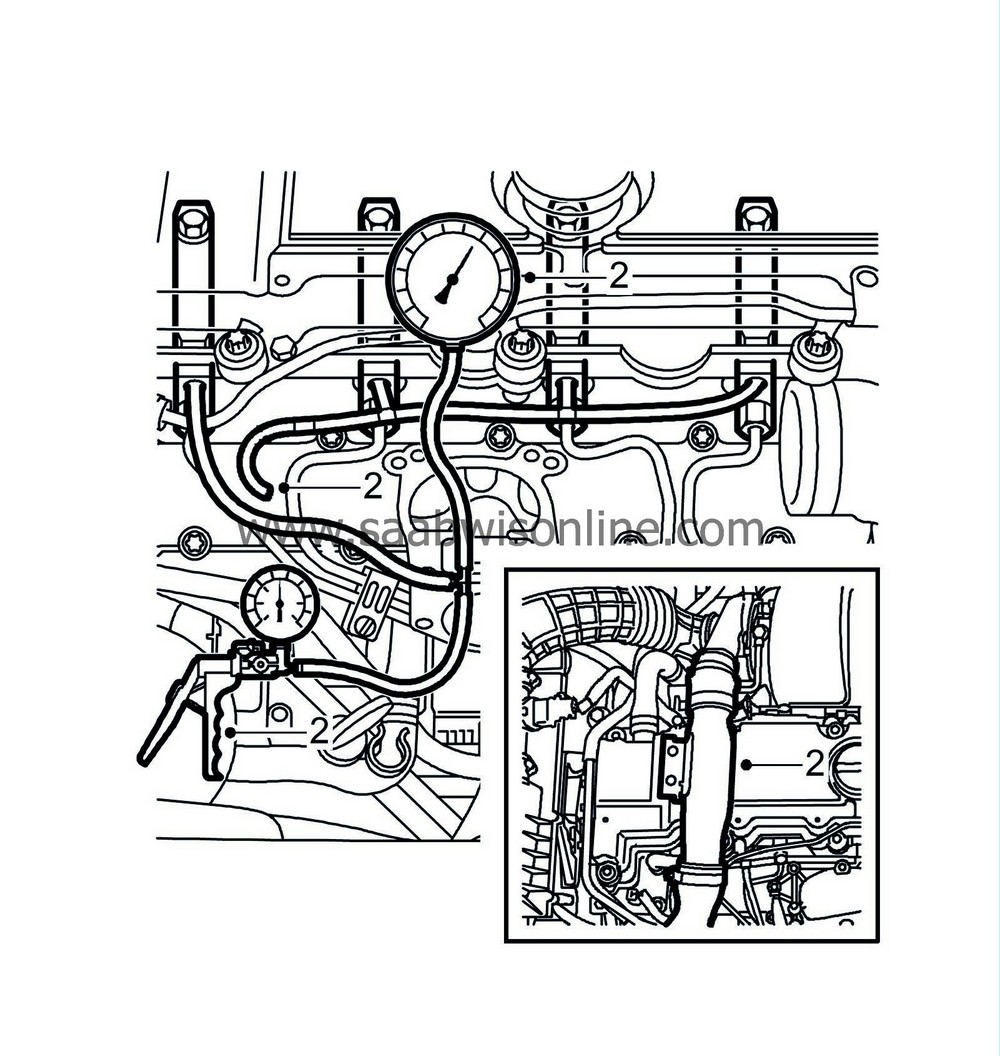
Connect
30 14 883 Pressure/vacuum pump
and
83 93 514 Boost pressure gauge
in turn to the four nipples on the fuel bridges. Create a negative pressure of -0.9 bar. The pressure should remain for approx. 10 min. If the pressure changes, all four O-rings and sealing sleeves between the injector and the fuel bridge should be changed. See Basic engine, diesel, Fuel system, Fuel bridges.
|
|
|
2.d.
|
Fit the new fuel return hoses onto the fuel bridges. Check the T-pieces that connect the fuel return hoses for damage, cracks, etc. Change if necessary.
|
|
|
2.e.
|
Carry out a new leakage test by connecting the vacuum pump and pressure gauge to the common hose on the fuel inlet.
|
|
|
2.f.
|
Fit the hose to the banjo nipple by the injection pump fuel supply.
|
|
|
2.g.
|
Remove the plugs and fit the charge air pipe.
|
|
5.
|
Replace the upper engine cover.
|
|
6.
|
Start the engine and check its operation.
|


 Warning

