Condenser, B207
| Condenser, B207 |
| Important | ||
|
The A/C receiver and the compressor oil absorb moisture from the air, which can then not be removed. Plug all connections that are opened immediately. |
||
| To remove |
| 1. |
Put the car on a lift.
|
|
| 2. |
Drain the refrigerant from the A/C system, see
Draining and filling the refrigerant
.
|
|
| 3. |
Remove the
front bumper shell.
|
|
| 4. |
Dismantle the right
headlamp
.
|
|
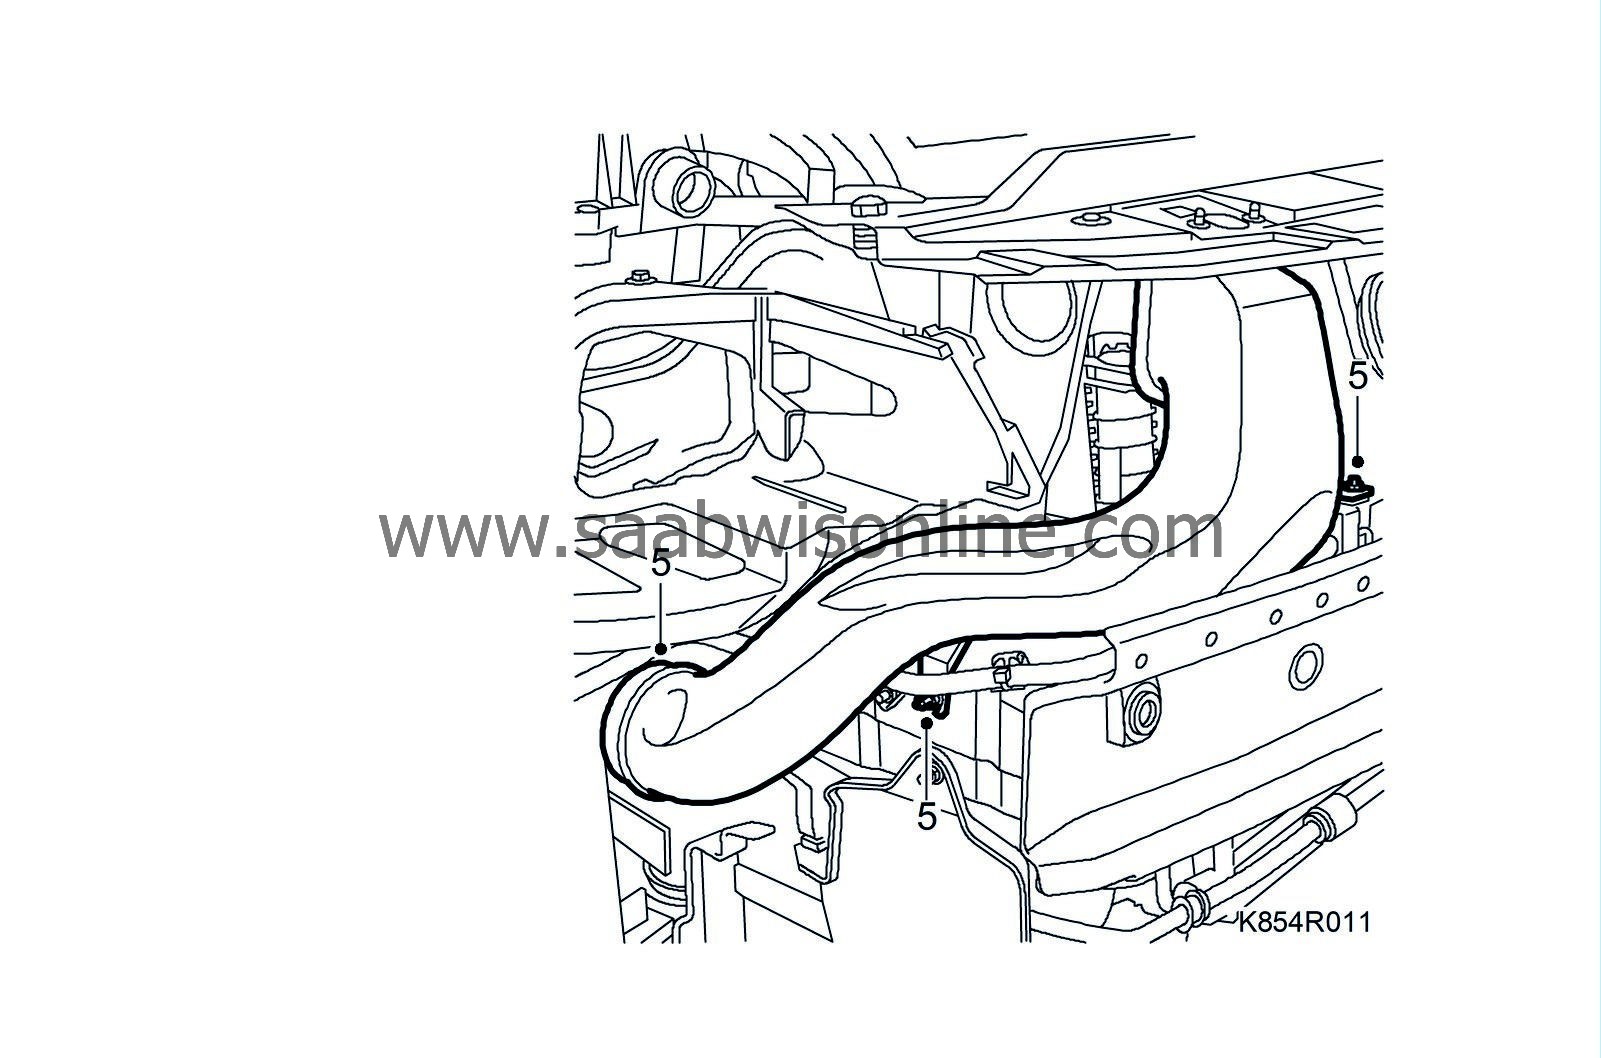
| 5. |
Remove the air intake.

|
|
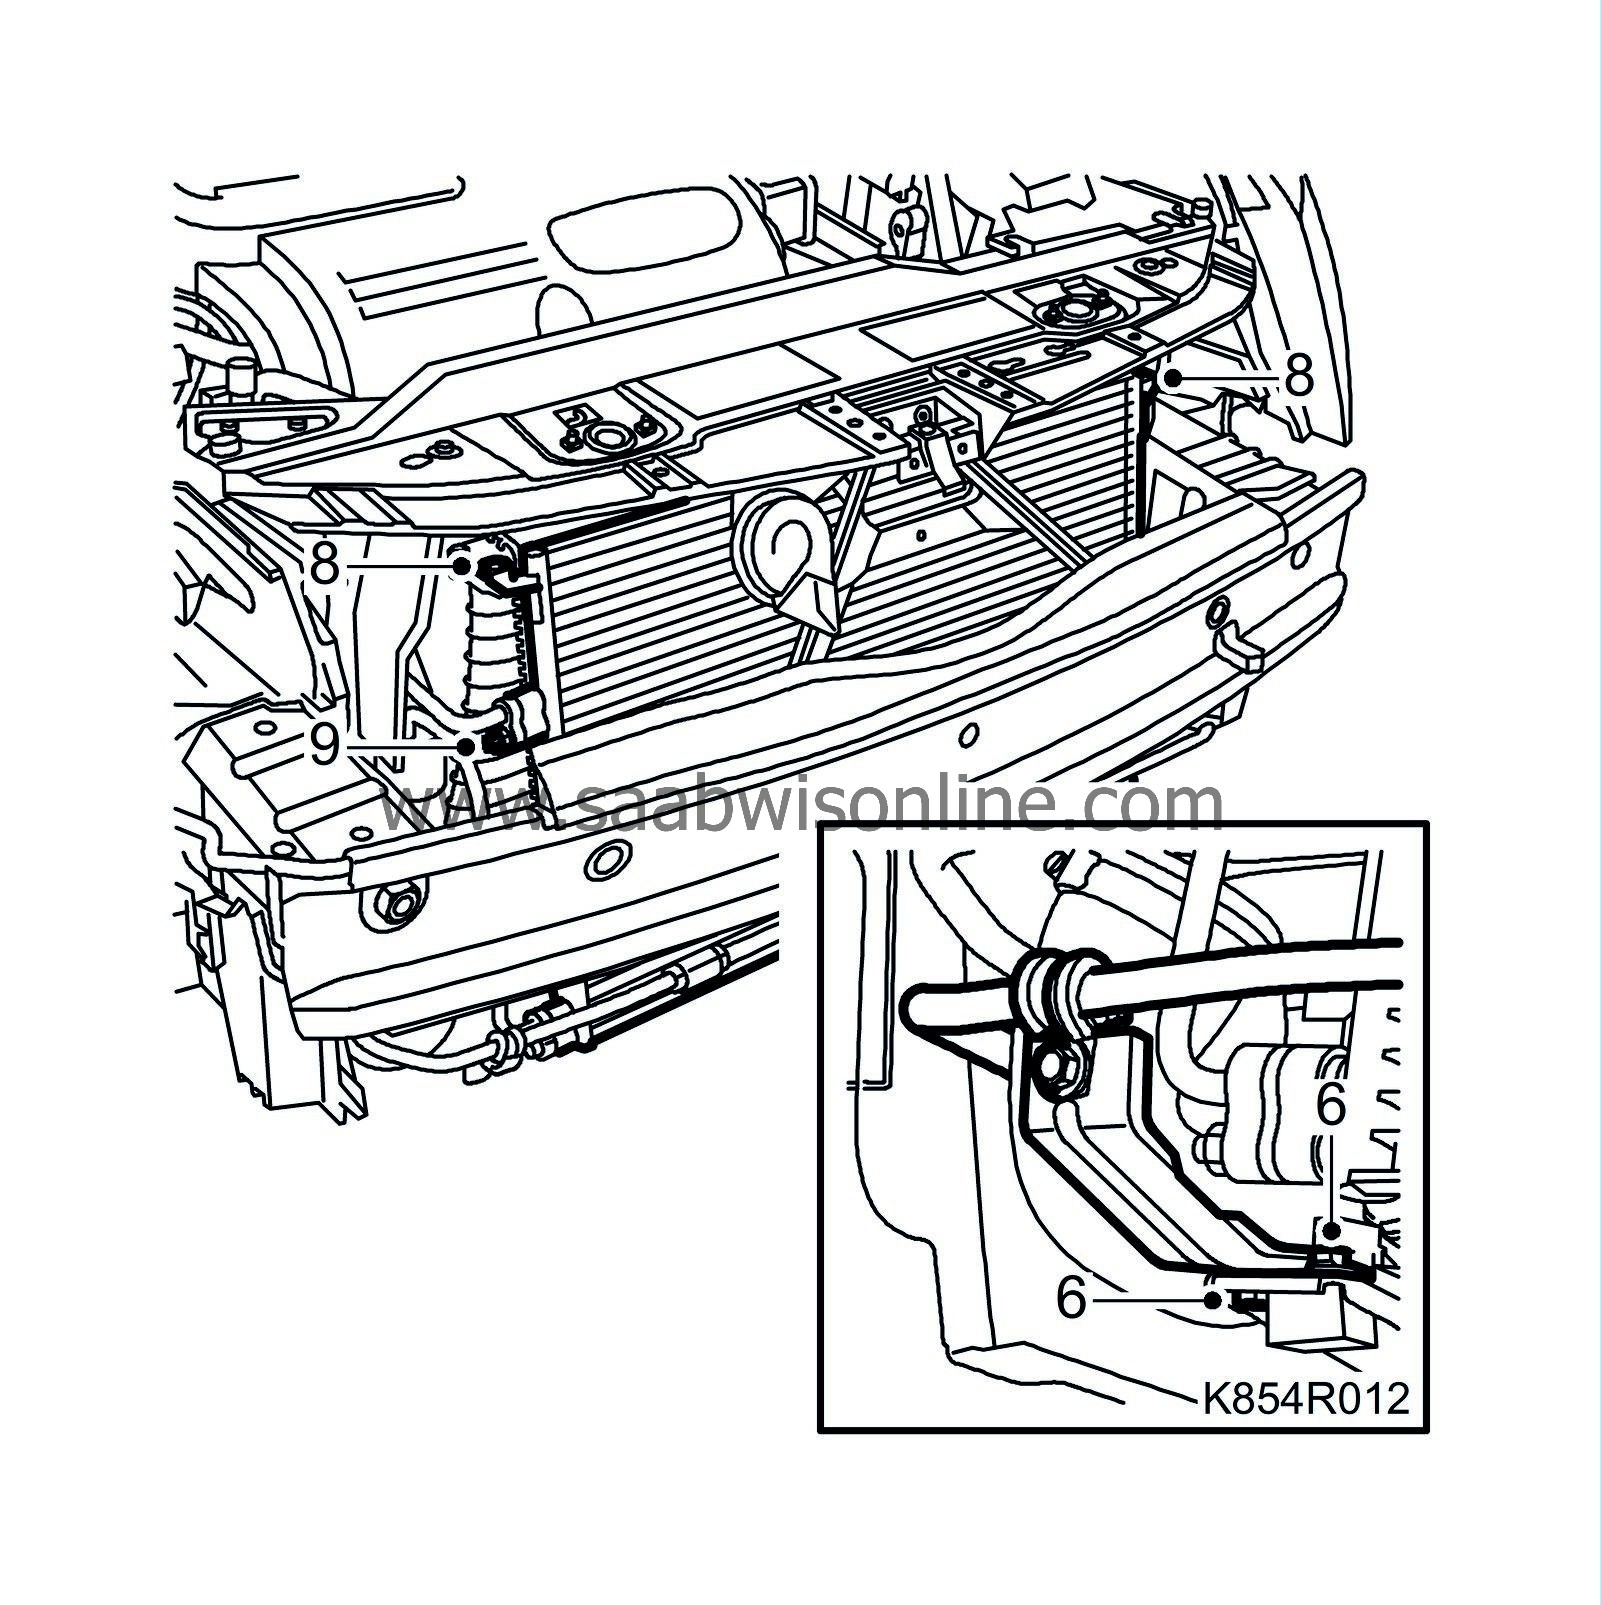
| 6. |
Remove the right mounting of the servo pipe.

|
|
| 7. |
Remove the nuts of the PAD connections.
|
|
| 8. |
Dismantle the condenser's upper screws.
|
|
| 9. |
Lift up the condenser from the lower support. At the same time, pull the PAD connections out of the condenser. Plug the openings.
|
|
| 10. |
Carefully lower and remove the condenser.
|
|
| To fit |
| 1. |
Adjust the oil quantity in the A/C system. See
Filling and adjusting the compressor oil
.
|
|
| 2. |
Fit new seals on the PAD connections.
|
|
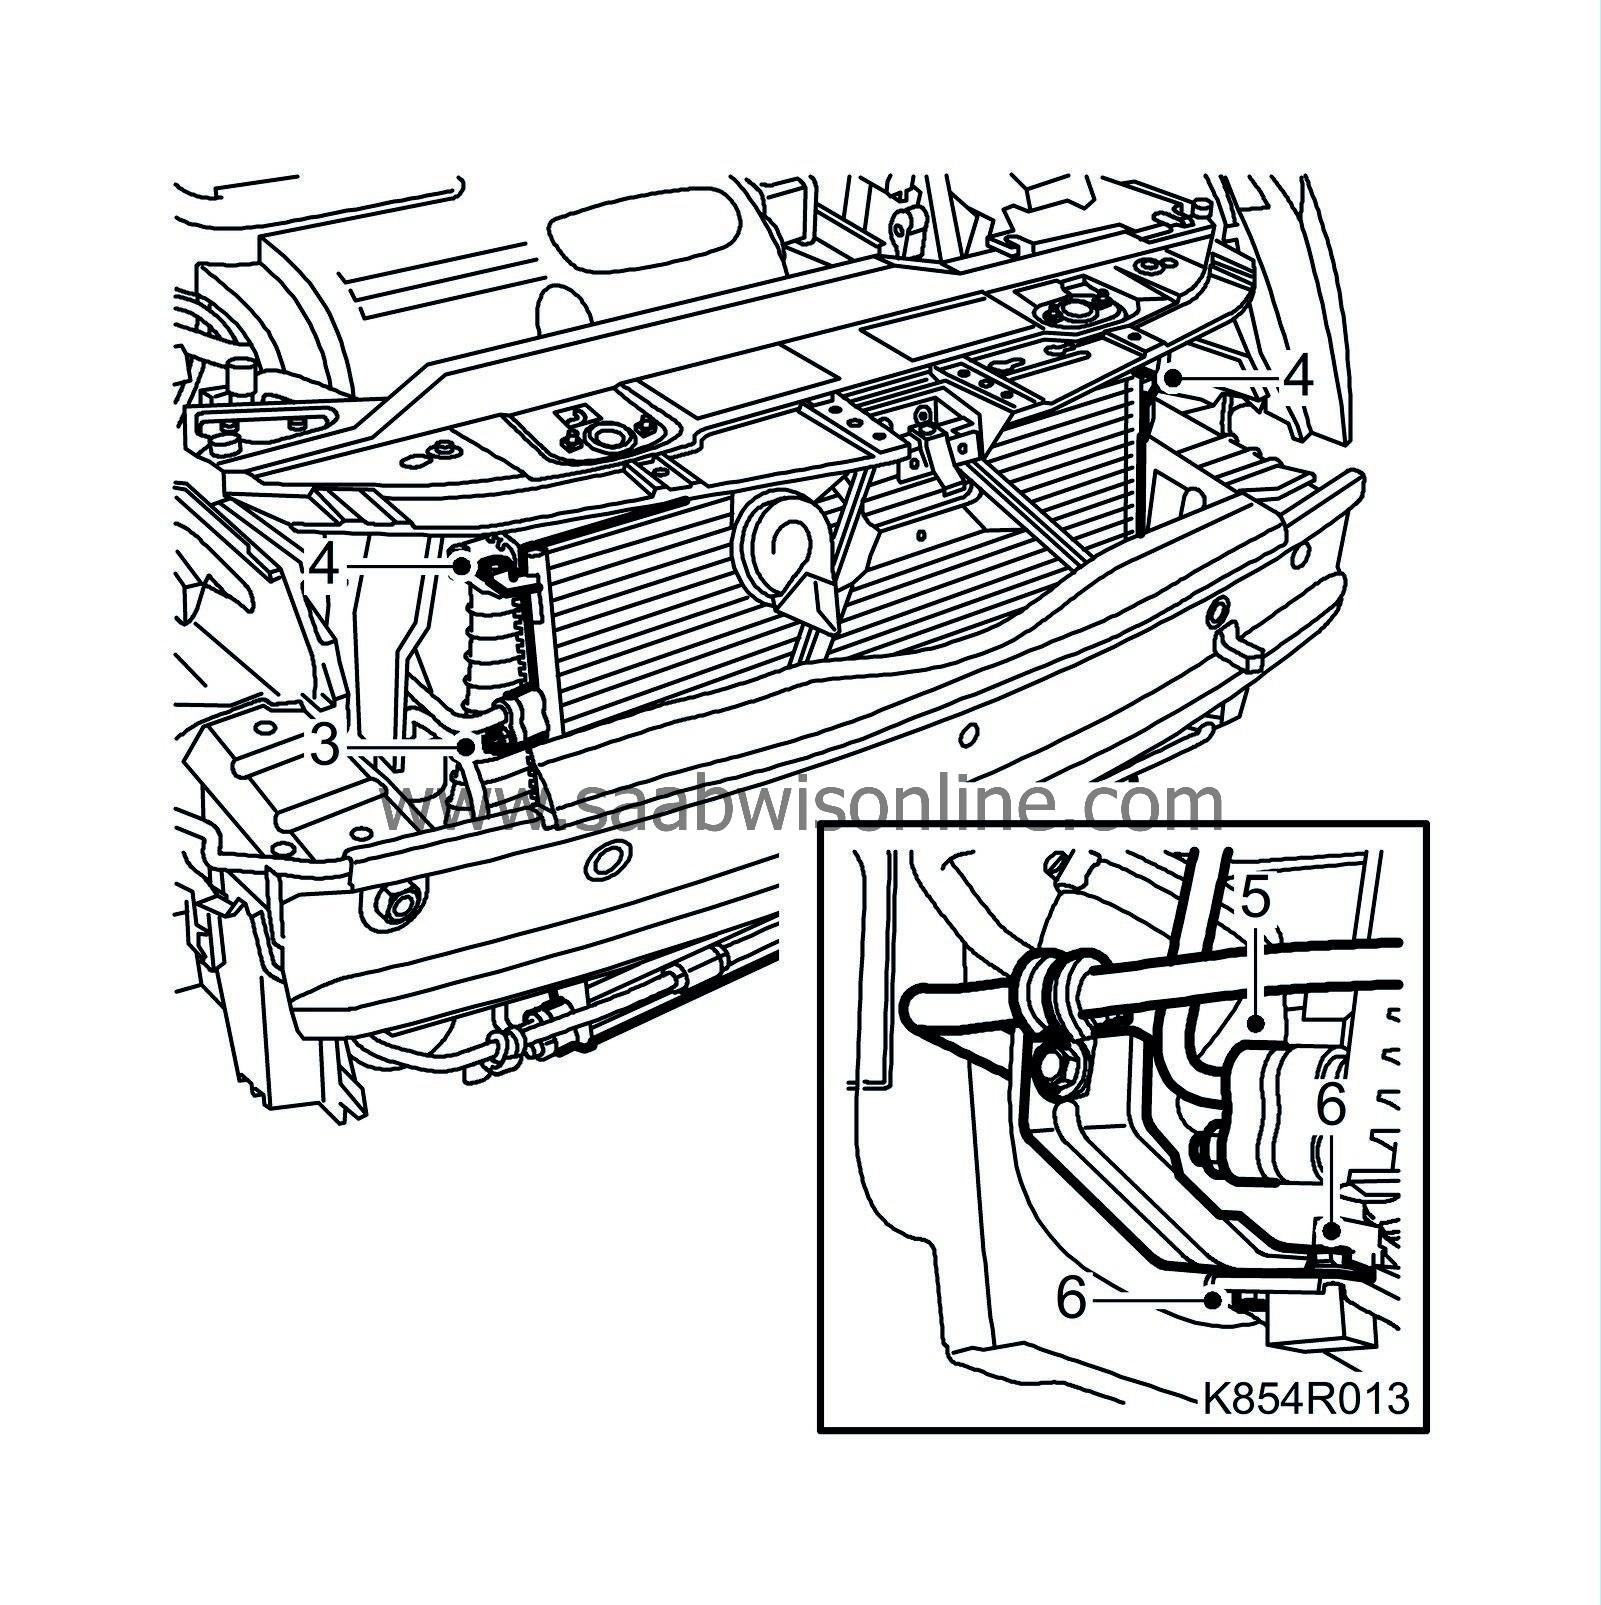
| 3. |
Raise the condenser into position. At the same time, attach the PAD connection to the condenser.

|
|
| 4. |
Fit the condenser to the charge air cooler. Tighten the upper screws.
|
|
| 5. |
Tighten the PAD connection.
Tightening torque 18 Nm (13 lbf ft) |
|
| 6. |
Fit the right mounting of the servo pipe.
|
|
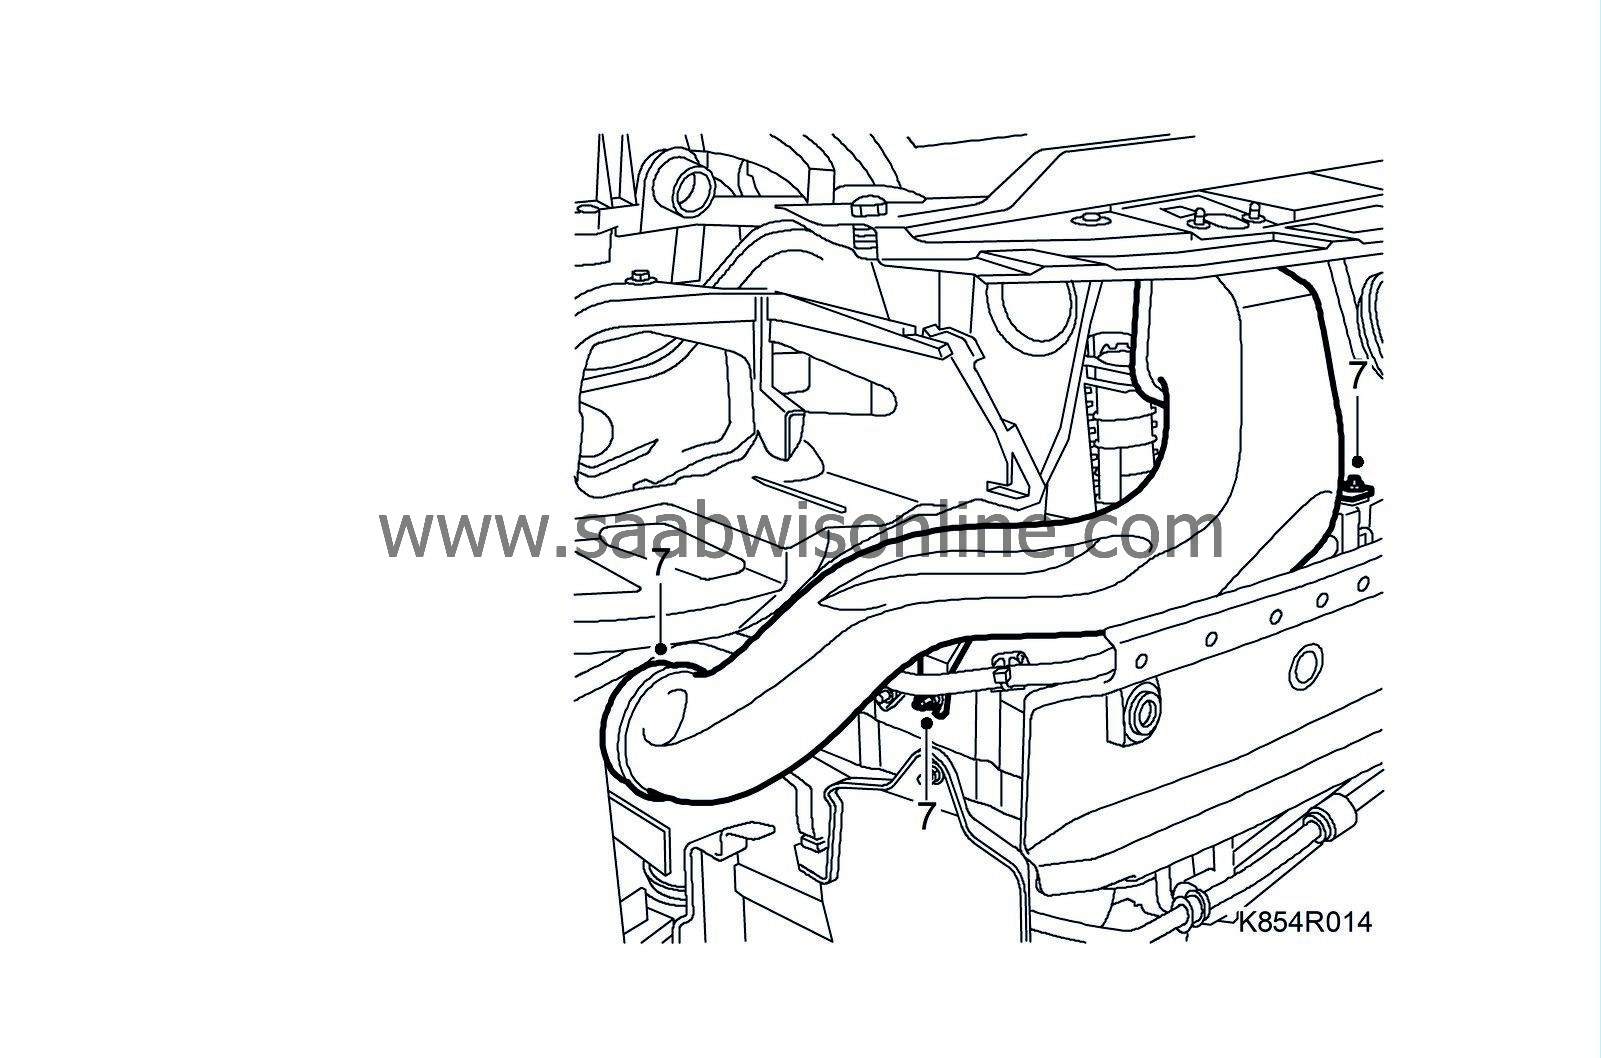
| 7. |
Fit the
right headlamp
.
|
|
| 8. |
Fit the air intake.

|
|
| 9. |
Fit the
Front bumper shell
.
|
|
| 10. |
Vacuum pump and fill the A/C system with refrigerant. See
Draining and filling the refrigerant
.
|
|
| 11. |
Check the performance of the A/C system. See
A/C system performance test
.
|
|


