Engine mounting, left, A20NFT/LHU
| Engine mounting, left, A20NFT/LHU |
| To remove |
| 1. |
Place drapes over the wings to keep the paintwork clean and protect it from damage. Raise the car.
|
|
| 2. |
CV:
Remove the diagonal braces. See
Chassis reinforcement, front subframe, CV, Z19DTH/DTR, A20NFT/LHU
|
|
| 3. |
Fit
83 96 152 Centring tool, power unit
(A) to the subframe. See also
Centring tool, engine and subframe
.

|
|
| 4. |
Lower the car.
|
|
| 5. |
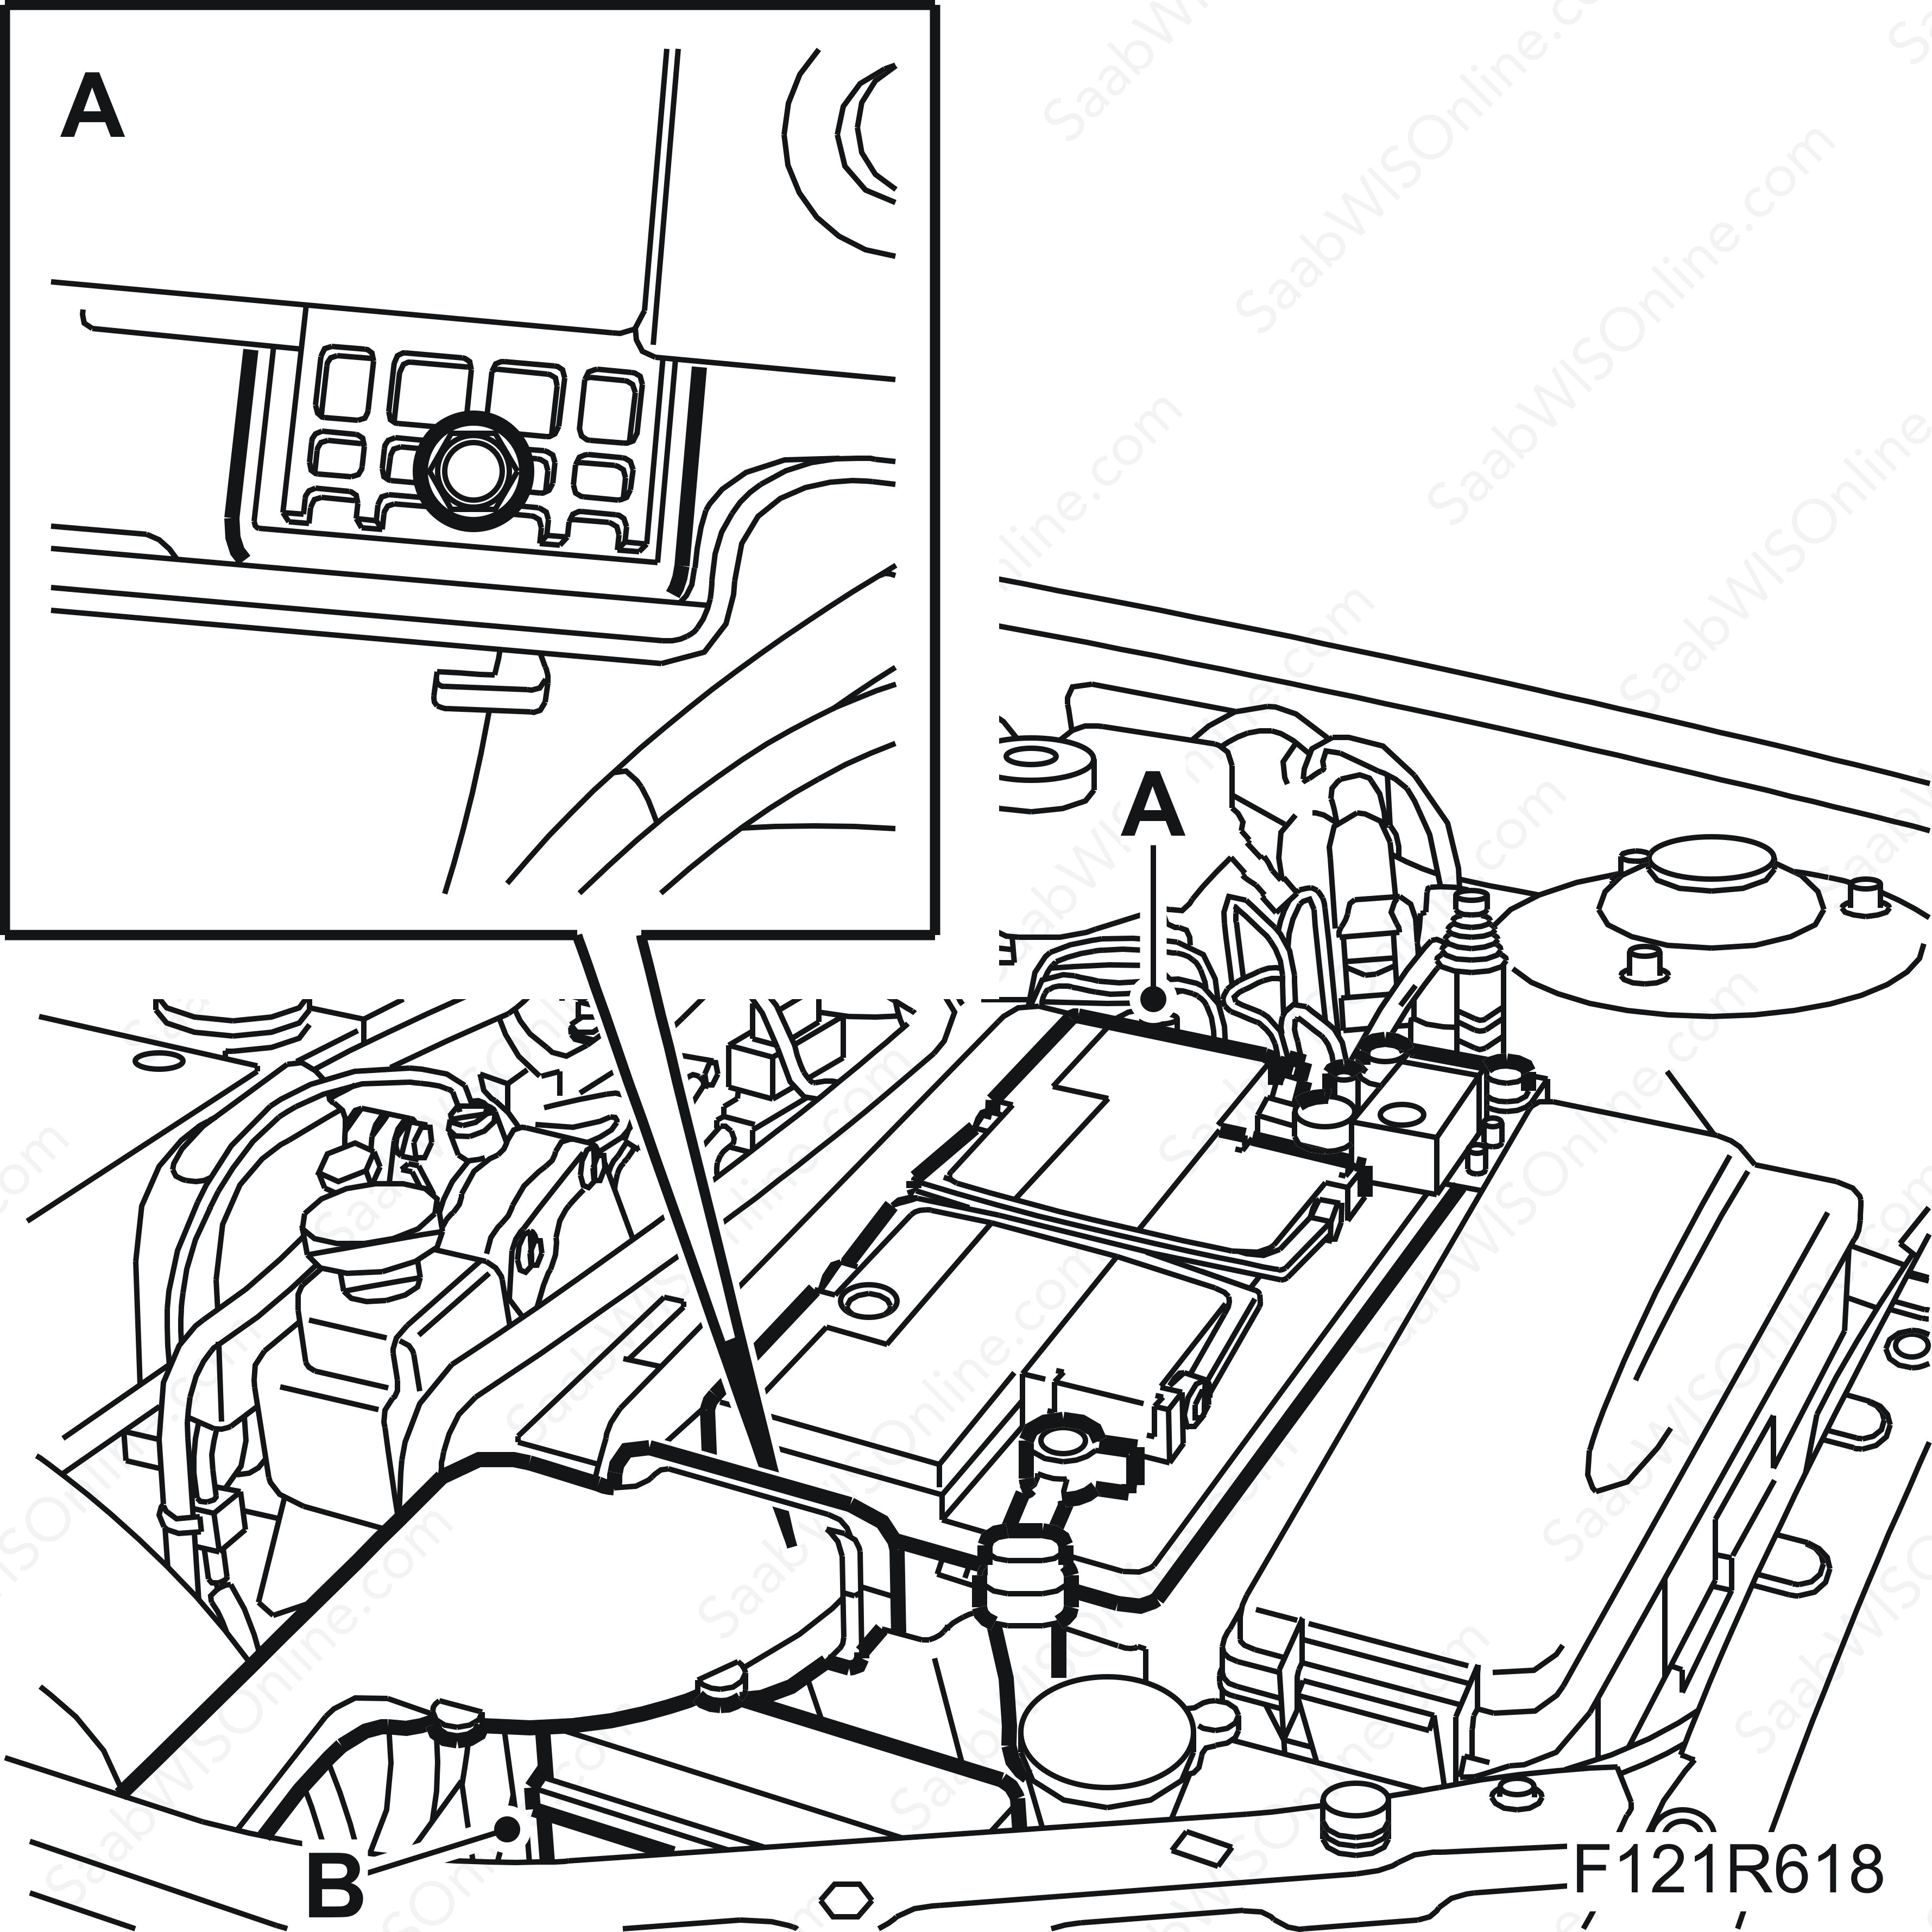
Remove the battery (A).
|
|
| 6. |
Remove the battery tray (B)
|
|
| 7. |
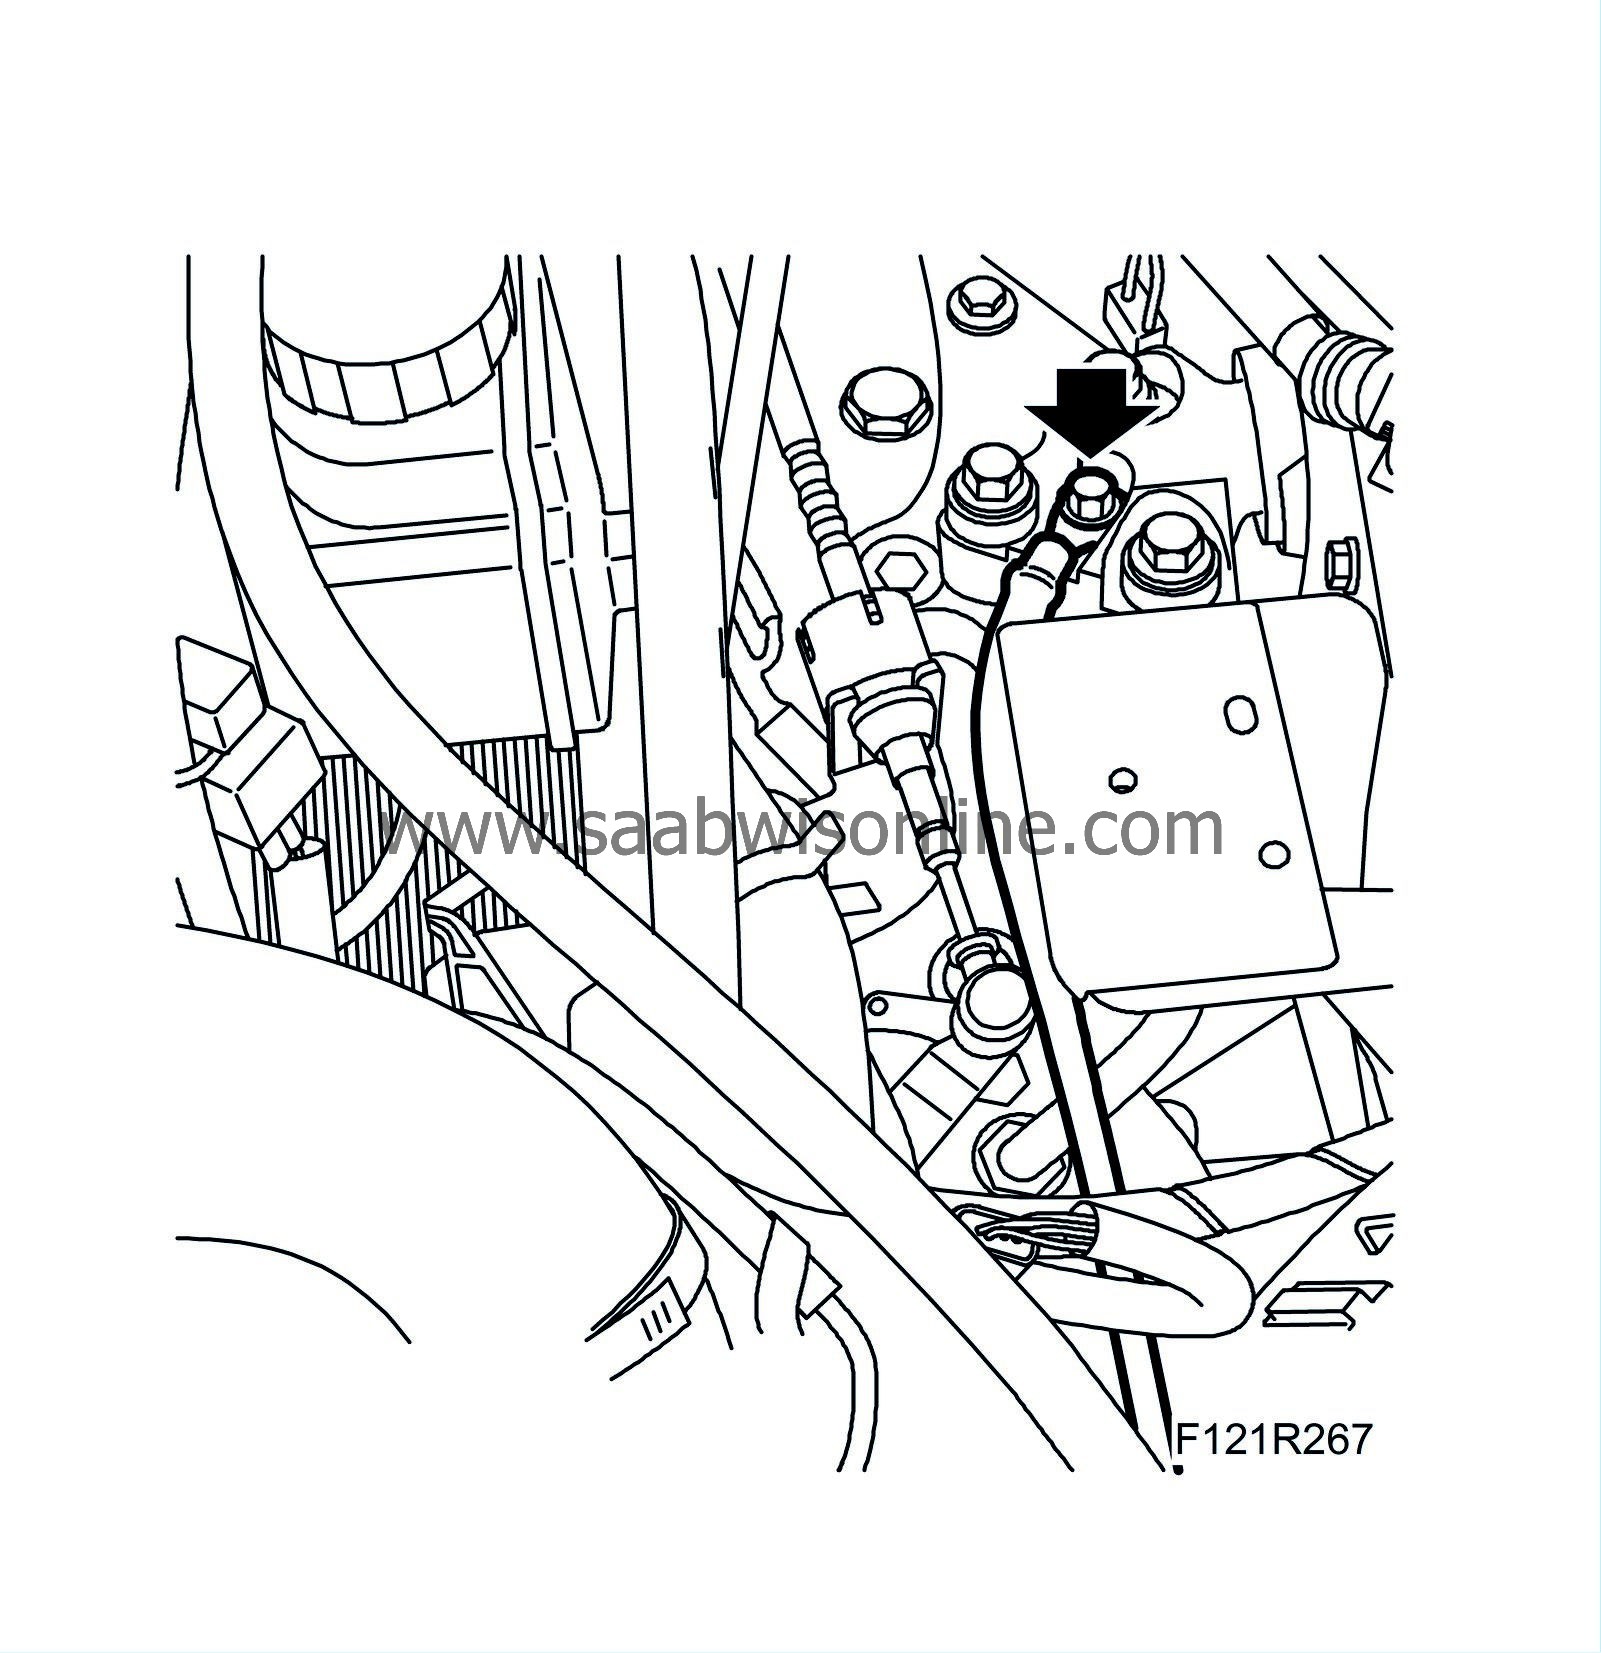
Remove the ground cable from the engine mounting.
|
|
| 8. |
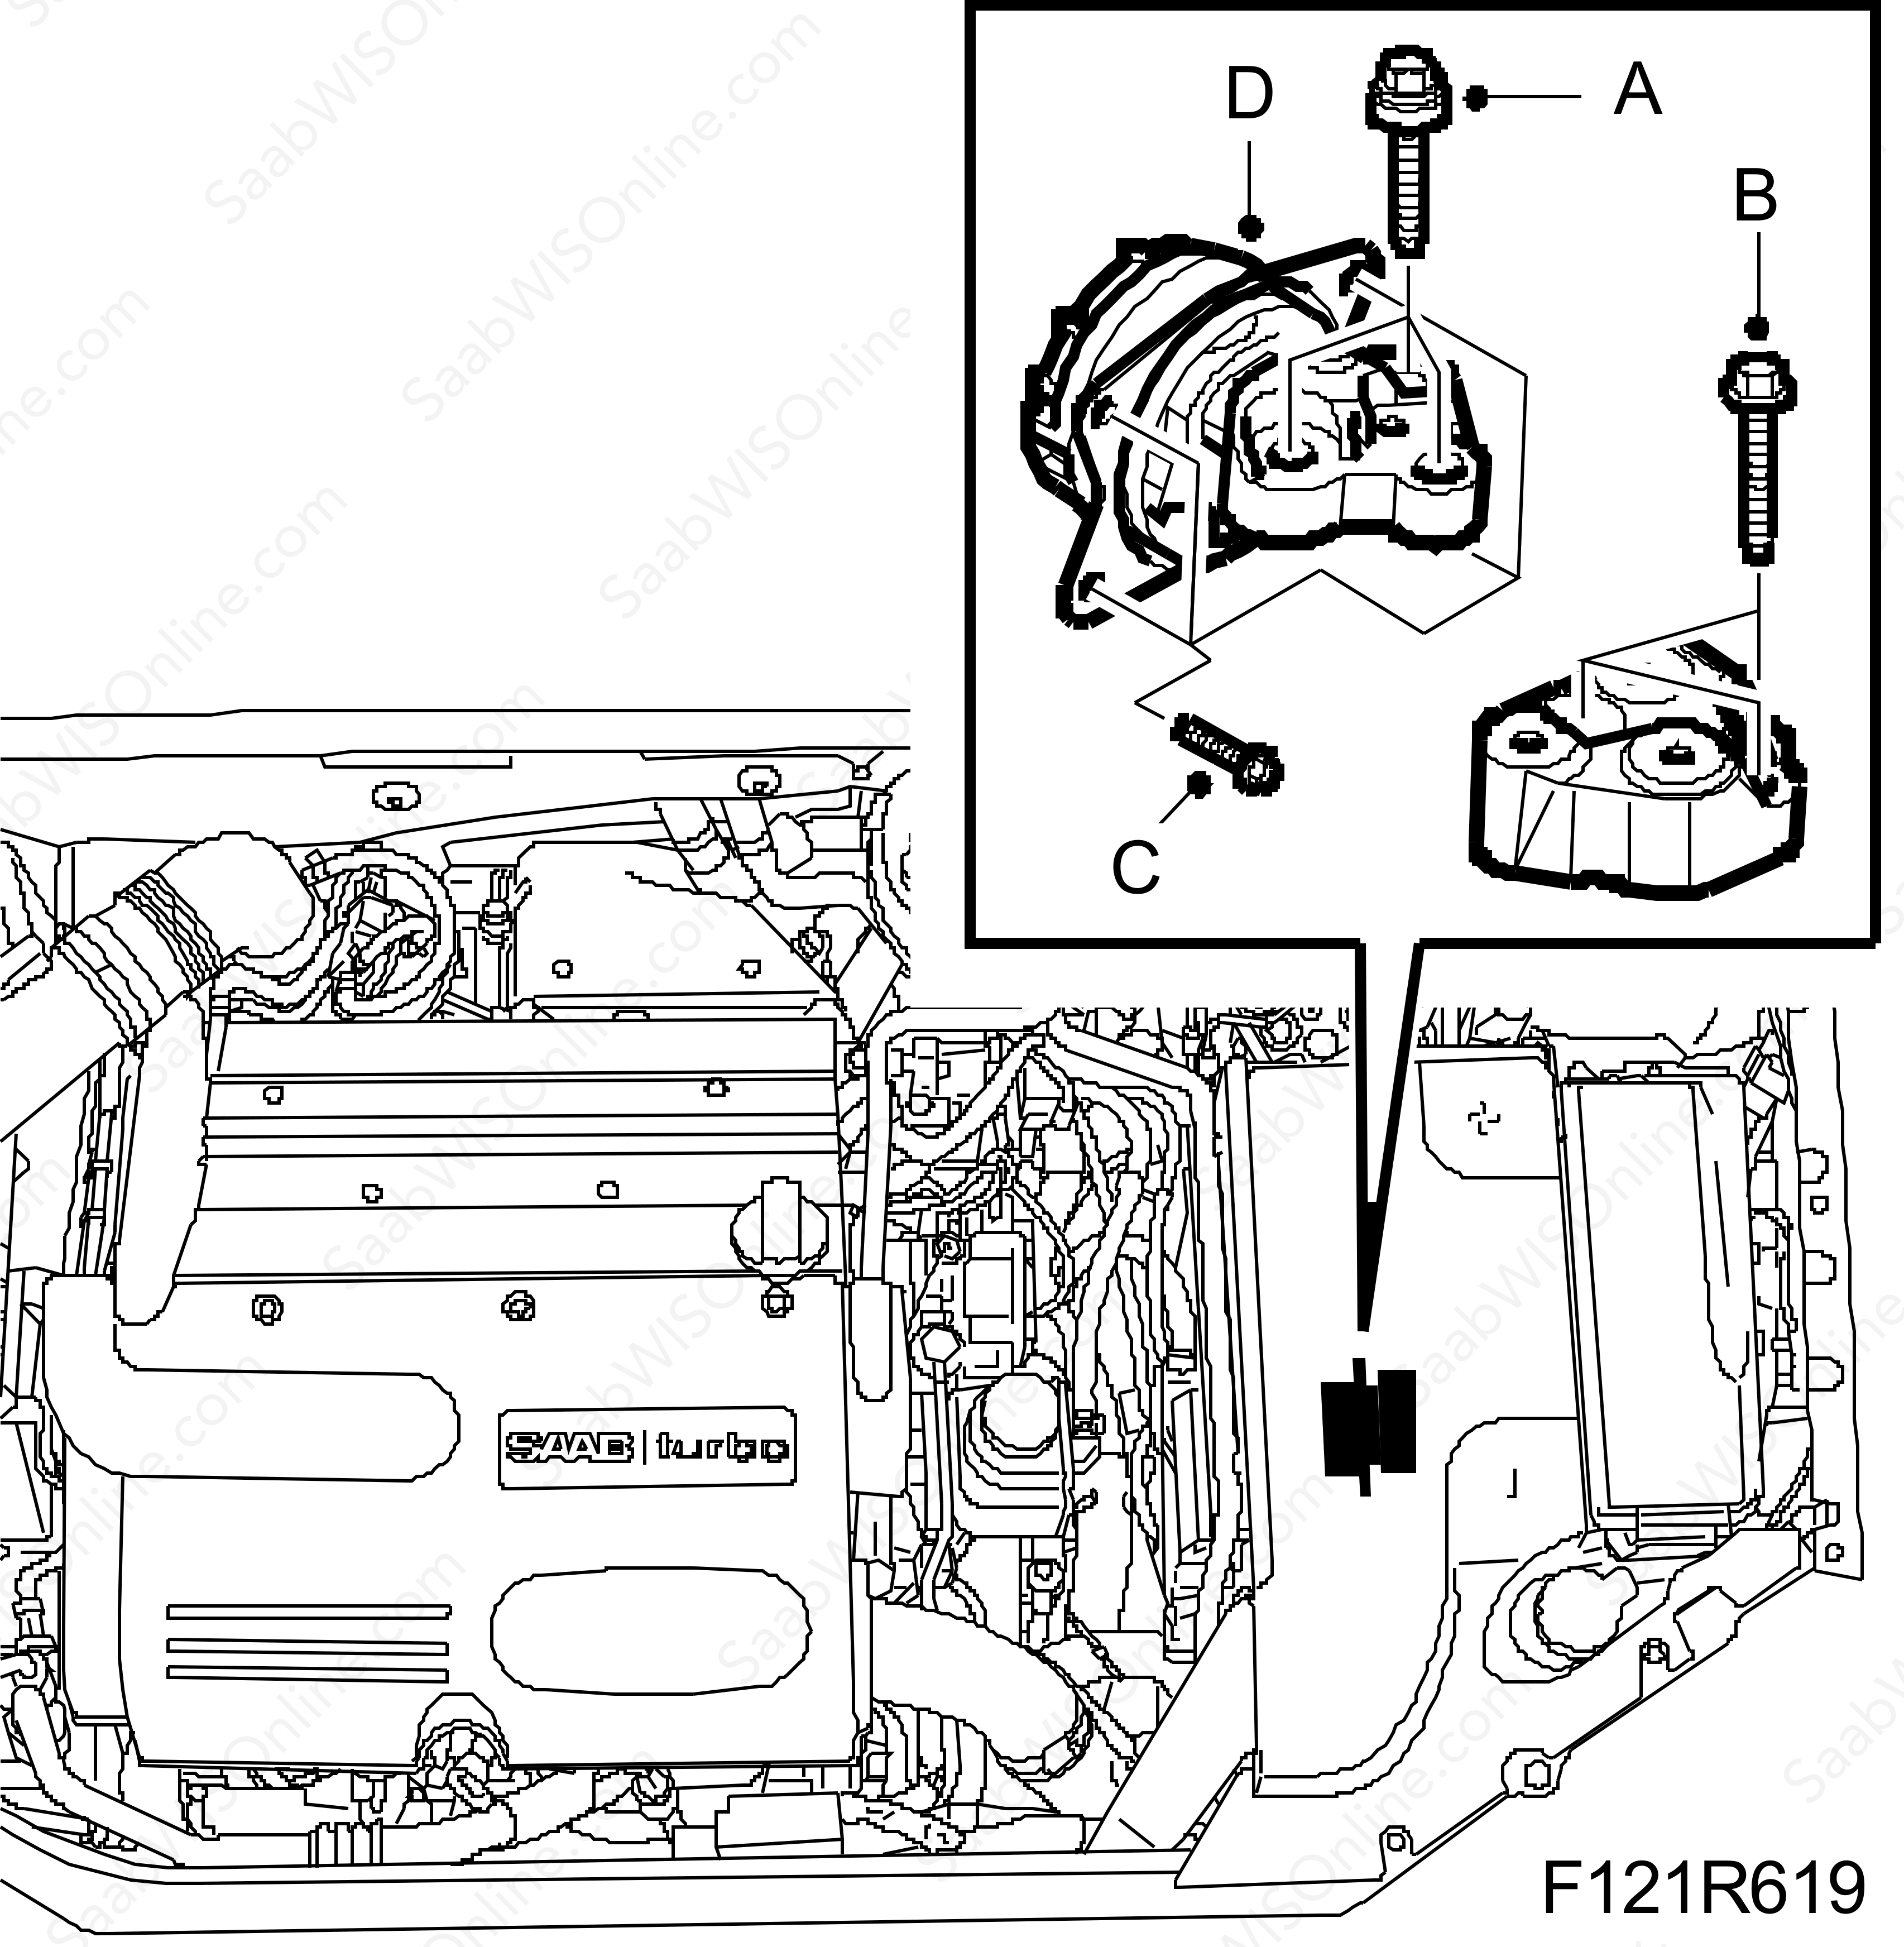
Remove the engine pad bolts (A) from the gearbox bracket.
|
|
| 9. |
Remove the bolts (B) for the gearbox bracket. Lift out the bracket.
|
|
| 10. |
Remove the engine pad bolts (C) from the body.
|
|
| 11. |
Remove the engine pad (D).
|
|
| To fit |
| 1. |
Fit the engine pad (A) in place. Tighten the bolts (B).
Tightening torque: 15 Nm + 45° (11 lbf ft + 45°) 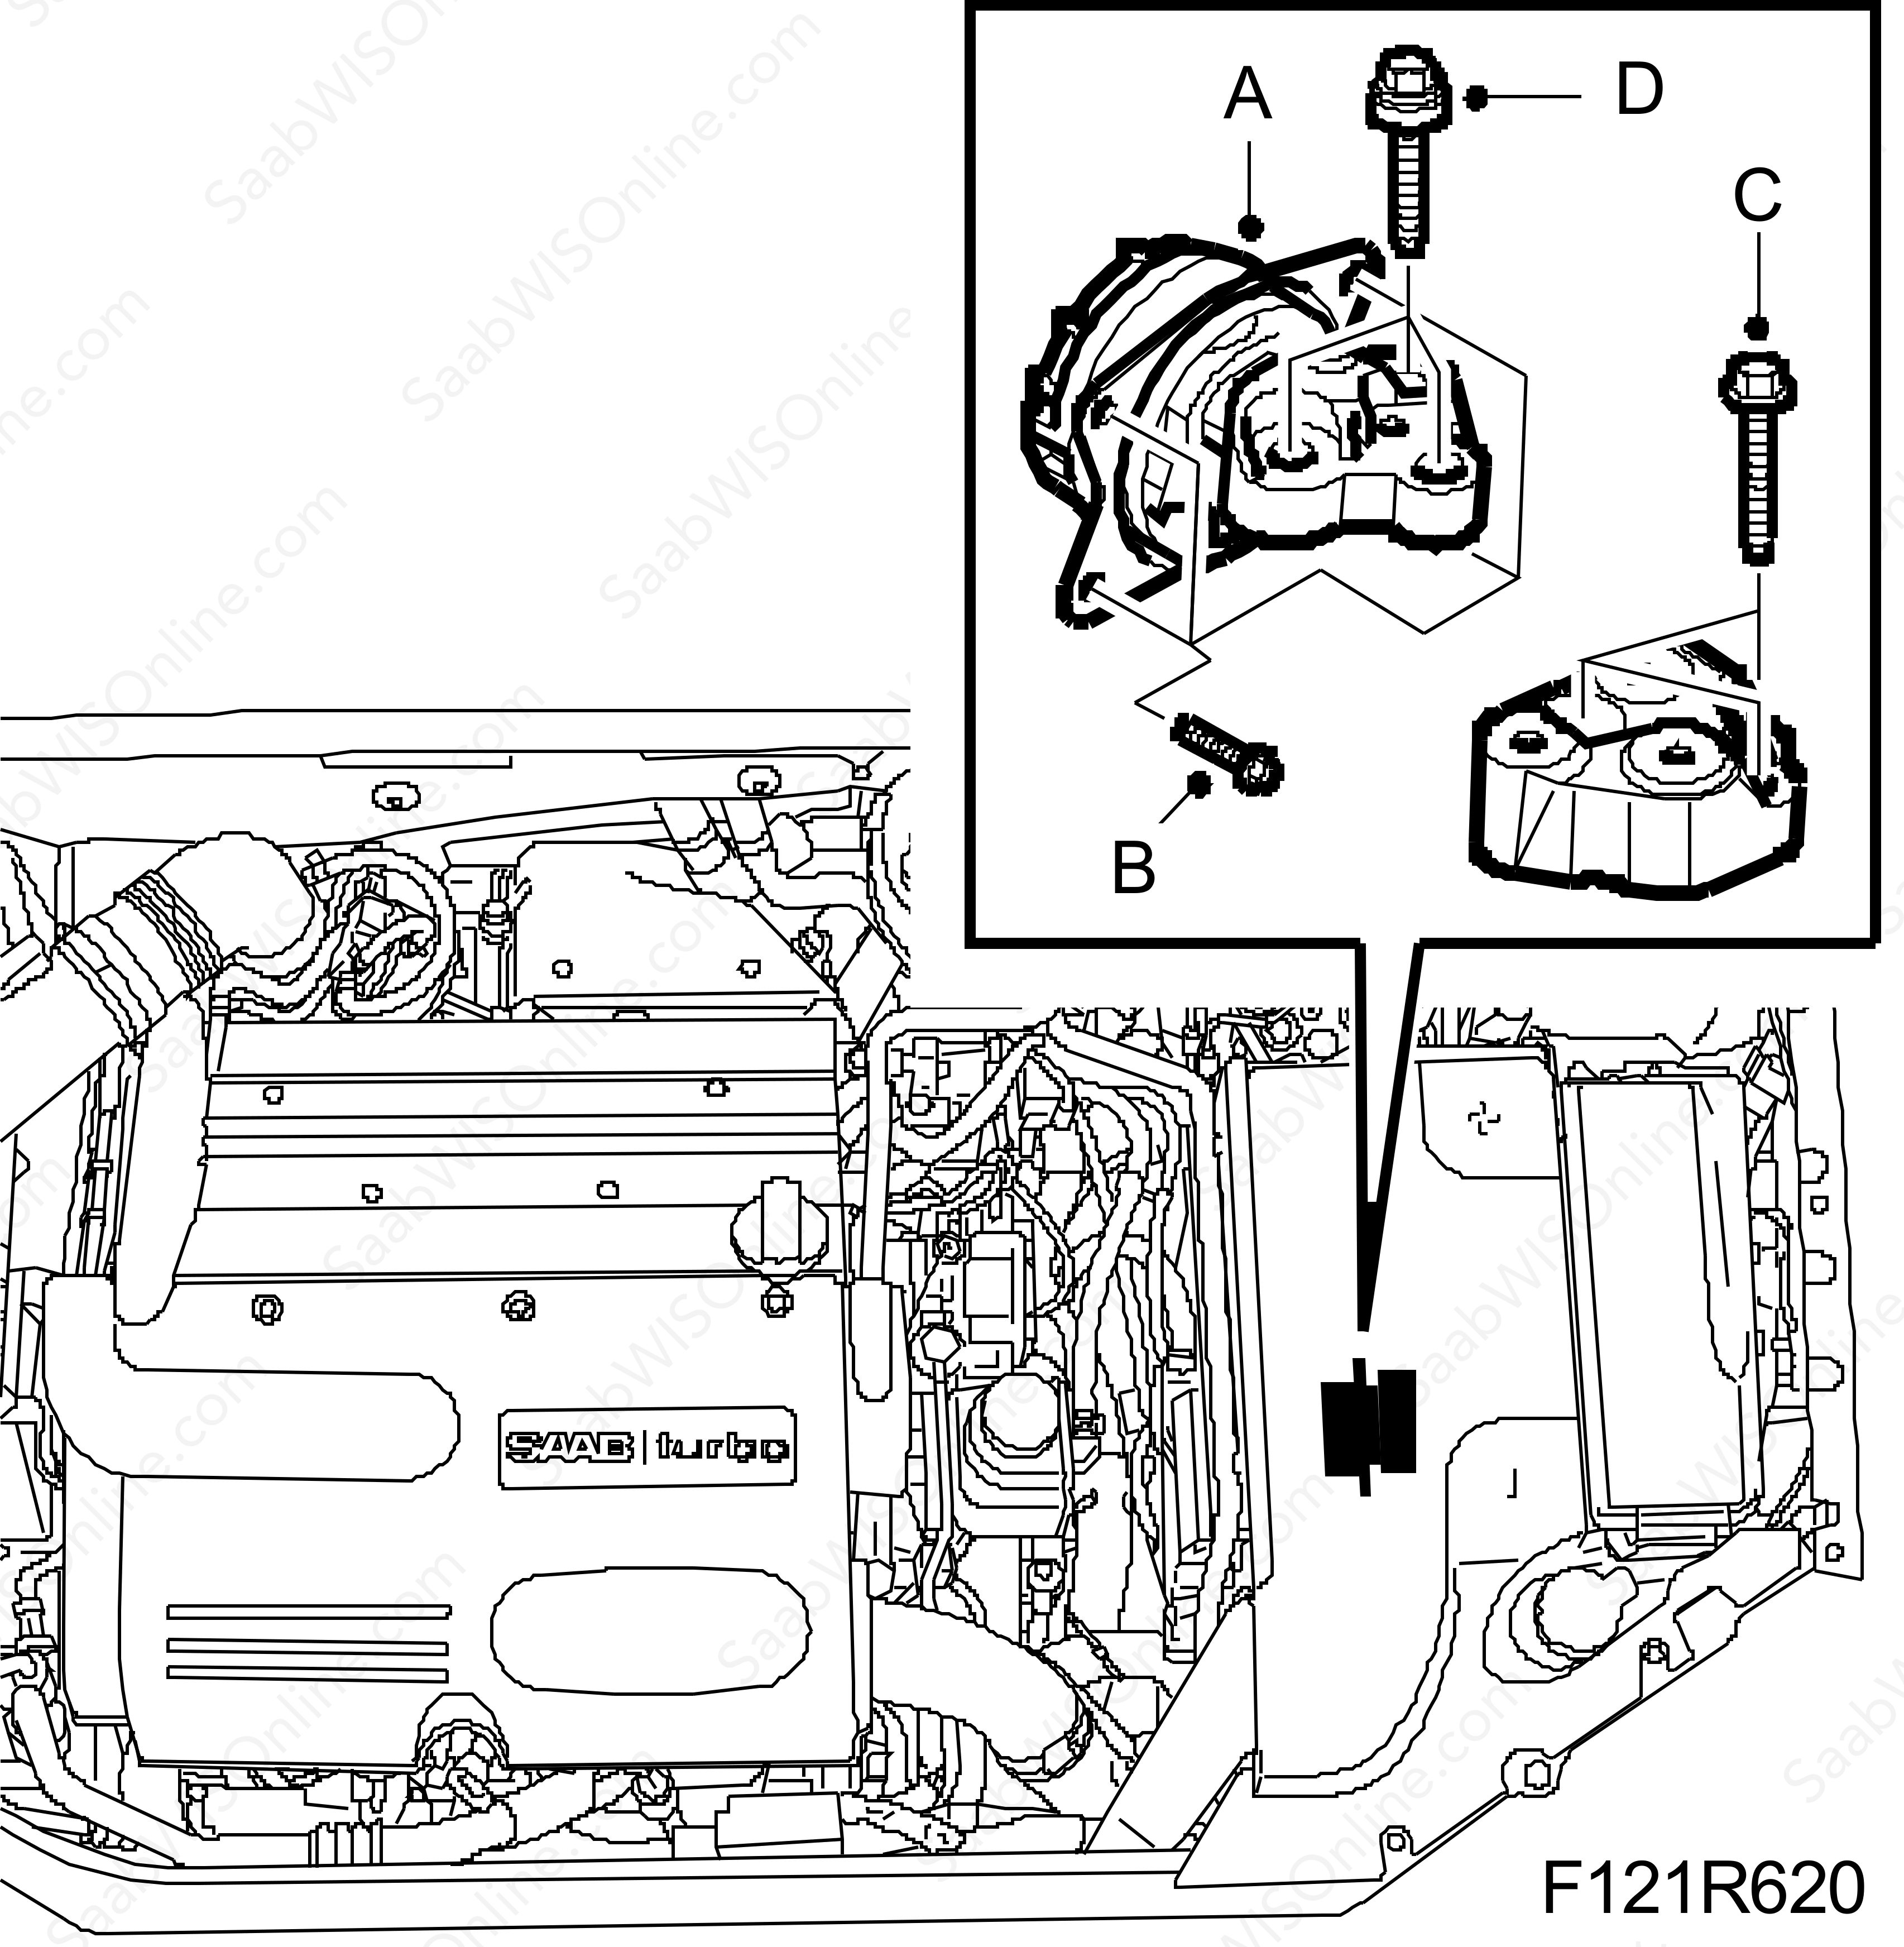
|
|
| 2. |
Fit the gearbox bracket (C).
Tightening torque 80 Nm (59 lbf ft). |
|
| 3. |
Fit the engine pad bolts (D) to the bracket.
Tightening torque 53 Nm (39 lbf ft) |
|
| 4. |
Fit the ground cable to the engine pad.

|
|
| 5. |
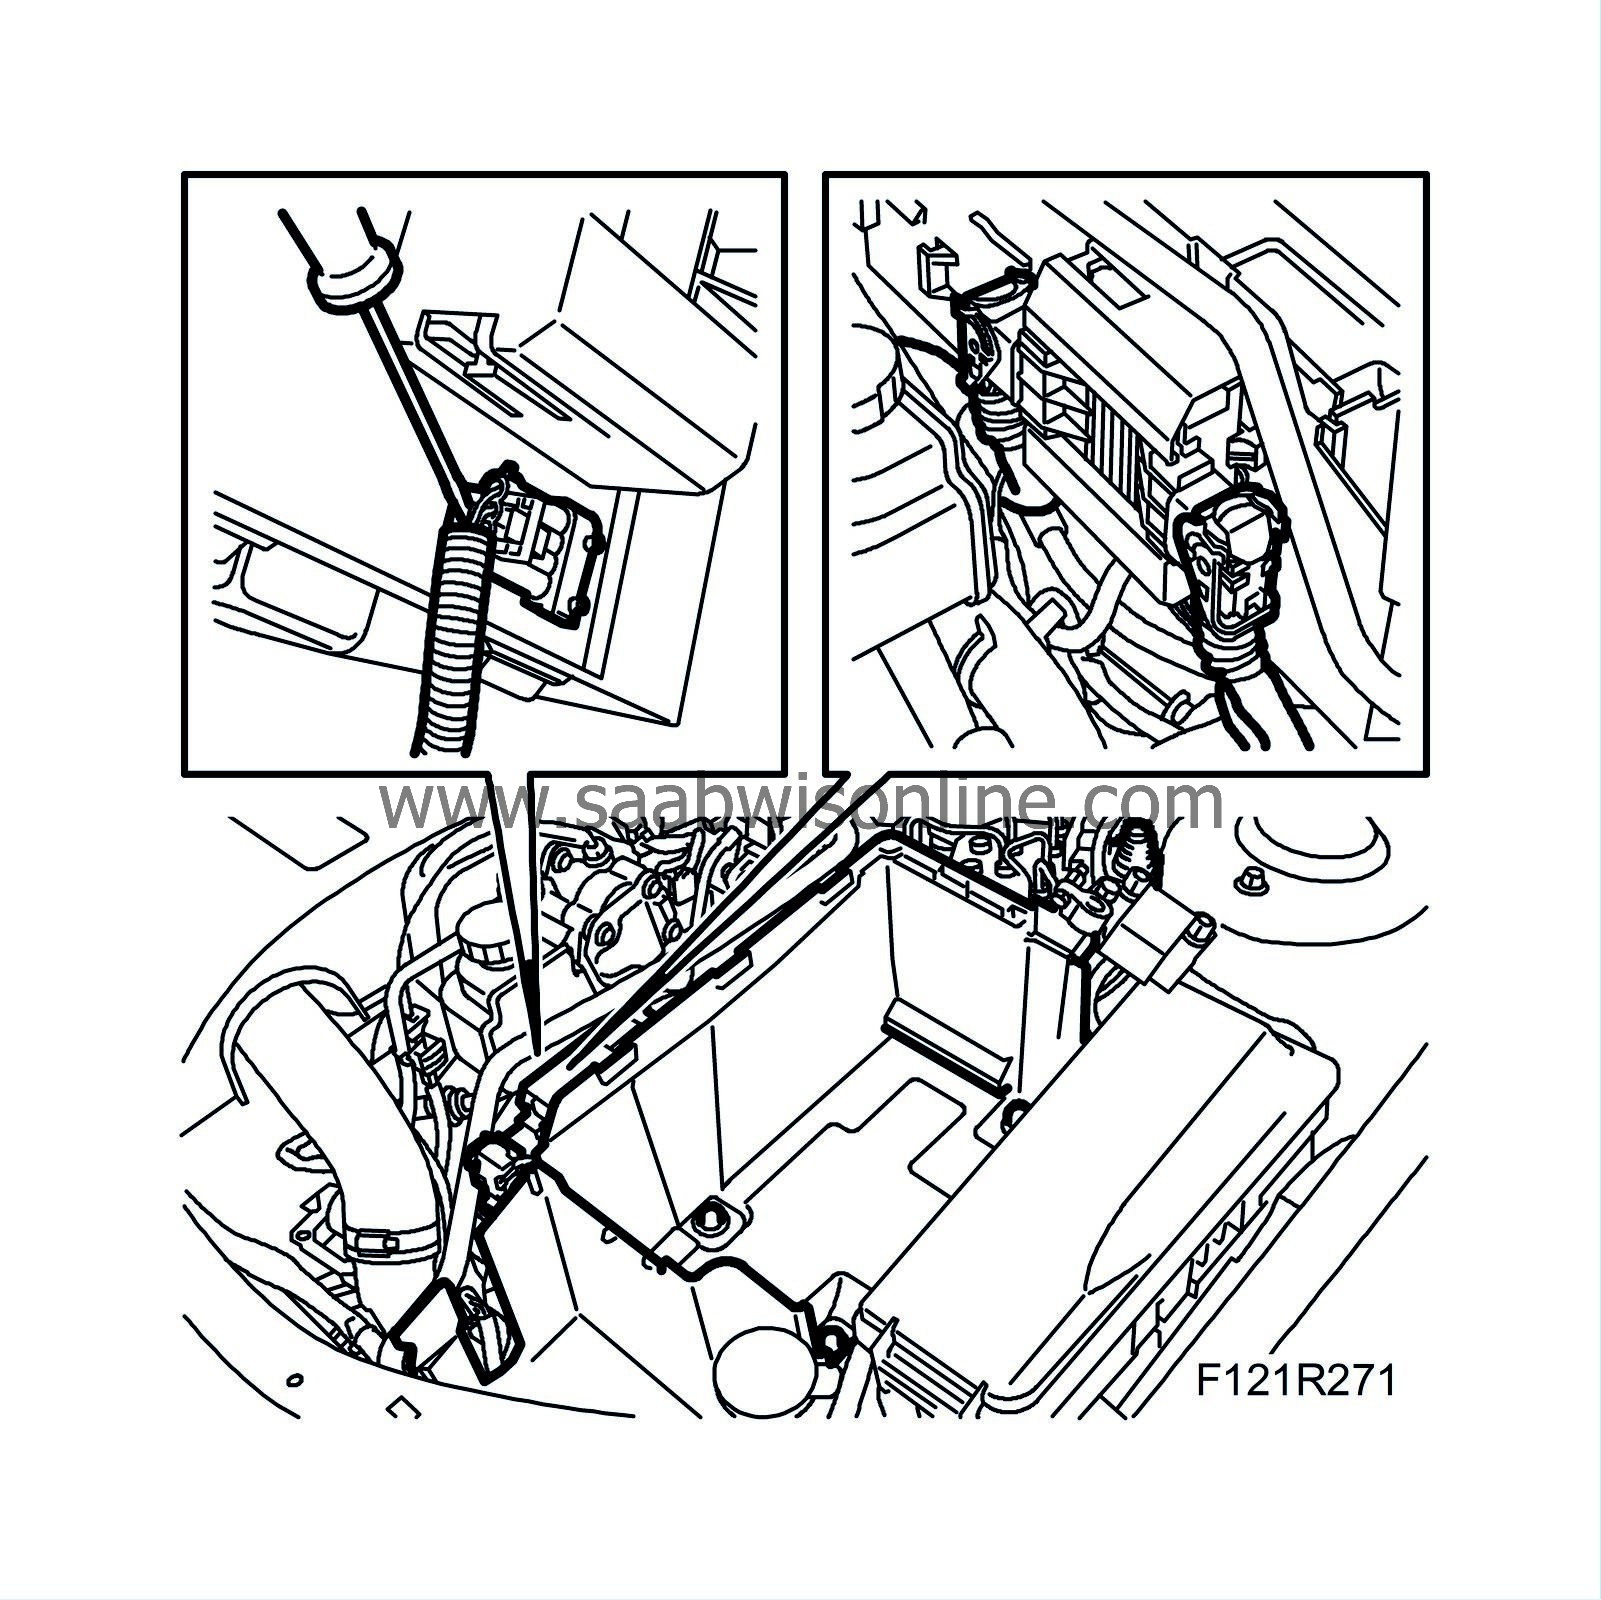
Fit the battery tray and battery.
|
|
| 6. |
Raise the car and remove
83 96 152 Centring tool, power unit
(A) from the subframe.

|
|
| 7. |
CV:
Fit the diagonal brace. See
Chassis reinforcement, front subframe, CV, Z19DTH/DTR, A20NFT/LHU
|
|
| 8. |
Lower the car and remove the wing protectors.
|
|
| 9. |
Carry out
Procedures after reconnecting the battery
|
|


