Fuel lines tank - engine bay
| Fuel lines tank - engine bay |
|
||||||||||||||||||||||
| Important | ||
|
Be particulary observant regardning cleanliness when working on the fuel system. Loss of function may occur due to very small particles. Prevent dirt and grime from entering the fuel system by cleaning the connections and plugging pipes and lines during disassembly. Use 82 92 948 Plugs, A/C system assembly. Keep components free from contaminants during storage. |
||
| To remove |
| 2. |
Disconnect the negative battery cable.
|
|
| 3. |
Z19:
Remove the upper engine cover. Remove the panel guard. Press out the clips' centre pin from the wheel housing side.
B207 RHD: Remove the air cleaner assembly. B207 with ethanol sensor: Remove the fuel line from the Ethanol sensor . |
|
| 4. |
Unplug the fuel lines in the engine bay, use
83 95 261 Fuel line tool
and plug the lines. Use
82 92 948 Plugs, A/C system, kit
.

|
|
| 5. |
Raise the car.
|
|
| 6. |
CV:
Remove
Chassis reinforcement, front subframe, CV, Z19DTH/DTR, A20NFT/LHU
.
|
|
| 7. |
Z19:
Remove
Exhaust pipe, front
.
B207:
Remove the exhaust pipe flange and unload the flexible section using
83 95 212 Strap
.
|
|
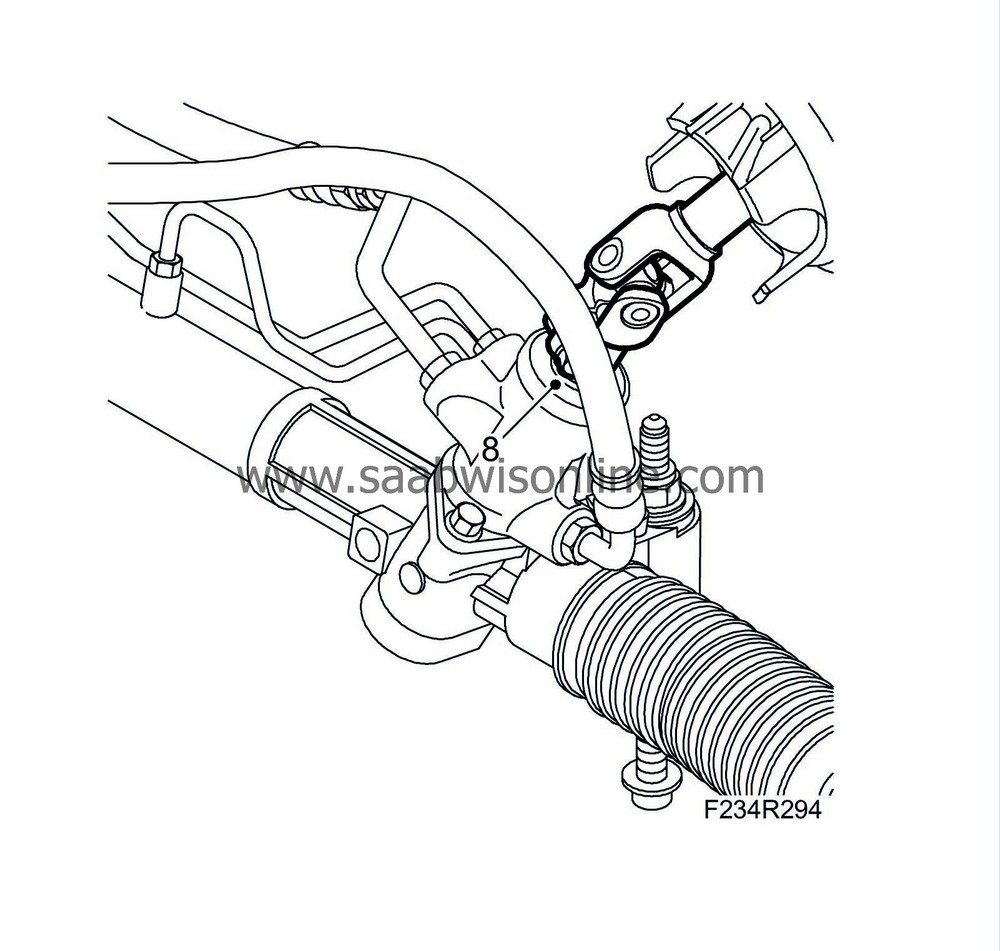
| 8. |
Detach the steering shaft joint from the steering gear.
|
|
| 9. |
Remove the rear torque rod bolt.

|
|
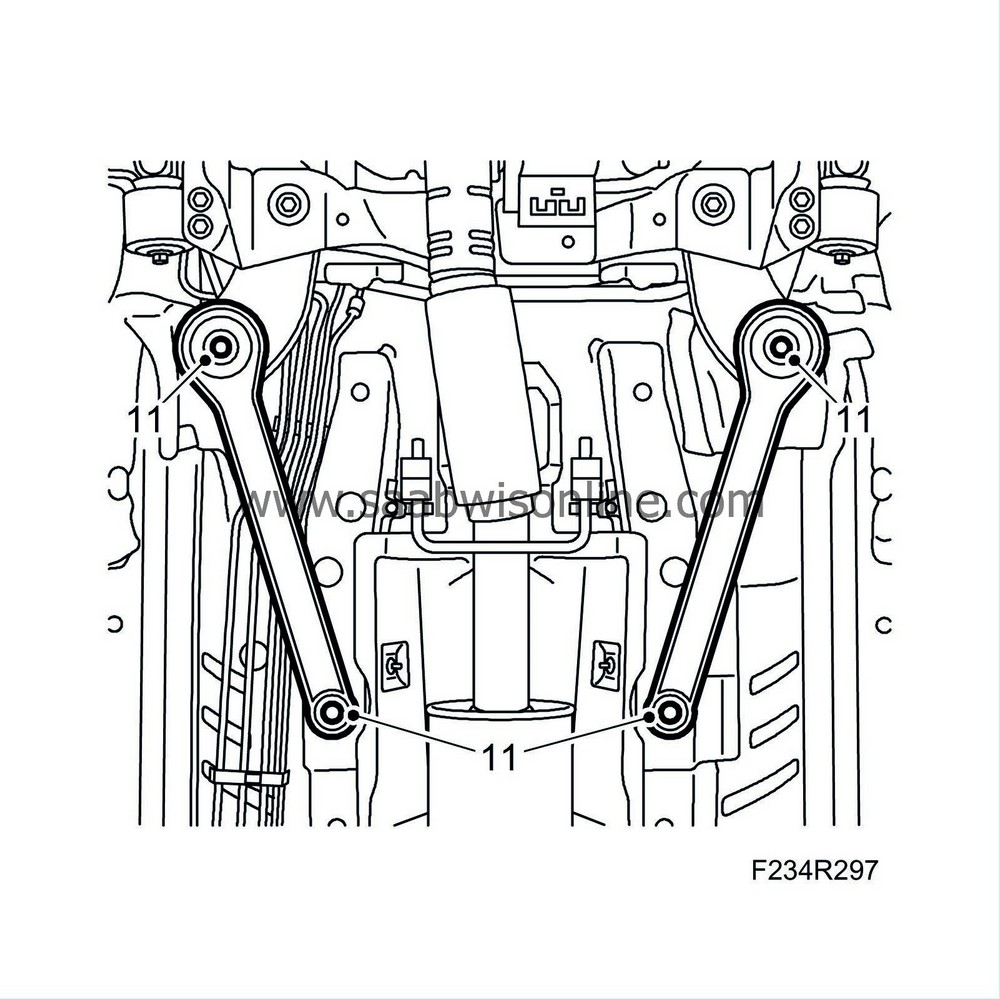
| 10. |
Use a column jack to relieve the load on the subframe and remove the rear bolts and stays.
|
|
| 11. |
Lower the rear edge of the subframe.
|
|
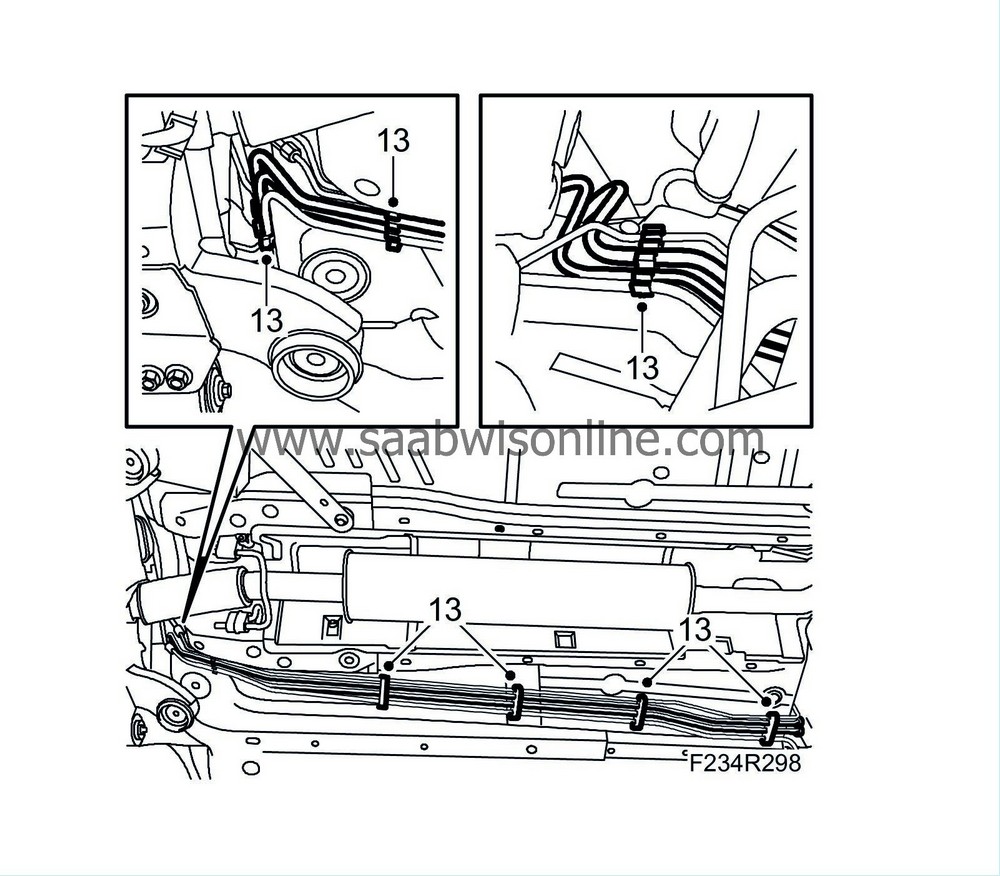
| 12. |
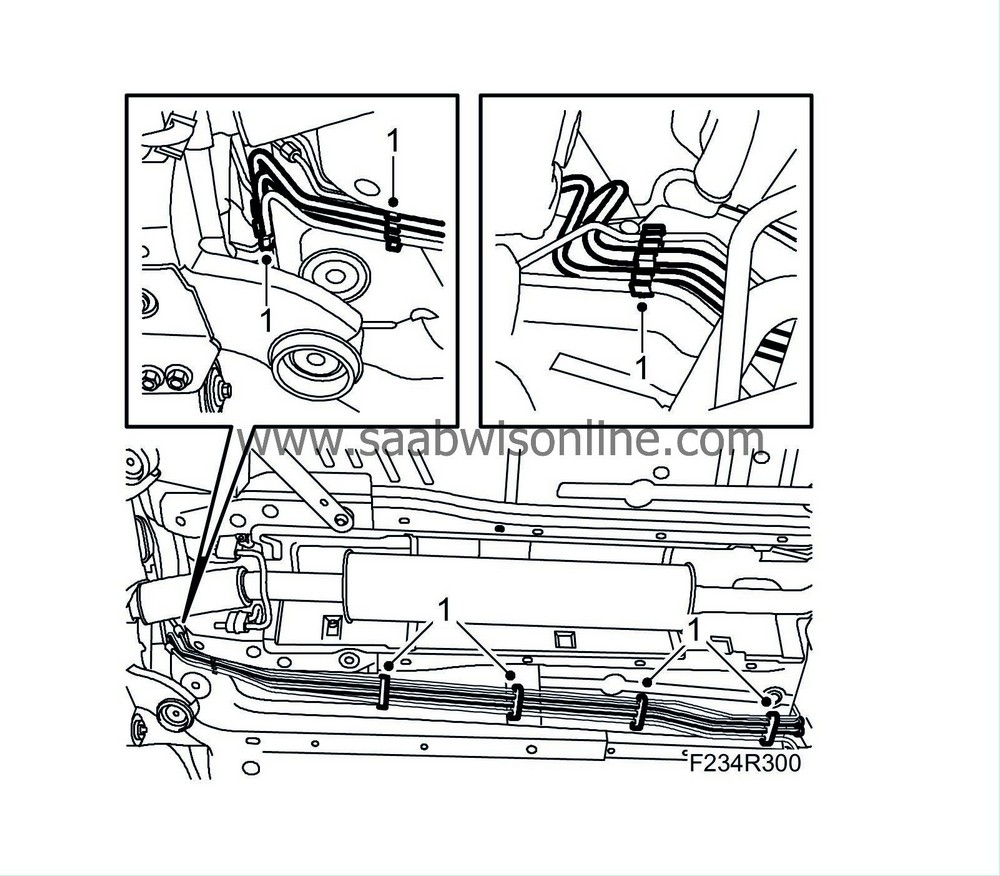
Undo the fuel lines from their holders and the brake pipes from the front holders.
|
||||||||||
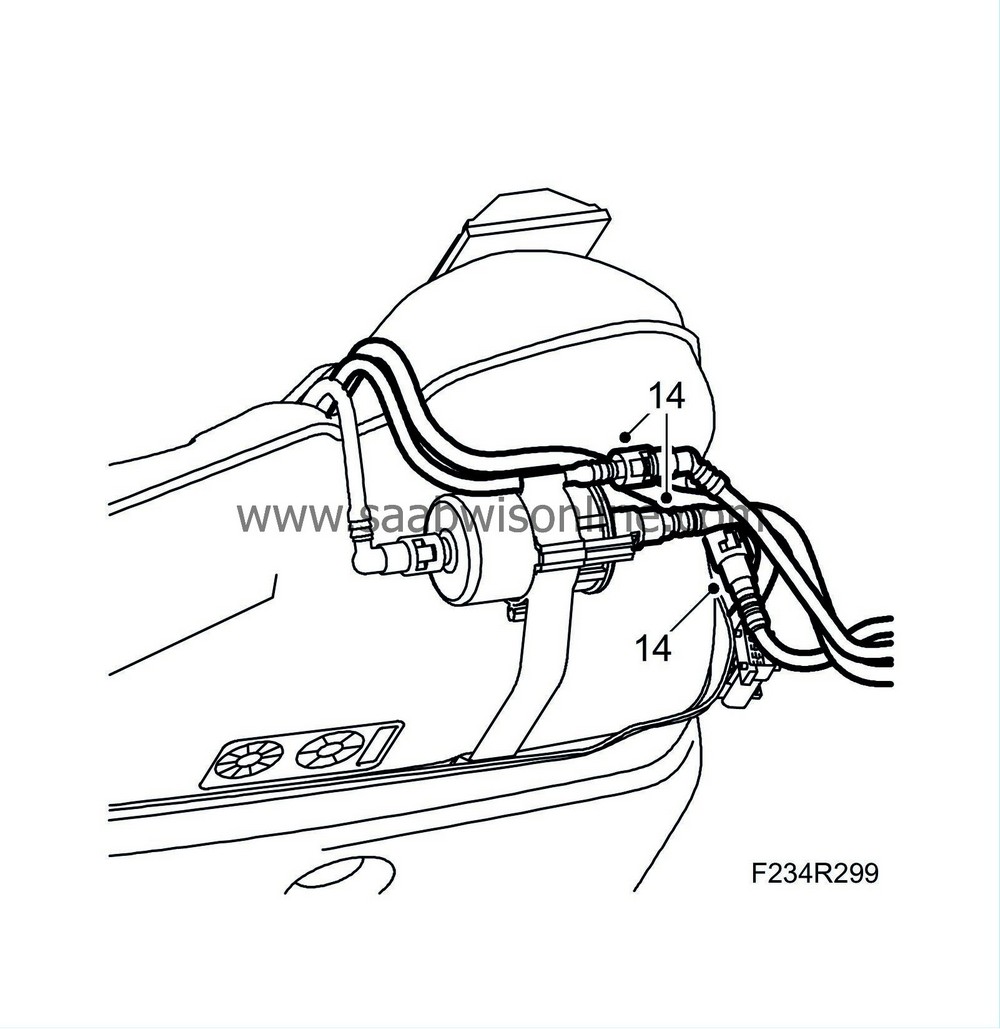
| 13. |
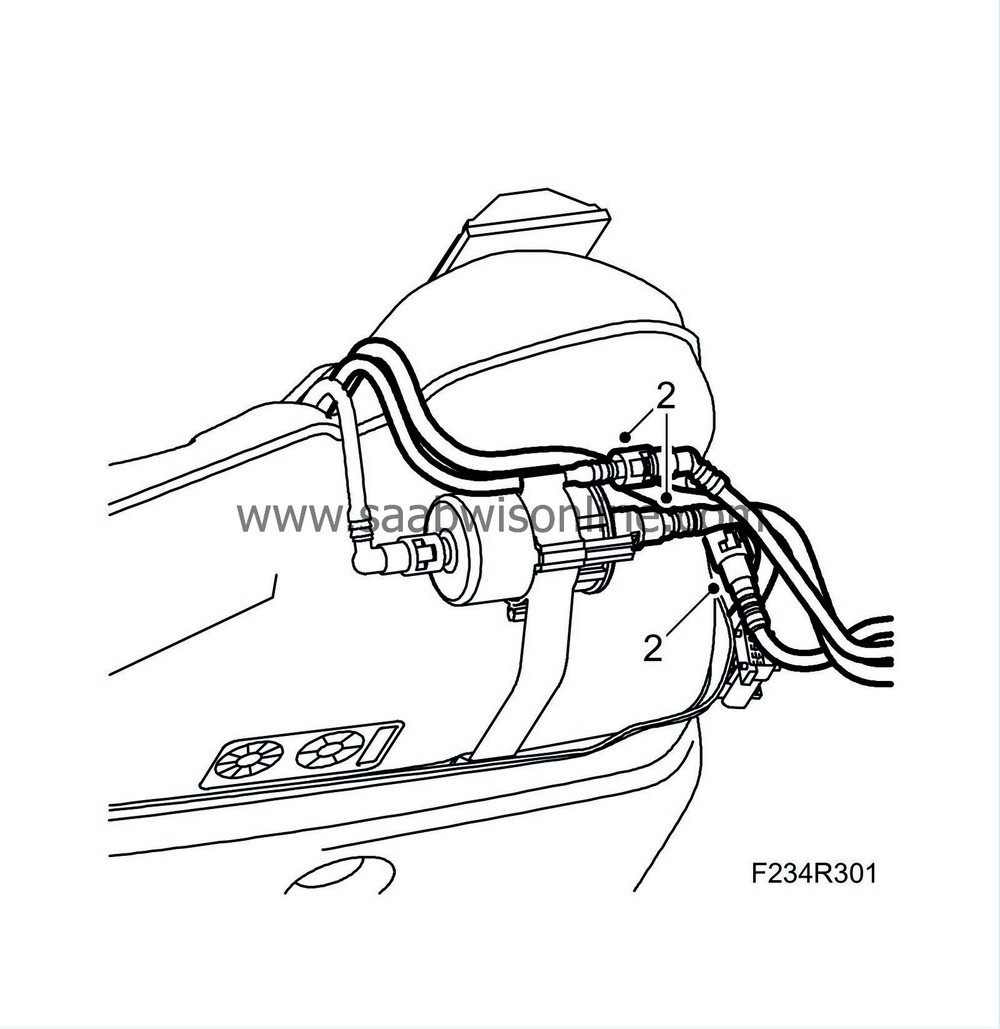
Place a receptacle under the car, detach the fuel lines at the fuel tank and plug them. For diesel and EU tank, use
83 95 261 Fuel line tool
.
|
|
| 14. |
Lower the pipes.
|
|
| To fit |
| 1. |
Fit the fuel lines in their holders.
|
|
| 2. |
Connect the fuel lines to the tank.
|
|
| 3. |
Raise the subframe using 83 95 311 Trolley lift with
83 94 801 Parent fixture
and
83 96 137 Centring tool, subframe - body
. Align the tool to the guide holes in the body. Fit the stays and the bolts.
Tightening torque, subframe: 75 Nm + 135° (55 lbf ft +135°) Tightening torque, stay: 90 Nm + 45° (67 lbf ft + 45°) 
|
|
| 4. |
Fit the torque rod bolt.
Tightening torque 80 Nm (59 lbf ft). 
|
|
| 5. |
Fit the steering shaft joint onto the steering gear. Clean the threads and apply
Thread locking adhesive, Loctite 242
to the threads.
Tightening torque 30 Nm (22 lbf ft) 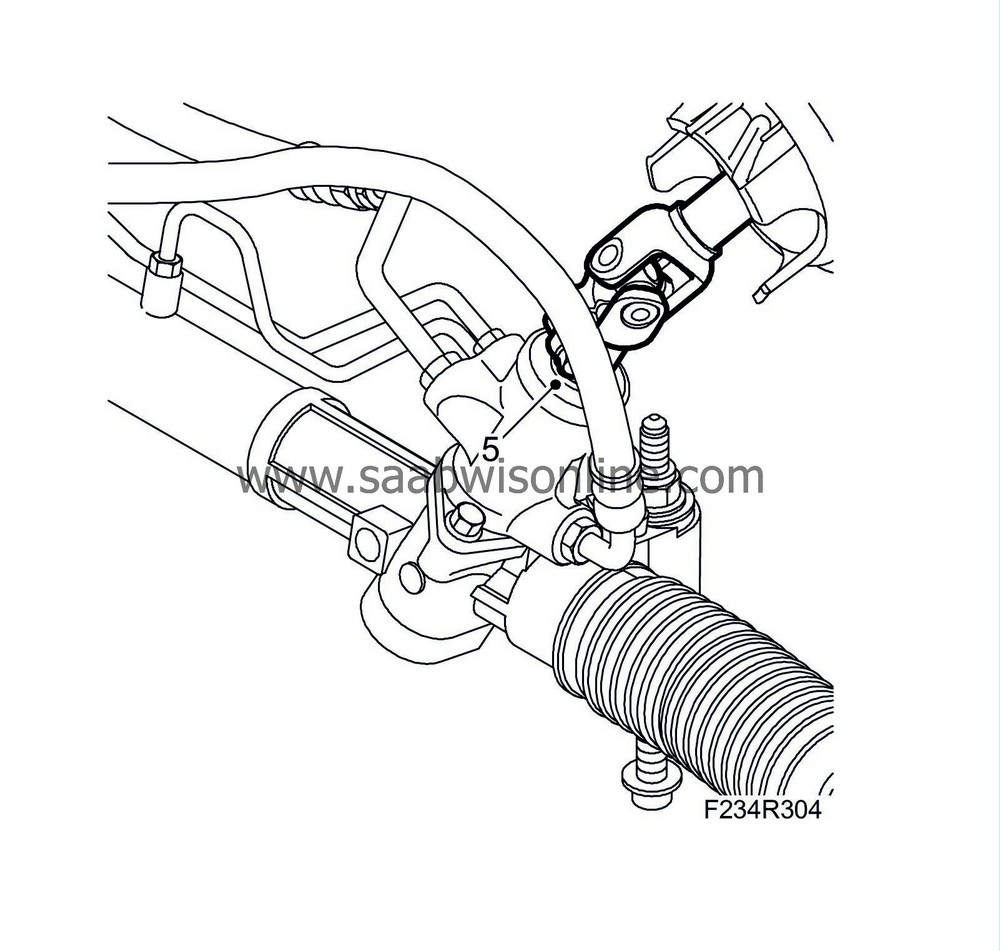
|
|||||||||
| 6. |
Fit the exhaust pipe flange and exhaust pipe mountings.
Tightening torque 30 Nm (22 lbf ft) Z19: Fit Front exhaust pipe . |
|
| 7. |
CV:
Fit
Chassis reinforcement, front subframe, CV, Z19DTH/DTR, A20NFT/LHU
.
|
|
| 8. |
Lower the car.
|
|
| 9. |
Connect the fuel lines in the engine bay.

|
|
| 10. |
B207 RHD:
Fit the air cleaner assembly.
Z19: Fit the panel guard over the fuel lines and the upper engine cover. B207 with ethanol sensor: Fit the fuel line to the Ethanol sensor . |
|
| 11. |
Reconnect the negative battery cable.
|
|
| 12. |
Carry out
Procedures after reconnecting the battery
.
|
|

 Warning


