Fuel tank, 4WD
| Fuel tank, 4WD |
|
||||||||||||||||||||||
| Important | ||
|
Be particulary observant regardning cleanliness when working on the fuel system. Loss of function may occur due to very small particles. Prevent dirt and grime from entering the fuel system by cleaning the connections and plugging pipes and lines during disassembly. Use 82 92 948 Plugs, A/C system assembly. Keep components free from contaminants during storage. |
||
| To remove |
| 1. |
Reduce the fuel pressure by removing fuse 2 when the engine is running (fuse 2 is in the electrical box in front of the battery). When the engine has stopped, turn the ignition key to LOCK and refit the fuse.
|
|
| 2. |
Drain the fuel tank. Refer to
Draining the fuel tank, 4WD
.
|
|
| 3. |
Raise the car.
|
|
| 4. |
Remove the exhaust system. See
Complete exhaust system, A20NFT/LHU
.
|
|
| 5. |
Remove
Propeller shaft
|
|
| 6. |
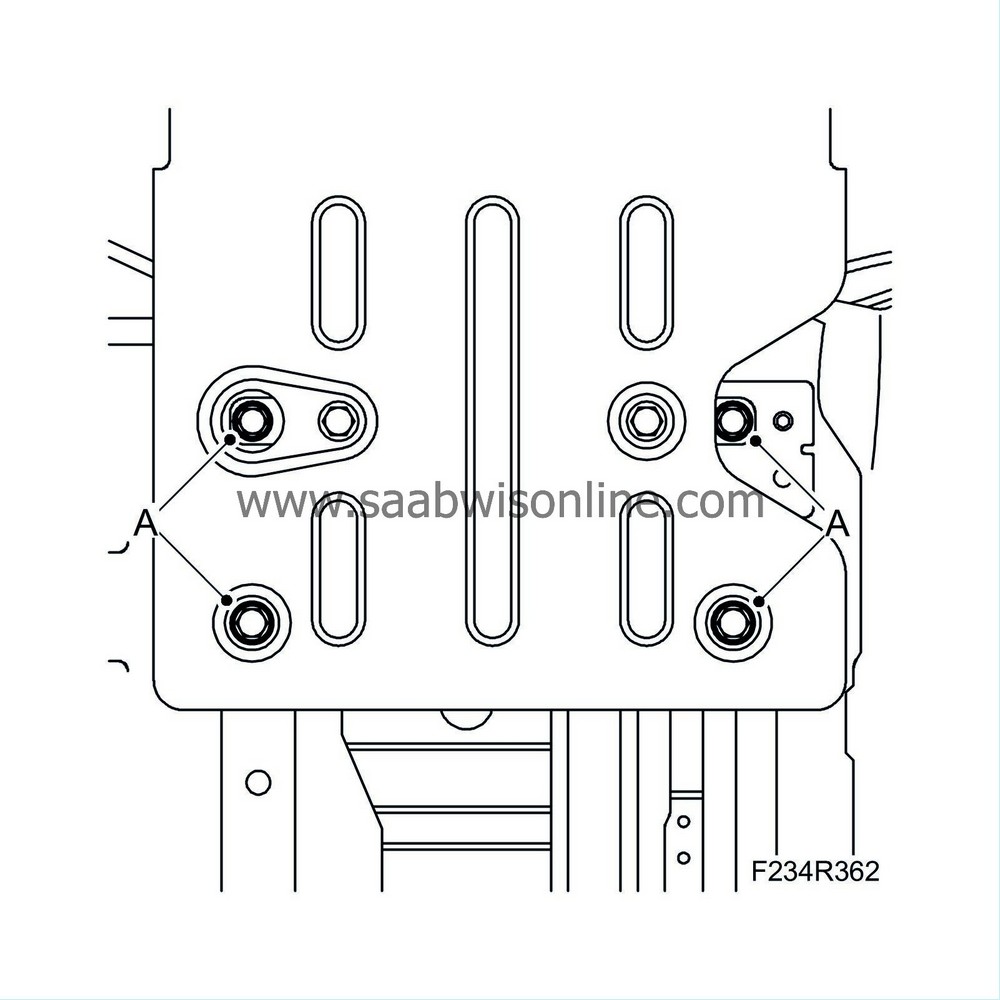
Remove the protective covers (A).
|
|
| 7. |
Place a receptacle under the tank.
|
|
| 8. |
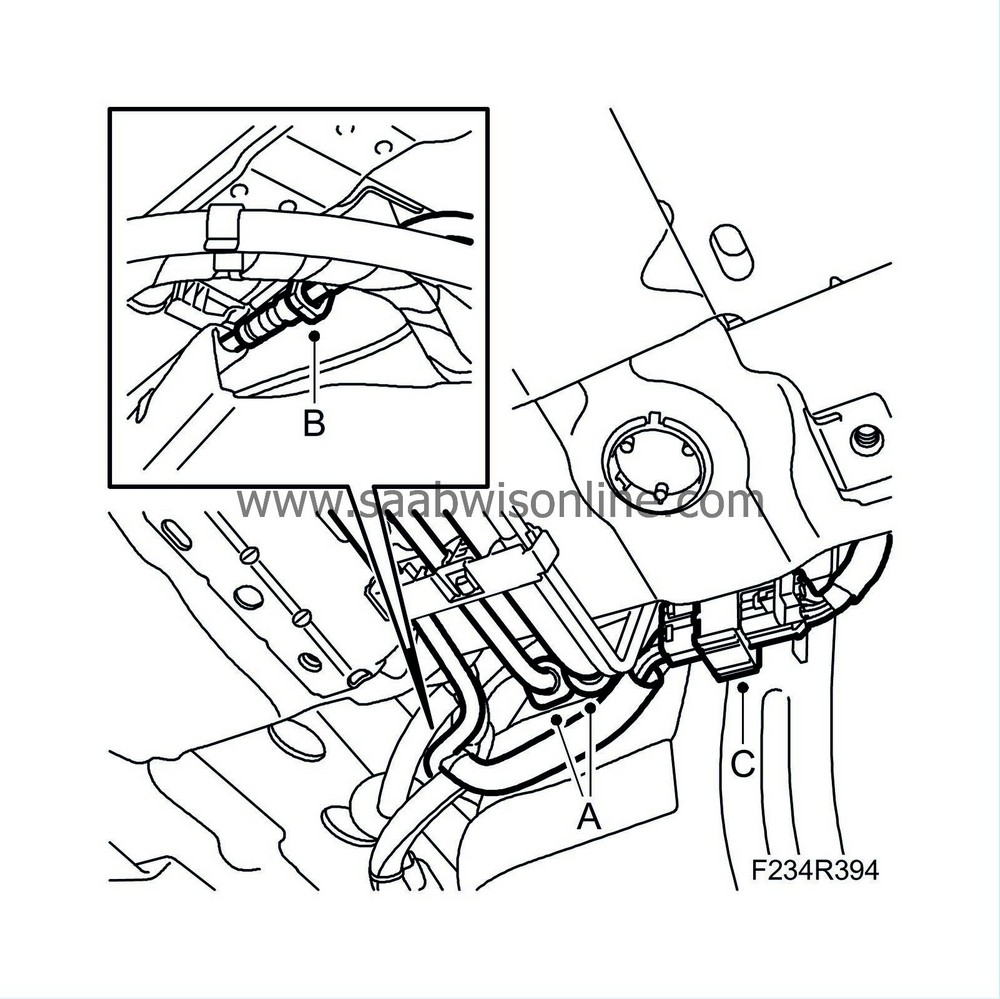
Remove the fuel tank's fuel lines (A) and the bleeder line (B). Plug the lines with suitable plugs.
|
|
| 9. |
Unplug the connector (C) on the fuel tank and remove it from its bracket.
|
|
| 10. |
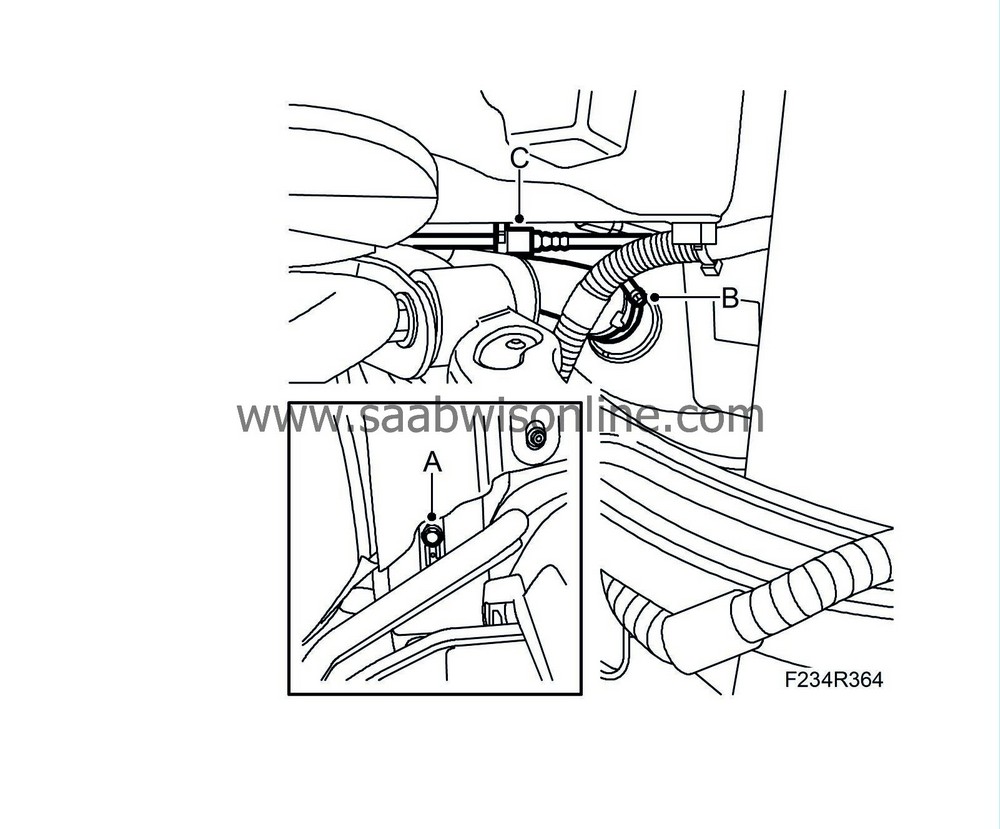
Remove the filler pipe's screw (A), the hose clip (B) and the bleeder hose's quick coupling (C). Remove the filler pipe's hose from the tank.
|
|
| 11. |
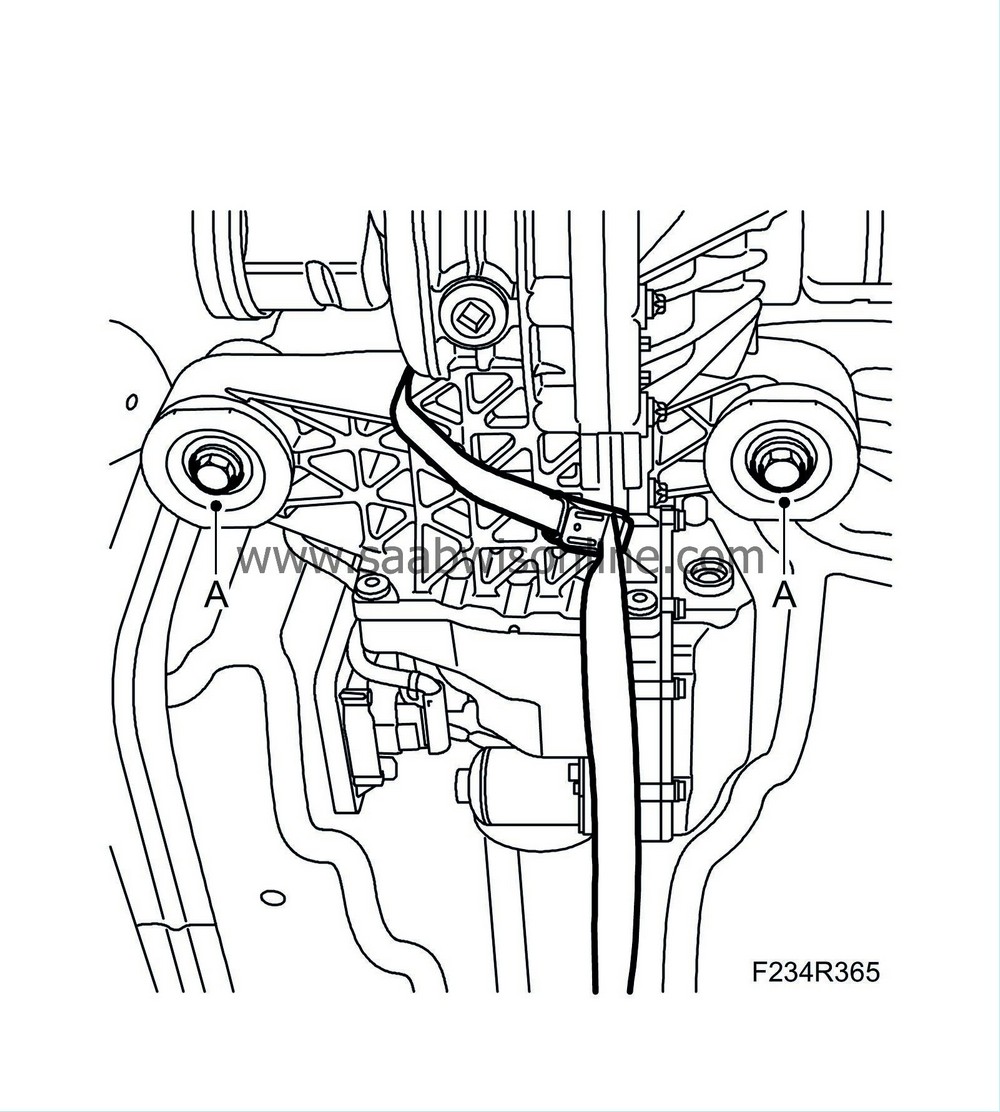
Secure the limited slip differential with
83 95 212 Strap
.
|
|
| 12. |
Lower the differential clutch approx. 10 mm by undoing the bolts (A).
|
|
| 13. |
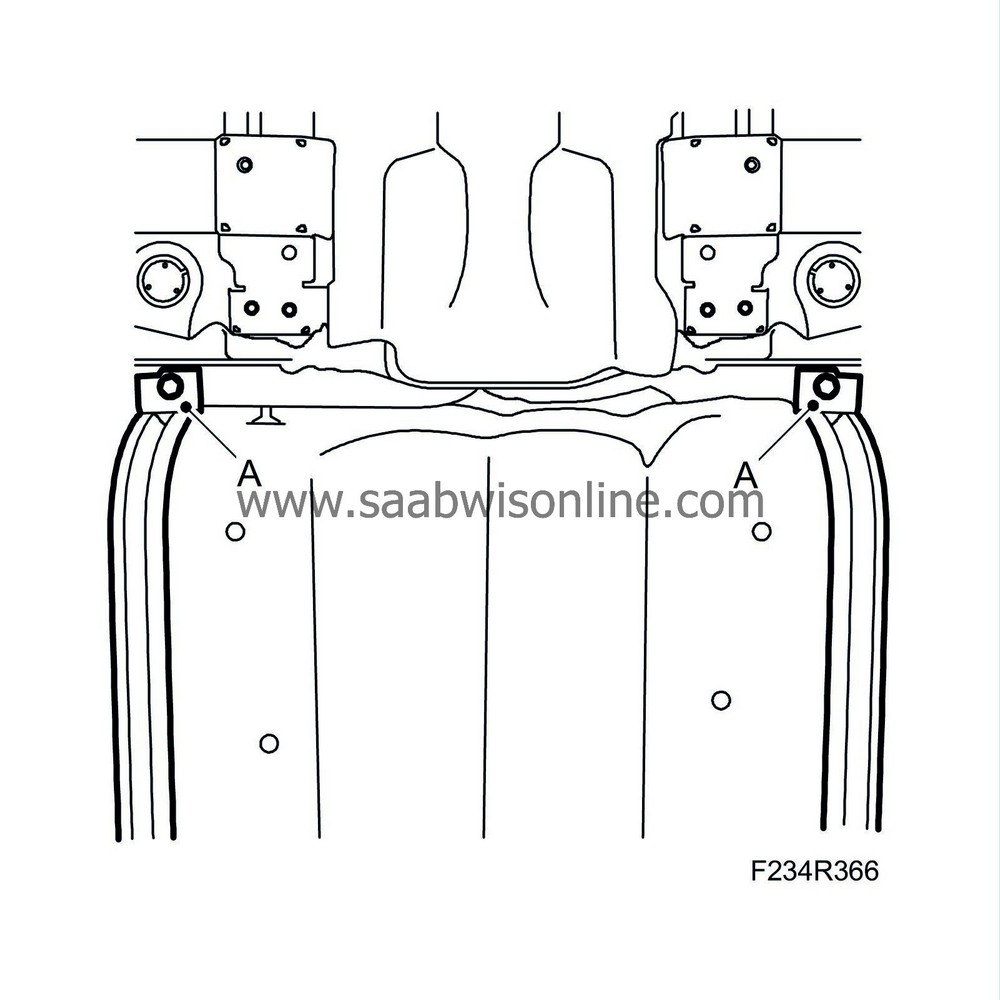
Place a column jack under the tank, remove the tank straps' bolts (A) and remove the fuel tank. Exercise caution when removing the tank; ensure that no components or connections sustain damage.
|
|
| To fit |
| 1. |
Replace the connecting hose between the tank and the filler pipe.
|
|
| 2. |
Place the fuel tank on a column jack and carefully lift it into place.
|
|
| 3. |
Fit the bolts (A) to the tank straps and lower the column jack.
Tightening torque 25 Nm (18 lbf ft) |
|
| 4. |
Plug in the fuel tank's connector (C) and fit it into its mounting.

|
|
| 5. |
Remove the plugs and fit the fuel lines (A) and the bleeder line (B).
|
|
| 6. |
Fit the filler pipe's hose and tighten the hose clip (B), connect the bleeder hose's quick coupling (C) and fit the screw (A).

|
|
| 7. |
Tighten the limited slip differential's bolts (A). Remove the strap.
Tightening torque: 90 Nm + 90 degrees 
|
|
| 8. |
Fit the protective covers (A).

|
|
| 9. |
Fit
Propeller shaft
.
|
|
| 10. |
Fit the exhaust system. See
Complete exhaust system, A20NFT/LHU
.
|
|
| 11. |
Lower the car and fill the tank with fuel.
|
|
| 12. |
Start the engine to check its function and for any fuel leaks.
|
|
| 13. |
Connect the diagnostic tool and erase any diagnostic trouble codes.
|
|

 Warning

