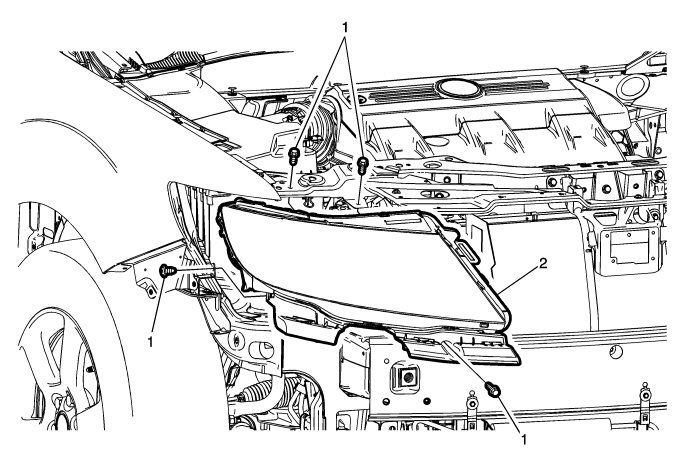
Headlamp Capsule Replacement
|
|
Headlamp Capsule Replacement
|

|
Callout
|
Component Name
|
 Warning
|
|
The high intensity discharge system produces high voltage and current. To reduce the risk of severe shocks and burns:
|
|
•
|
Never open the high intensity discharge system ballast or the arc tube assembly starter.
|
|
•
|
Never probe between the high intensity discharge system ballast output connector and the arc tube assembly.
|
|
|
|
|
|
 Warning
|
|
The high intensity discharge system produces high voltage and current. In order to reduce the risk of severe shocks and burns, the battery negative cable must be disconnected any time service work is being performed on or around the high intensity discharge system.
|
|
|
|
|
|
Preliminary Procedures
Remove the front bumper fascia assembly. Refer to
Front Bumper Fascia Replacement
.
|
|
1
|
Headlamp Capsule Bolt (Qty: 4)
Refer to
Fastener Caution
.
Tighten
9 N m (80 lb in)
|
|
2
|
Headlamp Capsule
Procedure
|
1.
|
Lift slightly then pull the headlamp capsule forward and disconnect the electrical harness connector from the back side of the headlamp.
|
|
2.
|
Remove and transfer the accessory bulb covers.
|
|
3.
|
Remove and transfer the headlamp bulbs.
|
|
4.
|
Remove and transfer the headlamp ballast.
|
|


 Warning

