Rear Wheel Speed Sensor Replacement
| Rear Wheel Speed Sensor Replacement |
| Removal Procedure |
Refer to Brake Dust Warning .
| Note | ||
|
If replacing the wheel speed sensor due to a DTC, inspect the back of the wheel bearing on the encoder surface for metallic chips or metal shavings. If you find traces of metal, clean the encoder surface to ensure that such traces do not affect the wheel speed sensor and set a DTC. Refer to Diagnostic System Check - Vehicle . |
| 1. |
Raise and support the vehicle. Refer to
Lifting and Jacking the Vehicle
.
|
|
| 2. |
Remove the tire and wheel assembly. Refer to
Tire and Wheel Removal and Installation
.
|
|
| 3. |
Remove the rear suspension link. Refer to
Rear Suspension Link Replacement - Upper to Lower Control Arm
.
|
|
| 4. |
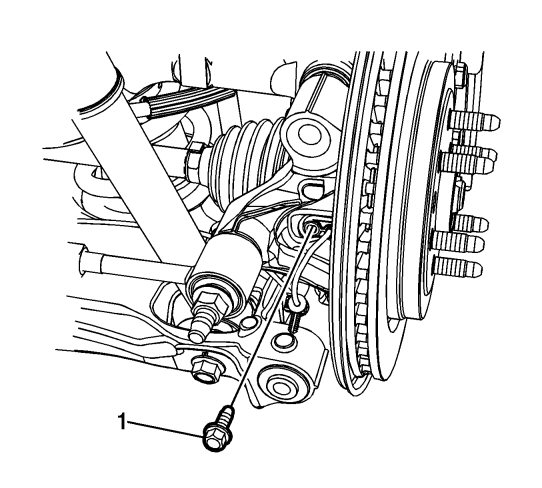
Remove the wheel speed sensor bolt (1). 
|
|||||||
| 5. |
Remove the wheel speed sensor (1) by pulling the sensor straight out of the rear suspension knuckle.

|
|
| 6. |
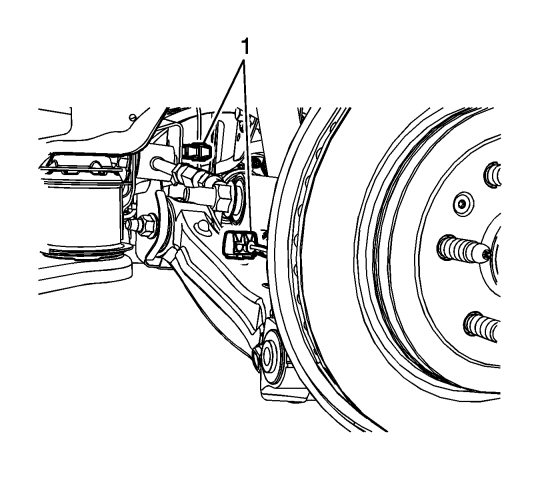
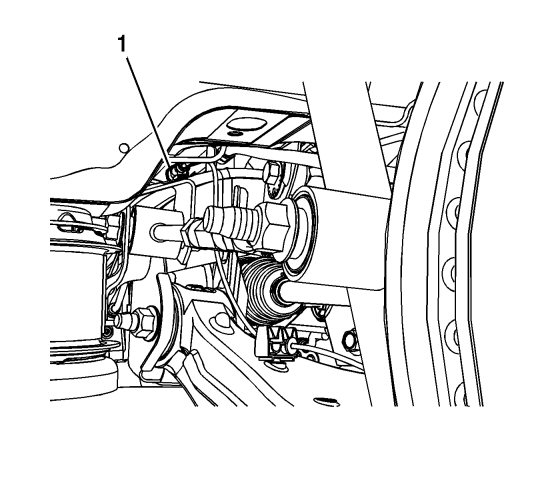
Release the wheel speed sensor harness from the retainers (1).

|
|
| 7. |
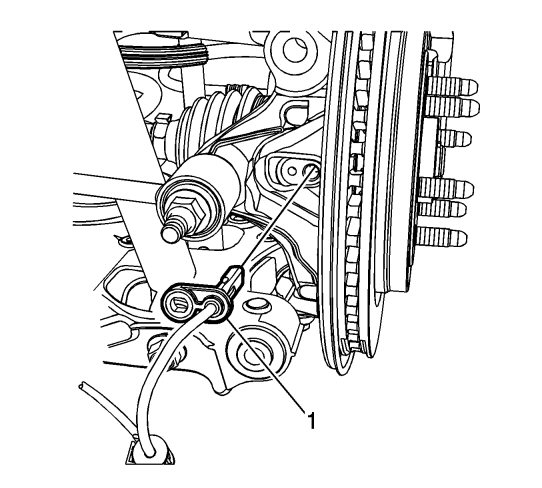
Disconnect the wheel speed sensor electrical connector (1).

|
|
| 8. |
Release the wheel speed sensor electrical connector retainer and remove the wheel speed sensor.
|
|
| Installation Procedure |
| 1. |
Install the wheel speed sensor connector retainer to the rear suspension cradle.

|
|
| 2. |
Connect the wheel speed sensor electrical connector (1).
|
|
| 3. |
Install the wheel speed sensor harness to the retainers (1).

|
|
| 4. |
Install the wheel speed sensor (1) to the rear suspension knuckle.

|
|
| 5. |
Refer to
Fastener Caution
.
Install the wheel speed sensor bolt (1) and tighten to 9 Nm (80 lb in) . 
|
|
| 6. |
Install the rear suspension link. Refer to
Rear Suspension Link Replacement - Upper to Lower Control Arm
.
|
|
| 7. |
Install the tire and wheel assembly. Refer to
Tire and Wheel Removal and Installation
.
|
|
| 8. |
Perform the
Diagnostic System Check - Vehicle
.
|
|


