Steering gear, 4-cylinder engine
|
|
Steering gear, 4-cylinder engine
|
When changing the steering gear on cars within the following VIN ranges
LHD up to W3056304
RHD up to W3056253
the steering column assembly must be adapted as described in points 20a-20g under
To fit
.

|
Important
|
|
Scrupulous cleanliness must always be observed when carrying out any work involving hydraulic components.
|
|
|
|
1.
|
Drain the power steering fluid reservoir, using oil suction equipment.
|
|
2.
|
Detach the reservoir and lift it aside.
|
|
3.
|
Carefully clean the area round the return hose's connection to the power steering fluid reservoir.
|
|
4.
|
Detach the return hose from the power steering fluid reservoir.
|
|
5.
|
Place the end of the hose in a receptacle that holds at least 1 litre.
|
|
6.
|
Raise the front assembly so that the wheels are clear of the floor and start the engine so that the power steering fluid is pumped out of the steering gear. Turn the steering wheel to full right and full left lock. Switch off the engine when the flow of fluid diminishes, as the pump should not be allowed to run dry.
|
|
7.
|
Plug the return hose and power steering fluid reservoir.
|
|
8.
|
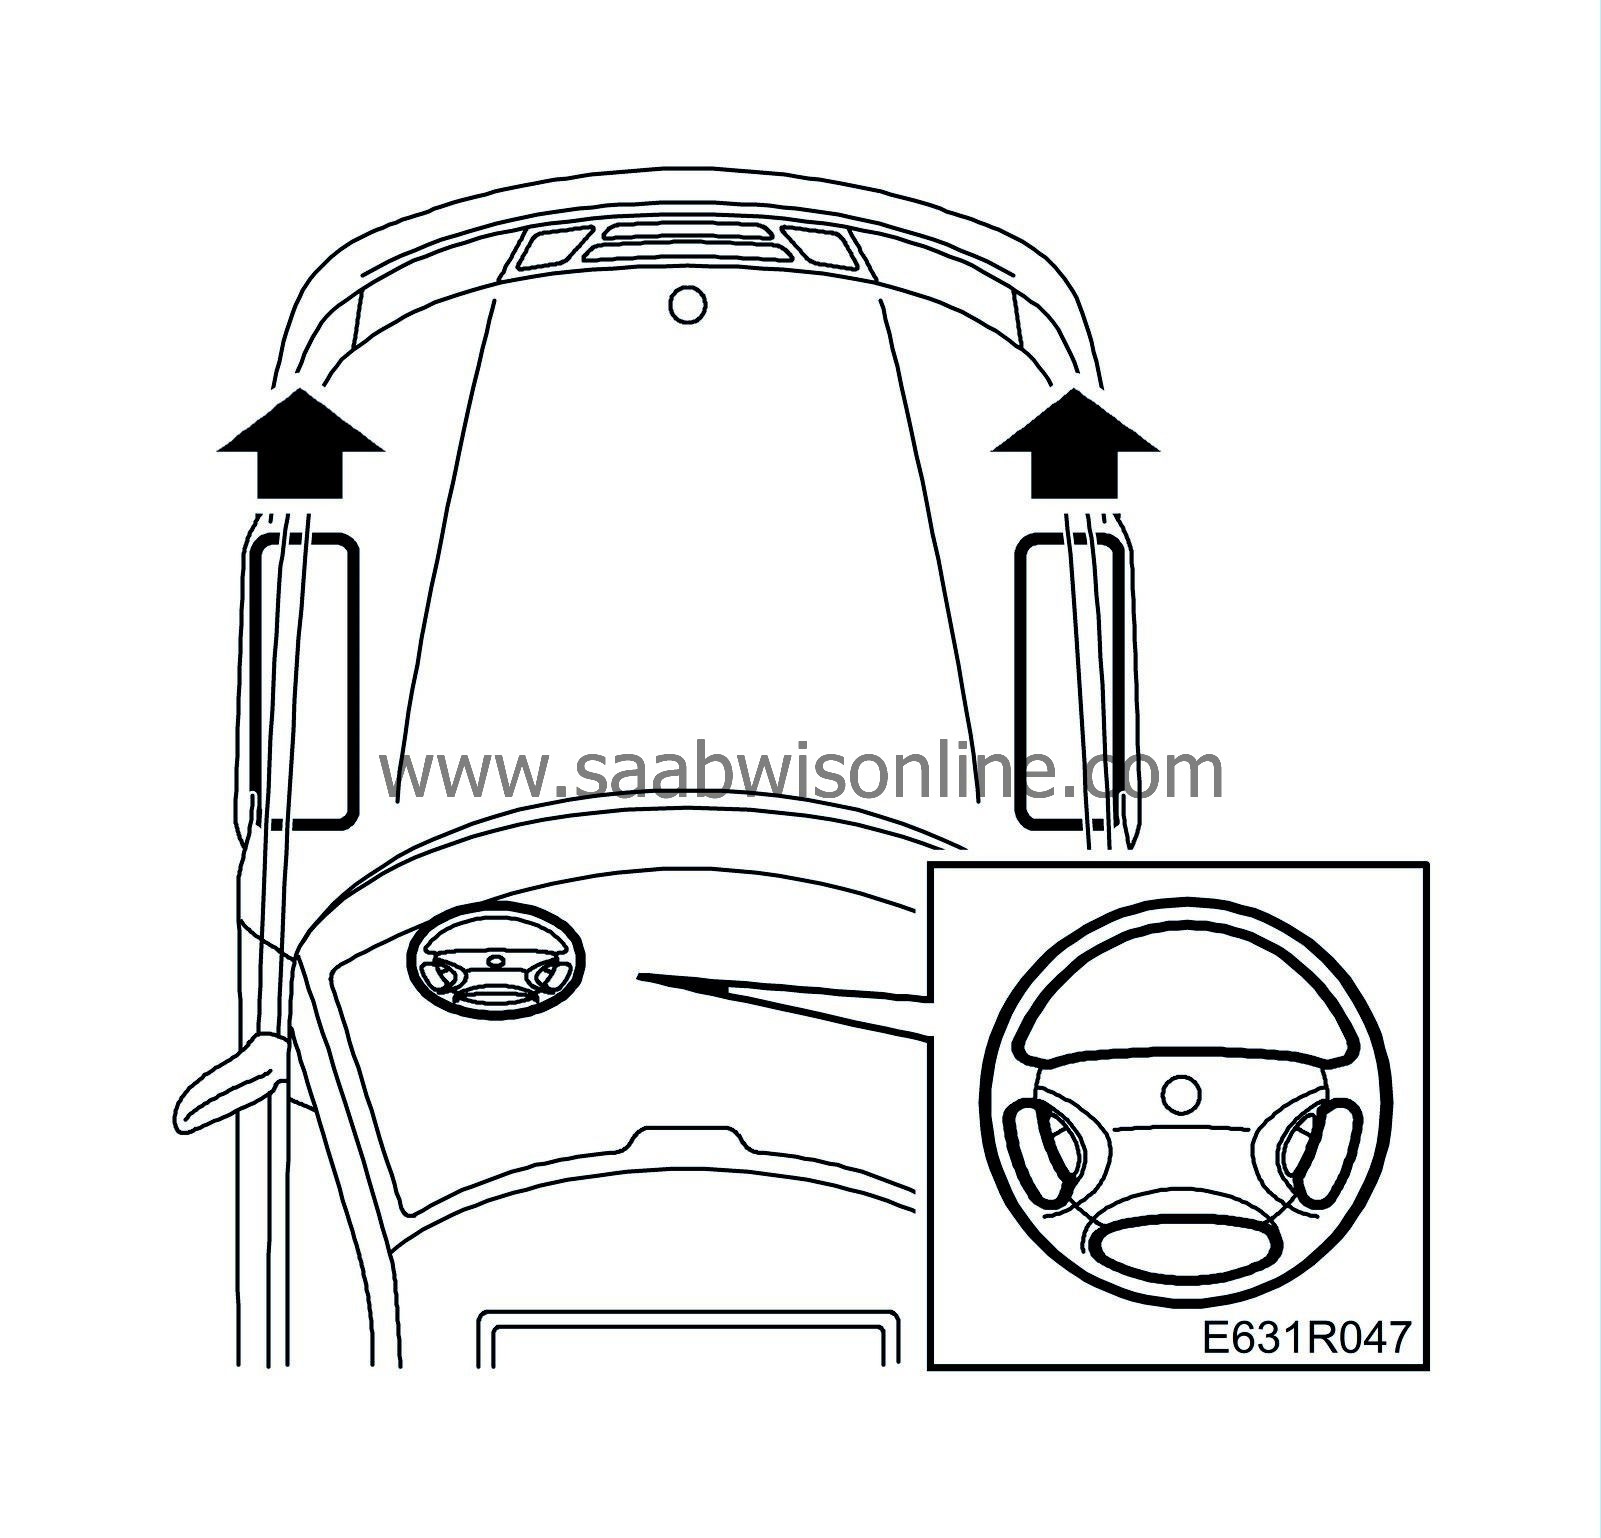
Turn the steering wheel to the straight-ahead position.
 Warning
|
|
Secure the steering wheel in this position to avoid twisting the coil spring to such an extent that it breaks.
|
|
|
|
|
|
|
Note
|
|
One way to secure the steering wheel is to tape it to the dashboard with heavy-duty adhesive tape of fabric-backed type.
|
|
|
9.
|
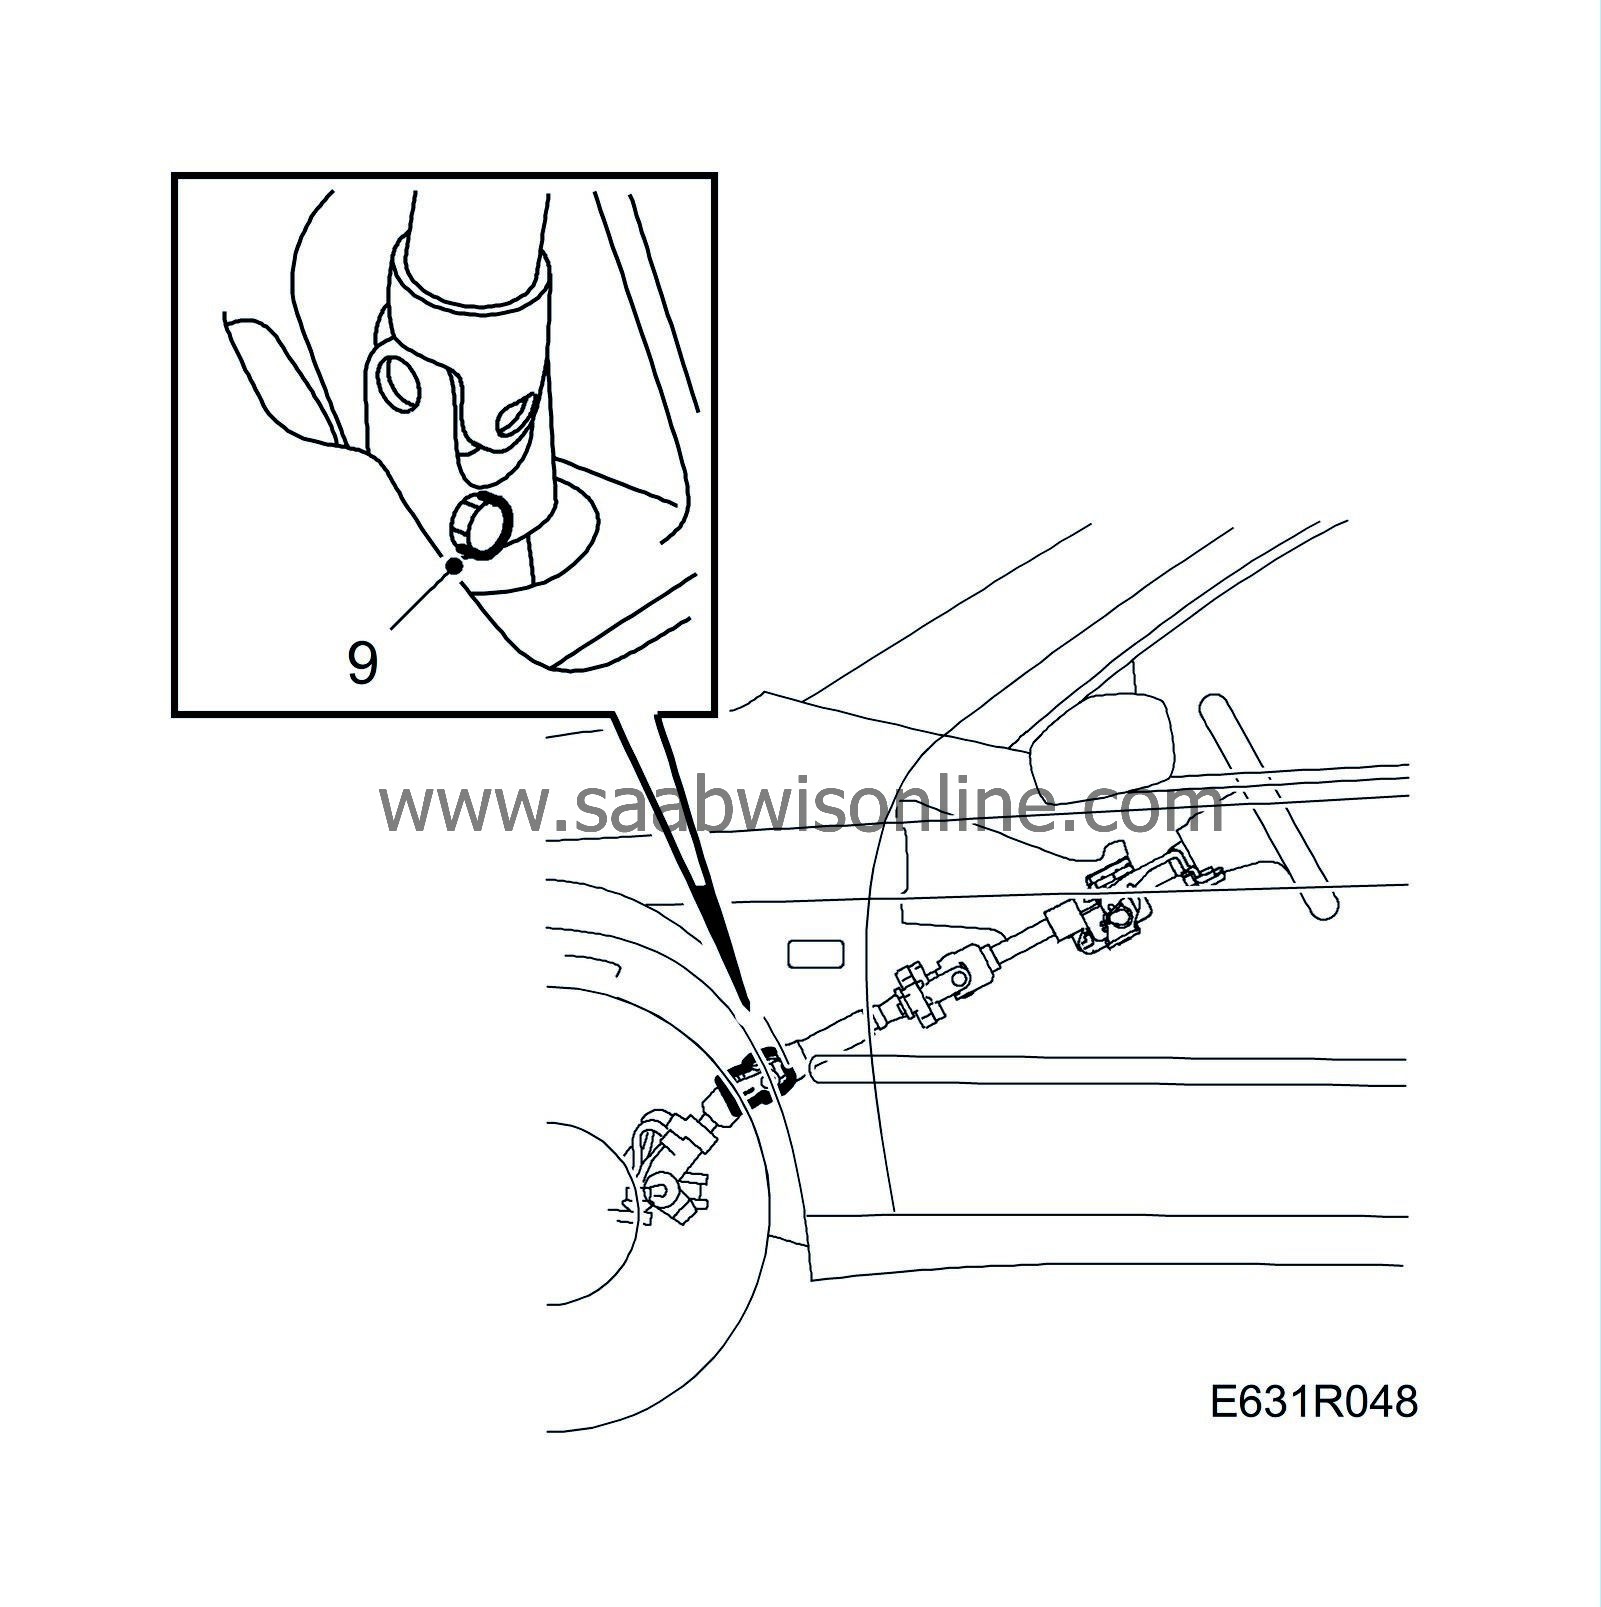
Remove the bolt securing the steering column shaft to the steering gear (accessible under the dashboard) and push the steering column shaft upwards, withdrawing it from the steering gear.
 Warning
|
|
Under
no circumstances
is the steering shaft to be separated.
|
|
|
|
|
|
|
|
10.
|
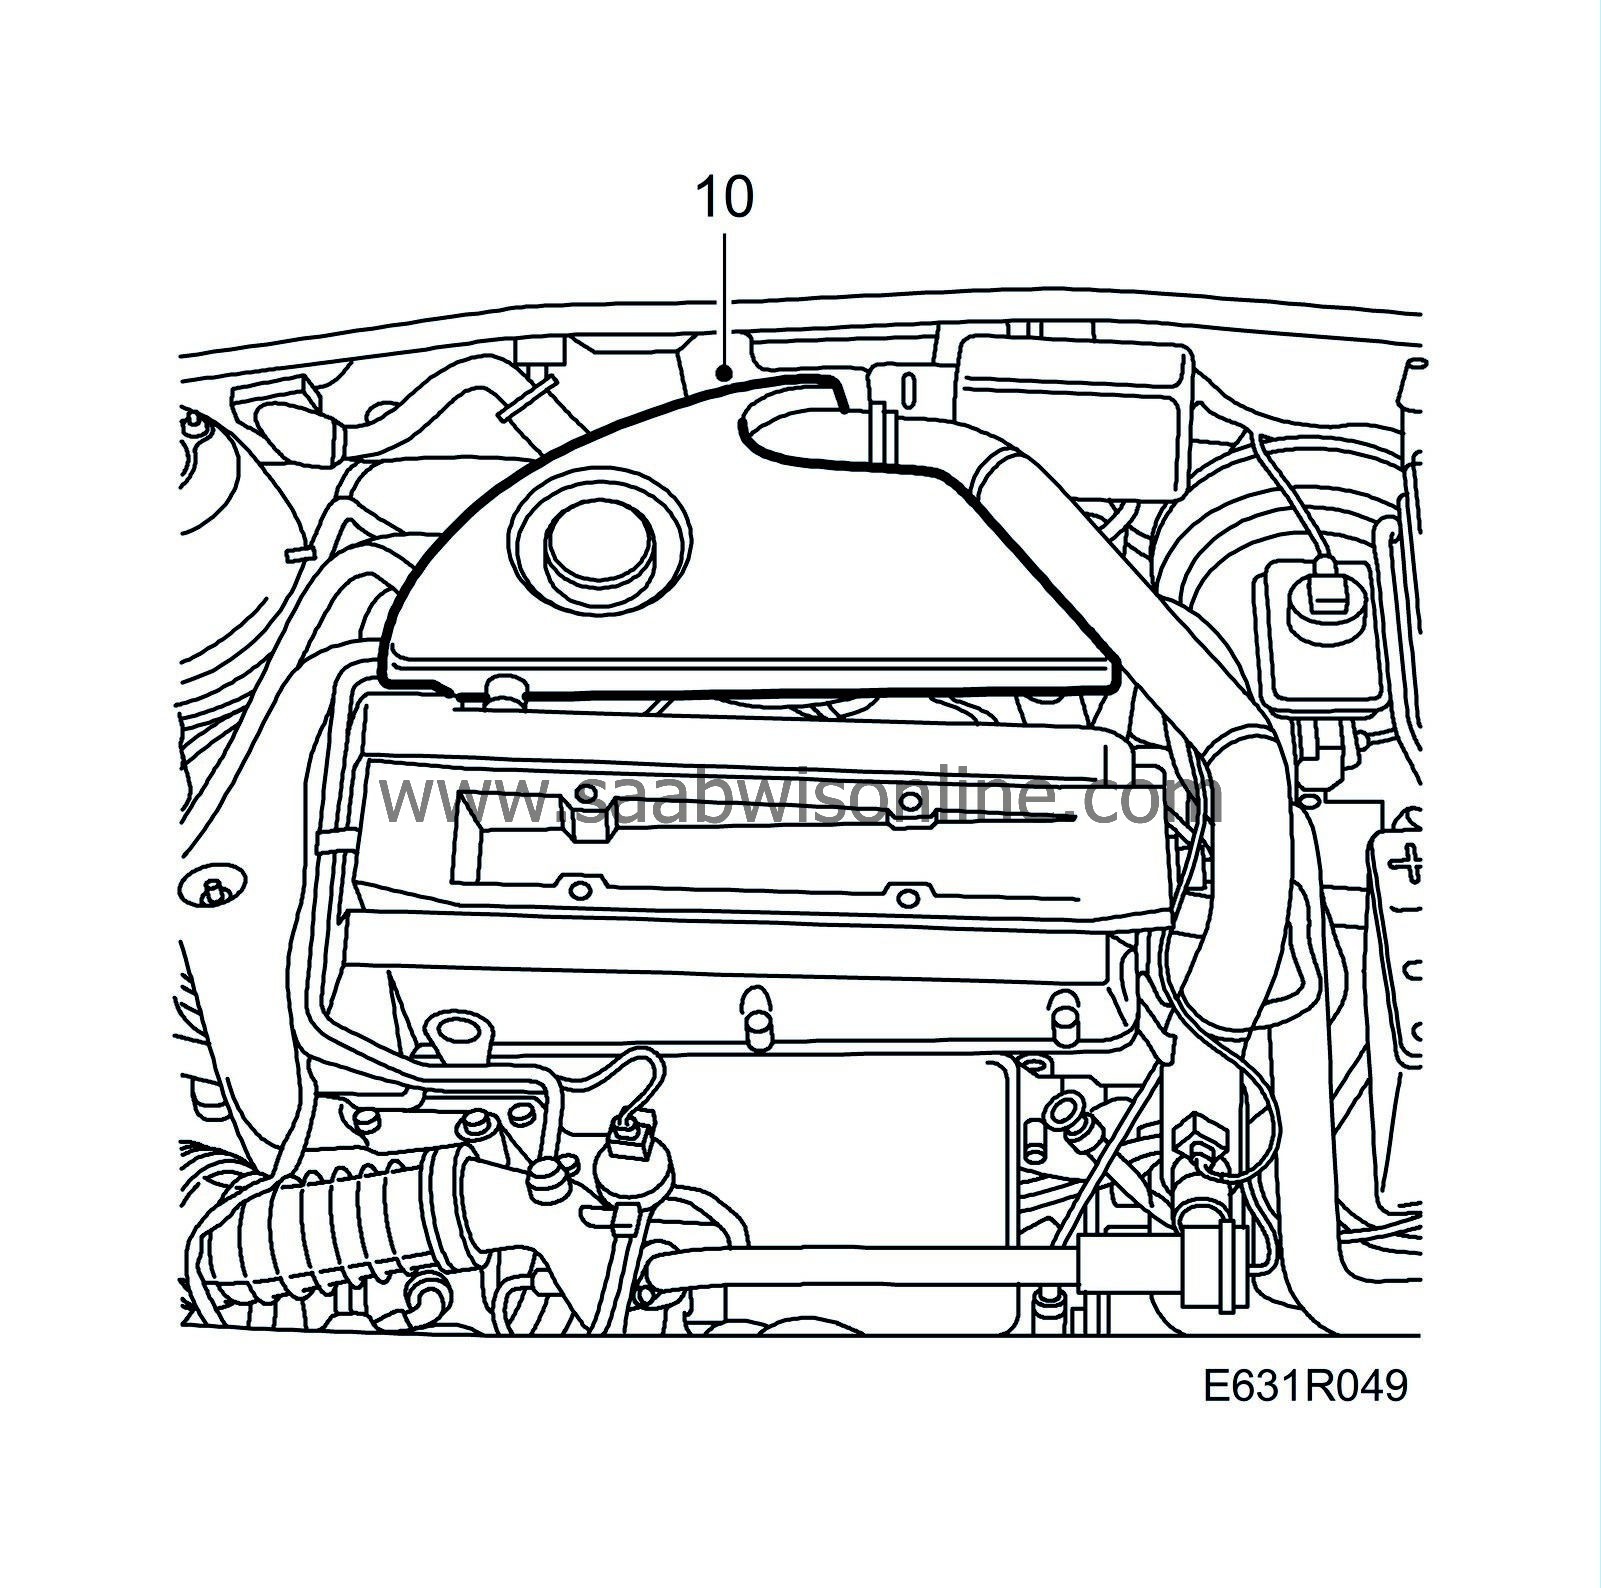
Remove the cover over the intake manifold.
|
|
11.
|
Undo the bolts securing the rear engine cushion to the subframe and the nut securing the engine cushion to the engine mounting.

|
|
13.
|
Lift the car and remove the front wheels.
|
|
14.
|
Undo the locknut on the track rod.

|
|
15.
|
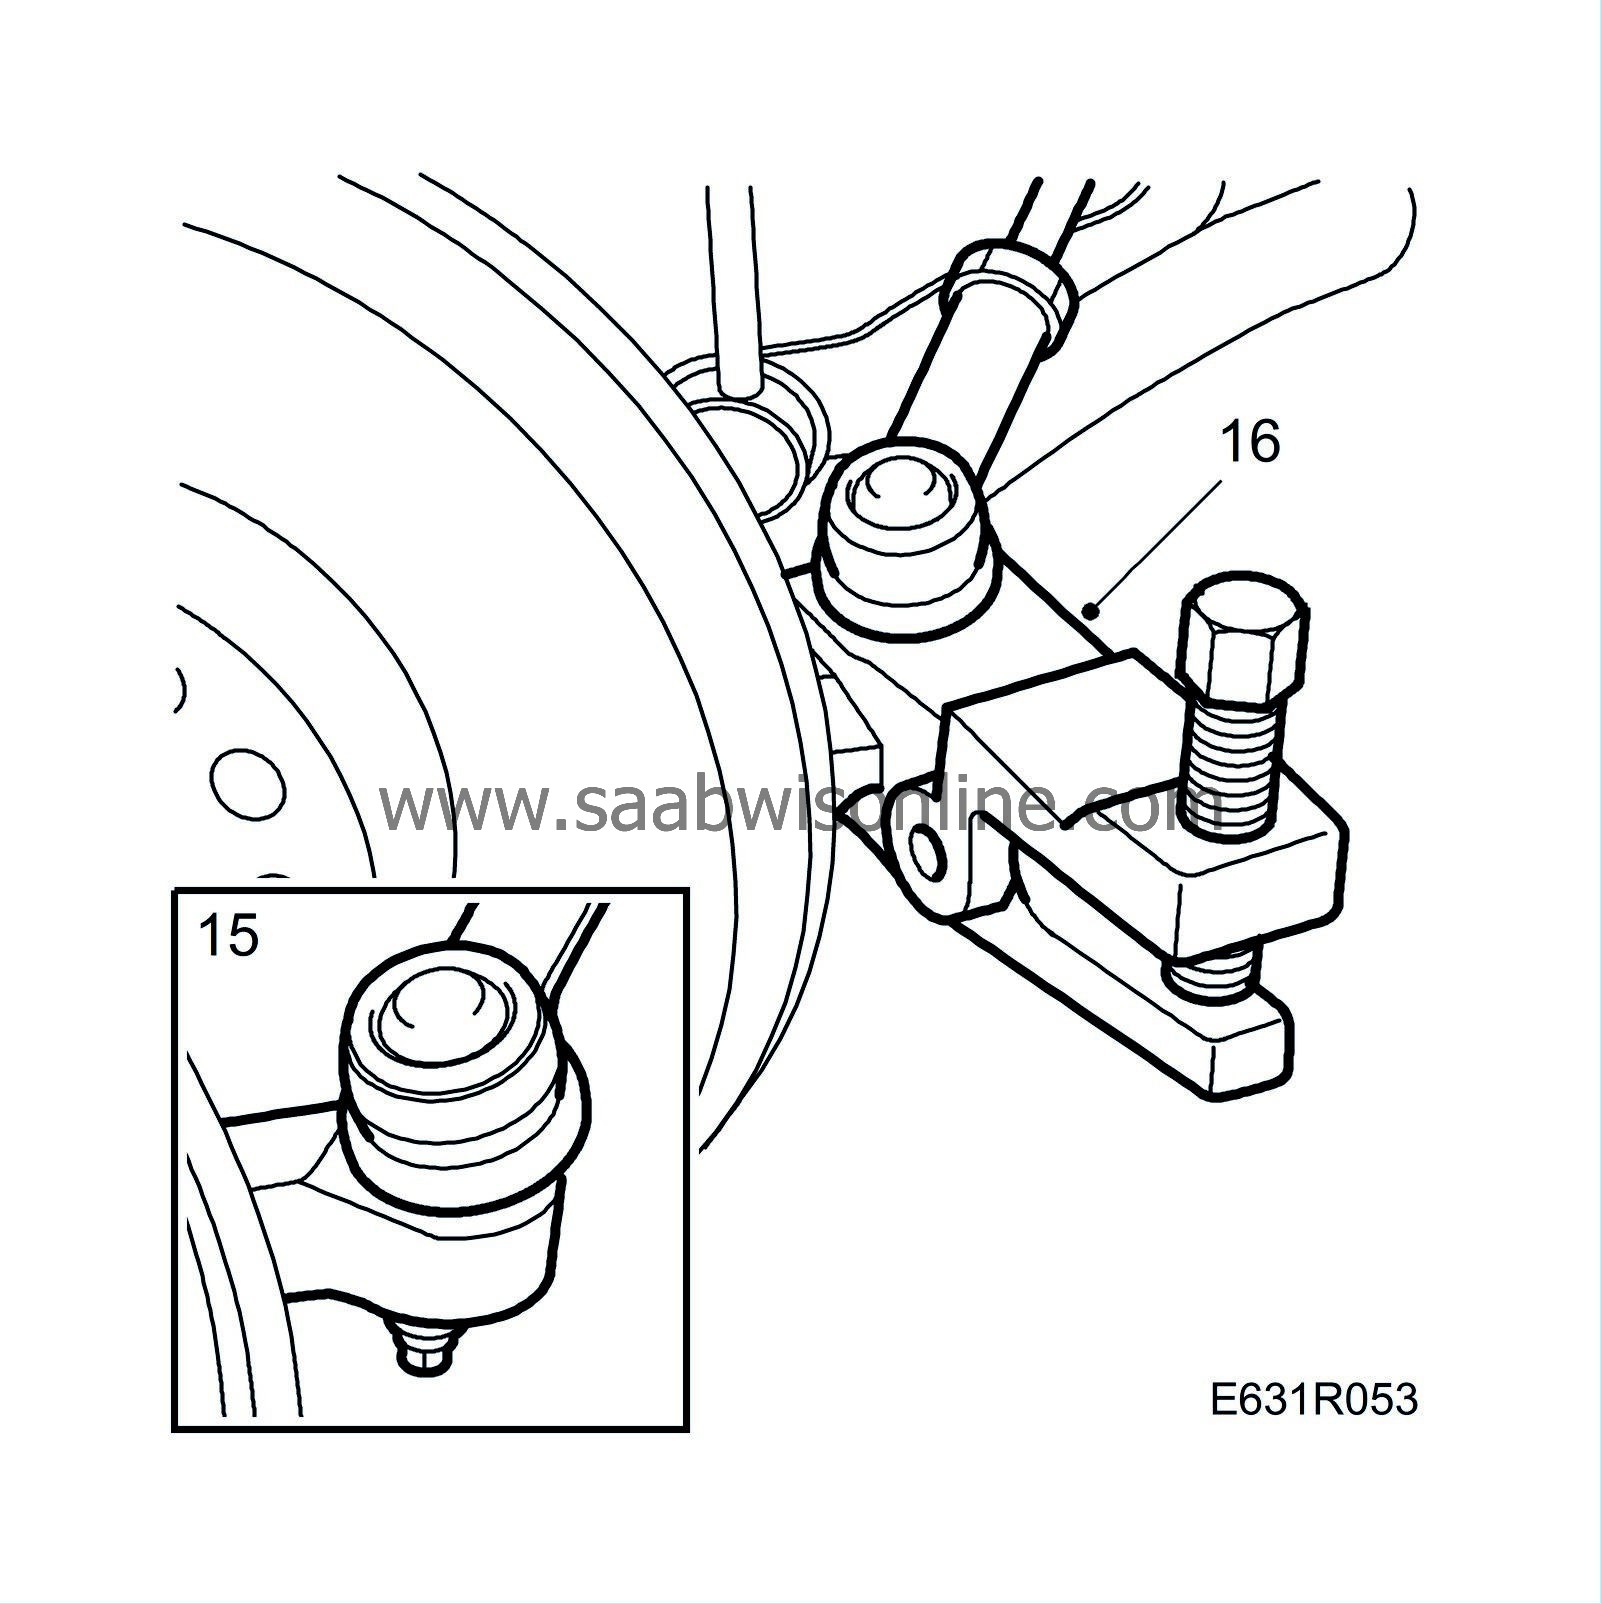
Undo the nut securing the track-rod end to the steering swivel member.
|
|
16.
|
Detach the track rod end from the steering swivel member using
89 96 696 Puller
.
|
|
17.
|
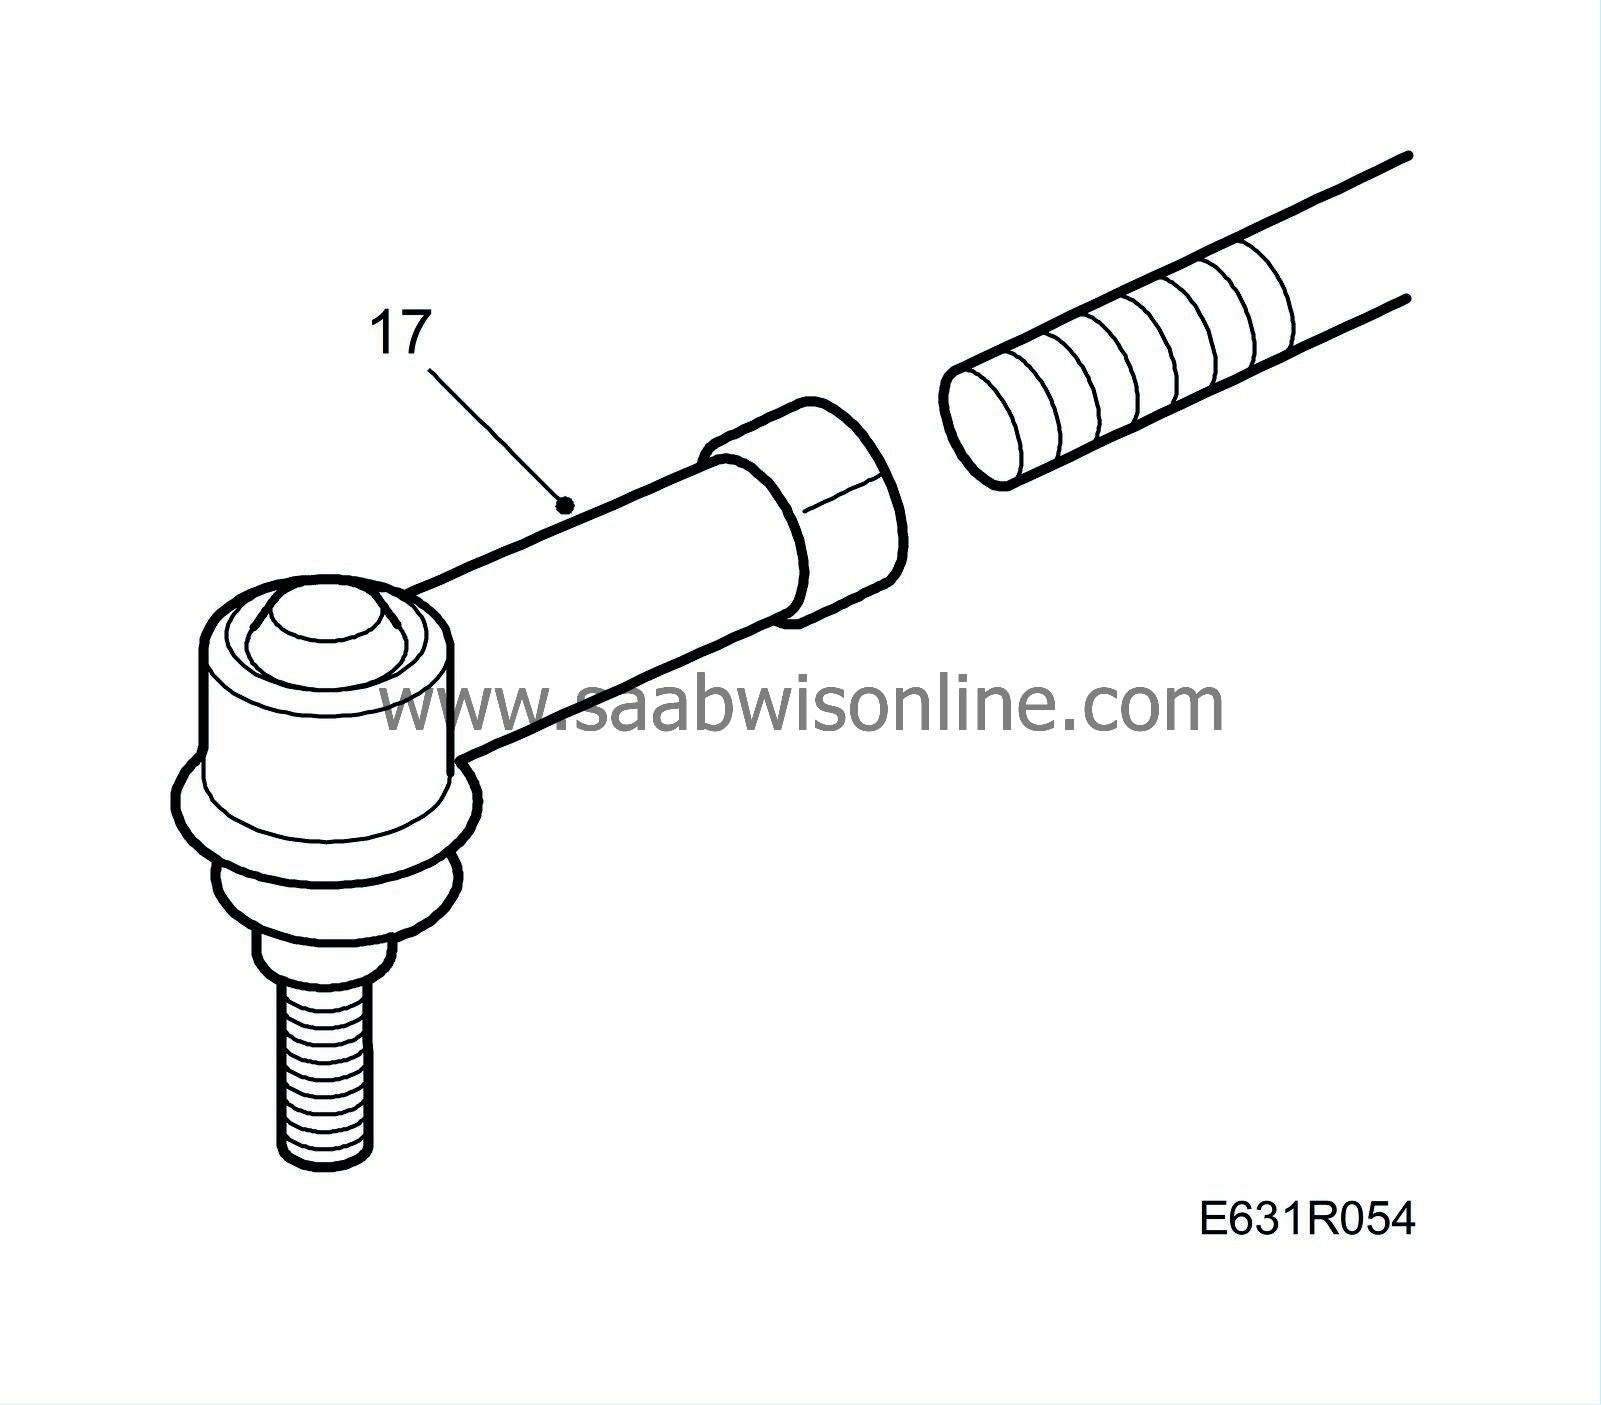
Unscrew the track-rod end from the track rod, counting the number of turns.
|
|
18.
|
Carry out points 14-17 on the other side of the car.
|
|
19.
|
Remove the reinforcement at the subframe's rear attachment point.

|
|
20.
|
Separate the exhaust pipe at the joint located between the catalytic converter and silencer.
|
|
21.
|
Remove the bolts from the subframe's centre attachment point, lower the rear of the subframe and remove the engine cushion.
|
|
22.
|
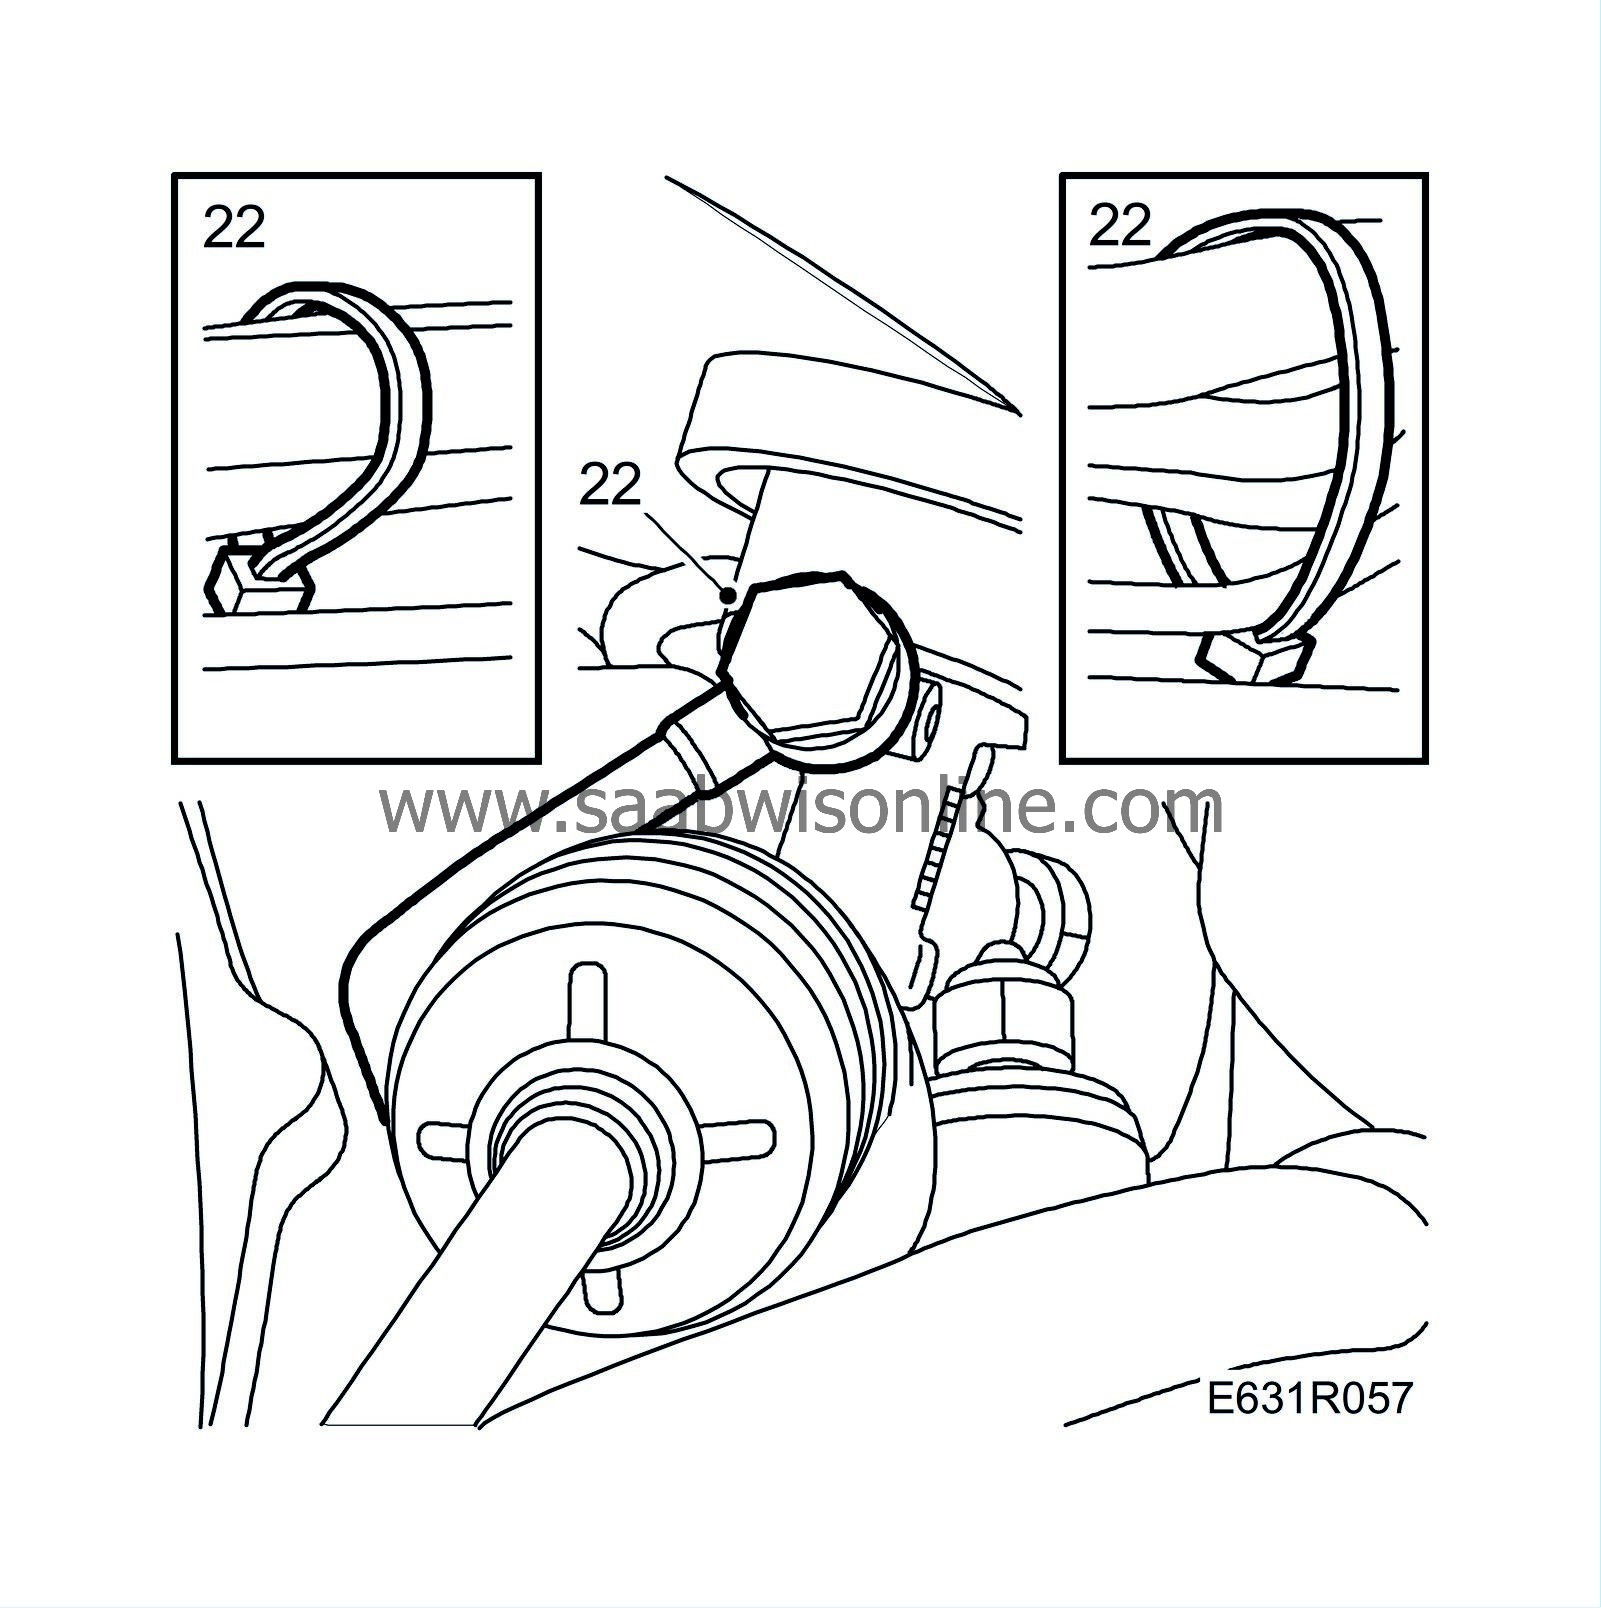
Disconnect the delivery and return pipes from the valve body and snip the cable ties.
|
|
23.
|
Remove the two steering gear retaining bolts.

|
|
24.
|
Remove the steering gear through the wheel housing on the passenger side, angling it to the front so that it clears surrounding components. Collect the valve body's dust cover.
|
Important
|
|
Take care to avoid damaging the gaiters.
|
|
|
|
|
1.
|
Turn the steering gear's pinion shaft until the rack is in the centre position and lift the steering gear into place through the wheel housing on the passenger side. Make sure that the steering gear does not catch on hoses and cables in the engine bay.
|
Important
|
|
Take care to avoid damaging the gaiters.
|
|
|
Fit the dust cover on the valve body.
|
|
2.
|
Connect the delivery and return pipes to the valve body, fitting new sealing rings.
Do not
tighten the bolts.
|
|
3.
|
Fit the steering gear's bolts in place, complete with washers and nuts, but do not tighten them. On LHD cars the washer on the right-hand side is replaced by a bracket for the delivery pipe.
|
|
4.
|
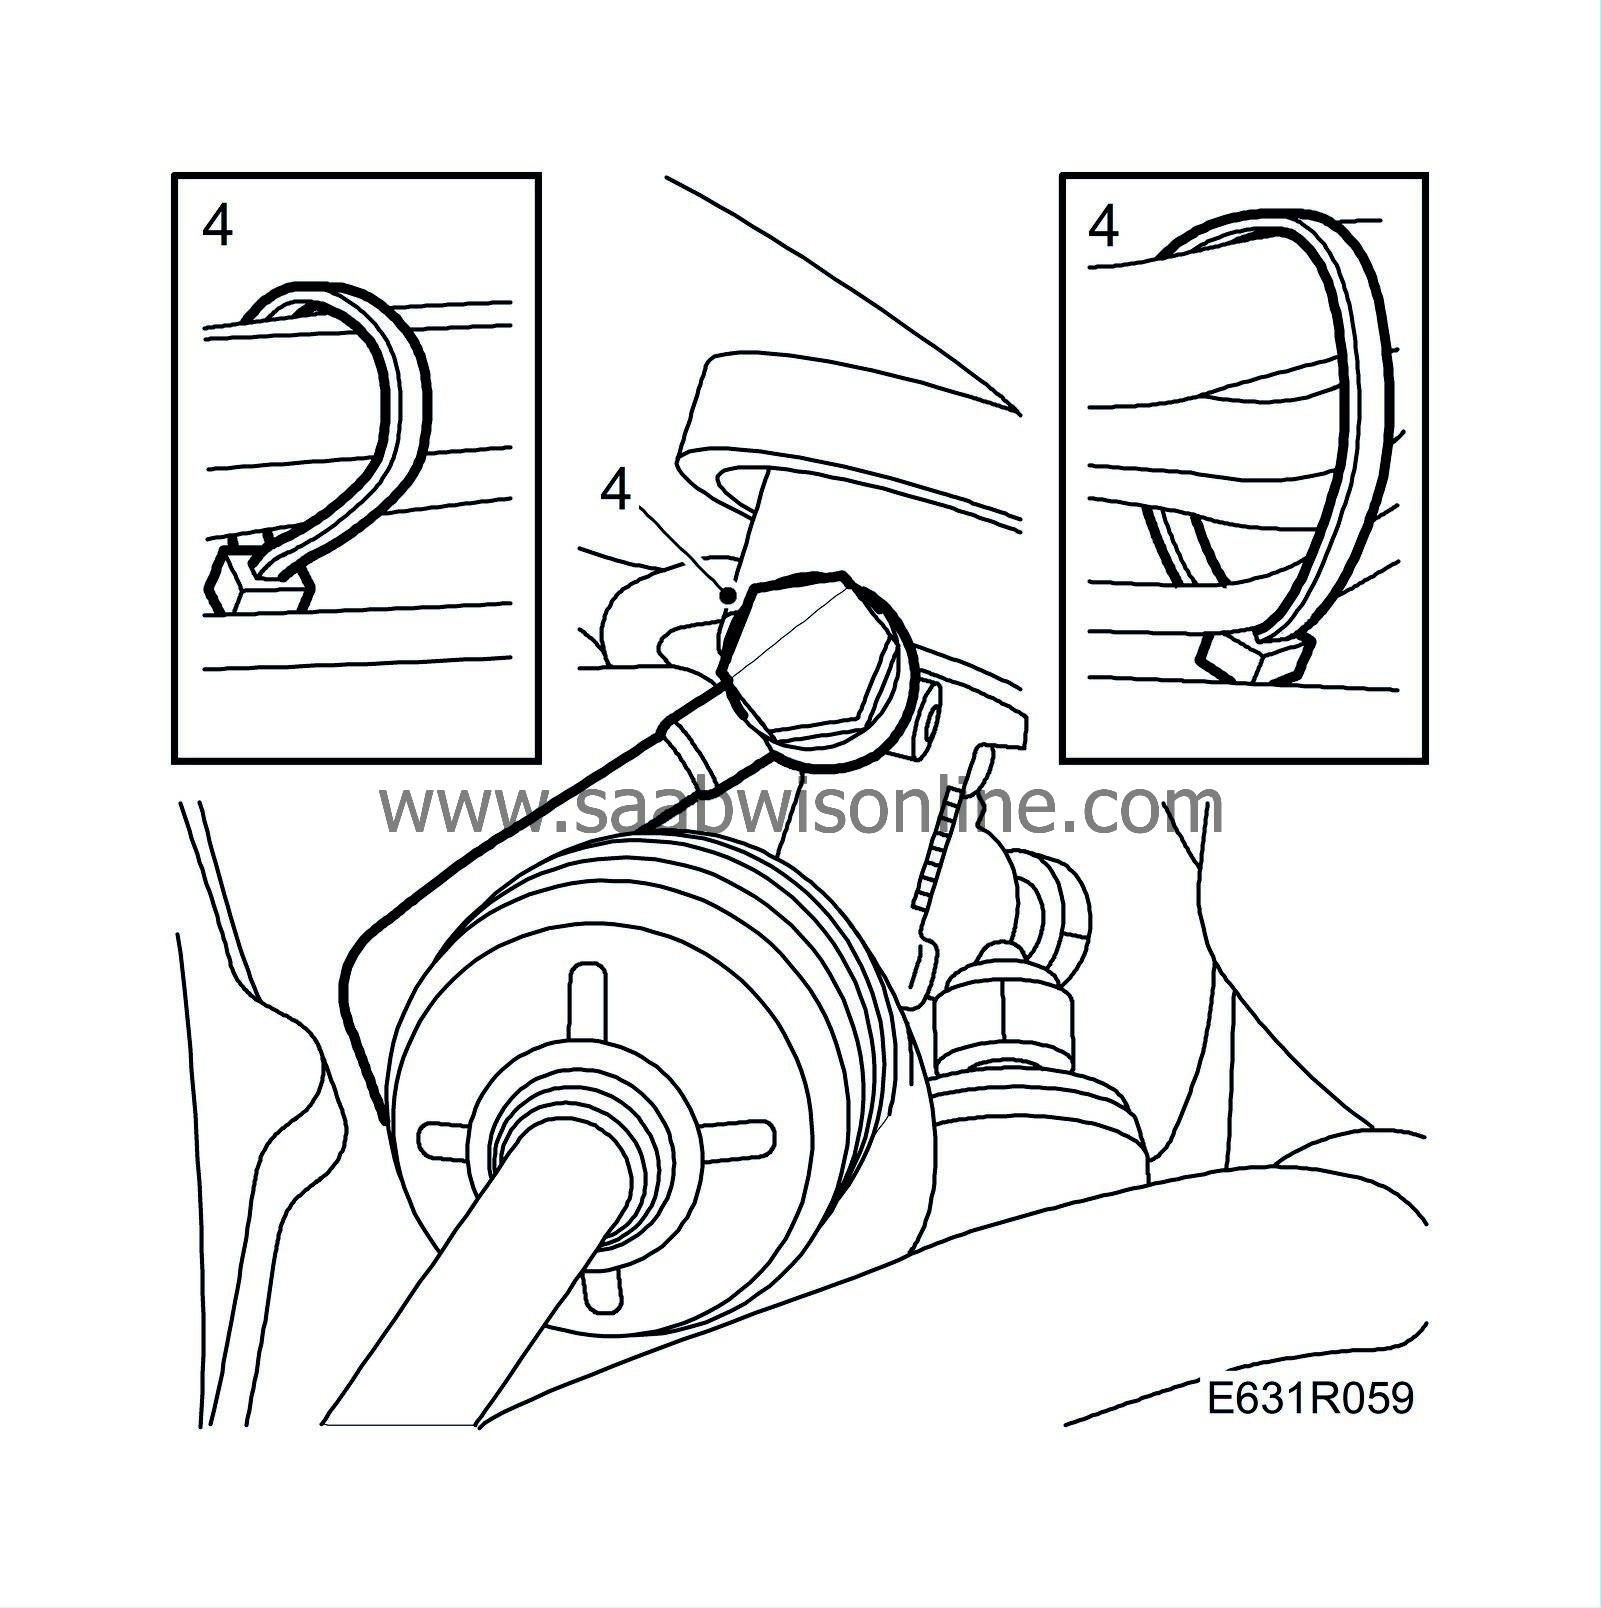
Tighten the delivery and return pipes connected to the valve body, holding them against turning. Secure them to the steering gear.
Tightening torque 30 Nm (25 lbf ft).
|
|
5.
|
Tighten the steering gear retaining bolts.
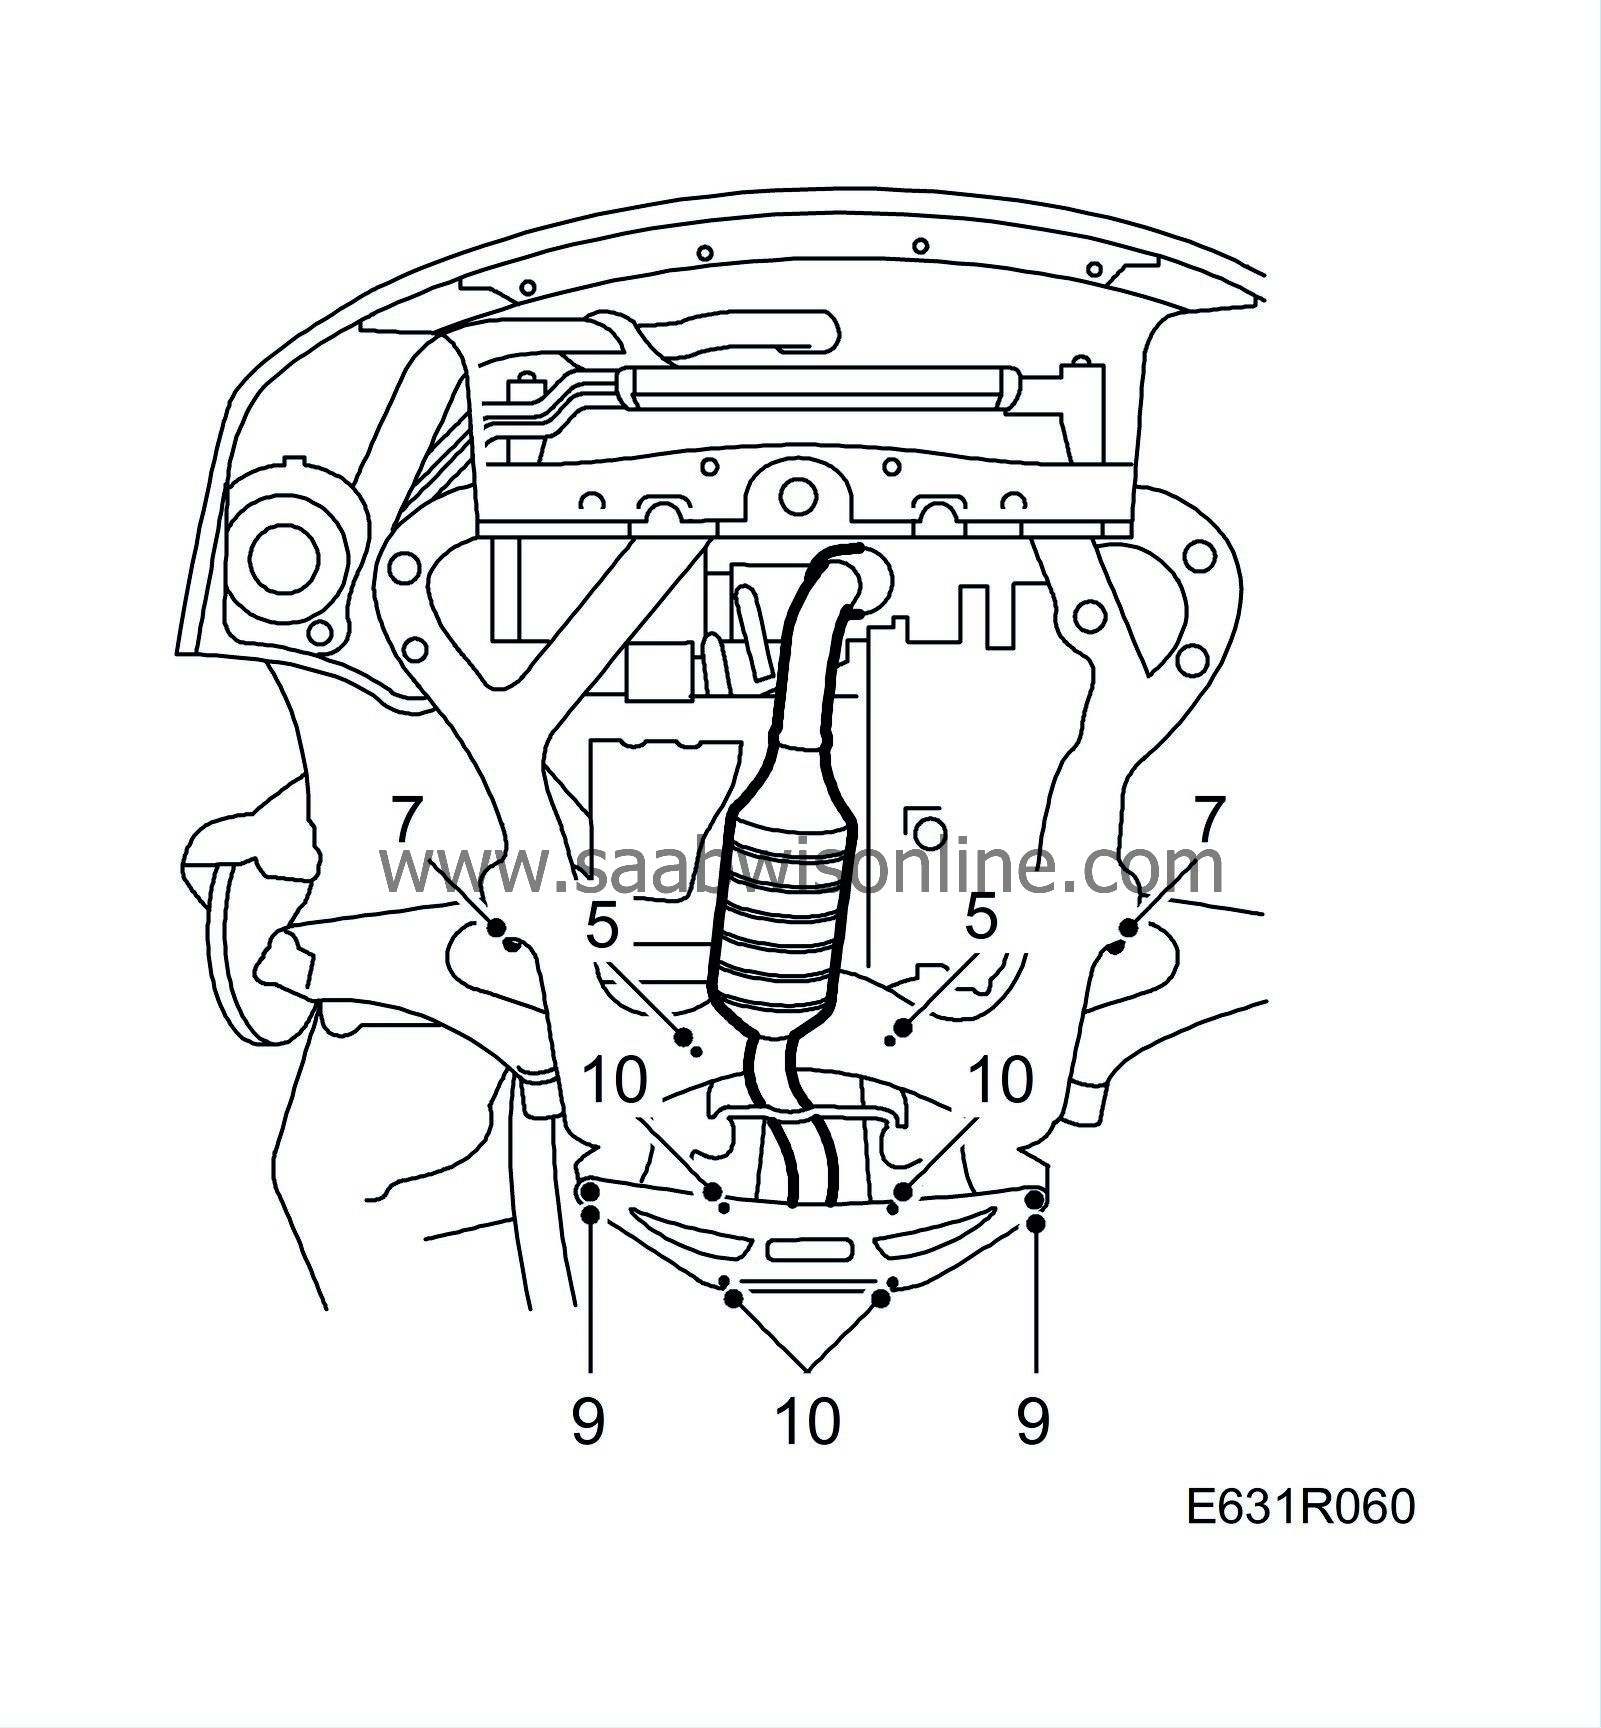
Tightening torque 95 Nm (70 lbf ft).
|
|
6.
|
Fit the engine cushion in place and screw in the retaining bolts a few turns.
|
|
7.
|
Raise the subframe and tighten the centre attachment point bolts.
Tightening torque 100 Nm (75 lbf ft) +45°.
|
|
8.
|
Reconnect the exhaust pipe joint located between the catalytic converter and silencer.
|
|
9.
|
Mount the subframe's rear attachment points together with the reinforcement.
Tightening torque 100 Nm (75 lbf ft) +45°.
|
|
10.
|
Tighten the reinforcement at the subframe's rear attachment point.
Tightening torque 65 Nm (50 lbf ft).
|
|
11.
|
Screw the track rod ends on the track rods the same number of turns as when they were removed, but do not tighten the locknuts.

|
|
12.
|
Mount the track rod ends on the steering swivel members.
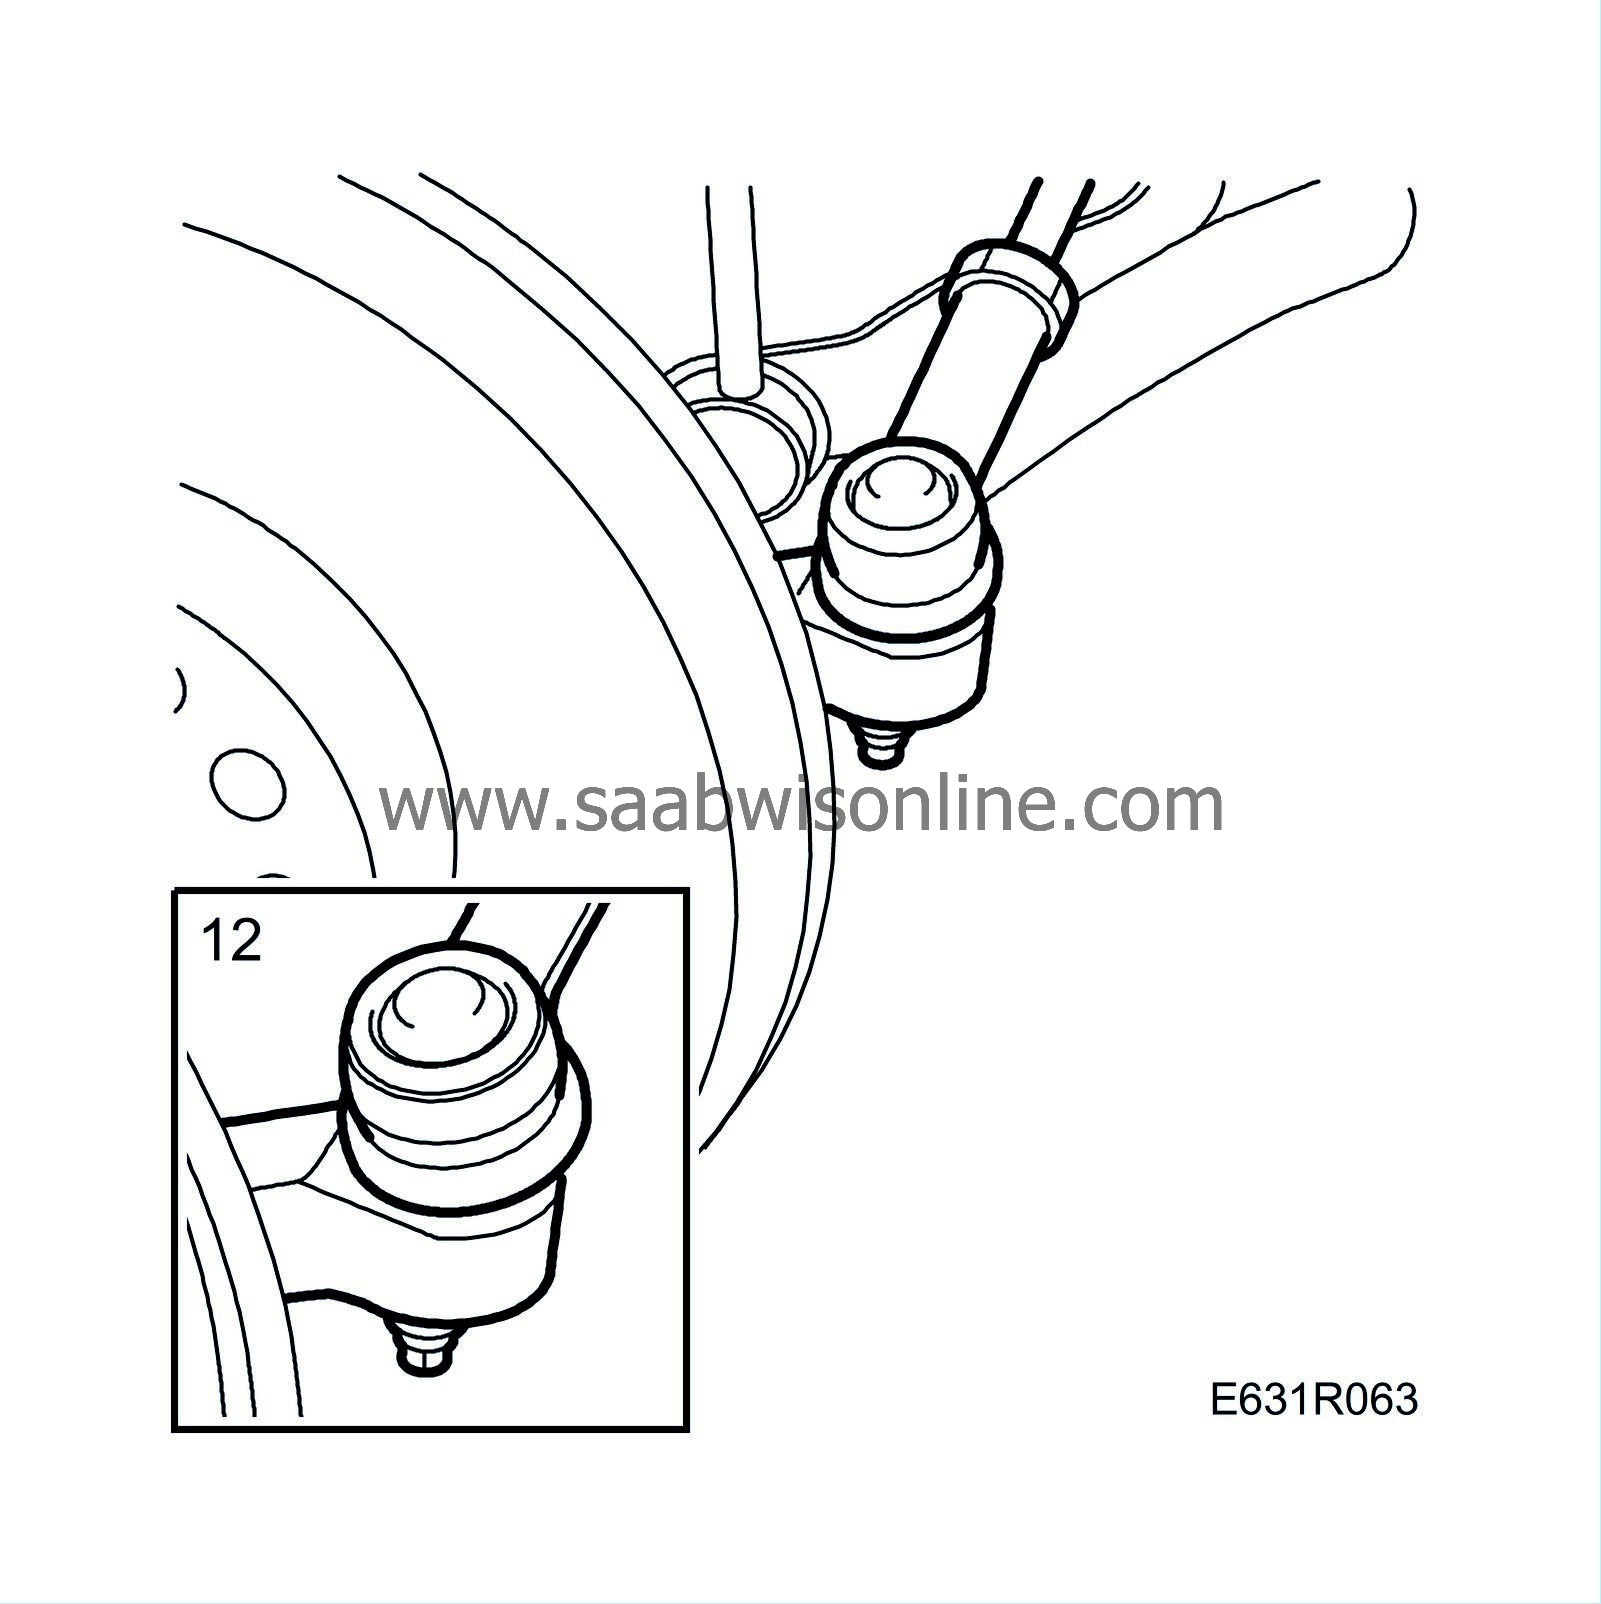
Tightening torque 60 Nm (45 lbf ft).
|
|
13.
|
Fit the wheels. Refer to
Wheels
.
Tightening torques
aluminium wheel 110 Nm (81 lbf ft)
steel wheel 50 Nm + 2x90°, max. 110 Nm (37 lbf ft + 2x90°, max. 81 lbf ft)
Lower the car to the floor.
|
|
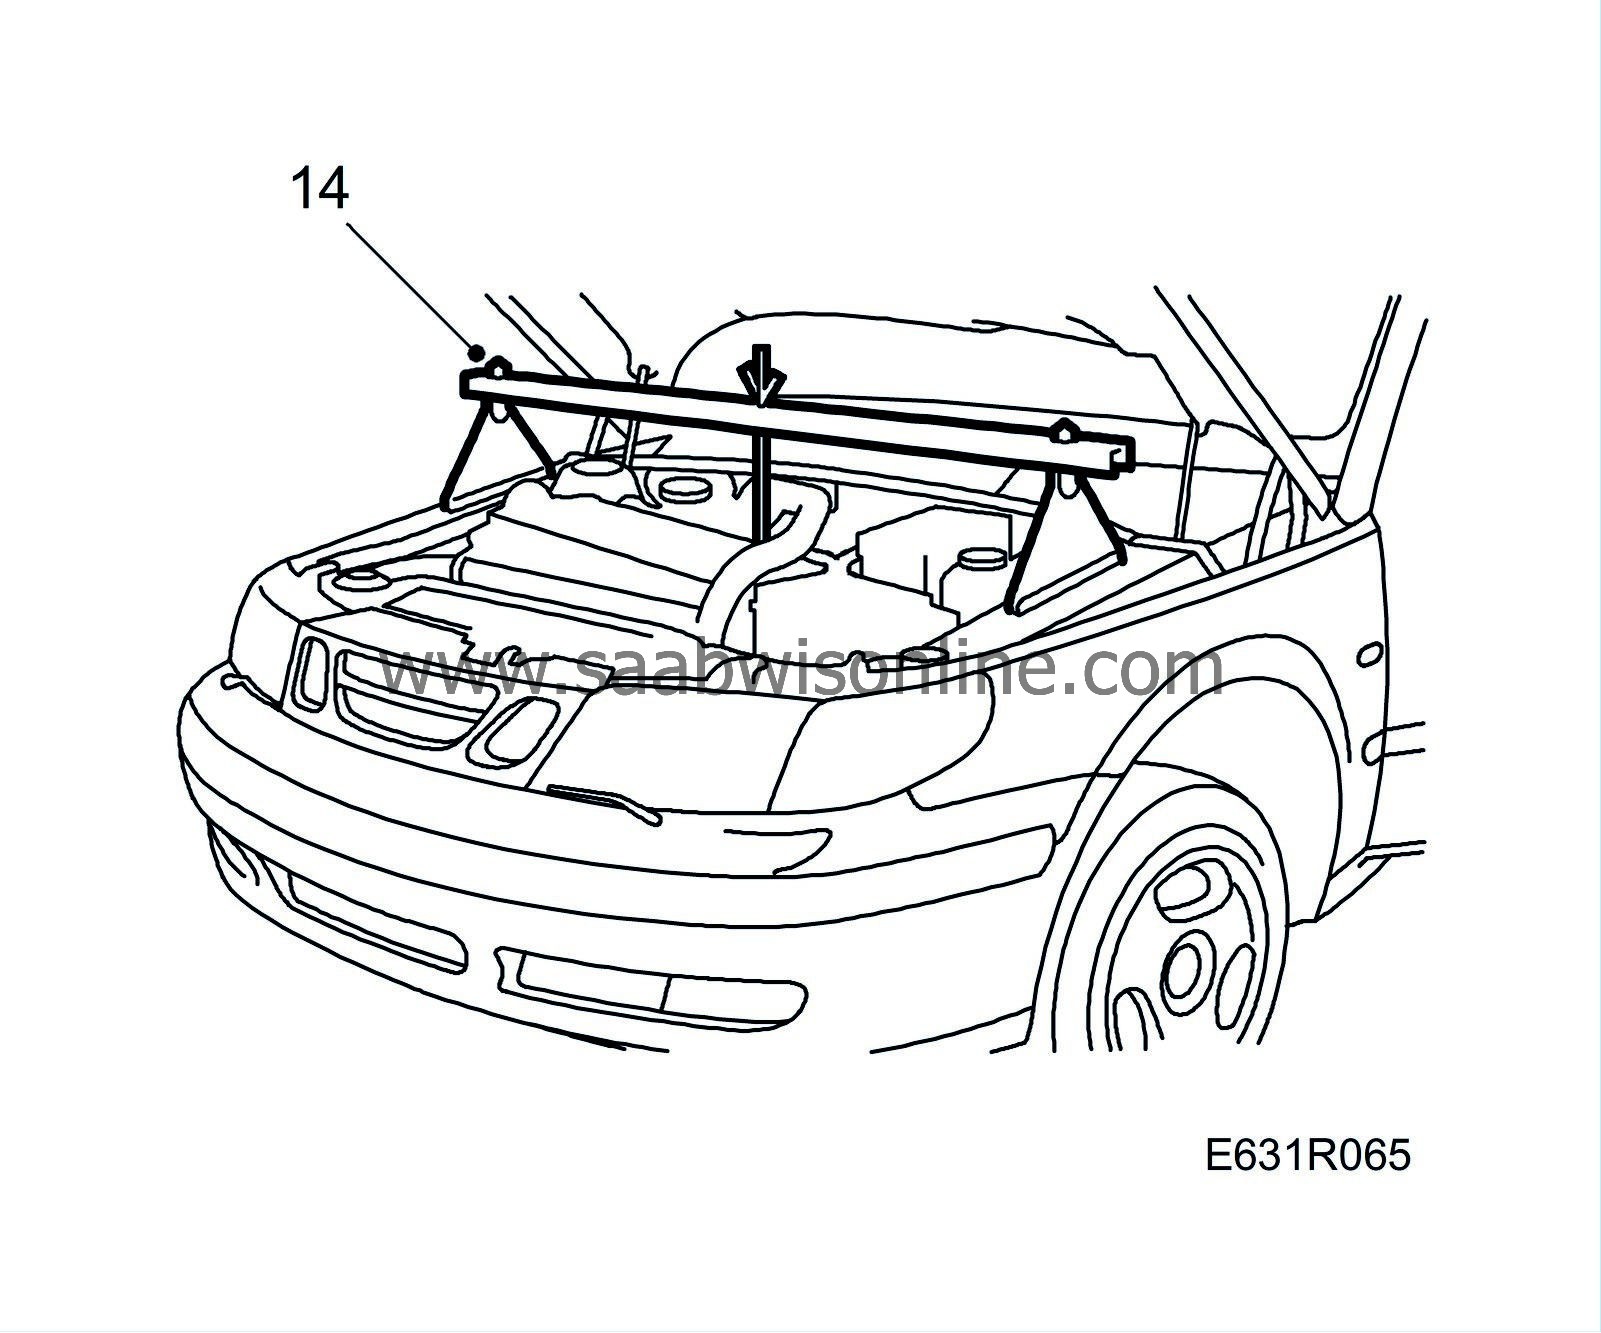
14.
|
Lower the engine on the rear engine mounting and remove the lifting beam.
|
|
15.
|
Tighten the bolts securing the rear engine cushion to the subframe.

Tightening torque 25 Nm (20 lbf ft).
|
|
16.
|
Tighten the bolt securing the rear engine cushion to the engine mounting.
Tightening torque 50 Nm (35 lbf ft).
|
|
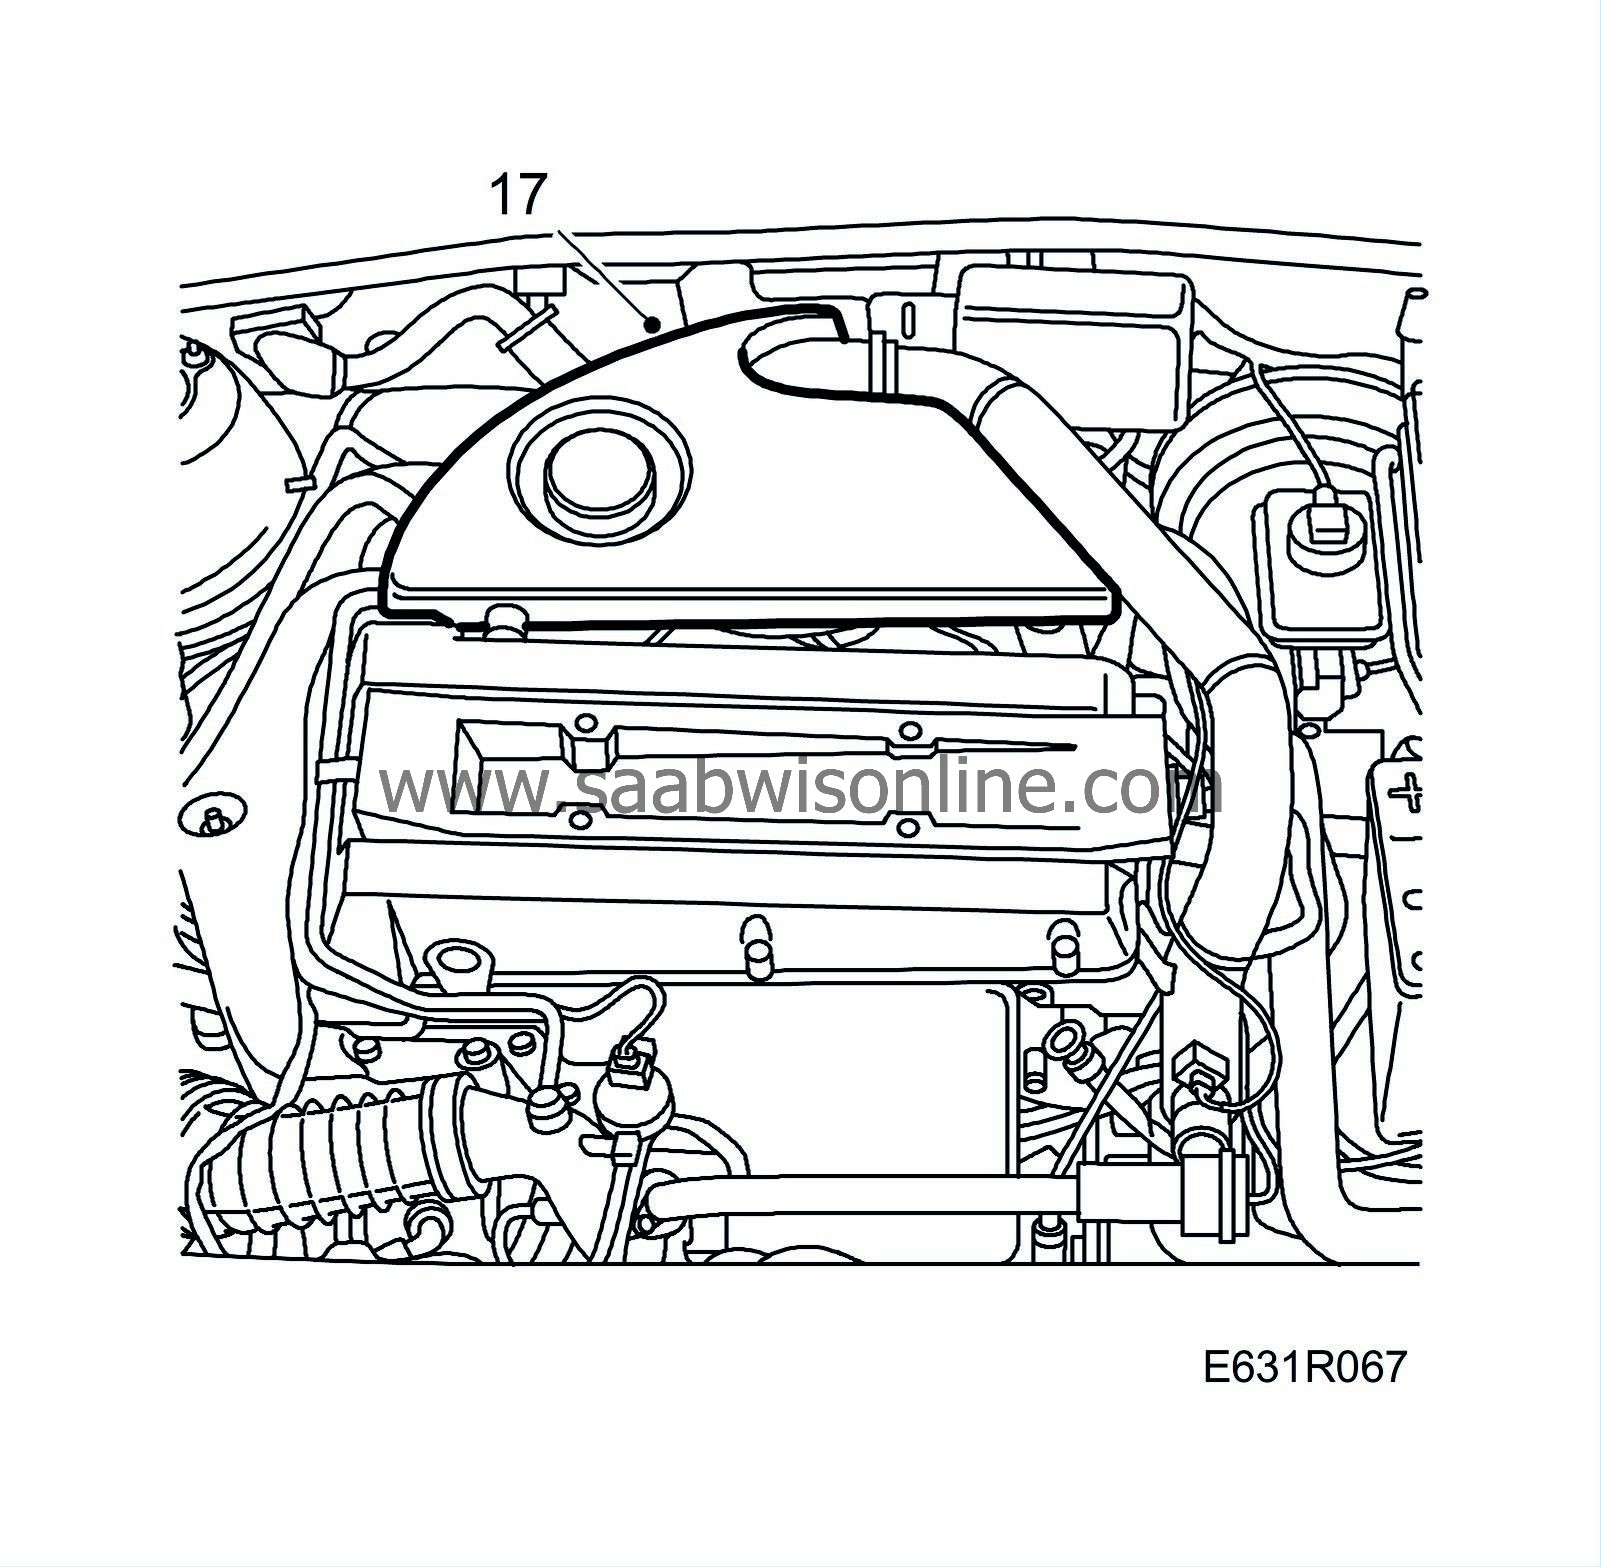
17.
|
Refit the cover on the intake manifold.
|
|
18.
|
Make sure the front wheels are in the straight-ahead position.
|
|
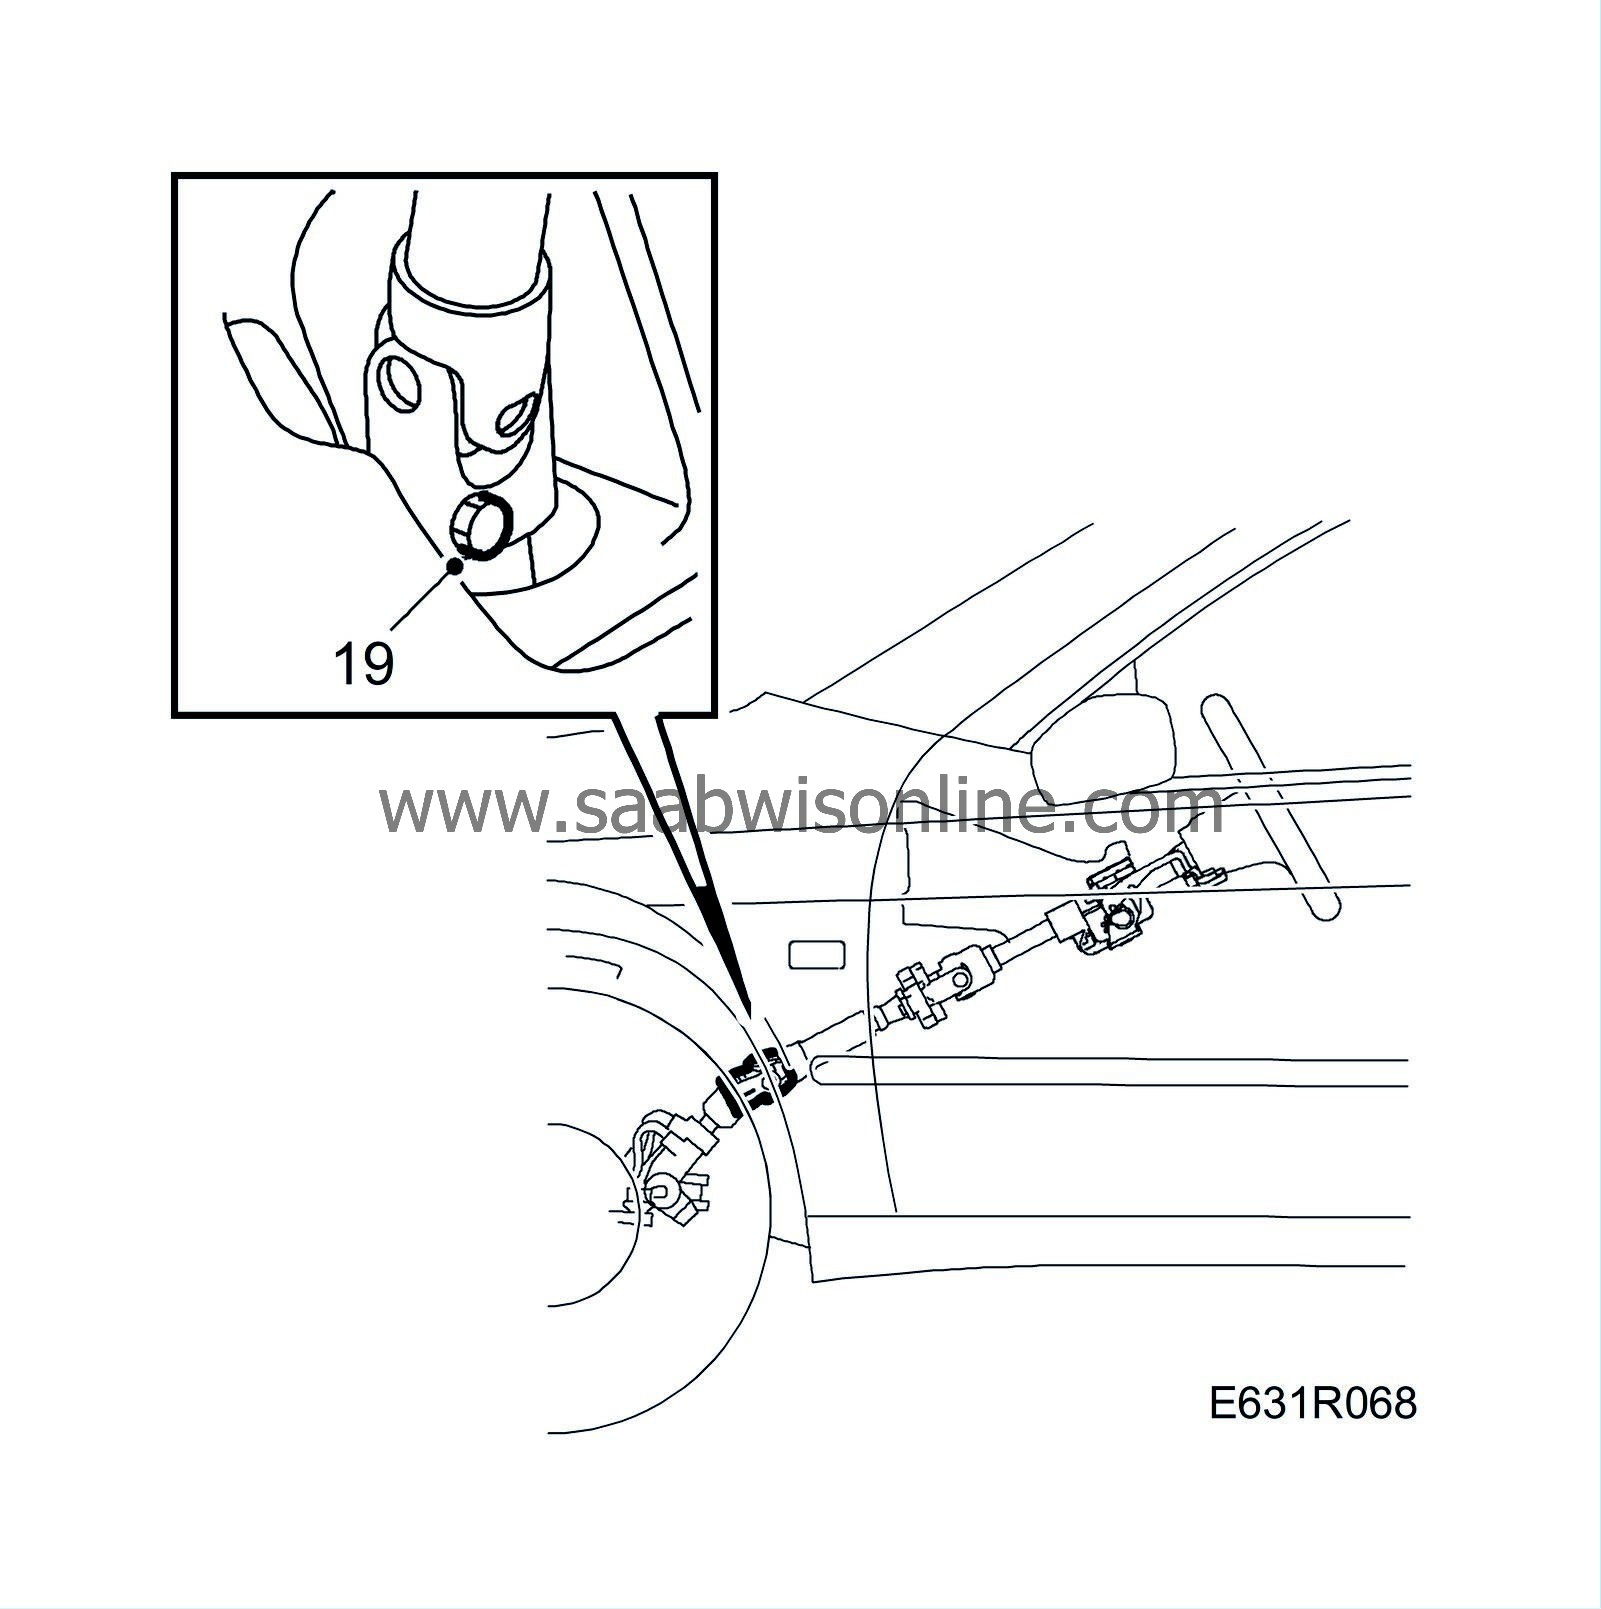
19.
|
Align the steering column shaft with the steering gear and tighten the bolt securing them to each other (accessible under the dashboard). Make sure that the steering gear bolt enters the milled groove on the pinion shaft.
 Warning
|
|
Under
no circumstances
is the steering shaft to be separated.
|
|
|
|
|
|
Tightening torque 30 Nm (25 lbf ft).
|
|
20.
|
Remove the tape or other means used to prevent the steering wheel from moving.
The procedure described in points 20a-20g should be carried out on cars within the following VIN ranges:
LHD up to W3056304
RHD up to W3056253
|
|
|
20.a.
|
Make sure the steering gear is in the straight-ahead position.
|
|
|
20.b.
|
Remove the steering wheel airbag unit. Refer to
Airbag, driver
. Place the airbag unit metal case side down.
|
|
|
20.c.
|
Remove the steering wheel.
|
|
|
20.d.
|
Protect the steering shaft bearing so that it is not damaged by swarf.
|
|
|
20.e.
|
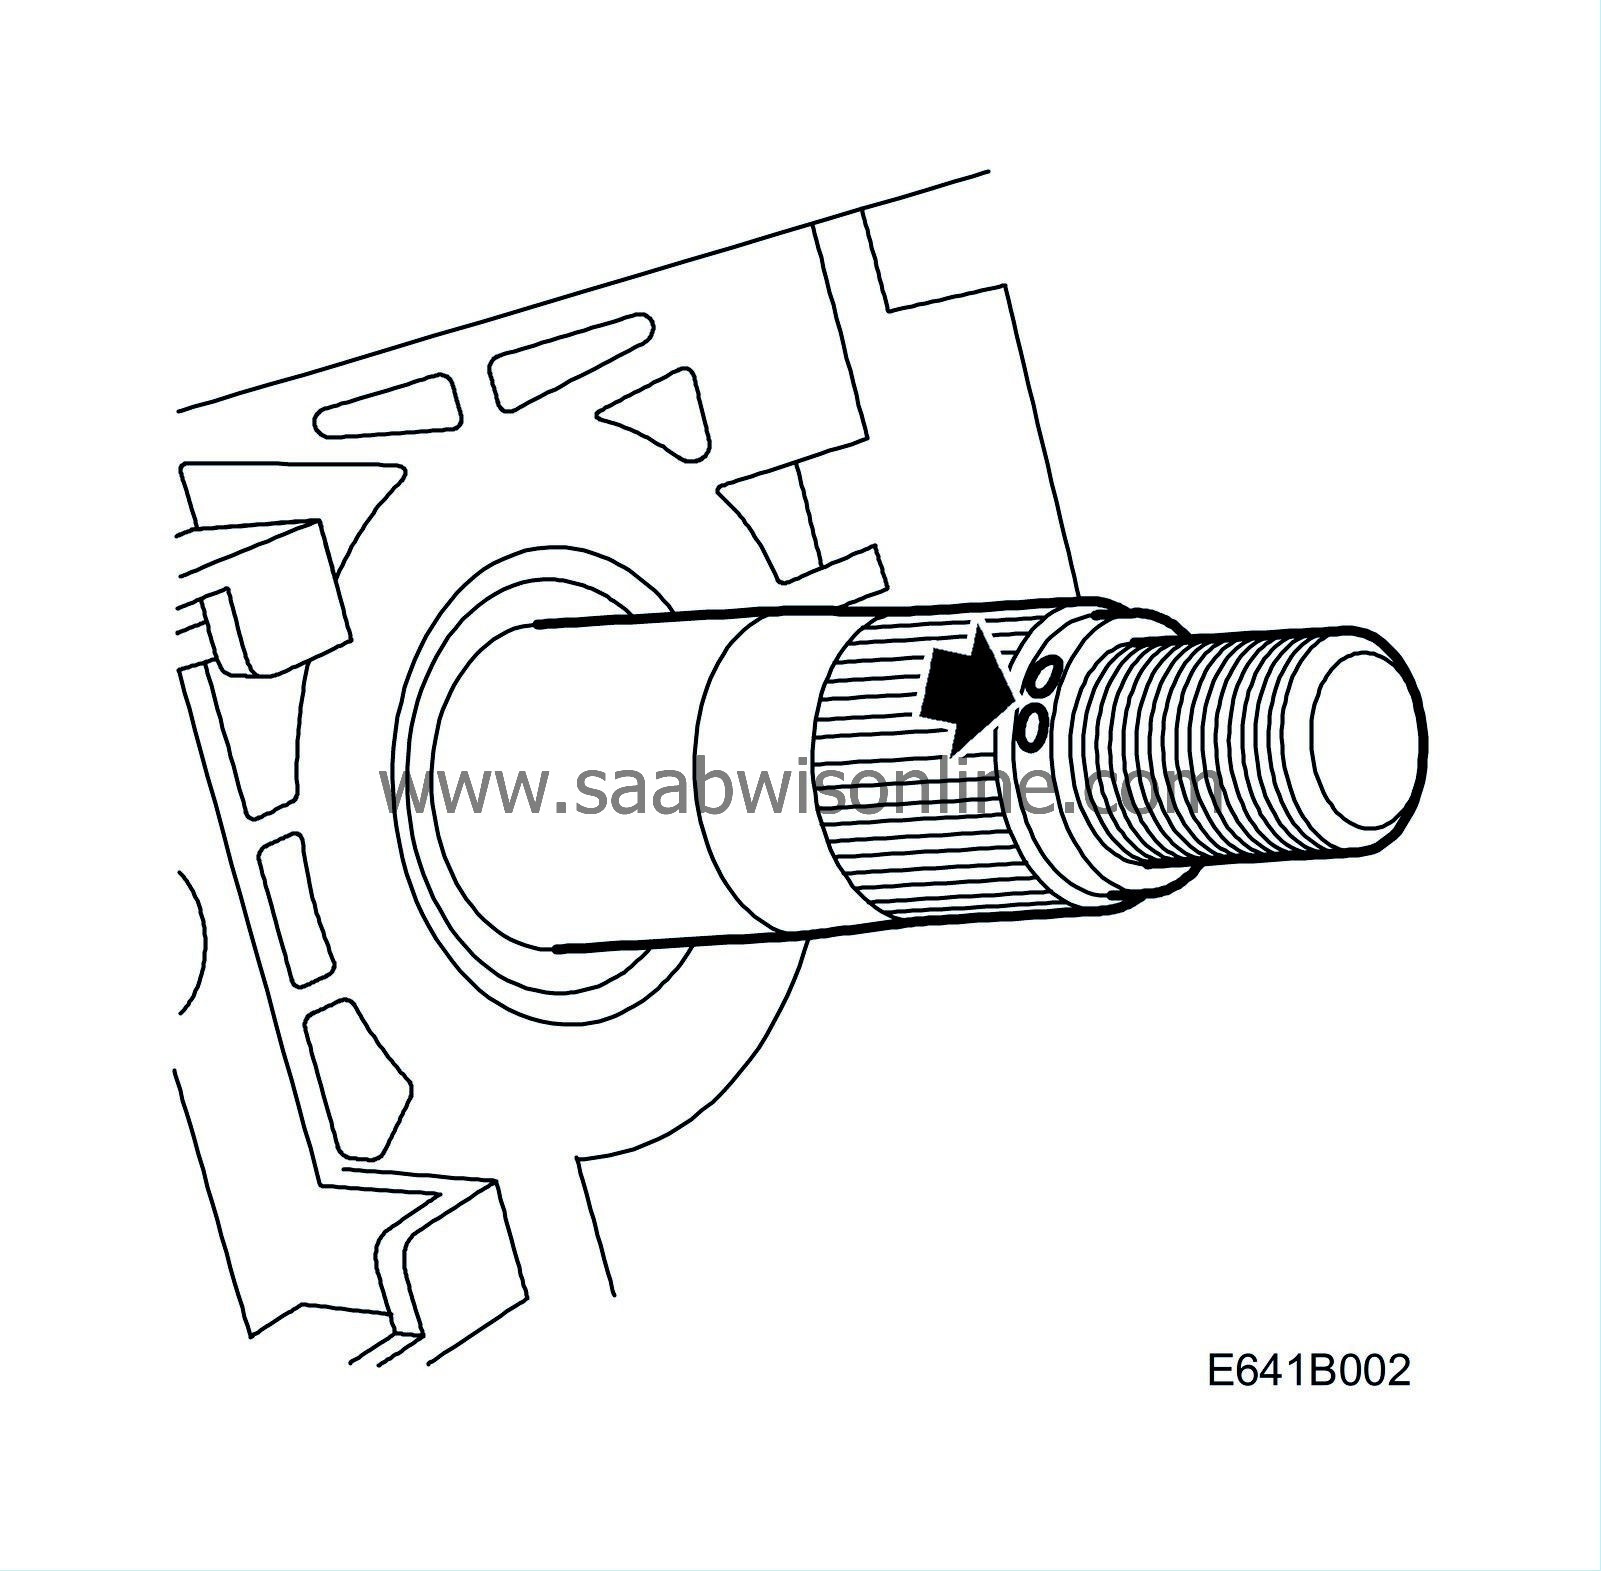
File away the code on the steering column shaft.
|
|
|
20.f.
|
Fit the steering wheel in the straight-ahead position and tighten the nut with a torque wrench.
Tightening torque 30 Nm (25 lbf ft)
|
|
|
20.g.
|
Fit the airbag unit, refer to
To fit
.
|
|
21.
|
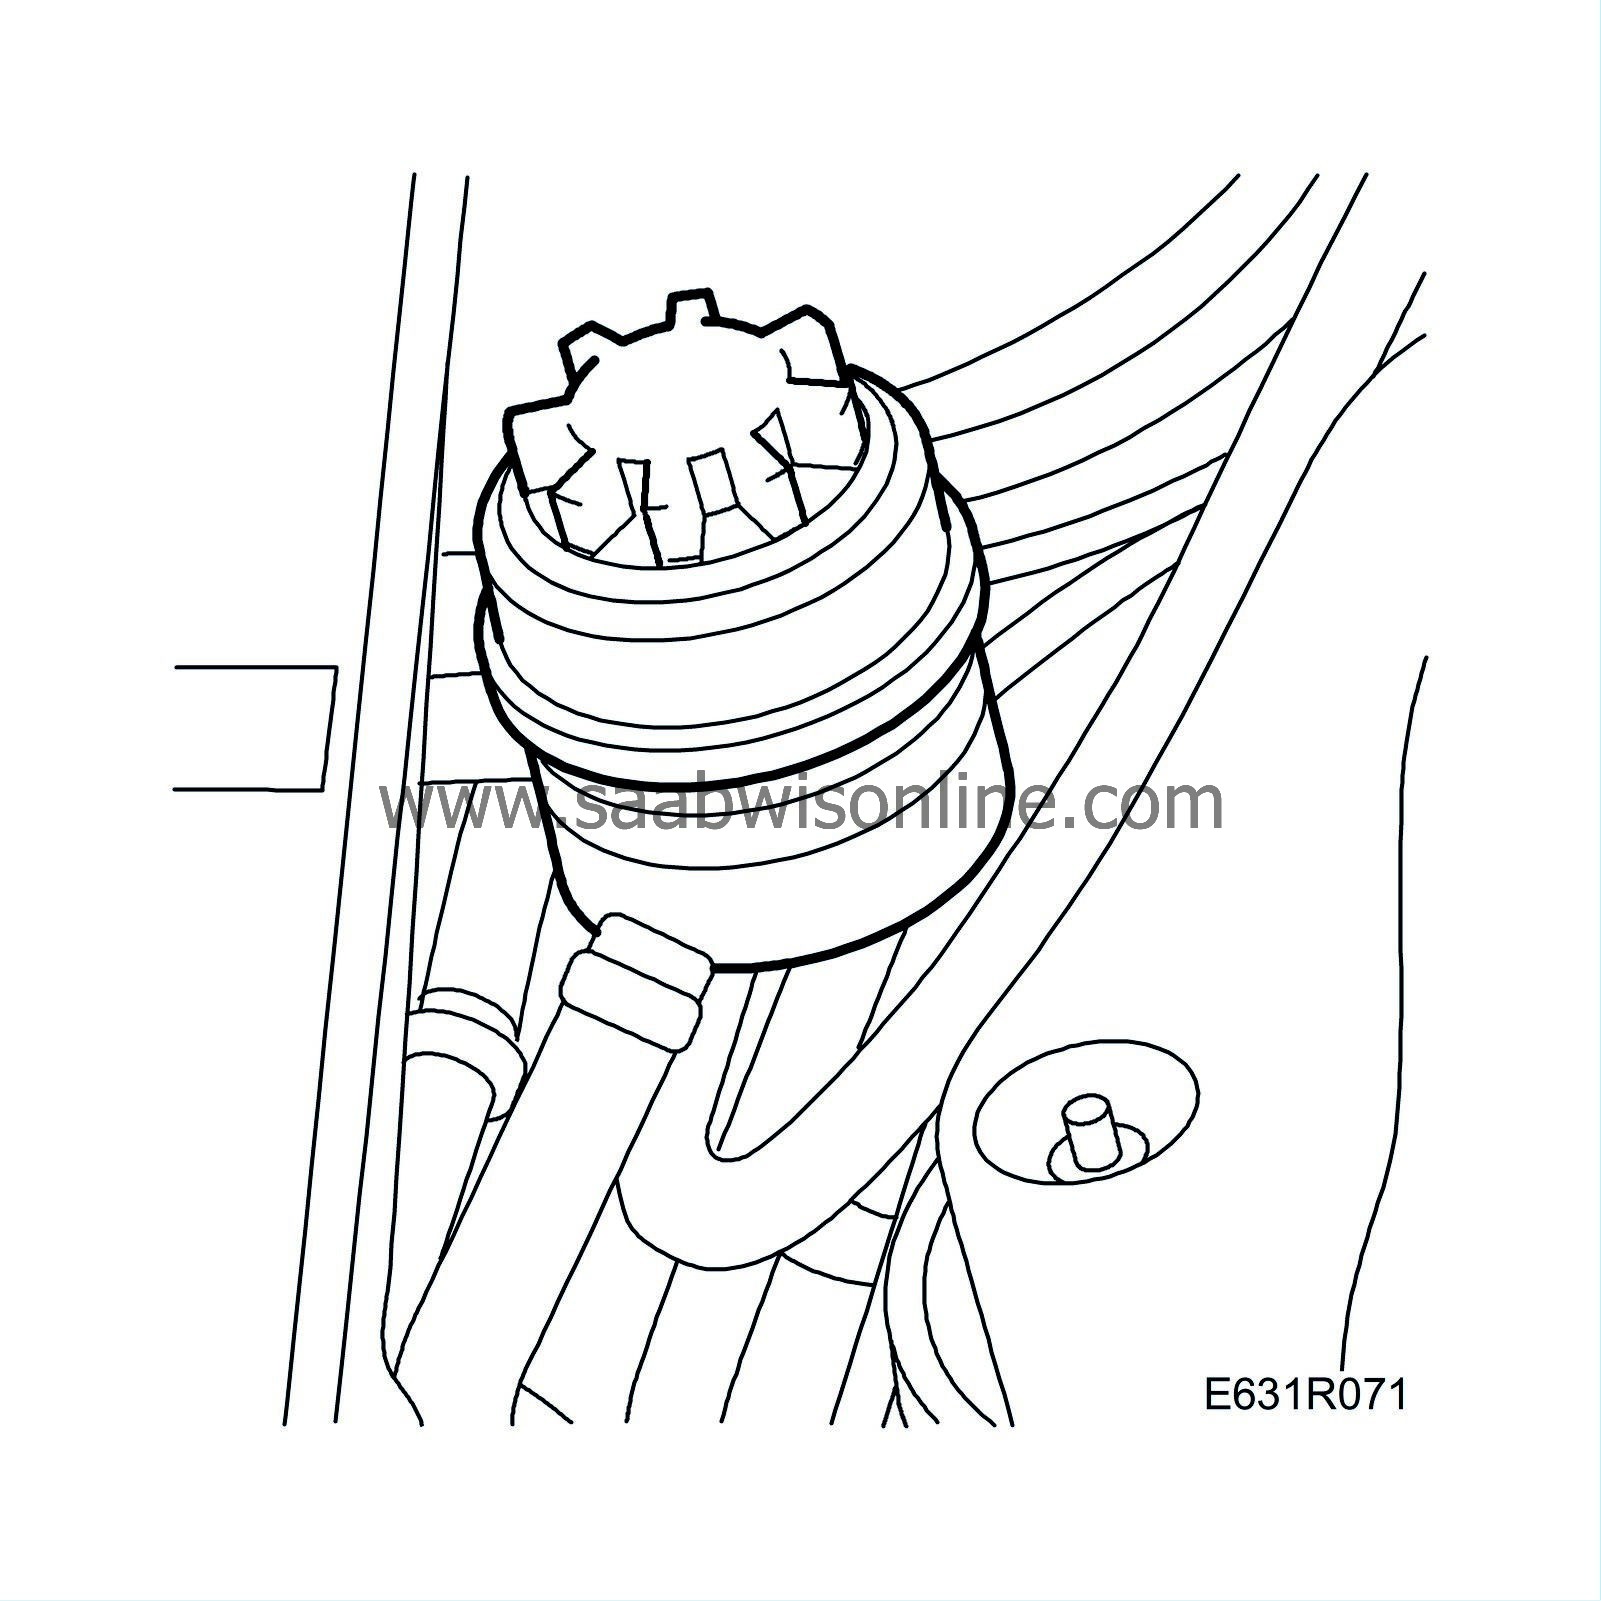
Connect the return hose to the power steering fluid reservoir and tighten the hose clip.
|
|
22.
|
Fit the reservoir.
|
Important
|
|
The position of the reservoir is fixed.
|
|
|
|
|
23.
|
Fill the power steering fluid reservoir with fluid and lift the front assembly so that the wheels are clear of the floor.
|
|
24.
|
Start the engine, turn the steering wheel full lock right and left 2-3 times. Turn off the engine and top up with fluid.
 Warning
|
|
Never start the engine with the power steering fluid reservoir filler cap unscrewed. Fluid could spurt out of the reservoir.
|
|
|
|
|
|
|
|
25.
|
Start the engine, turn the steering wheel full lock right and left 2-3 times. Turn off the engine and top up with fluid.
|
|
27.
|
Tighten the track rod locknuts.

Tightening torque 70 Nm (55 lbf ft).
|
|
28.
|
Check the position of the steering wheel and the operation of the steering gear on the open road.
|
|
29.
|
Check the system for leakage.
|


 Warning

