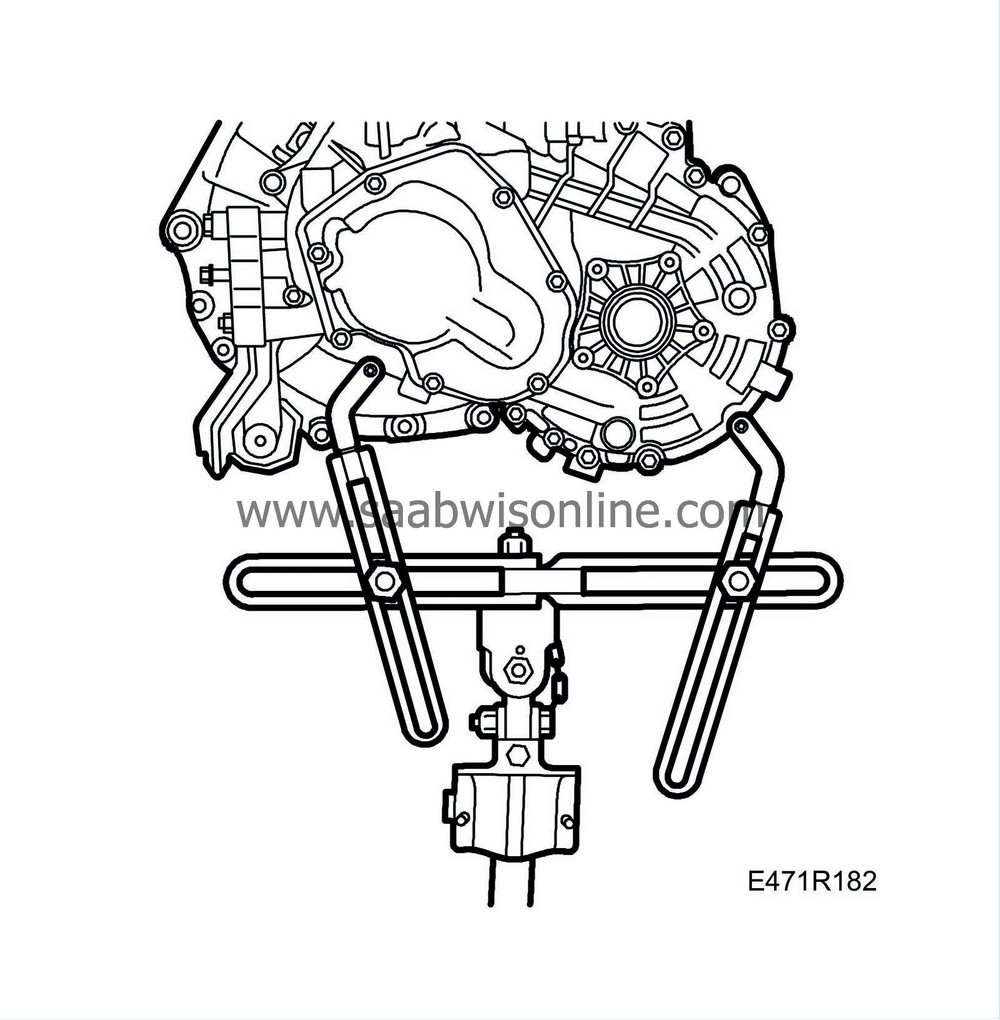
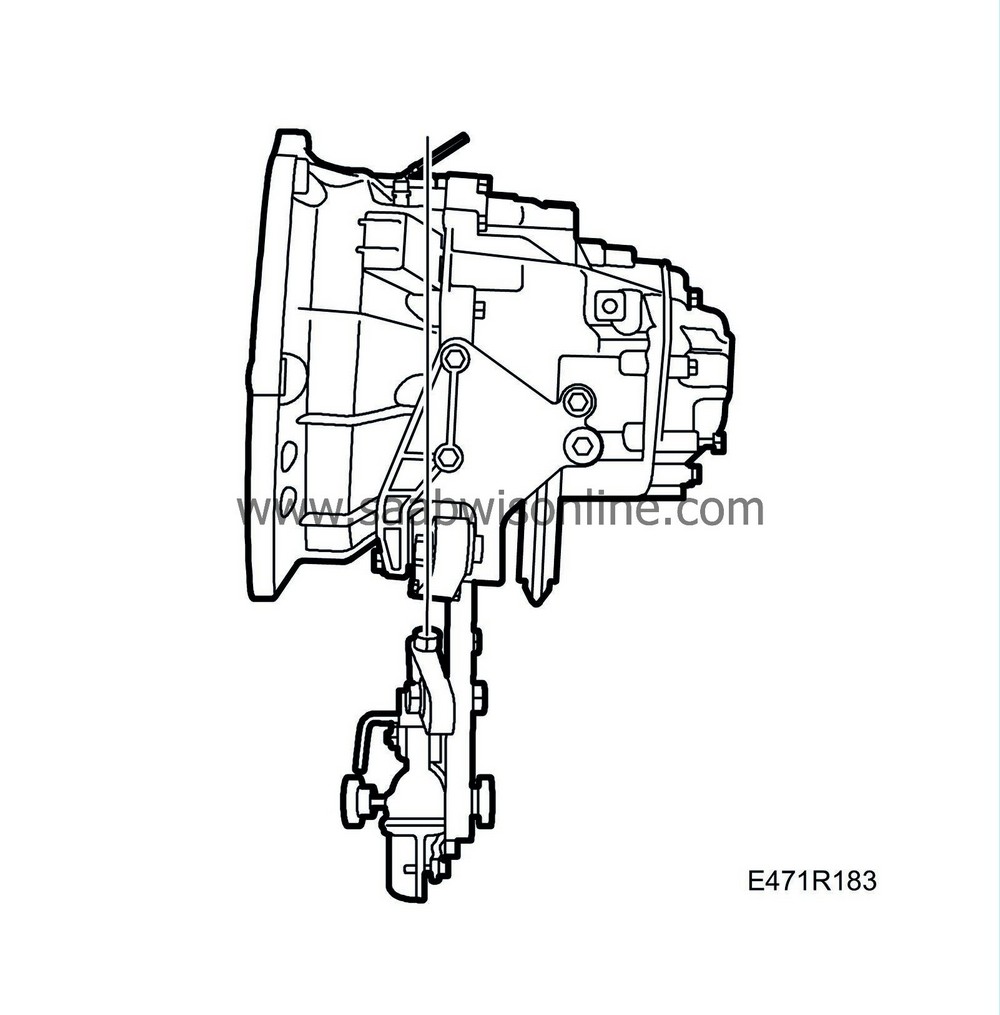
Gearbox removal Z19
| Gearbox removal Z19 |
|
|||||||
| 1. |
Place the car on a lift.
|
|
| 2. |
Remove the upper rivets and bolts from the bumper shell and place two
83 95 212 Straps
over the radiator member to suspend the radiator core later.
|
|
| 3. |
Fit wing covers to prevent paint damage and soiling of the wings.
|
|
| 4. |
Remove the upper engine cover with insulation.

|
|
| 5. |
Cars with battery cover:
Lift the cover off of the battery.
Alla:
Detach the battery cables.
|
|
| 6. |
Remove the battery. Detach and move aside the maxi fuse holder and remove the battery tray.

|
|
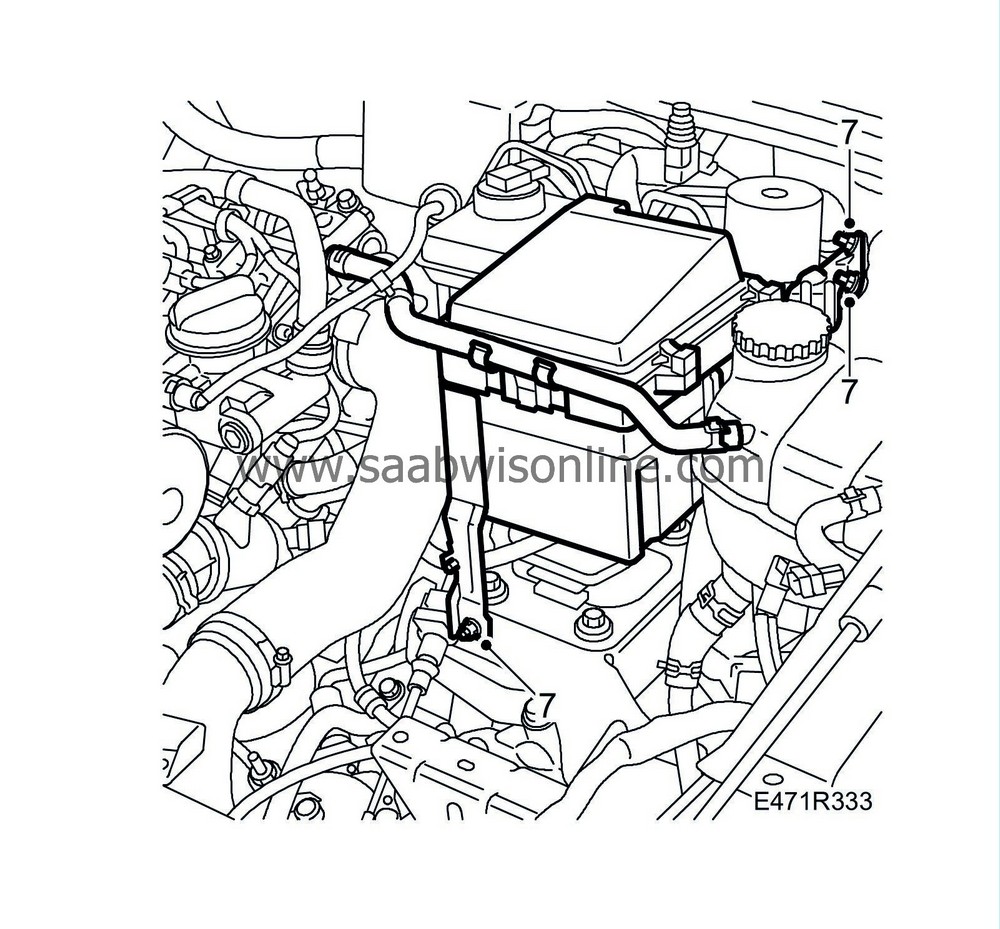
| 7. |
Disconnect the electrical distribution unit and move it aside.
|
|
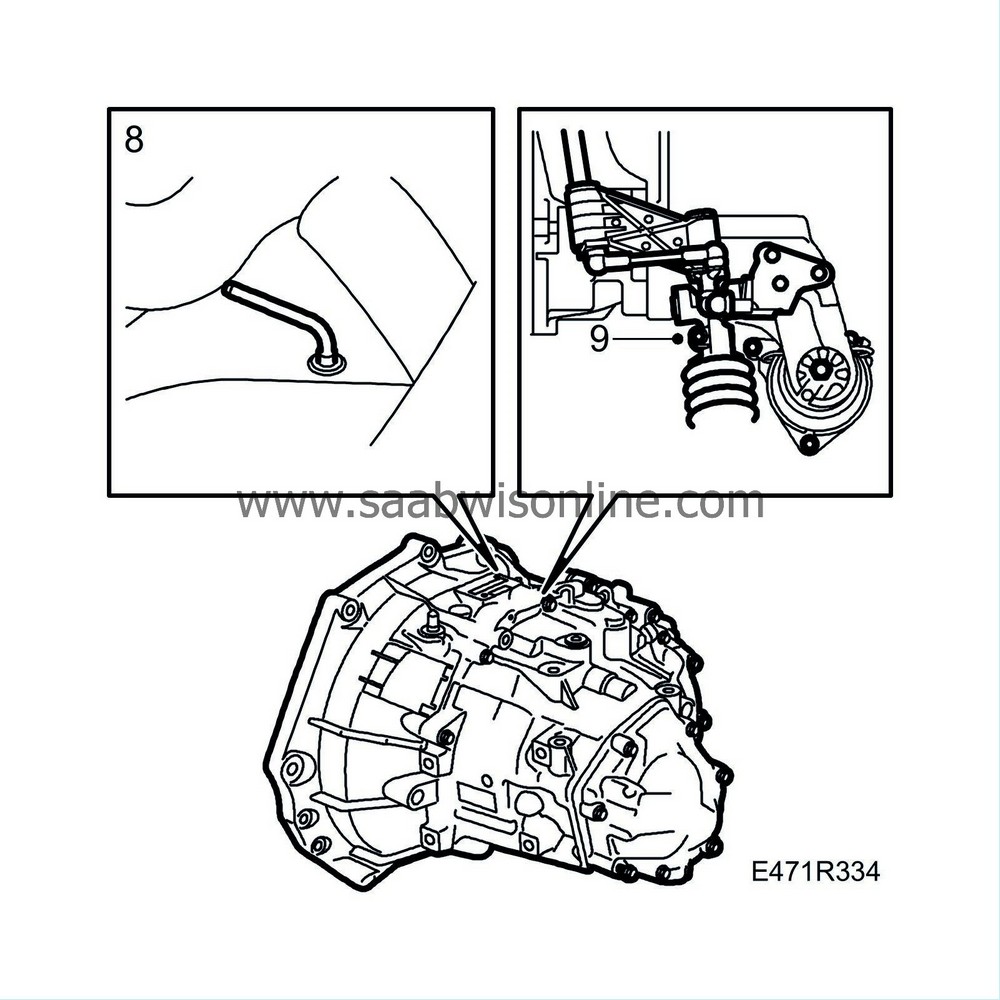
| 8. |
Lock in 4th at the gearbox by removing the plastic plug and inserting
87 92 335 Lock pin
.
|
|
| 9. |
Release the clamp which holds the selector rod in the gearbox linkage.
|
|
| 10. |
Engage 3rd gear so that the selector rod goes out of the linkage.
|
|
| 11. |
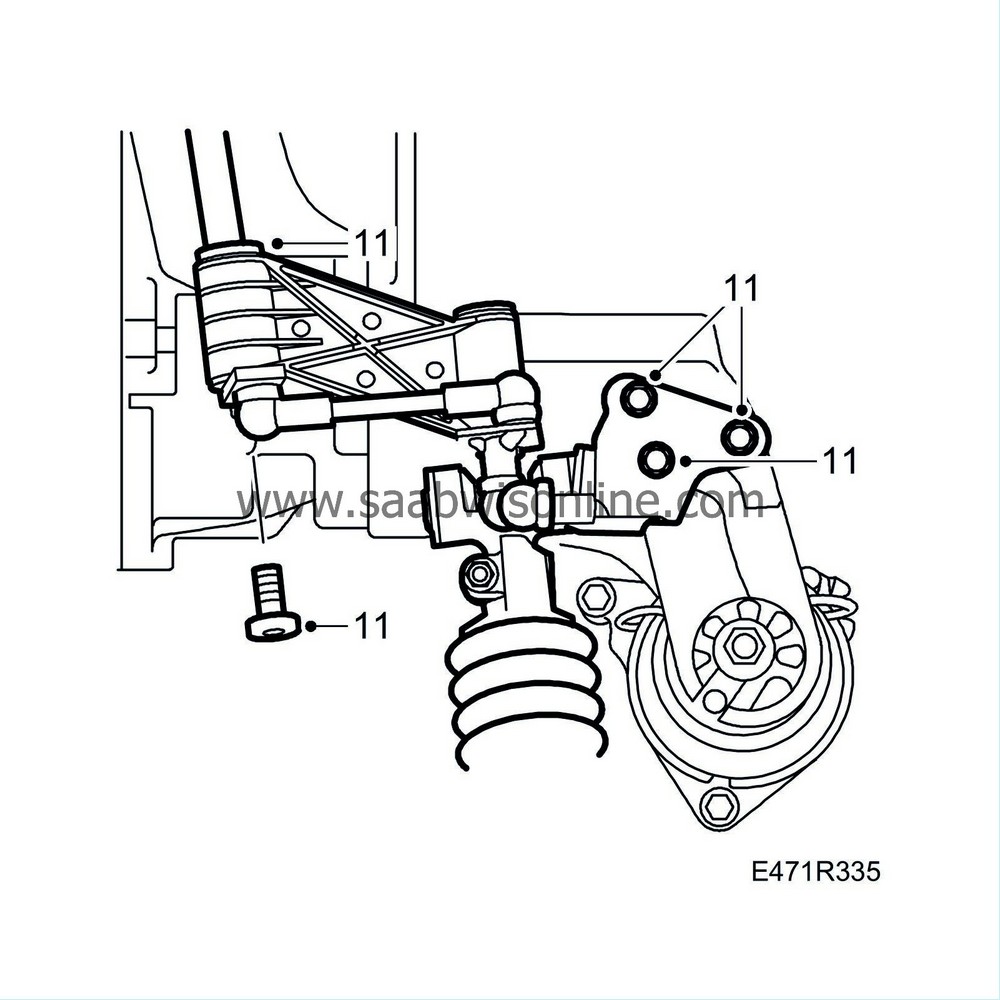
Detach the gear linkage at the gearbox and engine mounting. Remove the linkage. Keep track of the washer that sits on the selector rod.
|
|
| 12. |
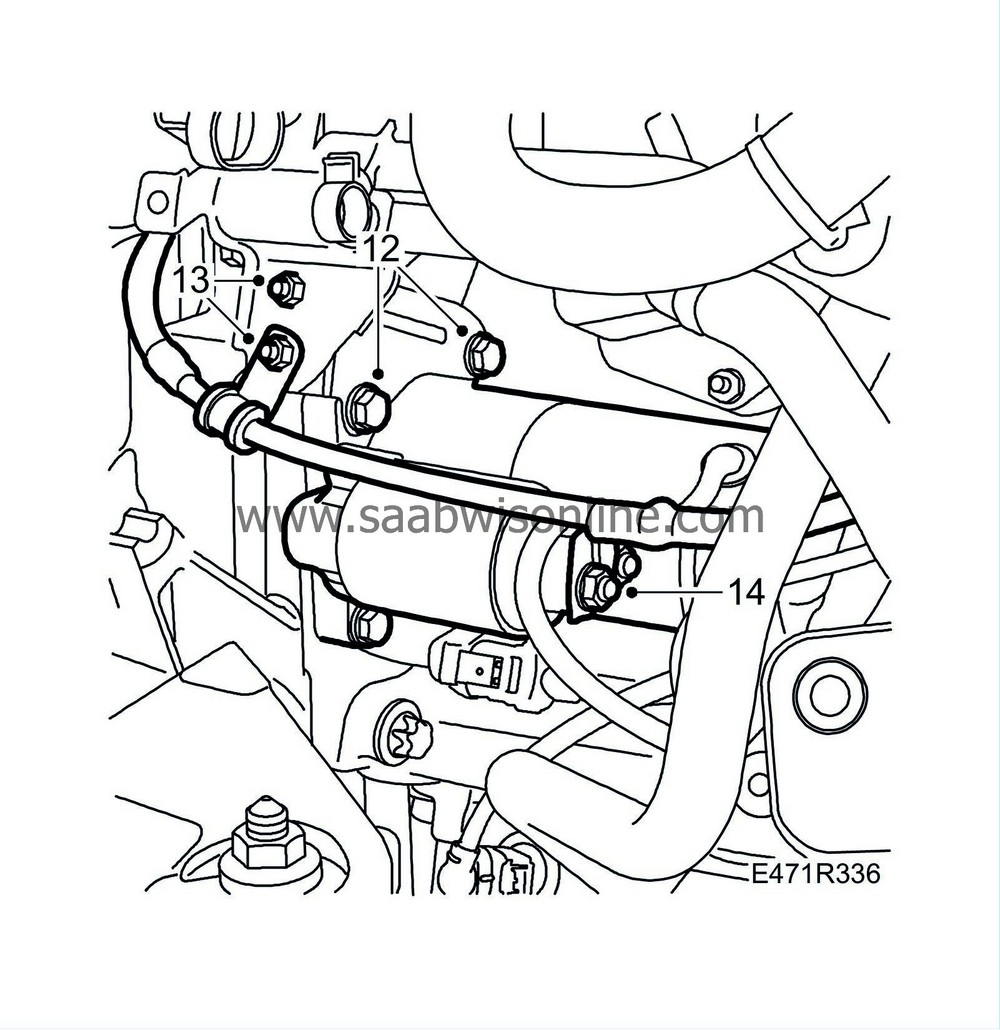
Remove the upper bolts of the starter motor.
|
|
| 13. |
Remove the bracket from the coolant pipes and the positive cable clamp.
|
|
| 14. |
Remove the starter motor connection cables.
|
|
| 15. |
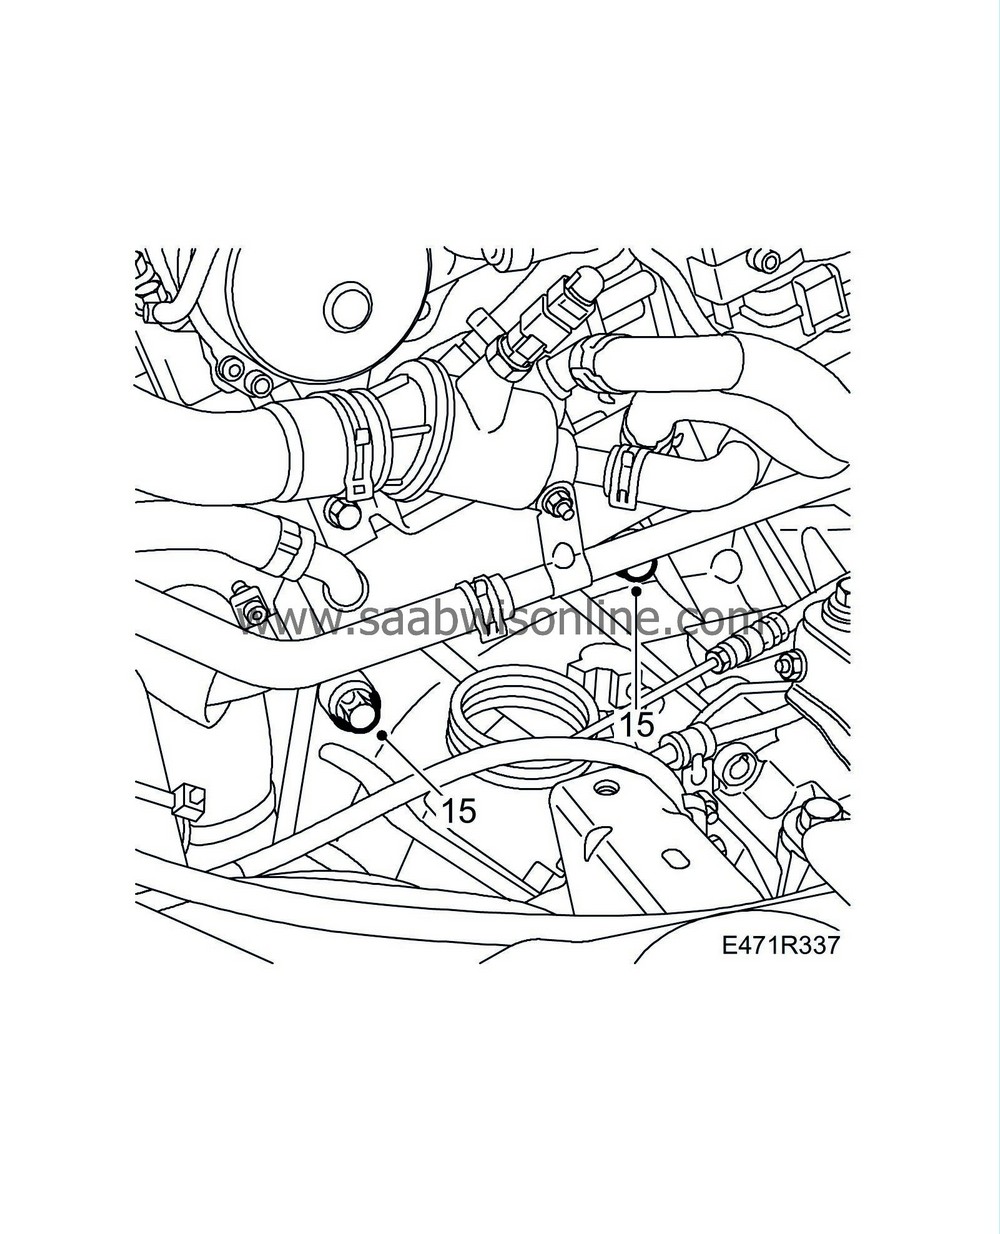
Remove the upper gearbox bolts.
|
|
| 16. |
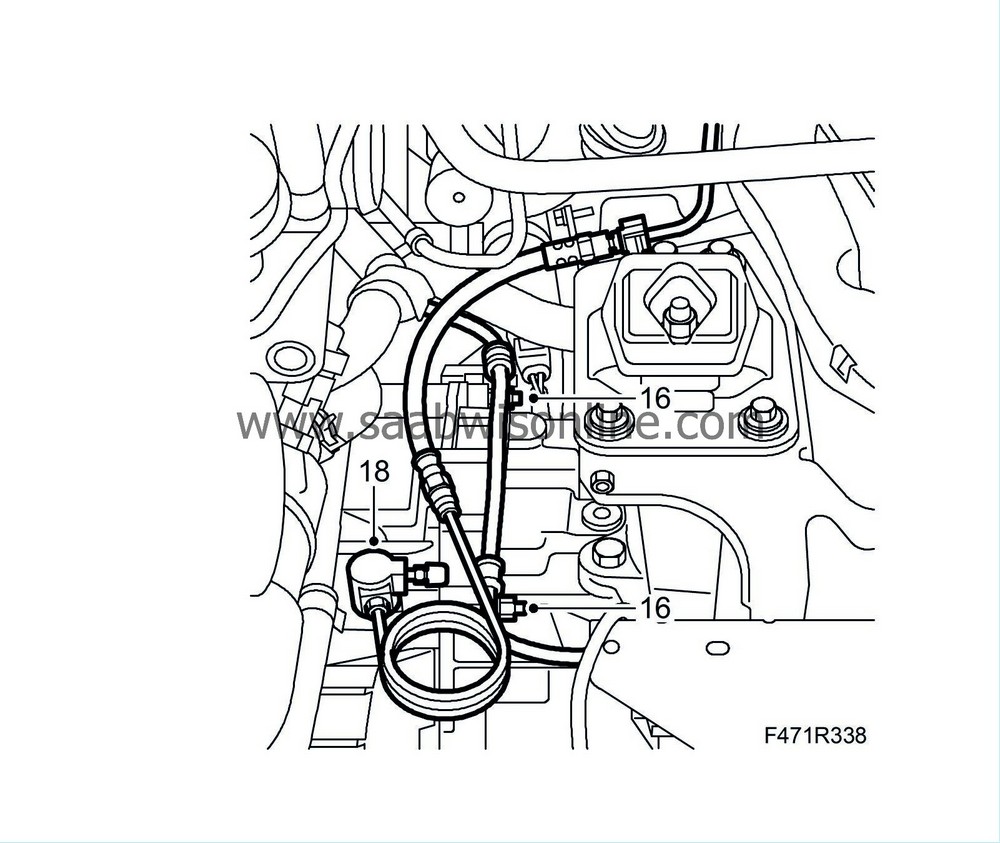
Remove the positive cable clamps from the gearbox.
|
|
| 17. |
Prevent brake fluid draining from the reservoir by blocking the brake fluid hose using
30 07 739 Hose pinch-off pliers
.
|
|
| 18. |
Remove the locking clip at the slave cylinder and release the connection to the pressure pipe. Refit the locking clip.
|
|
| 19. |
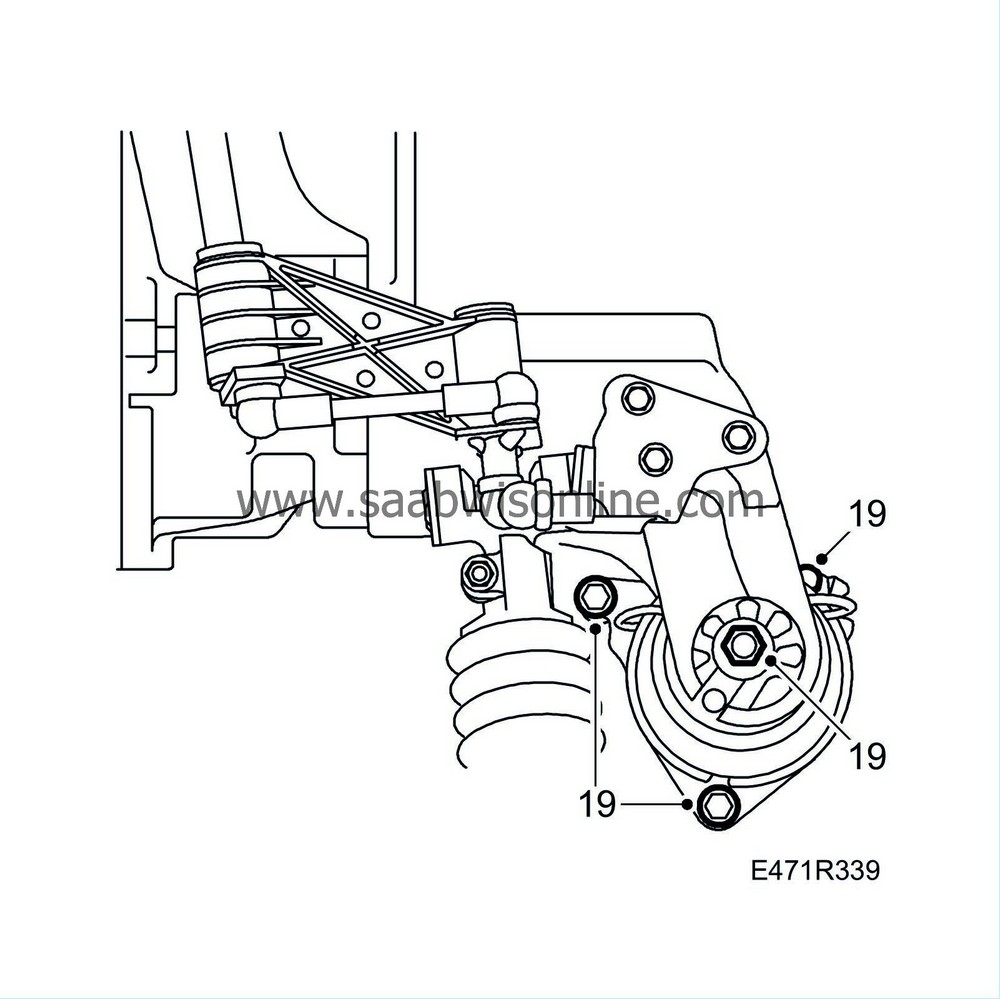
Remove the nuts on the rear engine mount. Loosen the 3 bolts holding the rear engine mount using a long 10 mm socket, an extension with ball (e.g. 30 17 613) and
Extension, 500 mm, 3/8 square
82 93 102. Leave the bolts in place.
|
|
| 20. |
Remove the connector from the reversing light switch.
|
|
| 21. |
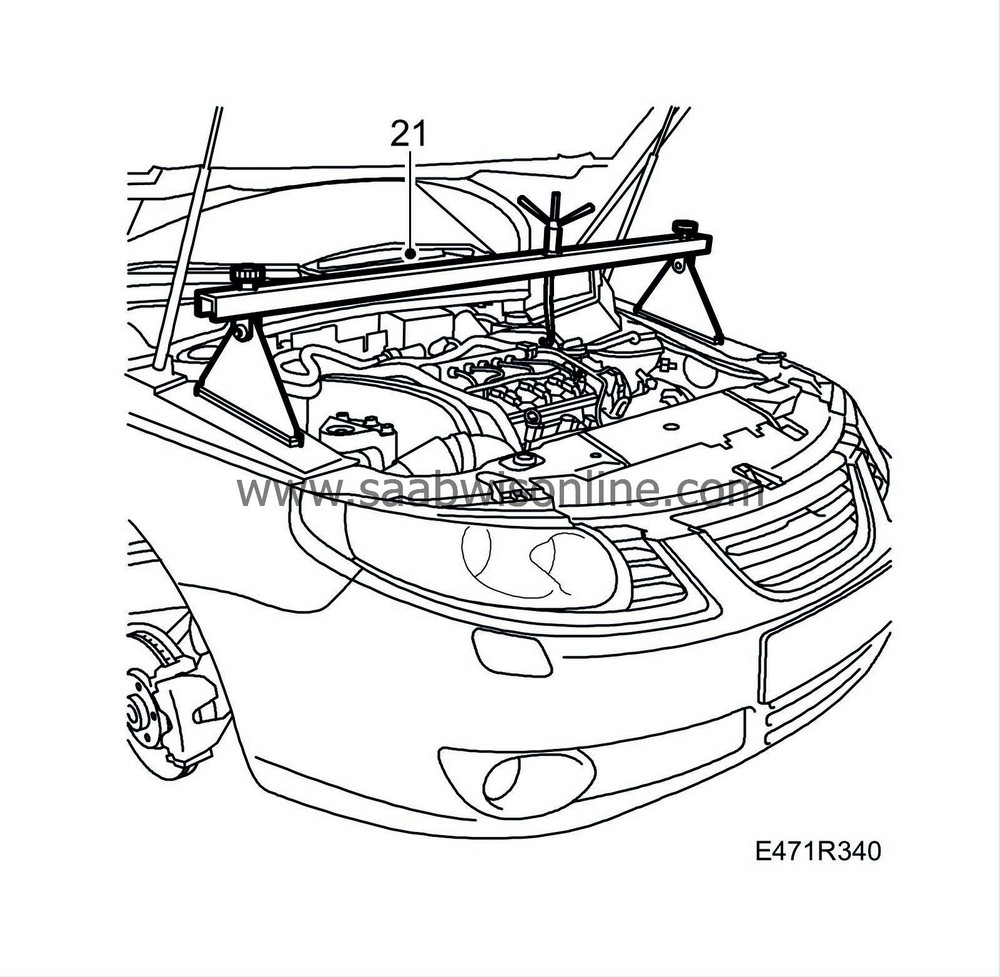
Relieve the load on the engine and gearbox with
83 94 850 Lifting beam
. Place the yoke on the wheelarch so it lies against the wing edges and near the wing fixing bolts.
|
|
| 22. |
Lift the car. Remove the front wheels.
|
|
| 23. |
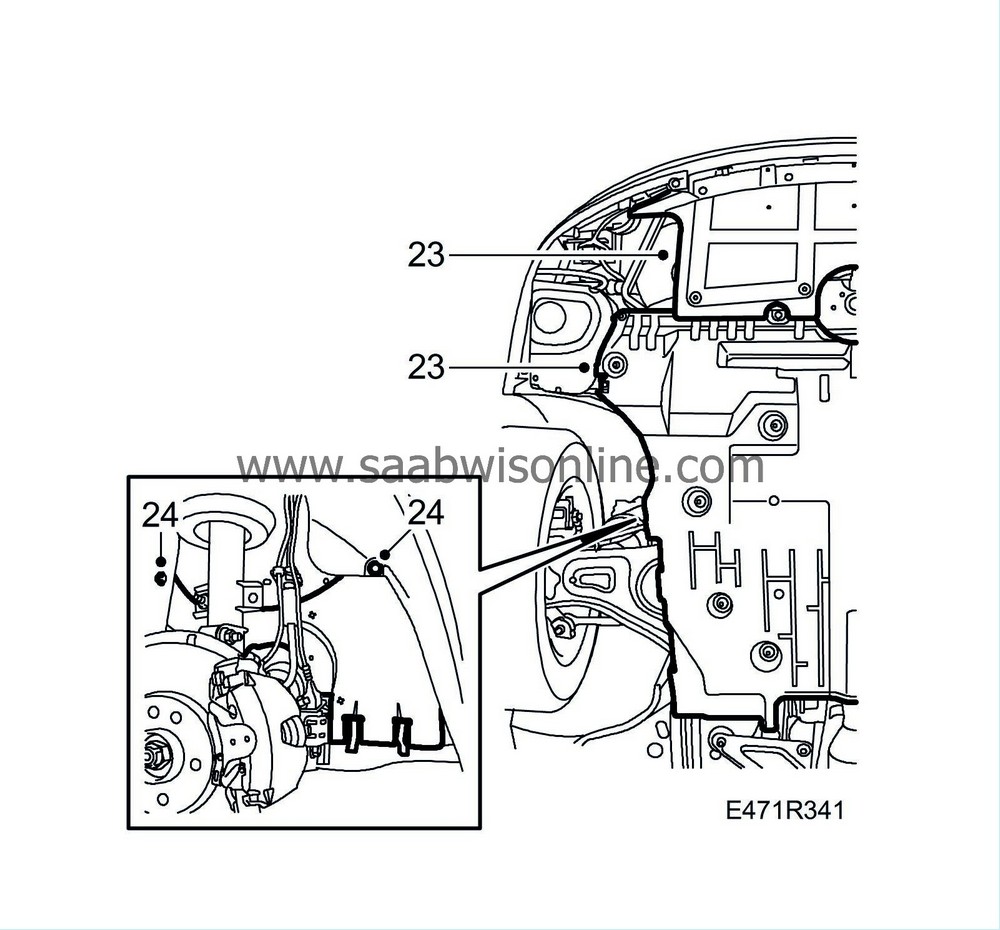
Remove the two lower engine covers and side covers in the wheelarches.
|
|
| 24. |
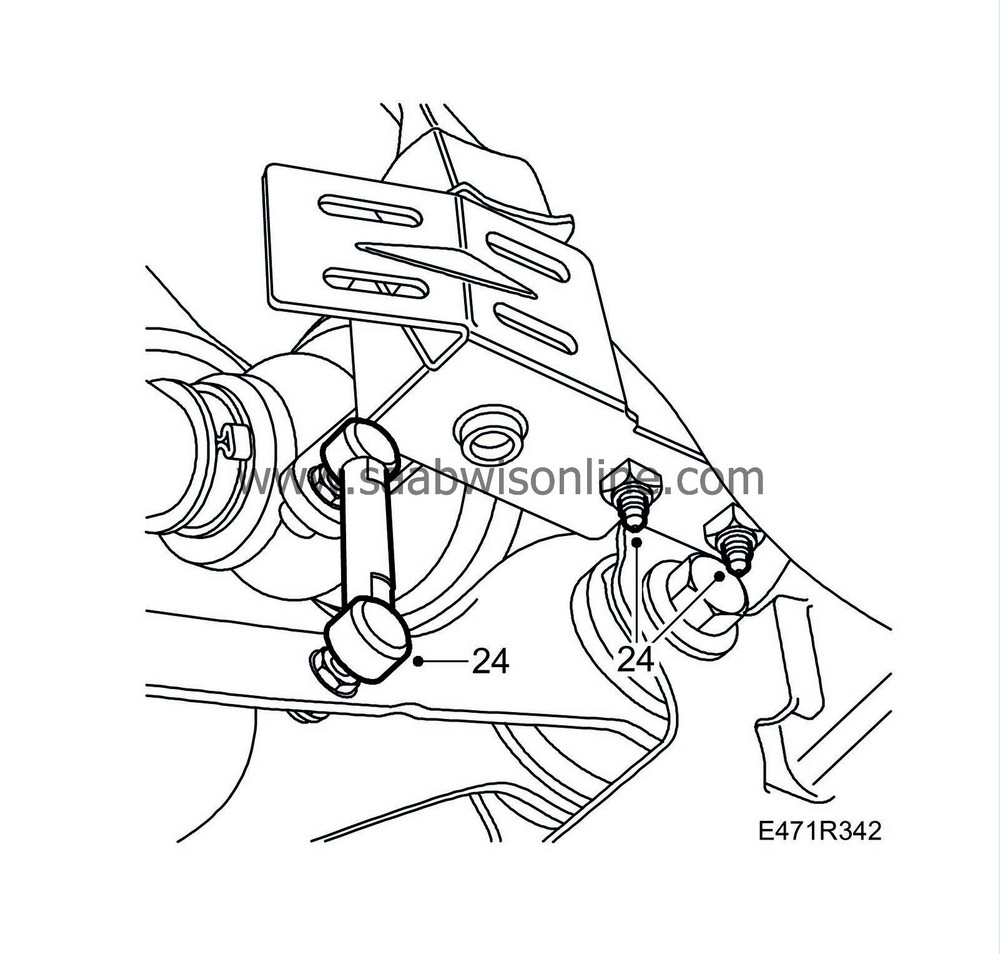
Remove the headlamp position sensor (option) and move the sensor aside.
|
|
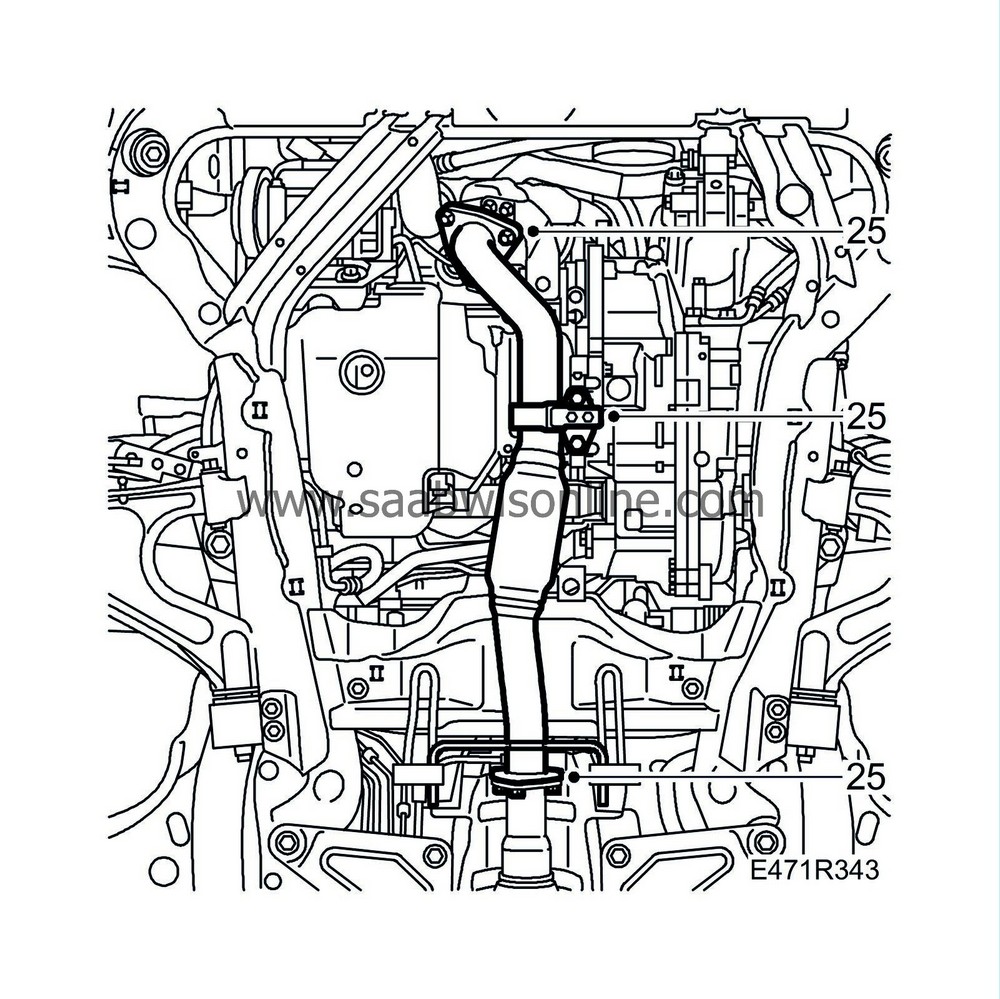
| 25. |
Remove the front exhaust pipe. See
Front exhaust pipe
.
|
|
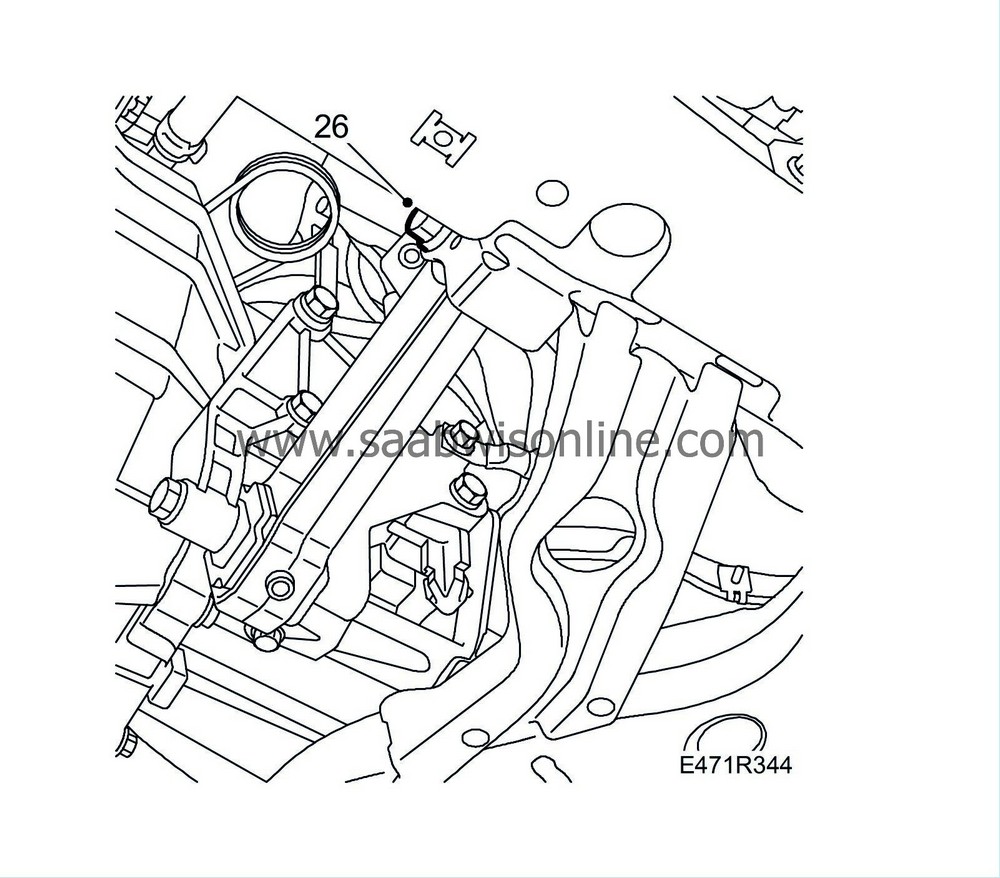
| 26. |
Remove the bolt holding the front torque rod to the subframe.
|
|
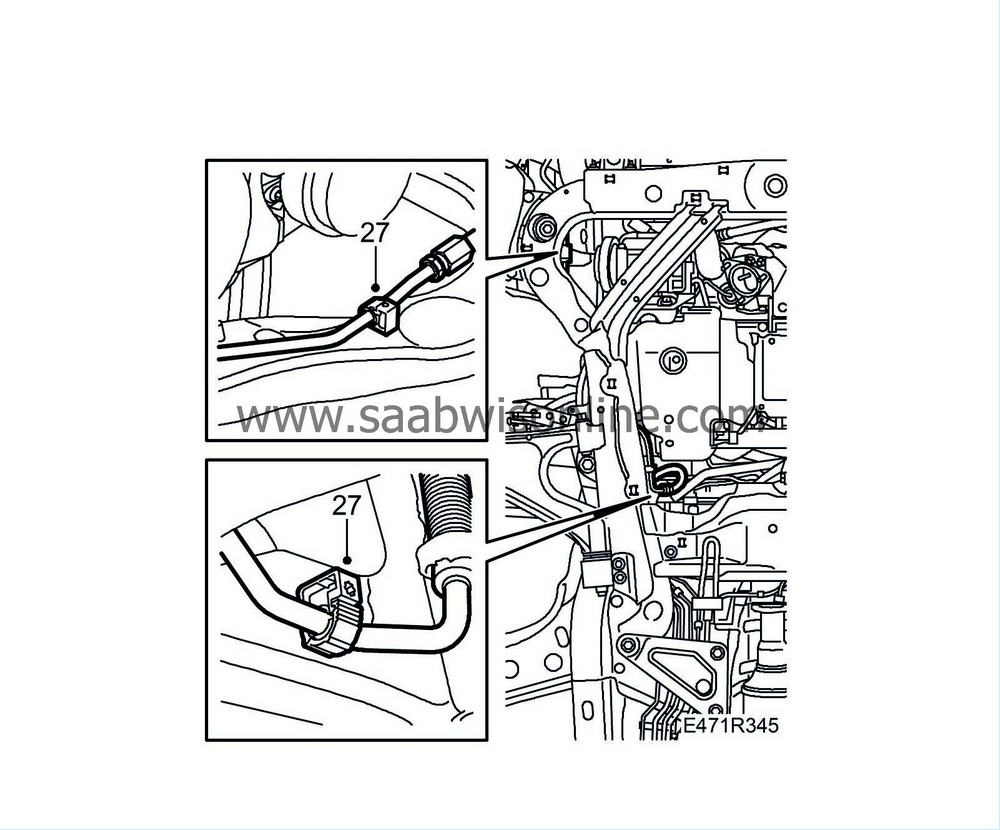
| 27. |
Release the clamps holding the power steering pipe.
|
|
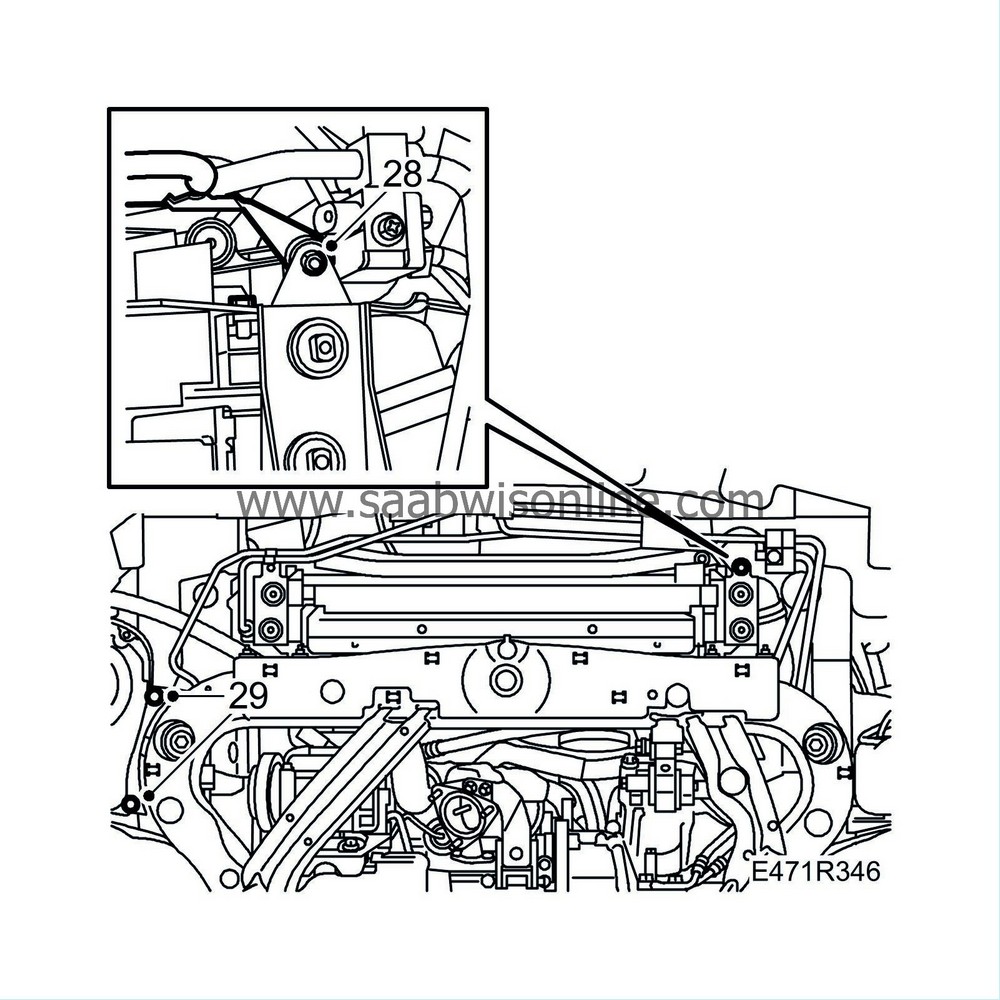
| 28. |
Remove the nuts of the power steering cooling pipe. Suspend the pipe with a
83 95 212 Strap.
|
|
| 29. |
Release the air filter housing from the subframe.
|
|
| 30. |
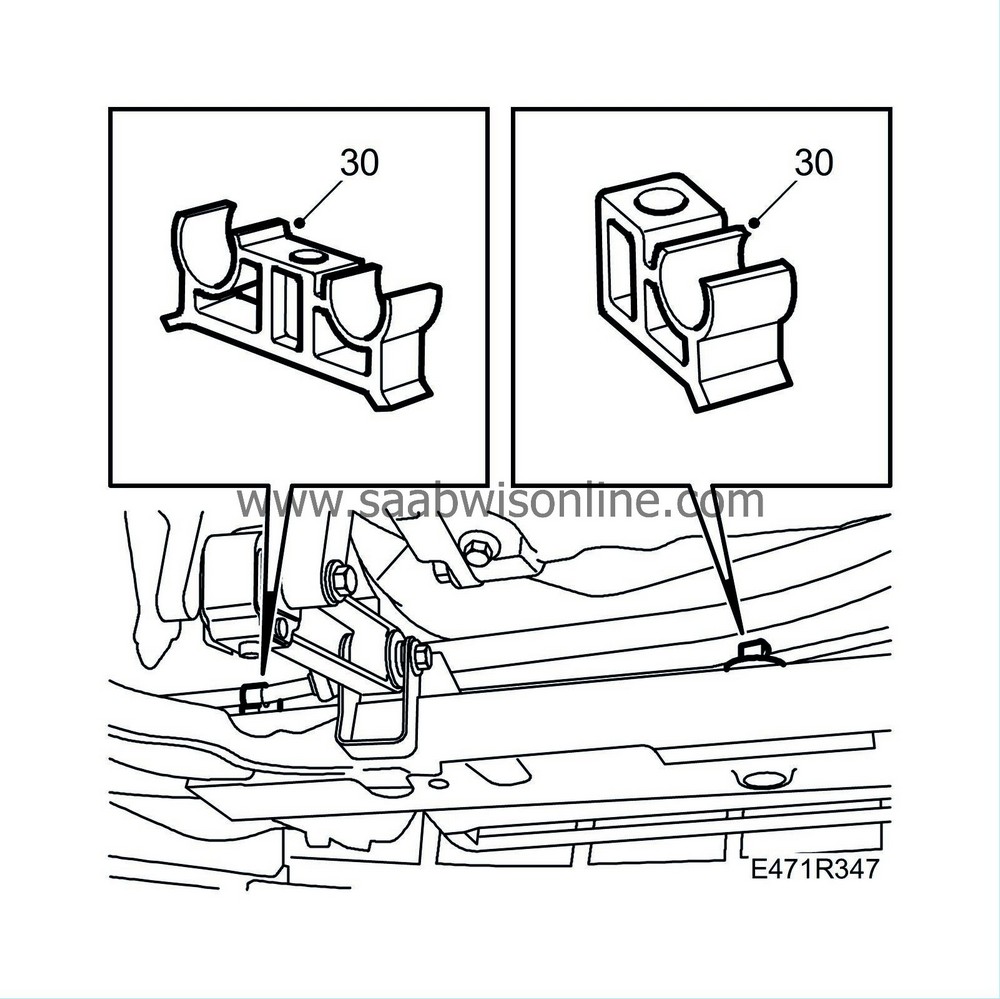
Release the AC pipe from the plastic clips on the subframe.
|
|
| 31. |
Pull a
83 95 212 Strap
around the radiator core and radiator member to keep the core supported.
|
|
| 32. |
Remove the bolts holding the outer ball couplings to the steering swivel member on both sides.
|
|
| 33. |
Remove the upper ball joint of the anti-roll bar on both sides.

|
|
| 34. |
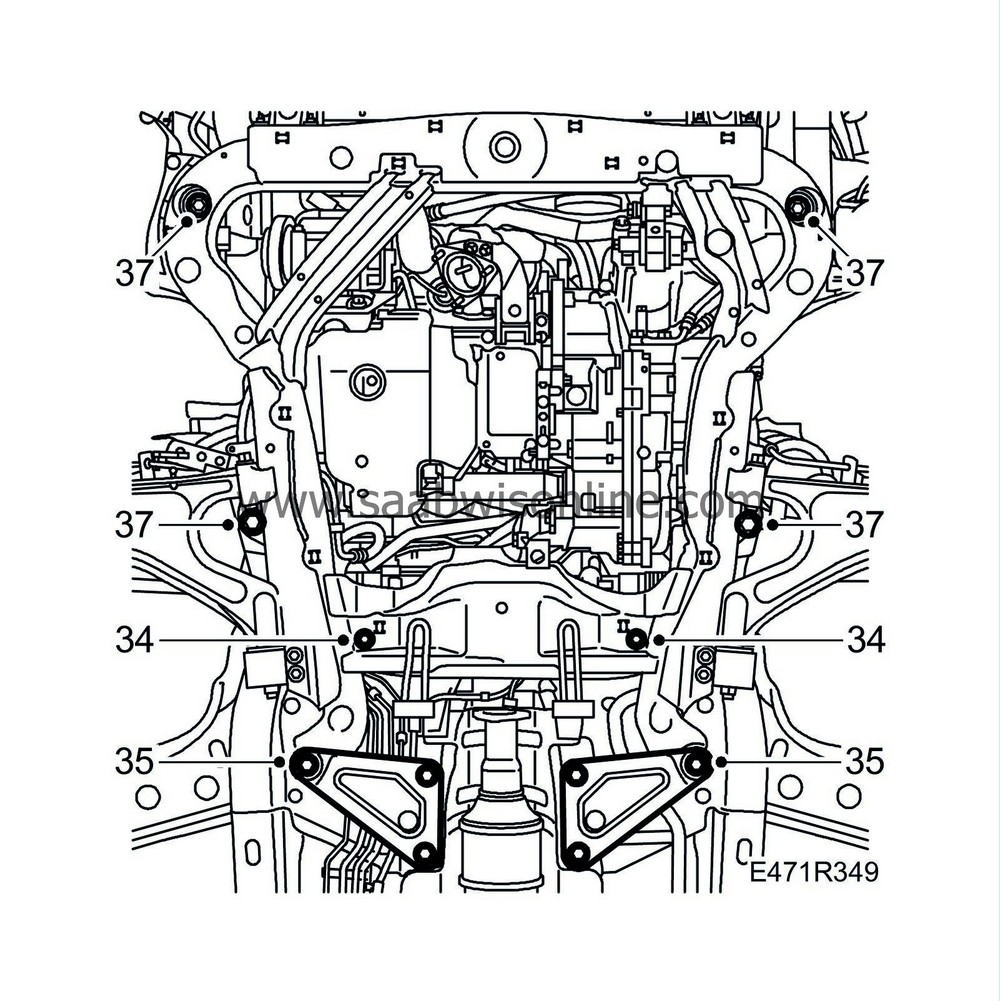
Remove the steering gear bolts.
|
|
| 35. |
Remove the bolts holding the rear support plates and the 2 rear bolts of the subframe.
|
|
| 36. |
Insert
83 95 311 Trolley lift
below the subframe with
83 94 801 Parent fixture
,
83 95 188 Basic fixture
and
83 95 196 Holder, front
.
|
|
| 37. |
Remove the 4 remaining bolts holding the subframe.
|
|
| 38. |
Release the suspension arm from the steering swivel member, lower further and roll the trolley lift away with subframe.
|
|
| 39. |
Slacken the gearbox drain plug, drain the transmission fluid and retighten the plug.
Tightening torque 50 Nm (37 lbf ft) |
|
| 40. |
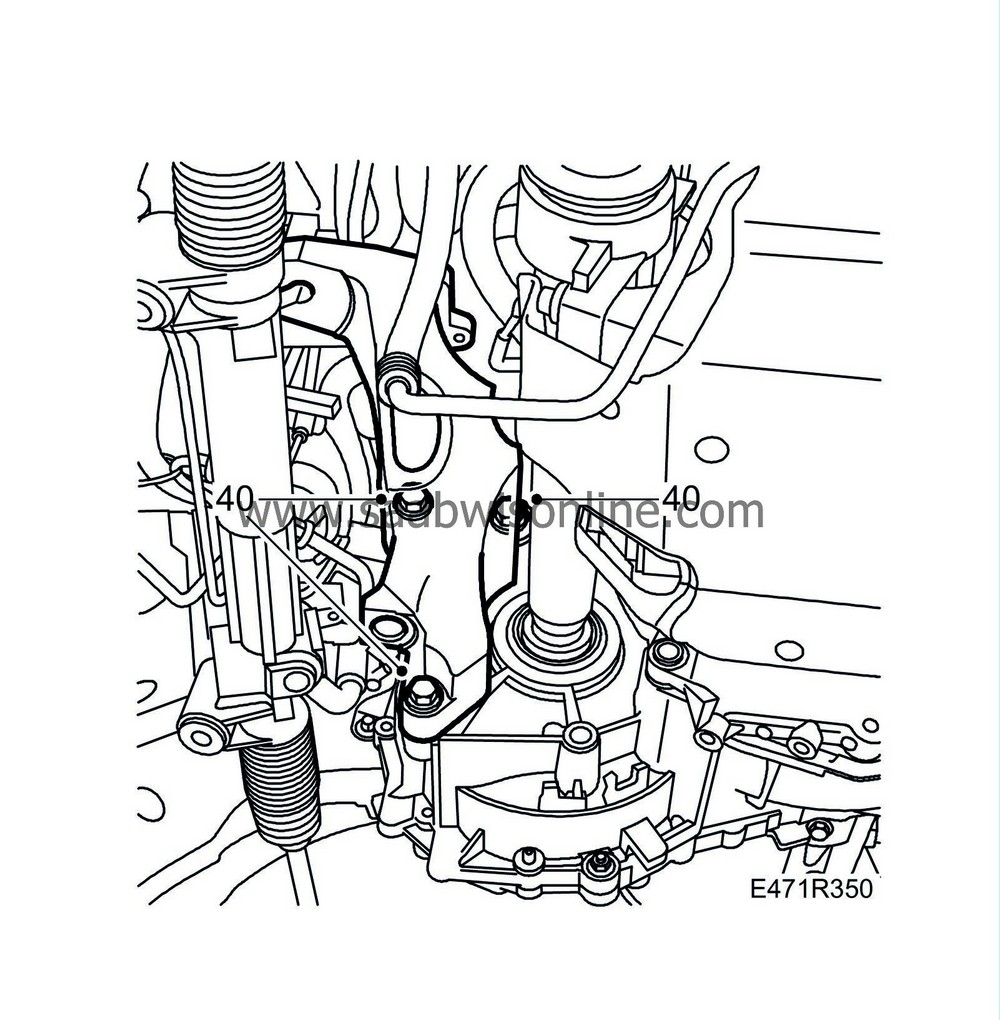
Remove the rear engine mounting and engine pad.
|
|
| 41. |
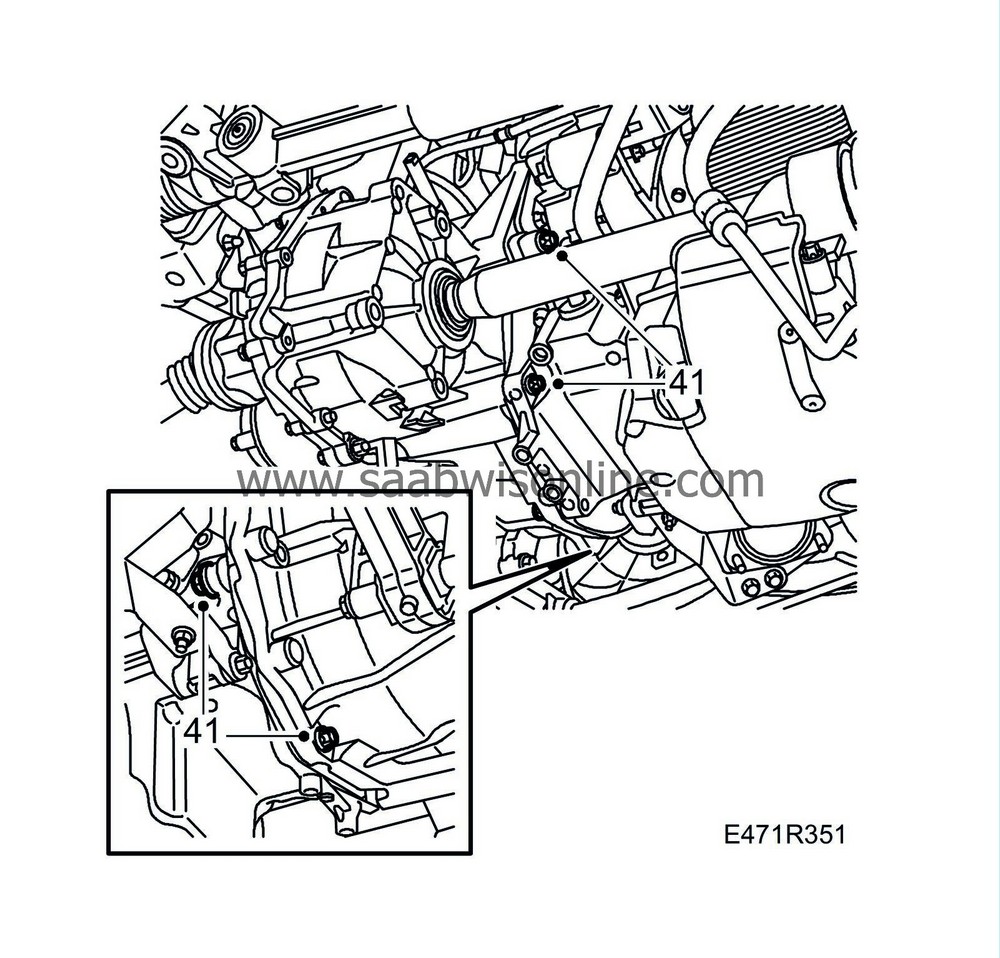
Remove the lower gearbox bolts. Leave one bolt in place until the gearbox is removed.
|
|
| 42. |
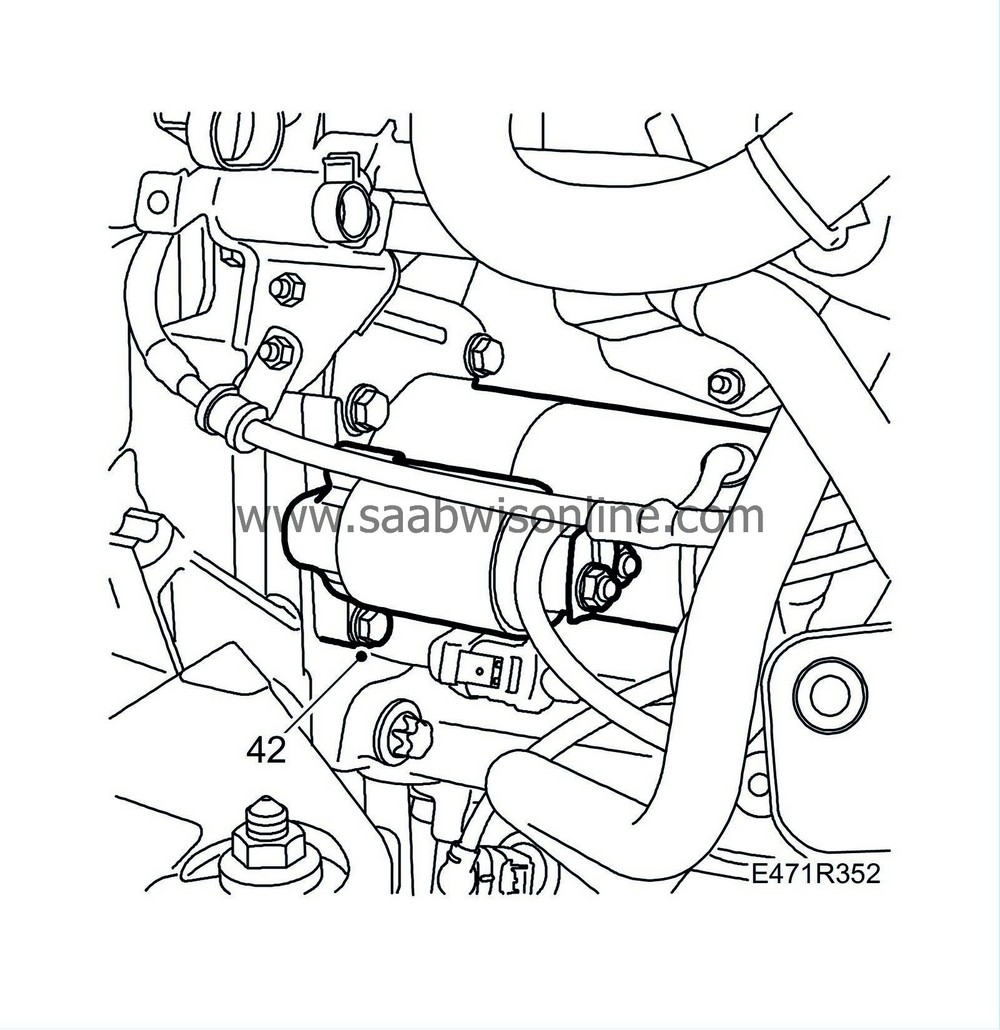
Remove the lower bolt of the starter motor and lower the starter motor.
|
|
| 43. |
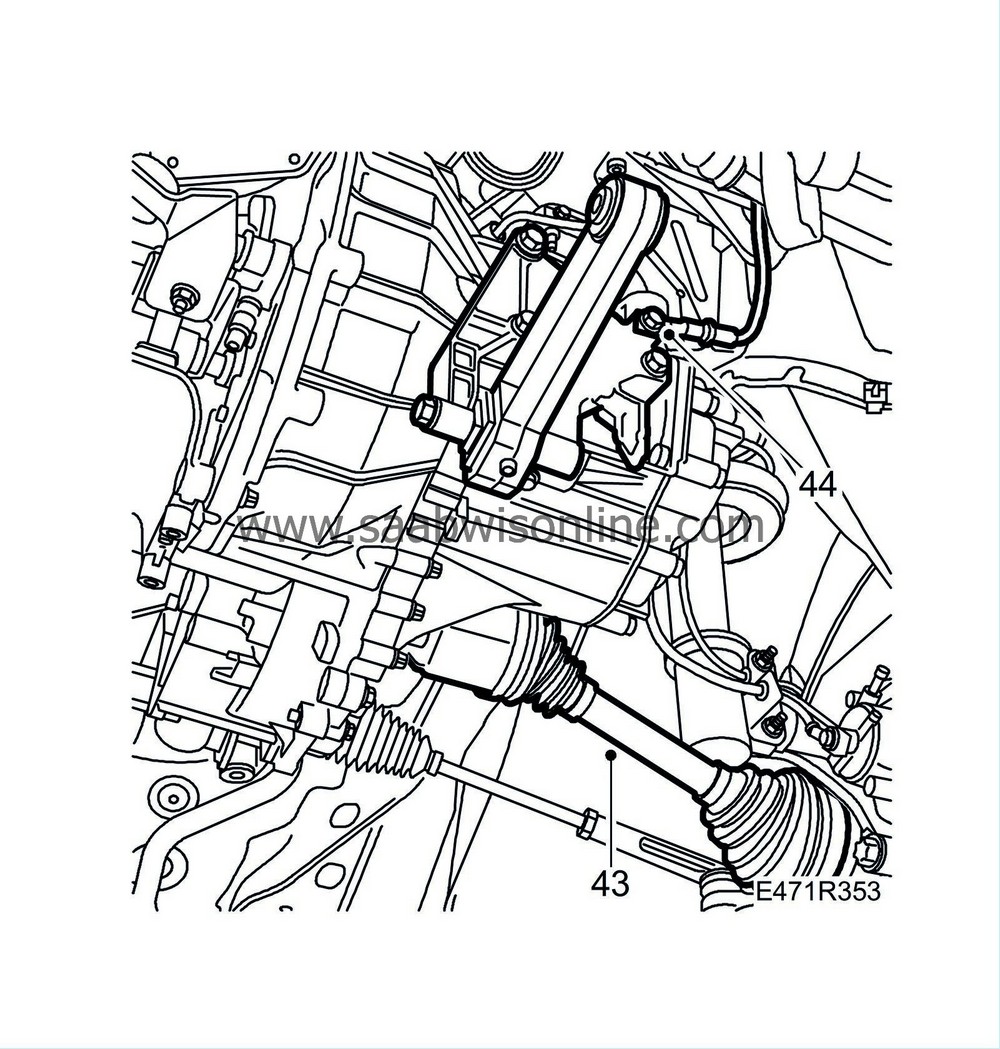
Release the left drive shaft with
87 92 616 Removal tool, drive shafts
. Suspend the shaft with a strap.
|
|
| 44. |
Disconnect the ground lead from the gearbox.
|
|
| 45. |
Lower the car to the floor.
|
|
| 46. |
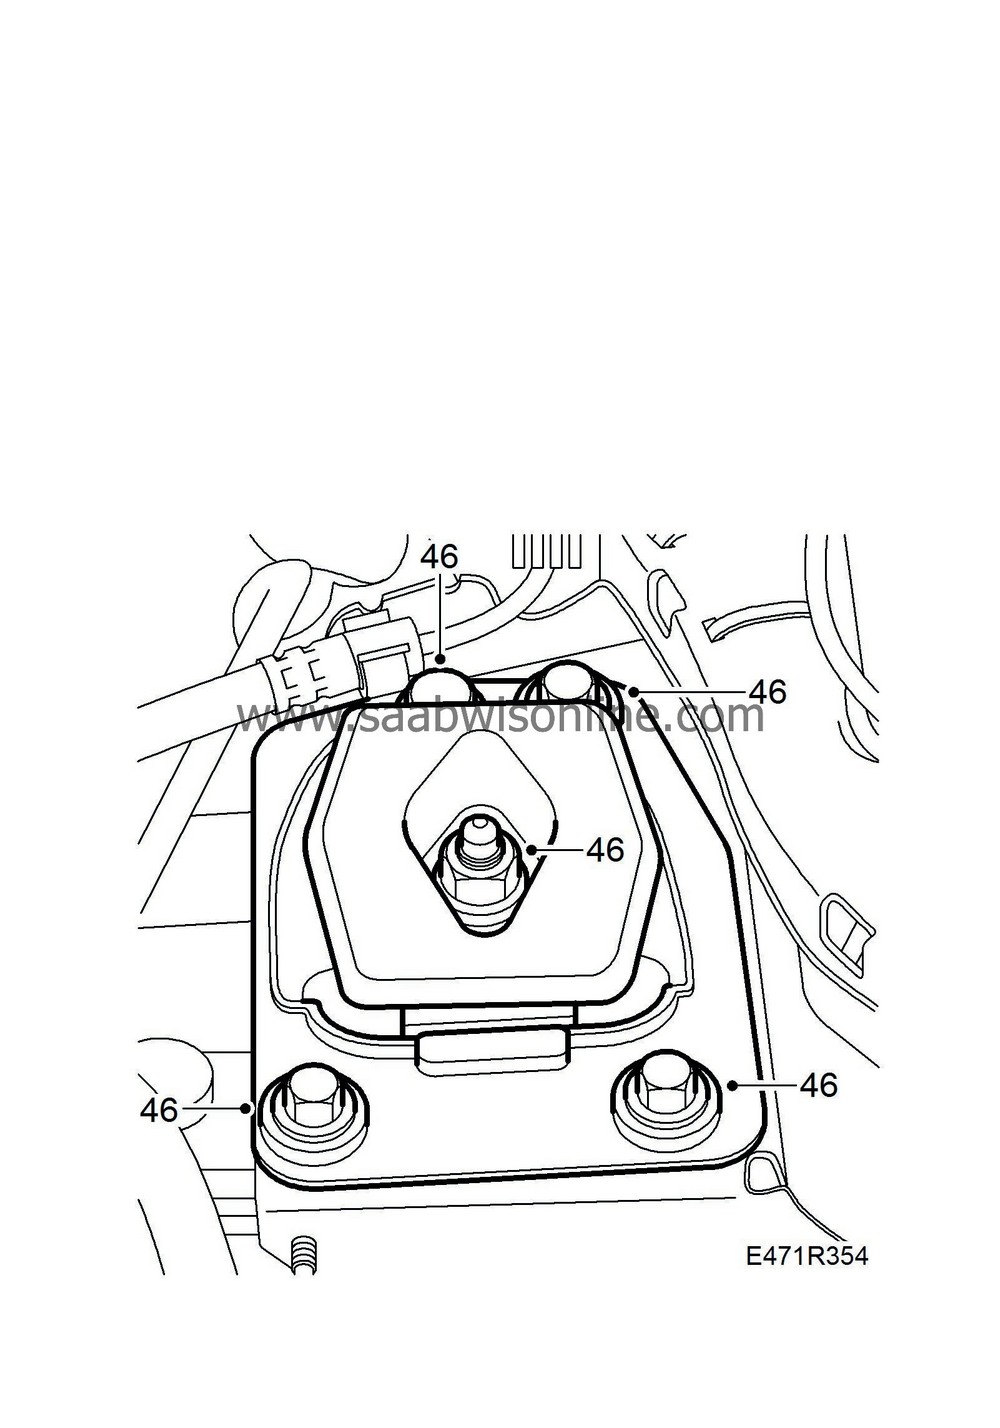
Mark the bolt positions and remove the nuts and bolts from the left engine pad. Lift away the pad.
|
|
| 47. |
Lower the assembly so that the gearbox is clear of the structural member. Remove the gearbox fixing from the gearbox.

|
|
| 49. |
Remove the last bolt between the engine and gearbox. Pull out and lower the gearbox.
|
|||||||||
| 50. |
Lift the gearbox off the jack and remove the lifting tool from the gearbox.
|
|

 Warning
