Installing the power train
|
|
Installing the power train
|
|
1.
|
Position a trolley lift with the power train and adjust it into position against the body.
|
|
2.
|
Raise further and fit the lower spindle joints to the steering swivel member. If necessary, adjust the trolley lift adjusting screws for even contact with the body. Check that the guide pins align with the reference holes in the body.
|
|
3.
|
Align and insert the bolts through the subframe into the body.
|
|
4.
|
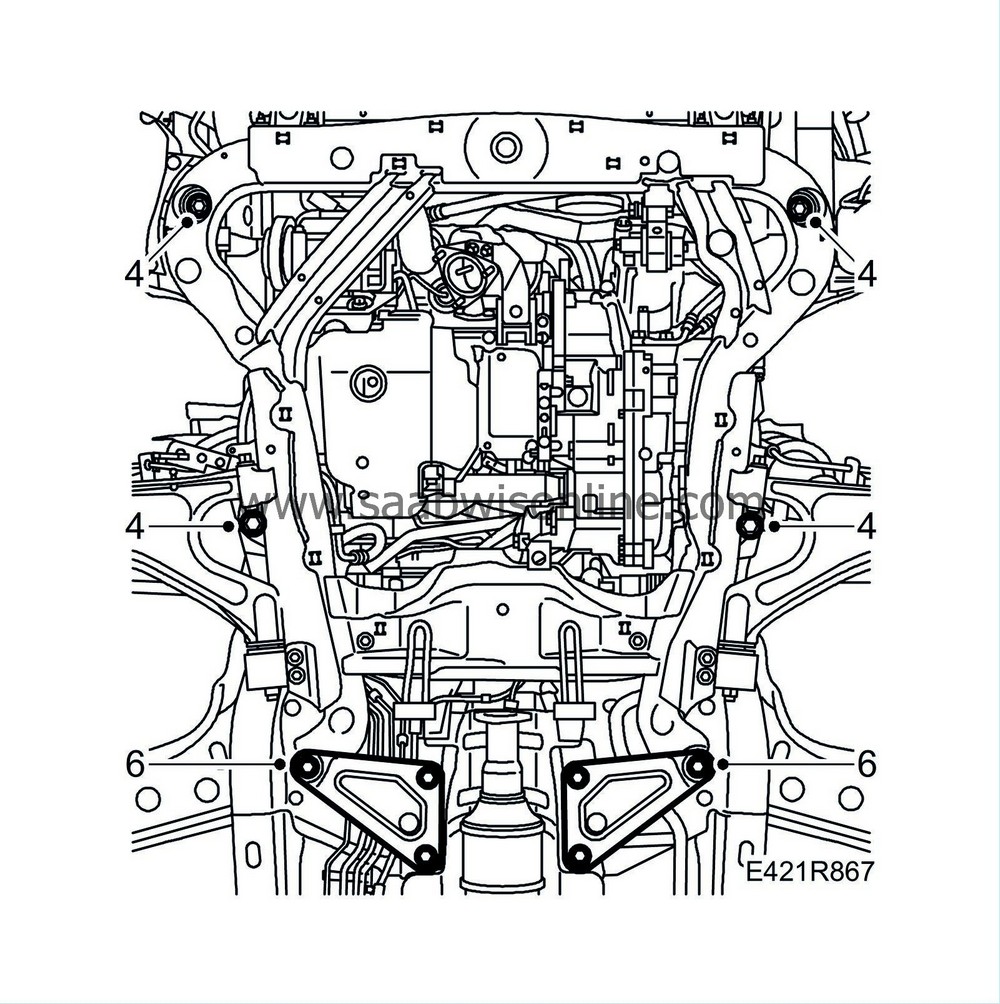
Raise the engine completely and tighten the subframe bolts.
Tightening torque: 75 Nm + 135° (55 lbf ft +135°)
|
|
5.
|
Lower and remove the trolley lift.
|
|
6.
|
Fit the triangular stiffeners.
|
|
7.
|
Lower the car to the floor.
|
|
8.
|
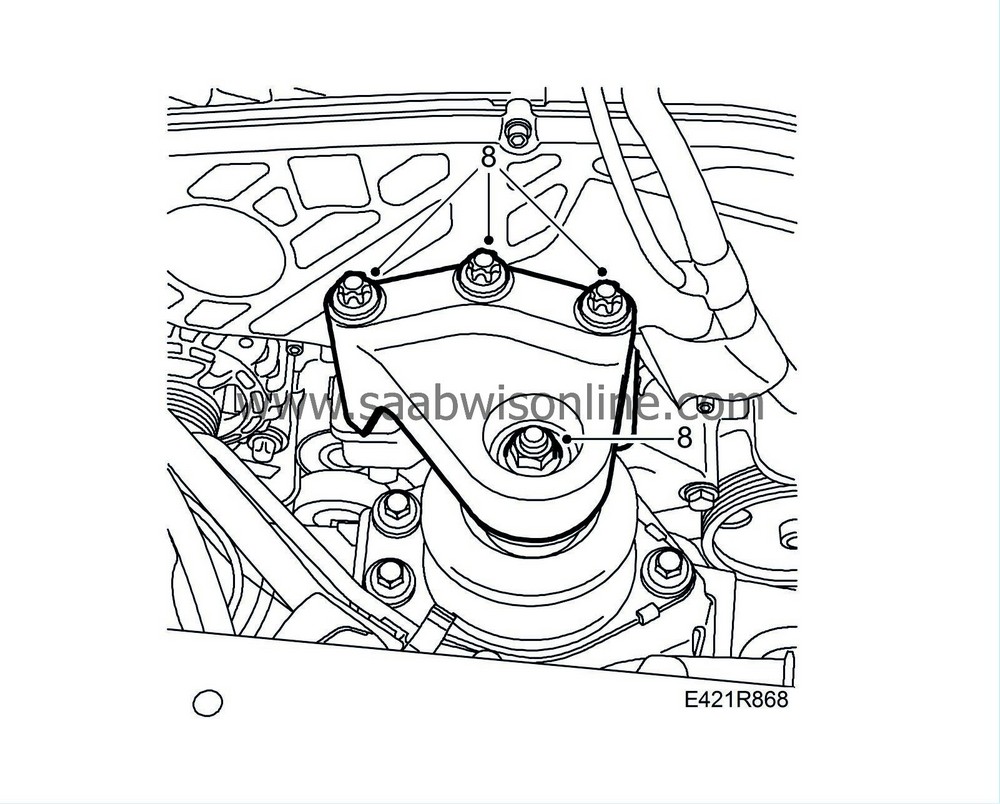
Fit the right engine mounting.
Tightening torque, bolts 50 Nm (37 lbf ft)
Tightening torque, nut, up to and including Vehicle Identification Number 73514907:
84 Nm (62 lbf ft)
Tightening torque, nut, from and including Vehicle Identification Number 73514908:
74 Nm (55 lbf ft)
|
|
9.
|
Fit the nut and the four bolts of the gearbox mounting.
Tightening torque, nut, up to and including Vehicle Identification Number 73514907:
84 Nm (62 lbf ft)
Tightening torque, nut, from and including Vehicle Identification Number 73514908
74 Nm (55 lbf ft)
Tightening torque, bolts 40 Nm + 45° (30 lbf ft + 45°)

|
|
10.
|
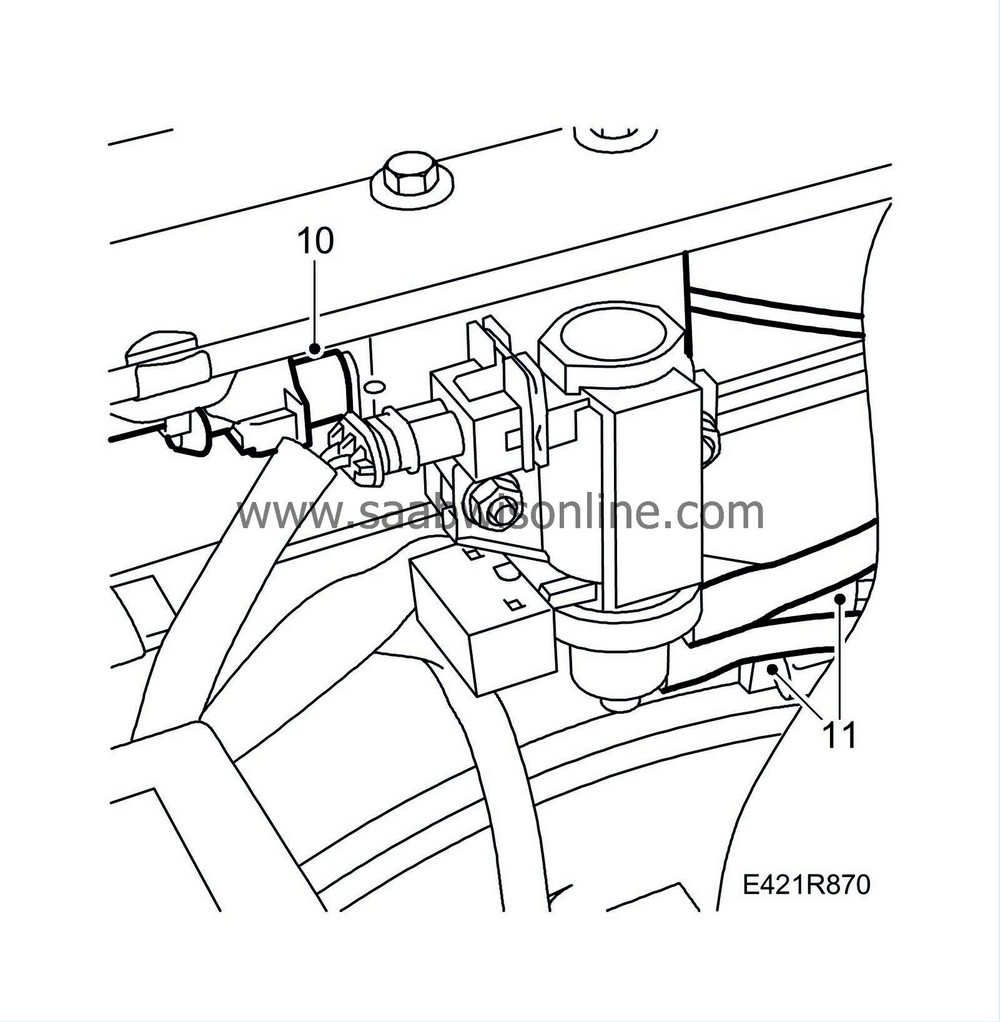
Fit the front temperature sensor connector and connect the contact to the mounting.
|
|
11.
|
Attach the vacuum hoses to the charge air solenoid valve (179a)
|
|
12.
|
Fit the lower radiator hose to the coolant pipe.

|
|
13.
|
Attach the coolant reservoir hose to the coolant pipe.
|
|
14.
|
Attach the upper coolant hose to the thermostat housing.
|
|
15.
|
Attach the rear coolant hoses to the thermostat housing and EGR cooler.
|
|
16.
|
Attach the brake vacuum hose to the vacuum pump.
|
Important
|
|
Ensure that the steering knuckle stub is visible on the top of the steering knuckle housing before the bolt is fitted.
|
|
|
|
|
17.
|
Fit the bracket to the bulkhead.

|
|
18.
|
Plug in the connectors between the engine wiring harness and the body harness on the bulkhead.
|
|
19.
|
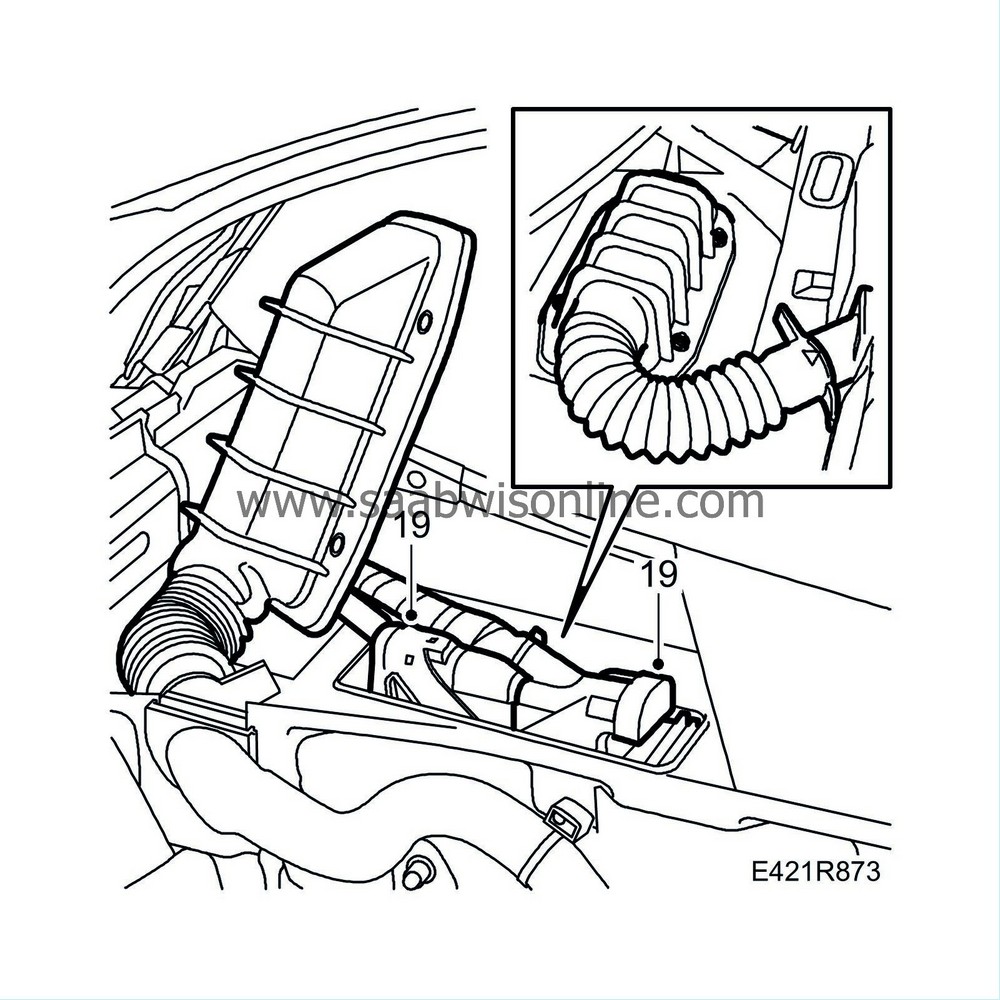
Attach the control module's multicontacts and close the catches.
|
|
20.
|
Fit the protective cover on the control module.
|
|
21.
|
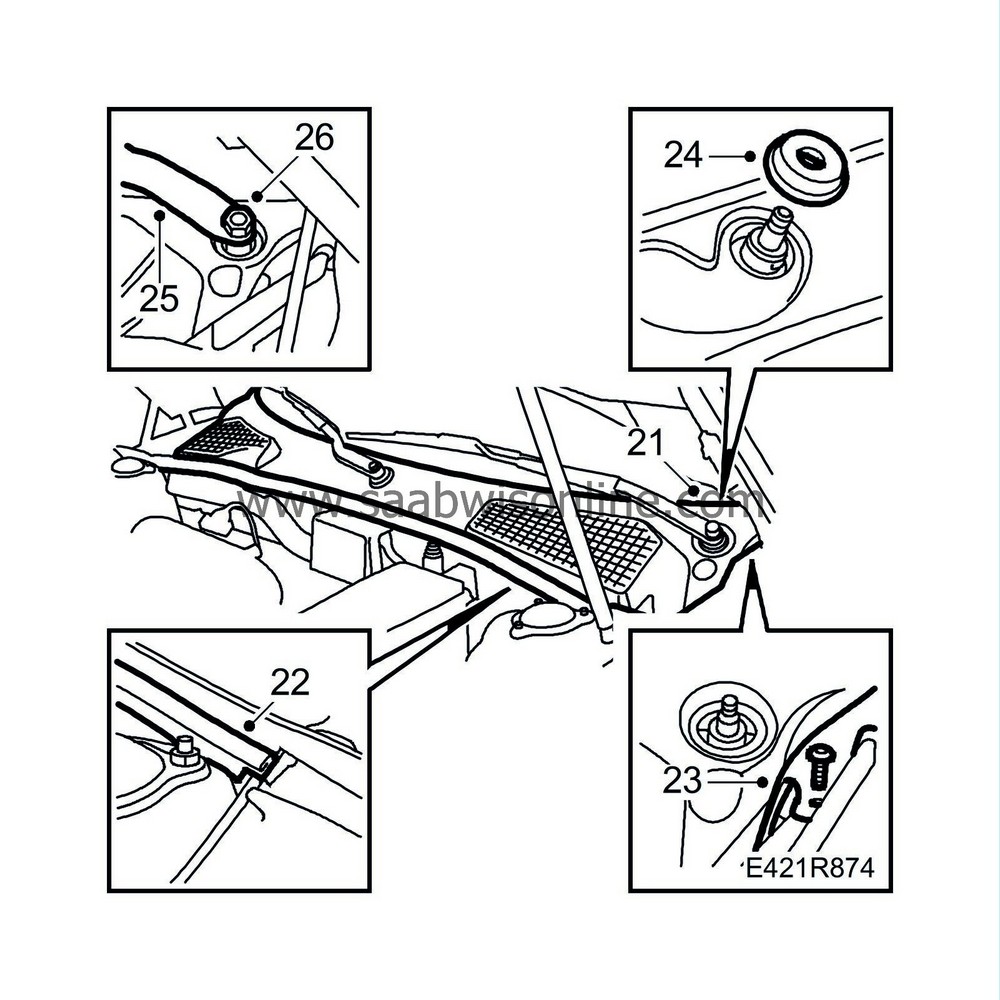
Fit the windscreen cover by grasping the front edge and pressing downward/inward. Be careful with the bonnet release wire on the left-hand side.
|
|
23.
|
Fit the two screw clips on the ends of the windscreen cover.
|
|
24.
|
Fit the rubber wiper spindle seals.
|
|
25.
|
Fit the windscreen wipers
|
|
26.
|
Tighten the nuts of the wiper spindles and fit the blanking-off washers.
|
|
27.
|
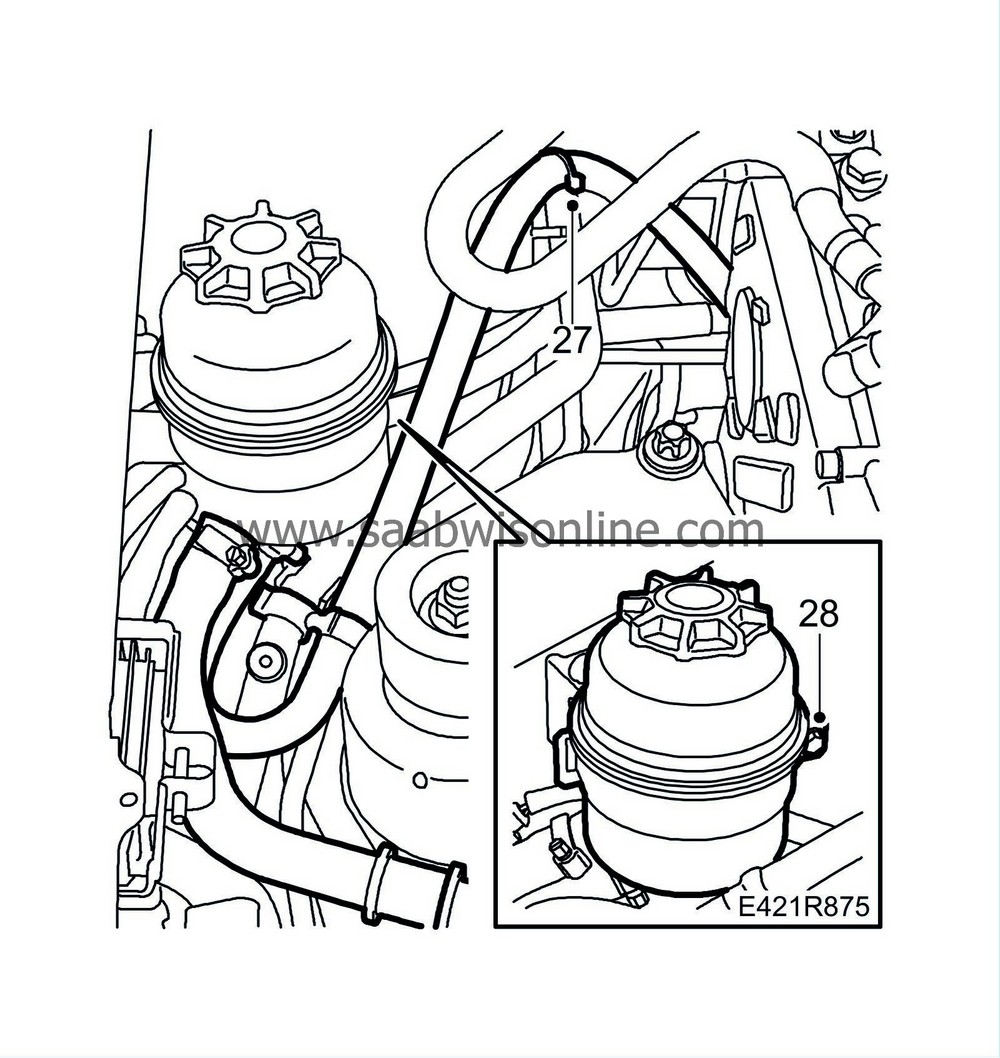
Fit the power steering fluid reservoir hose to the fixing.
|
|
28.
|
Fit the power steering fluid reservoir to its mounting.
|
|
29.
|
Remove the plugs and attach the power steering pump delivery hose to the pump.

|
|
30.
|
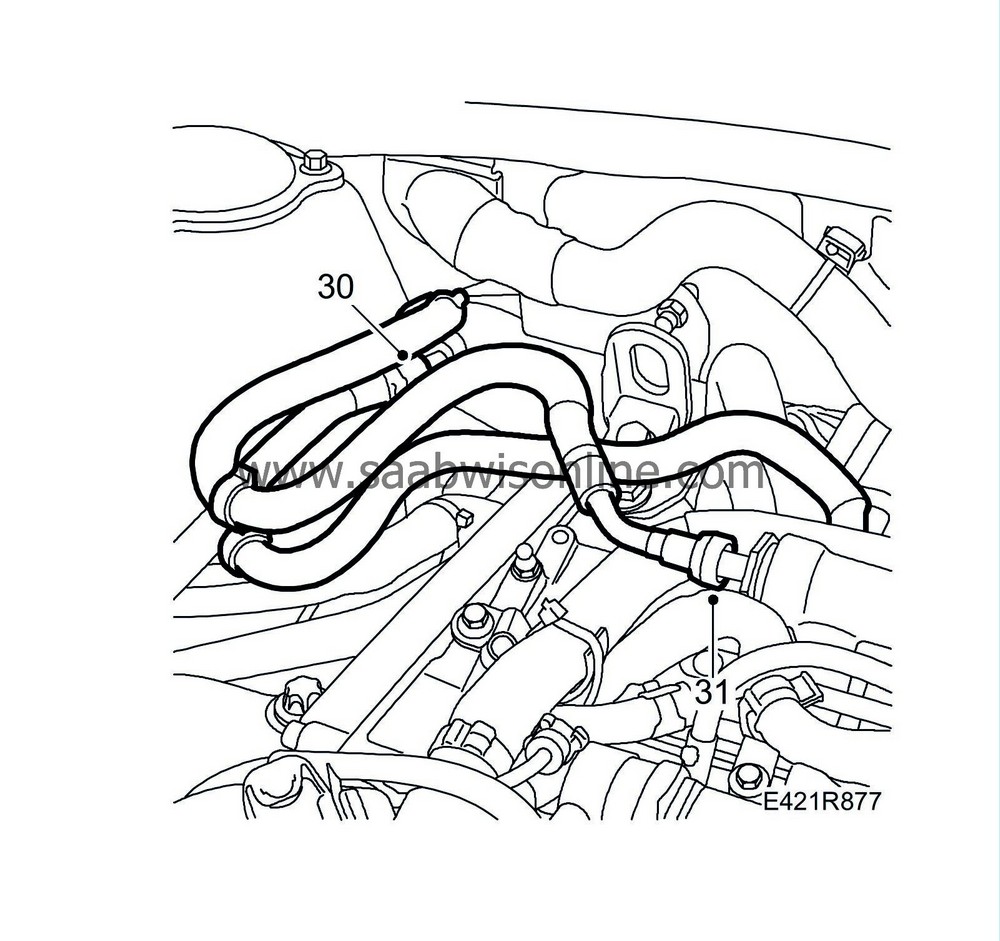
Remove the plugs and attach the fuel supply hose to the pipe.
|
|
31.
|
Remove the plugs and attach the fuel return hose to the fuel return tank.
|
|
32.
|
Attach the mass air flow sensor connector and the bracket.

|
|
33.
|
Plug in the connectors between the engine wiring harness and the body's right front wiring harness. Fit the fixings.
|
|
34.
|
Fit the turbo's intake pipe.

|
|
35.
|
Fit the crankcase ventilation pipe.
|
Note
|
|
Cars with preheated crankcase ventilation:
Take care so that the heating coil in the hose is not damaged.
|
|
|
37.
|
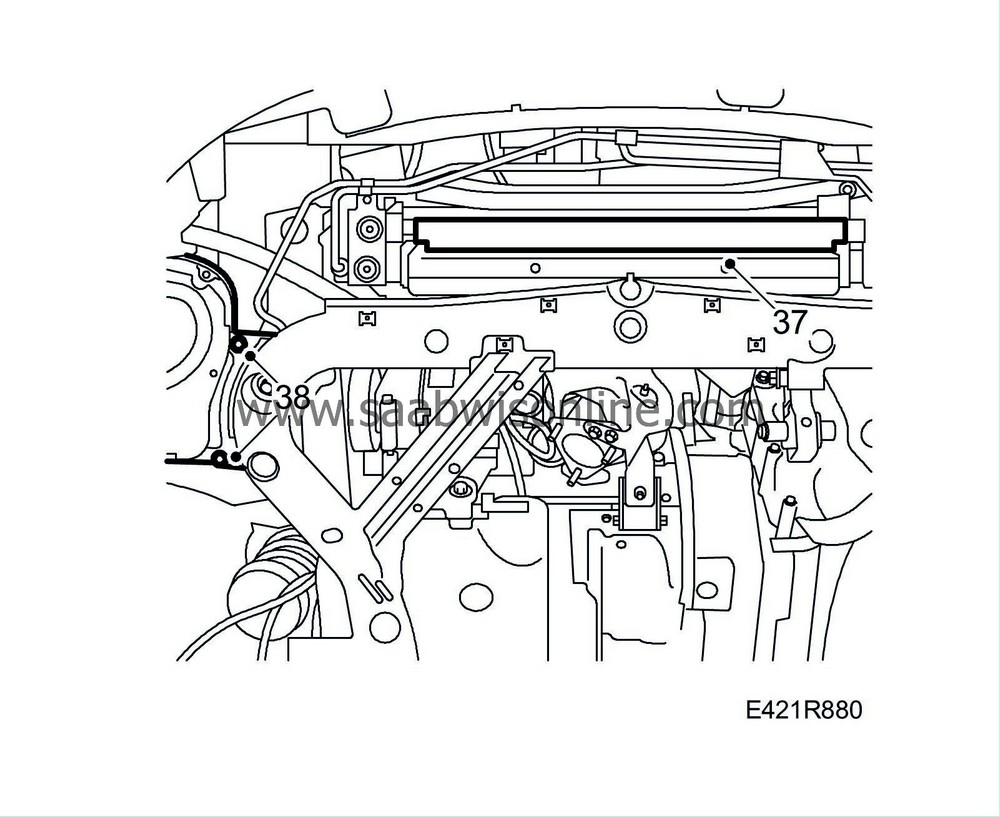
Fit the lower air baffle of the charge air cooler.
|
|
38.
|
Fit the air filter housing's mountings to the subframe.
|
|
39.
|
Fit the A/C pipes to the attachment points on the subframe.

|
|
40.
|
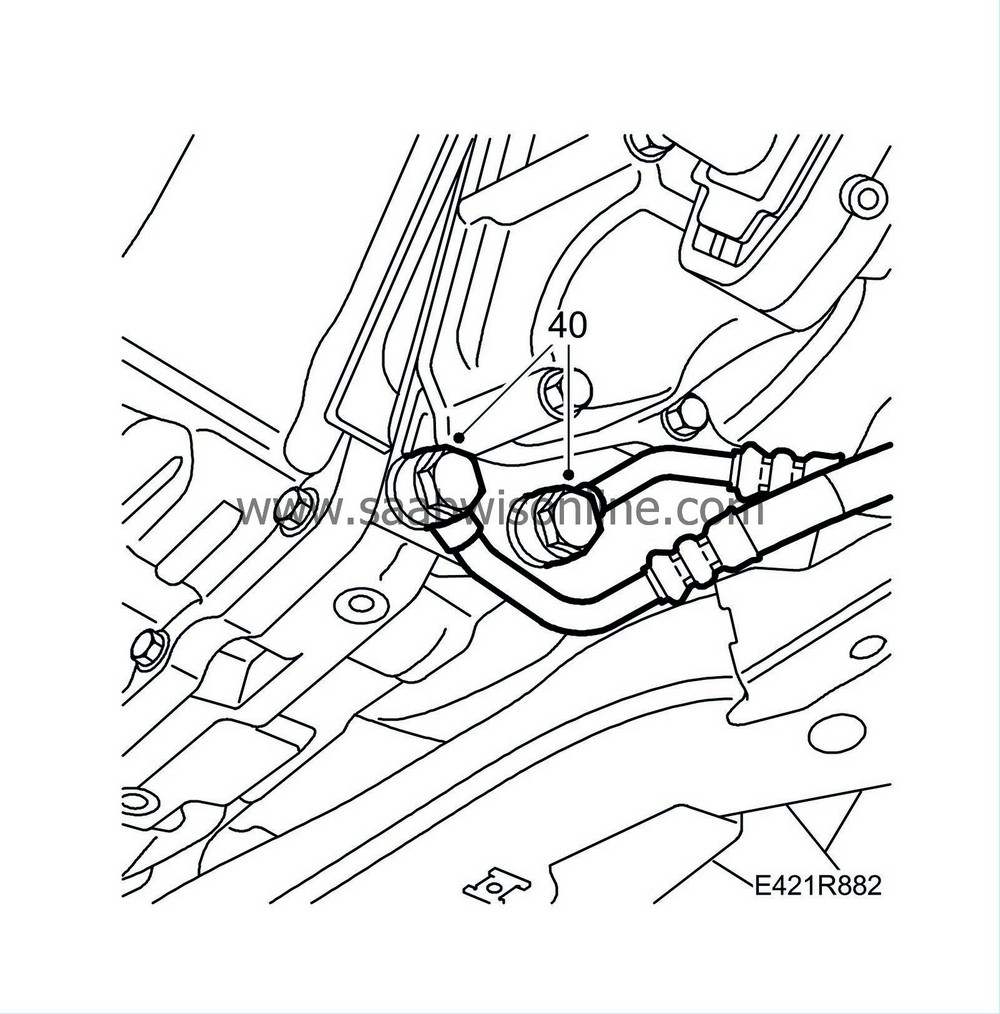
Aut:
Remove the plugs and attach the inlet and outlet hoses of the oil cooler.
|
|
41.
|
Remove the plastic wedges between the gearbox and subframe as well as between the subframe and A/C compressor bracket and between the subframe and intermediate shaft bracket.
|
|
42.
|
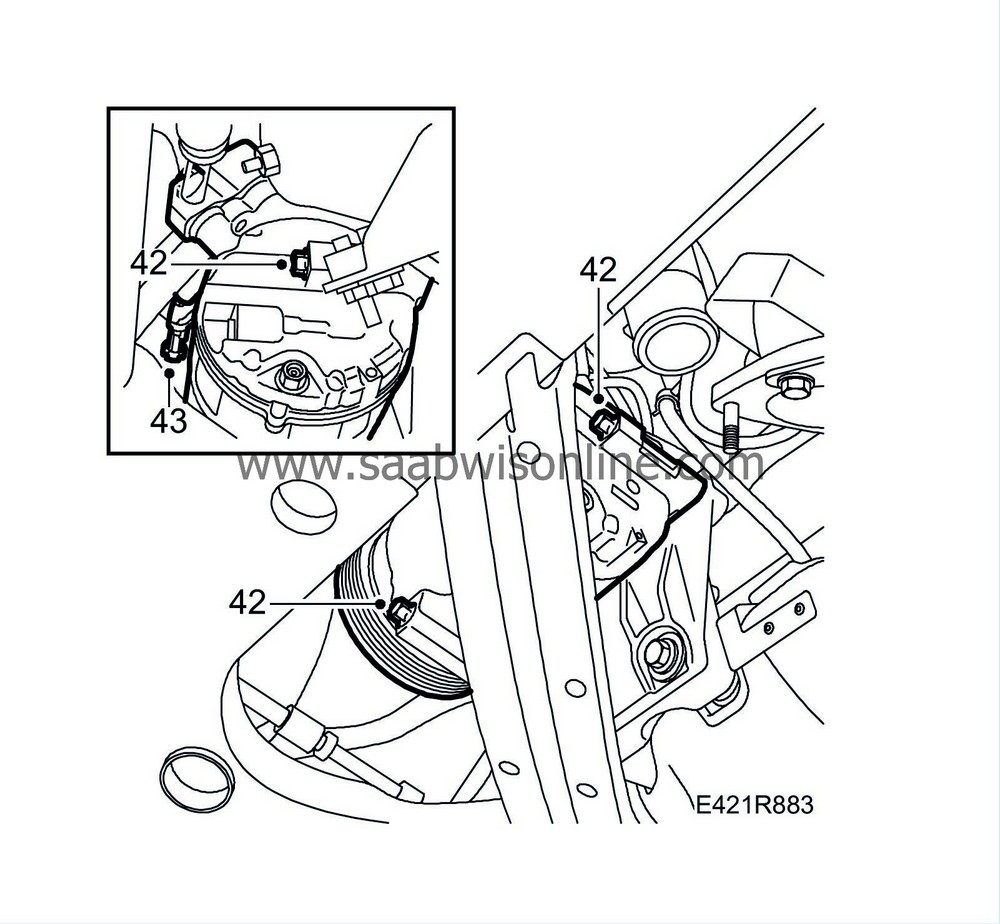
Fit the A/C compressor bolts.
Tightening torque: 25 Nm (18 lbf ft)
|
|
43.
|
Attach the A/C compressor connector.
|
|
44.
|
Fit the upper nuts of the anti-roll bars.
Tightening torque: 90 Nm (66 lbf ft)

|
|
45.
|
Fit the nuts of the track rods.
Tightening torque: 35 Nm (26 lbf ft)
|
|
46.
|
Fit the lead-through bolt to the lower spindle joint on the right and left sides.
Tightening torque: 60 Nm +30° (44 lbf ft +30°)
|
|
47.
|
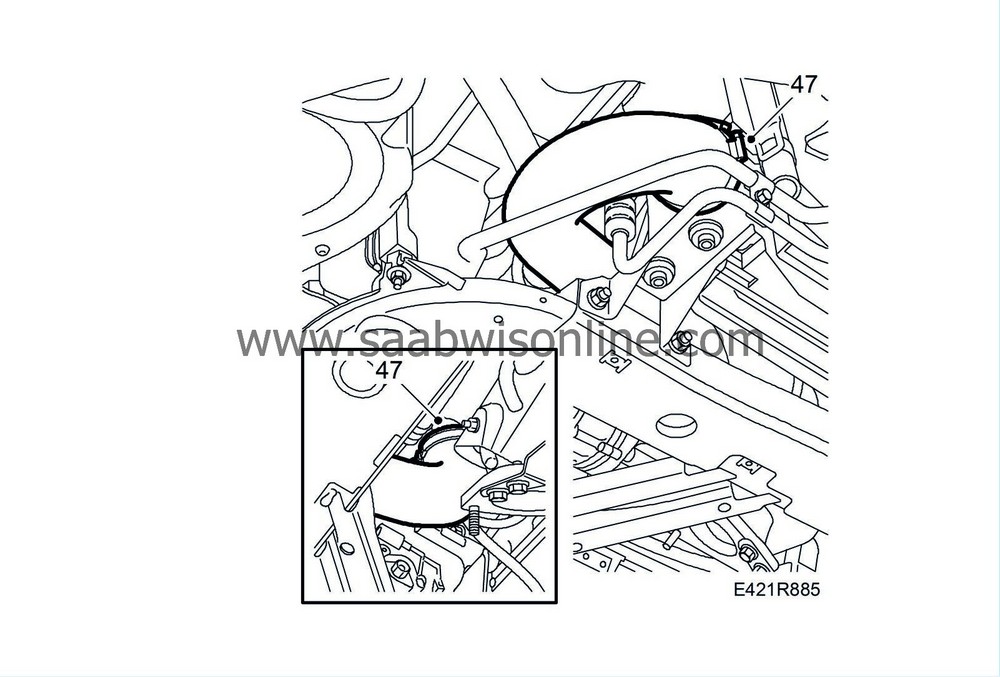
Fit the lower right charge air hose to the charge air cooler and turbocharger.
|
|
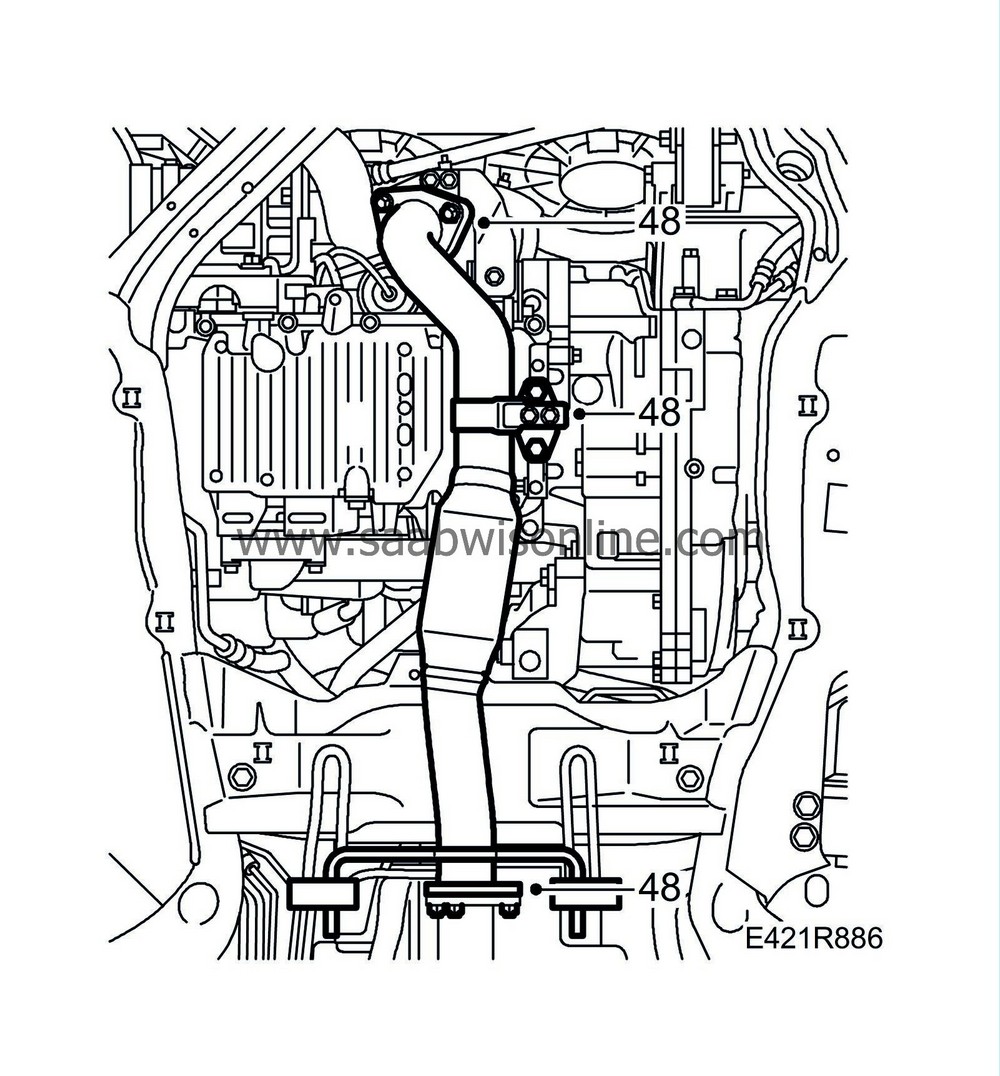
48.
|
Fit the front exhaust pipe.
|
|
49.
|
Relieve the tension on the belt tensioner and fit the belt following the marked direction of rotation. Remove the lock pin.

|
|
50.
|
Attach the ground cable to the gearbox mounting.

|
|
51.
|
Fit the gearbox cover.

|
|
52.
|
Fit the belt circuit's cover.

|
|
53.
|
Cars with Xenon headlamps:
Plug in the connector of the headlamp controller on the link arm.
|
|
54.
|
Fit the front lower engine cover.
|
|
55.
|
Fit the lower engine cover.

|
|
56.
|
Fit the hub nuts.
Tightening torque: 230 Nm (170 lbf ft)
|
|
57.
|
Fit the front wheels. See
Wheels
.
|
|
58.
|
Lower the car to the floor.
|
|
59.
|
Fill the cooling system with coolant. See
Coolant
. Close the coolant reservoir cap.
|
|
60.
|
Aut:
Plug in the connectors and secure the gearbox wiring harness.

|
|
62.
|
Man:
Fit the connection to the delivery pipe and fit the clip at the slave cylinder. Remove the hose pinch-off pliers. Bleed the clutch.

|
|
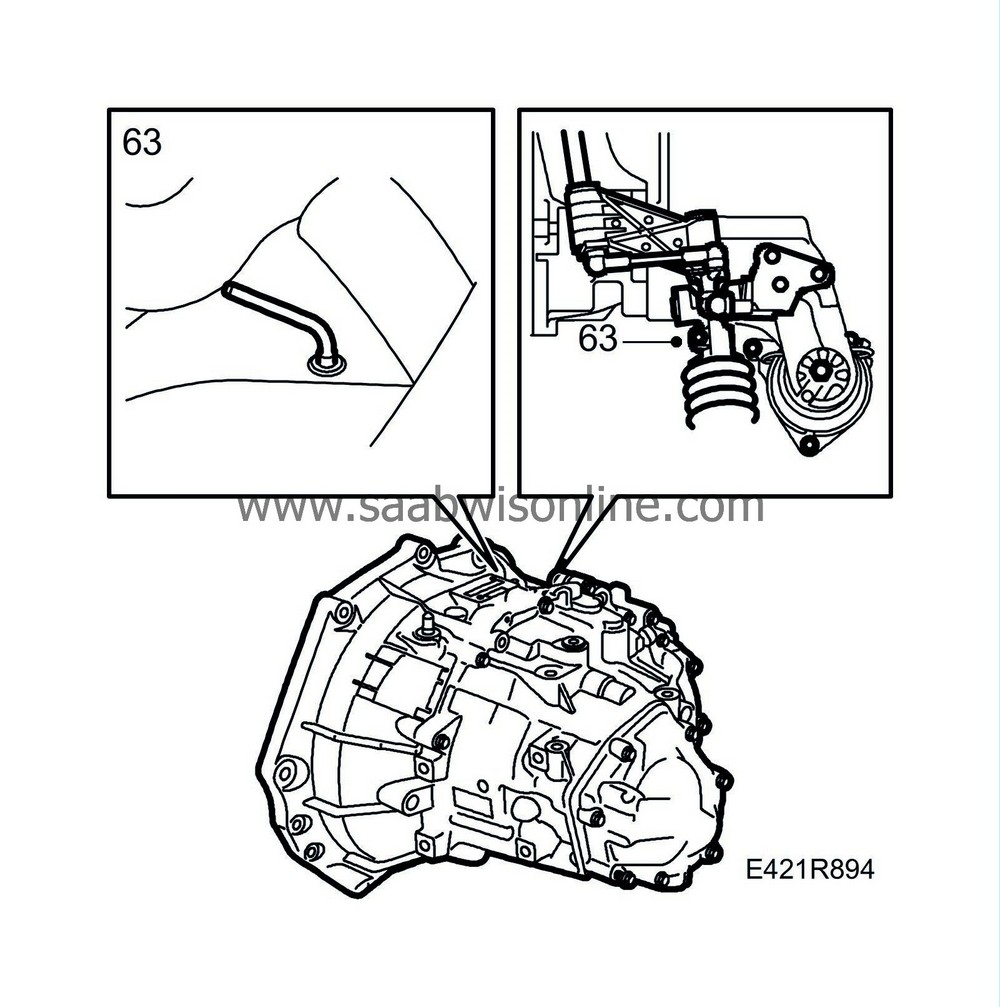
63.
|
Man:
Fit the clamp holding the selector rod to the linkage on the gearbox. Remove the lock pins. Refit the plastic plug.
|
|
64.
|
Fit the electrical distribution box.

|
|
65.
|
Attach the charge air hose to the throttle body and charge air pipe.
|
|
66.
|
Attach the breather hose between the engine and coolant reservoir.
|
|
67.
|
Fit the upper engine cover and insulation.
|
|
68.
|
Fit the clamp holding the positive cable to the body.

|
|
69.
|
Attach the positive cable to the cable terminal.
|
|
70.
|
Fit the holder and insert all maxi fuses.
|
|
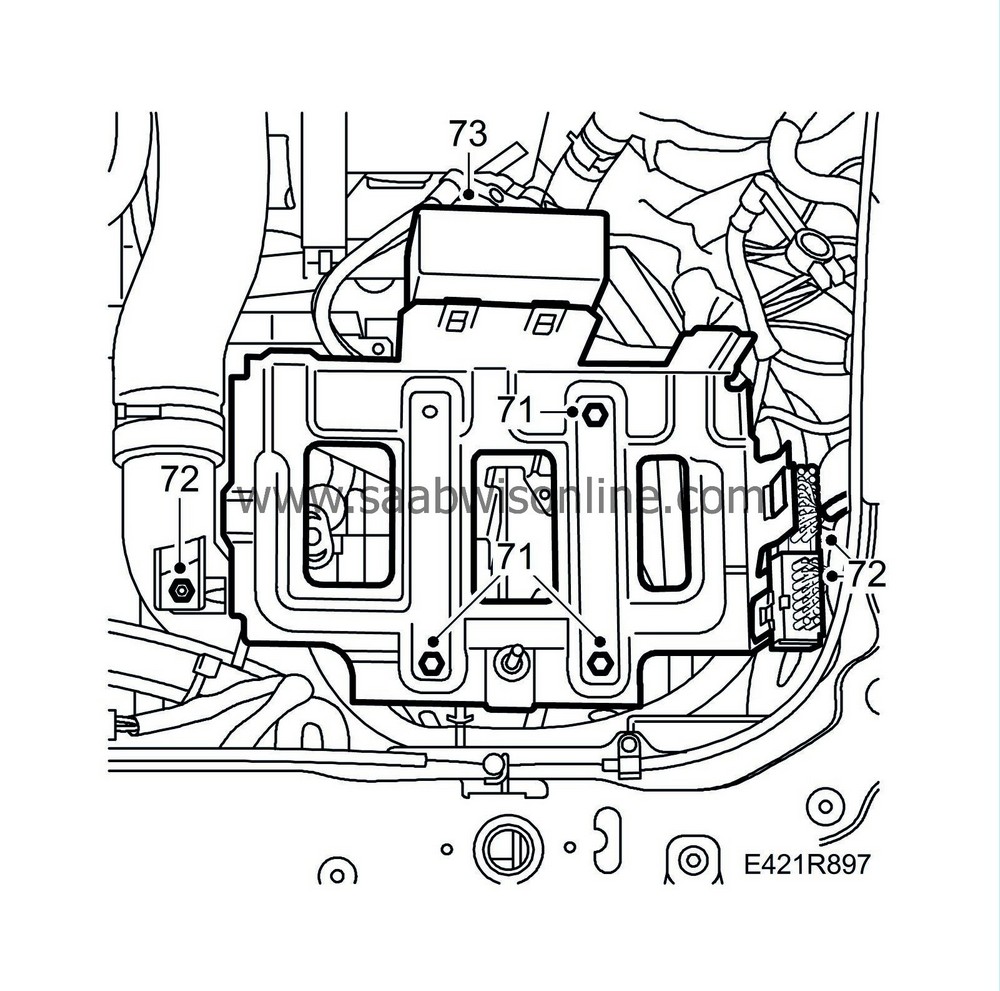
71.
|
Fit the battery tray.
|
|
72.
|
Fit the charge air pipe nut to the battery tray and plug in the connectors.
|
|
73.
|
Fit the maxi fuse holder to the battery tray.
|
|
74.
|
Fit the battery and connect the battery cables.
|
|
75.
|
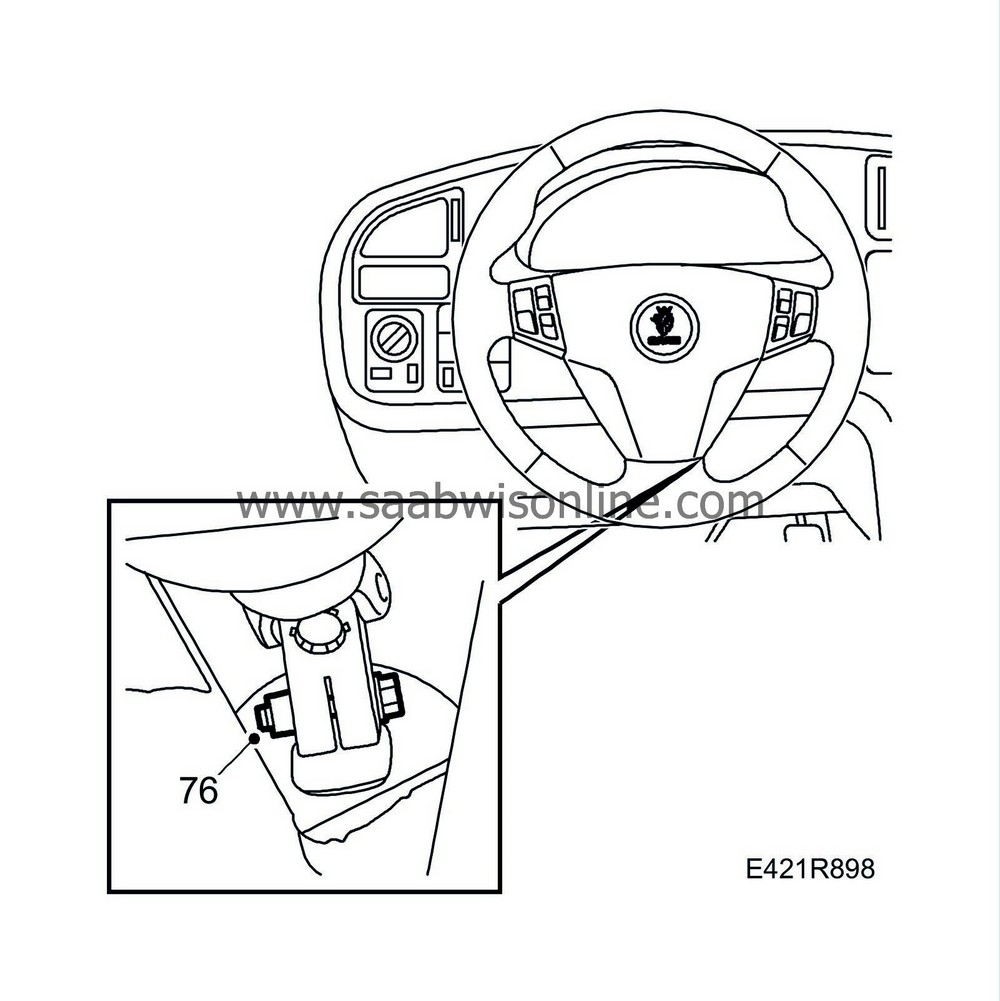
Attach the steering column connection to the steering gear inside the cabin. Undo the steering wheel fixing.
|
|
78.
|
Fit the insulation and upper engine cover.
|


