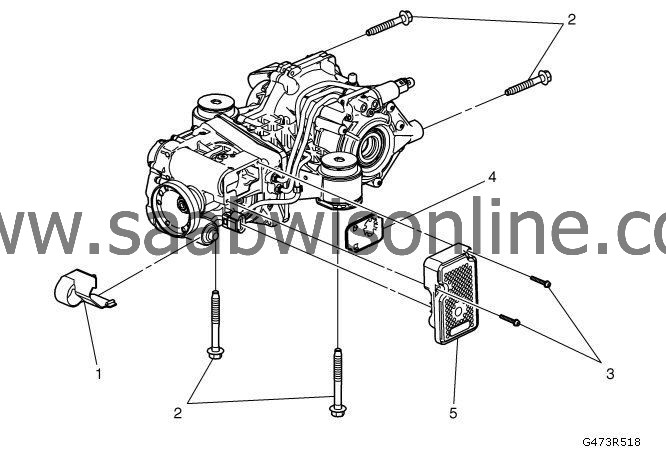
Rear Differential Clutch Control Module Replacement
|
|
Rear Differential Clutch Control Module Replacement
|

|
Callout
|
Component Name
|
Preliminary Procedure
|
1
|
Protective Cover
Procedure
|
1.
|
Unhook the protective cover from the hydraulic pump.
|
|
3.
|
Remove the electrical connection.
|
|
2
|
Rear Axle Assembly Bolts (Qty: 4)
 Warning
|
|
To prevent personal injury and/or component damage, support the differential case when removing the case from the axle housing. If the case is not supported, the differential case could fall and cause personal injury or damage to the differential case.
|
|
|
|
|
|
Refer to
Fastener Caution
.
Procedure
|
1.
|
Support with a column jack.
|
|
2.
|
Secure with cable ties.
|
|
3.
|
Lower the differential clutch assembly just enough to reach the control module. Take care that the drive shaft universal joints are not damaged.
|
Tighten
90 Nm (66 lb ft) + 90 degrees + 15 degrees
|
3
|
Control Module Bolts (Qty: 2)
 Warning
|
|
The hydraulic pressure in the differential clutch is very high. To prevent personal injury, wait for at least 10 minutes before removing any parts from the differential clutch.
|
|
|
|
|
|
Tighten
6 Nm (53 lb in)
|
4
|
Sealing
|
5
|
Rear Differential Clutch Control Module
Procedure
Do not separate control module and valve.
|


 Warning

