SAAB WIS ONLINE

B1331

B1331

Electric detonator 1 Short circuit to battery positive Short circuit to ground


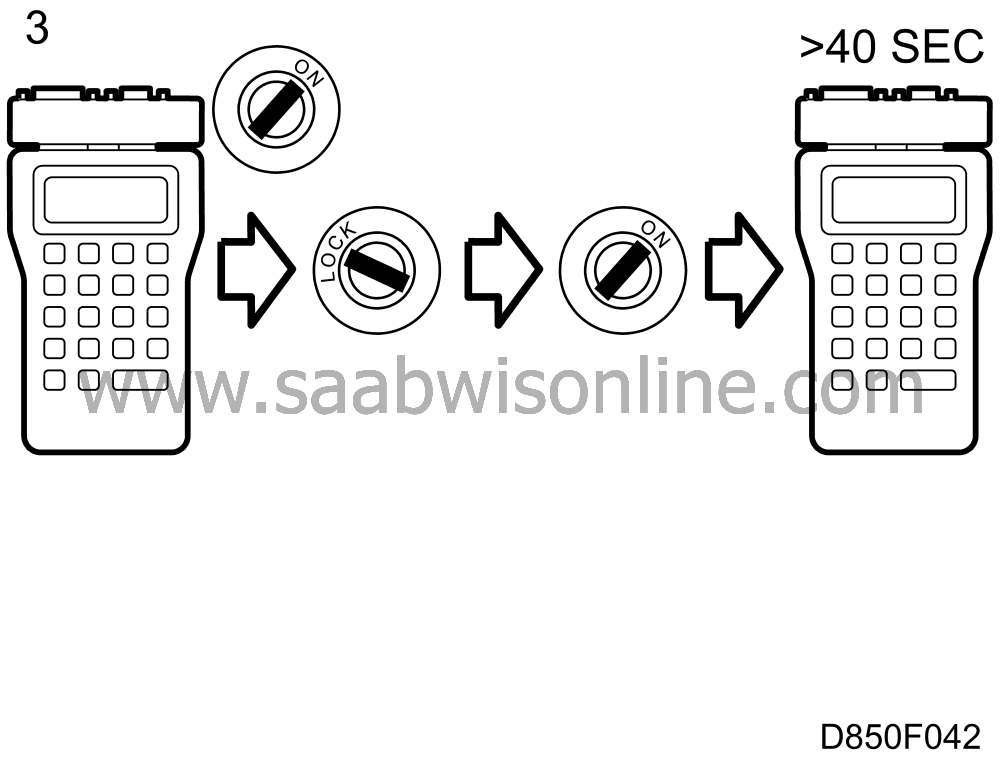
1. Make a note of the diagnostic trouble code and then clear it. Switch the ignition off and on again, wait for at least 40 seconds with the ignition switched on and check to see whether the diagnostic trouble code recurs. If it does, it is a permanent fault. Proceed to point 2.

If it does not, the fault is intermittent.

Leave the ignition switched on and turn the steering wheel. Jiggle the connectors and wiring to check for an open circuit/loose contact. Note whether the SRS lamp starts to flash again. If it does, check whether the diagnostic trouble code recurs.

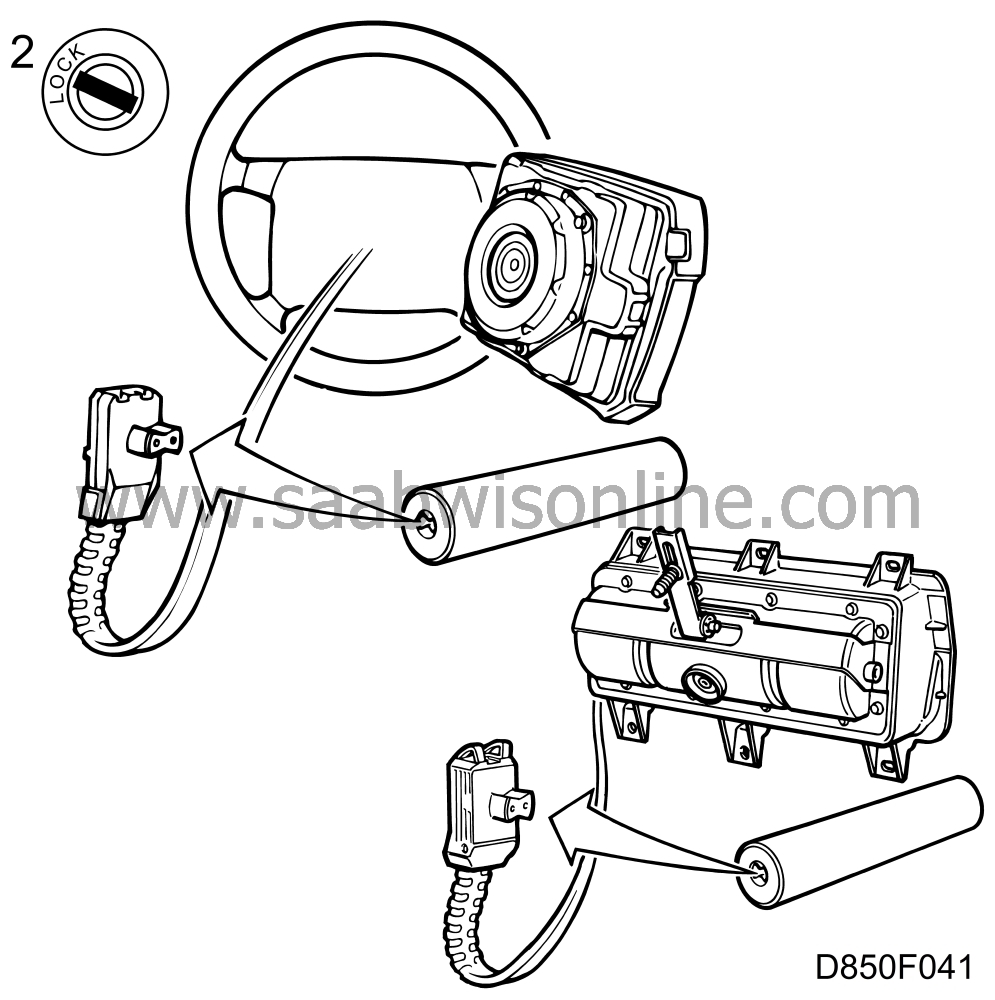
2. Unscrew the steering wheel airbag and unplug the connector at the back of the airbag. Connect reference resistor 84 71 153 to the connector.

On cars with a passenger airbag, remove the glove box, unplug the connector on the underside of the passenger airbag and connect reference resistor 84 71 153 to the connector.

3. Switch on the ignition and clear the diagnostic trouble code. Switch the ignition off and on again, wait for at least 40 seconds and then check to see whether the diagnostic trouble code recurs.


If the diagnositc trouble code recurs, proceed to point 4.

If the diagnostic code has gone, the steering wheel airbag is at fault. Switch off the ignition and carry out a double check by connecting the airbag. Switch on the ignition and wait for at least 40 seconds. Check to see whether the diagnostic trouble code recurs.

If it does, switch off the ignition and change the steering wheel airbag. Switch on the ignition and clear the diagnostic trouble code. Switch the ignition off and on again, wait for at least 40 seconds and check to see whether the diagnostic trouble code recurs.

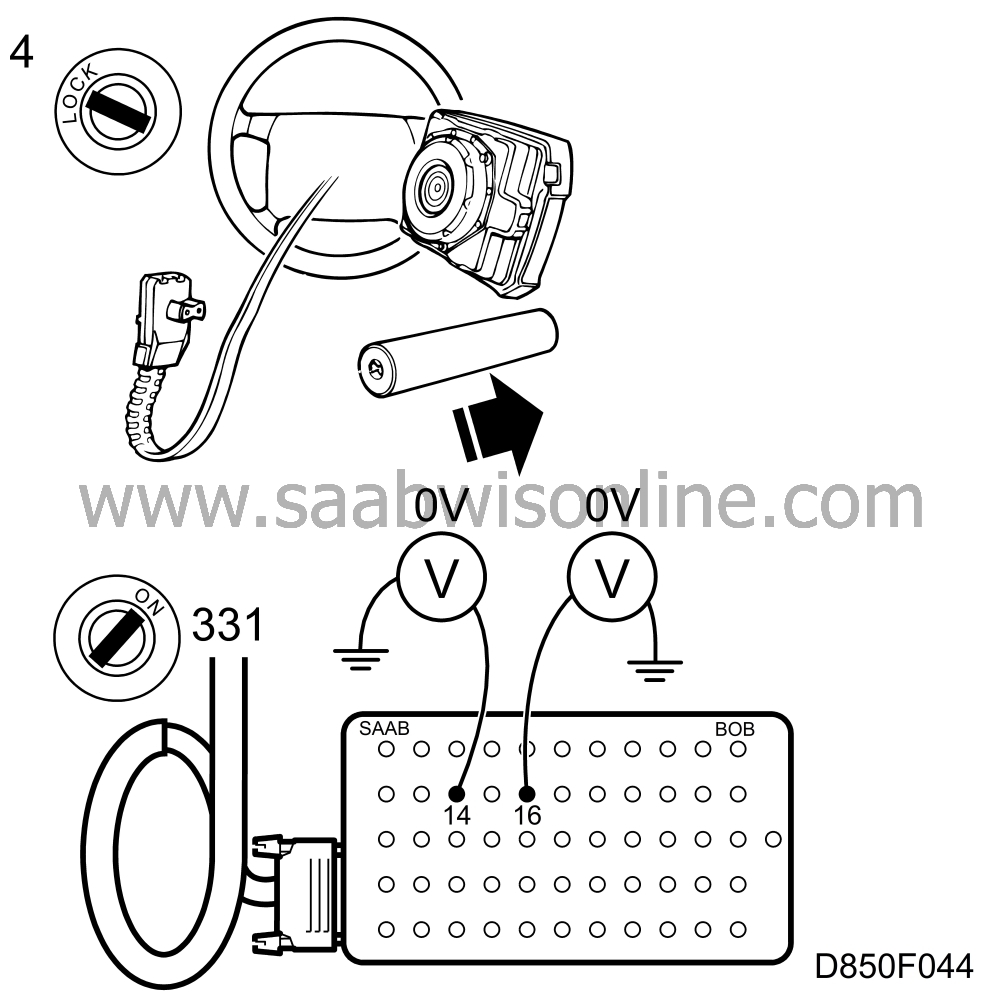
4. Switch off the ignition and remove the reference resistor connected to the steering wheel airbag's connector. Unplug the connector at the control module and connect a BOB to the connector on the wiring.


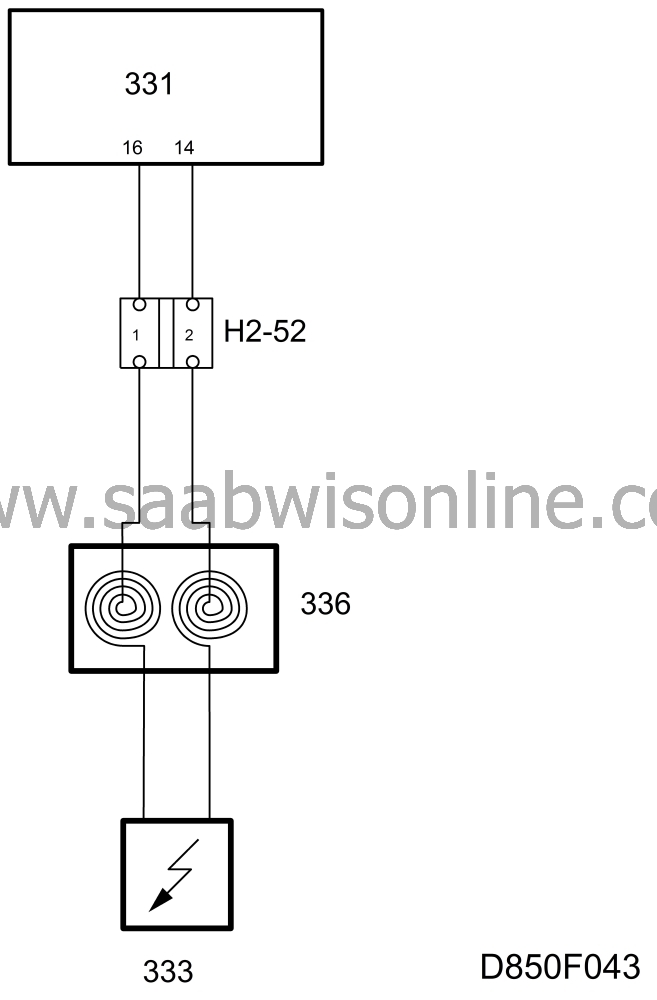
Switch on the ignition and connect a voltmeter to pin 16 and a good grounding point and to pin 14 and a good grounding point.

If either of the readings shows battery voltage, proceed to point 5.

If neither of the readings shows battery voltage, proceed to point 6.


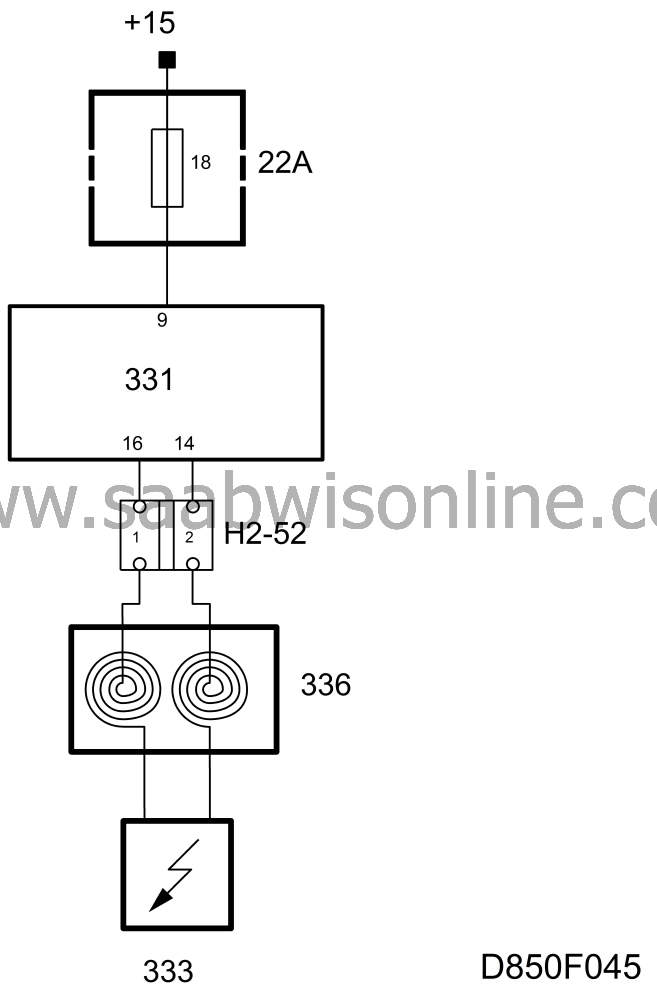
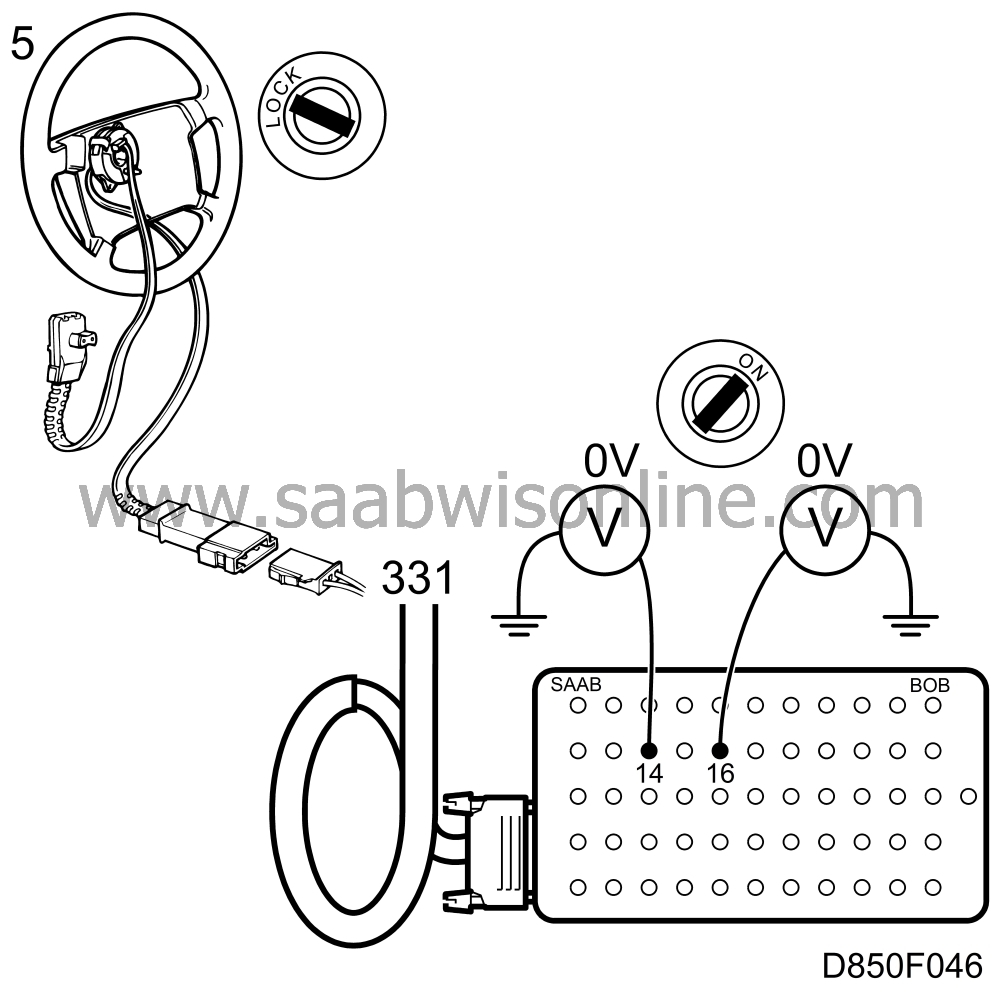
5. Switch off the ignition and open connector H2-52. Swich on the ignition and connect a voltmeter to pin 16 and a good grounding point and to pin 14 and a good grounding point.


If neither of the readings shows battery voltage, the fault is in the contact roller (coil spring) which should then be changed.

If any of the readings shows battery voltage, the fault is in the wiring harness between connector H2-52 and the connector at the control module.

Investiage the causes. Change the wiring harness.

Proceed to point 8.

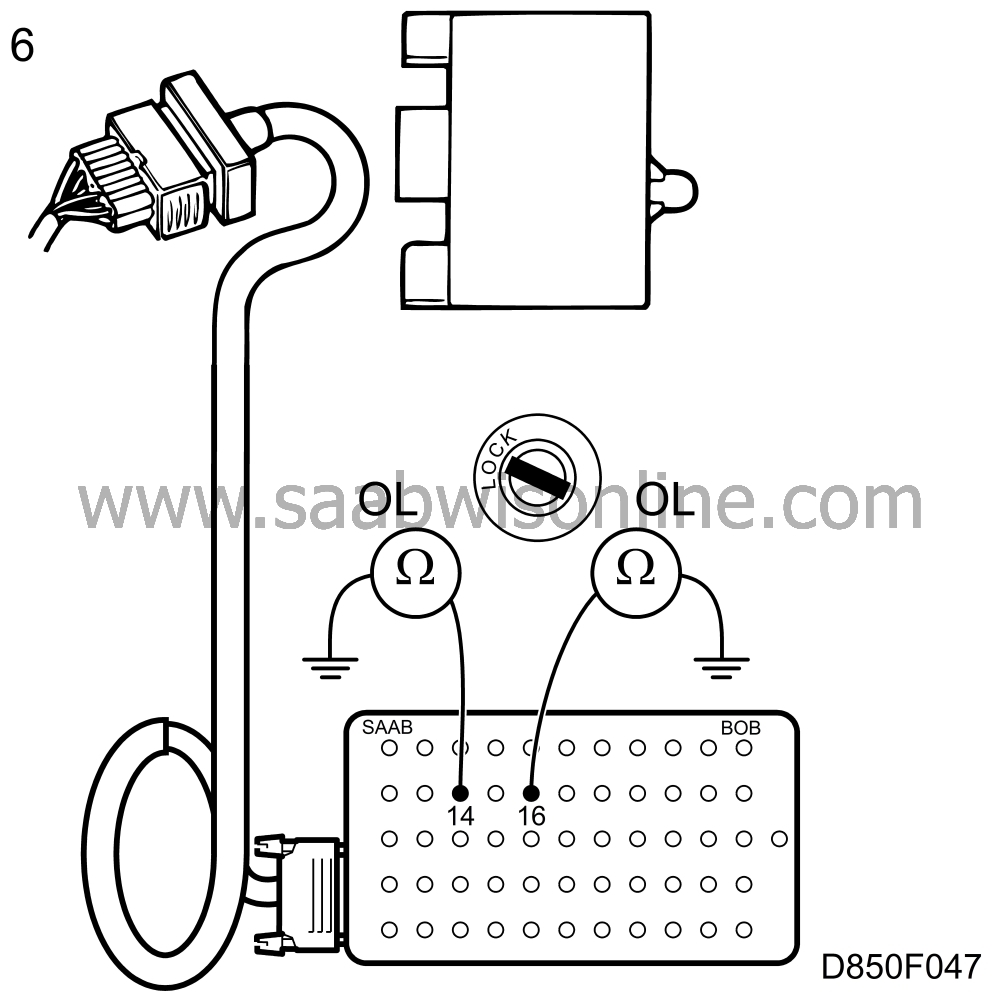
6. Switch off the ignition and connect an ohmmeter to pin 16 and a good grounding point and to pin 14 and a good grounding point.


If either of the readings shows low resistance, proceed to point 7.

If both readings show high resistance, proceed to point 8.

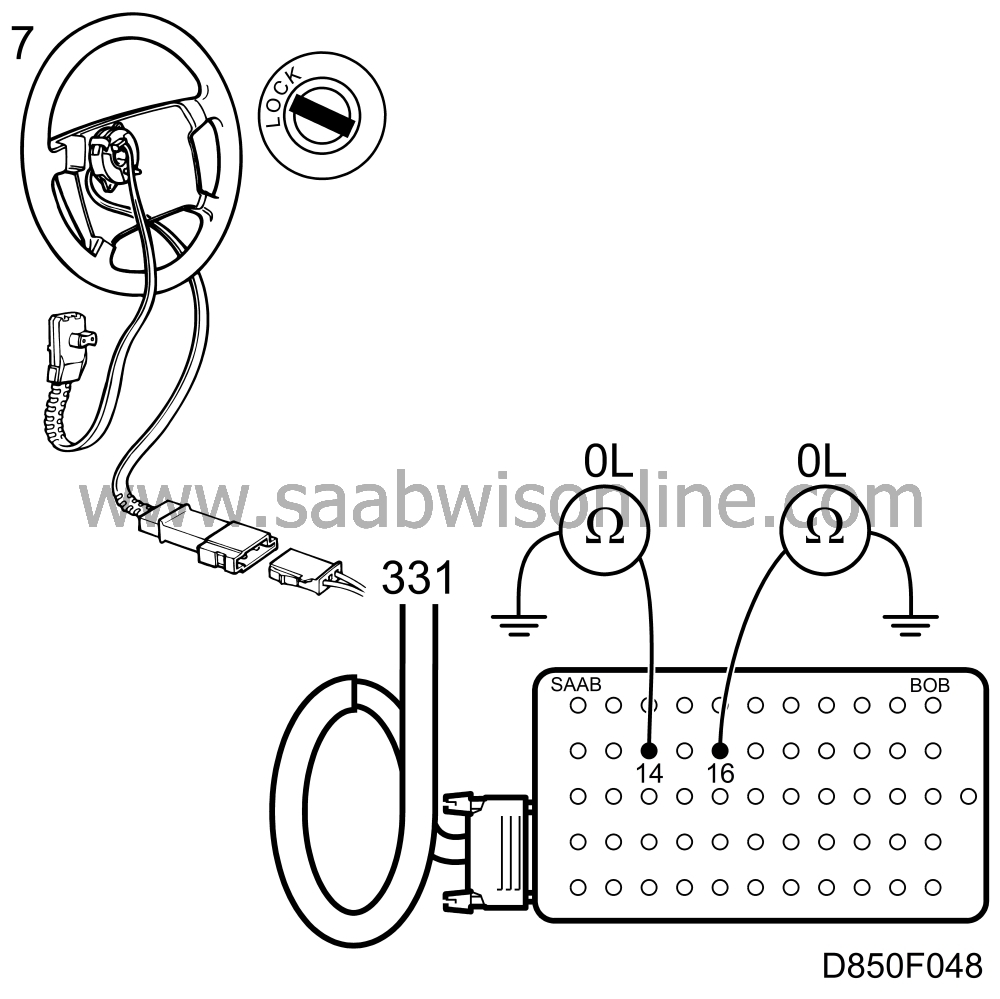
7. Open connector H2-52. Connect an ohmmeter to pin 16 and a good grounding point and to pin 14 and a good grounding point.


If both readings show high resistance, the fault is in the contact roller (coil spring) which should then be changed.

If either of the readings shows low resistance, the fault is in the wiring between connector H2-52 and the connector at the control module.

Investiage the causes. Change the wiring harness.

Proceed to point 8.

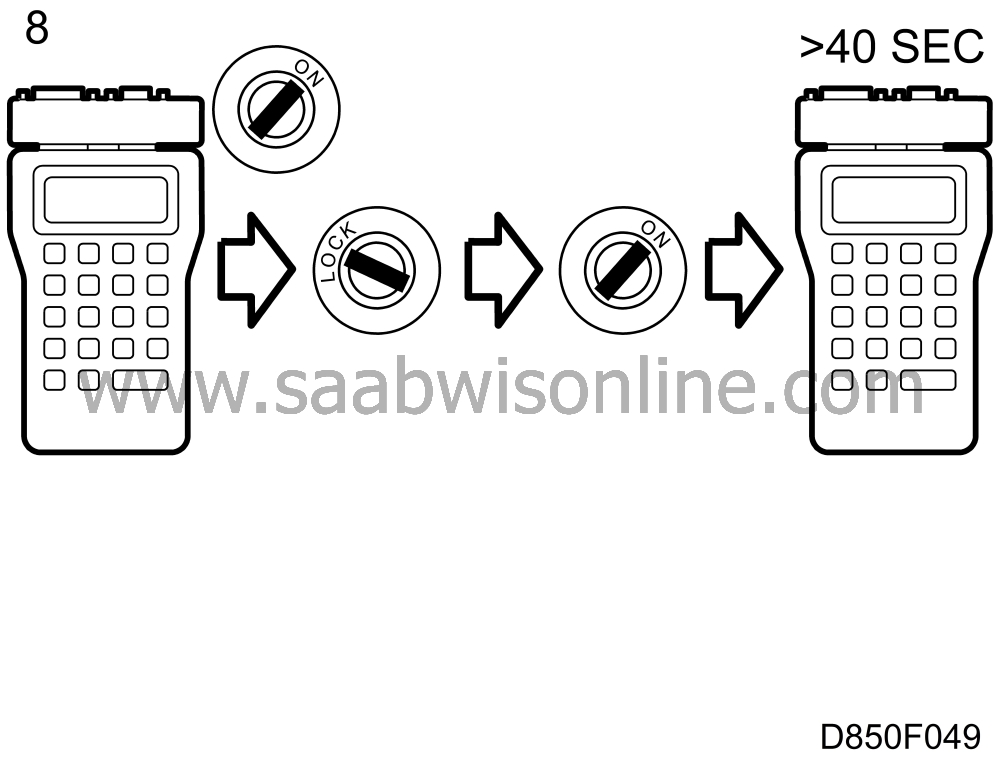
8. Plug in the connectoros, switch on the ignition and clear the diagnostic toruble code. Switch the ignition off and then on again, wait for at least 40 seconds and then check to see whether the diagnostic trouble code recurs.


If the diagnositc trouble code recurs, proceed to .