Slave cylinder
| Slave cylinder |
| Dismantling |
| 1. |
Remove the gearbox as described in the "Removing, fitting" section of "Manual gearbox"
 .
.
|
|
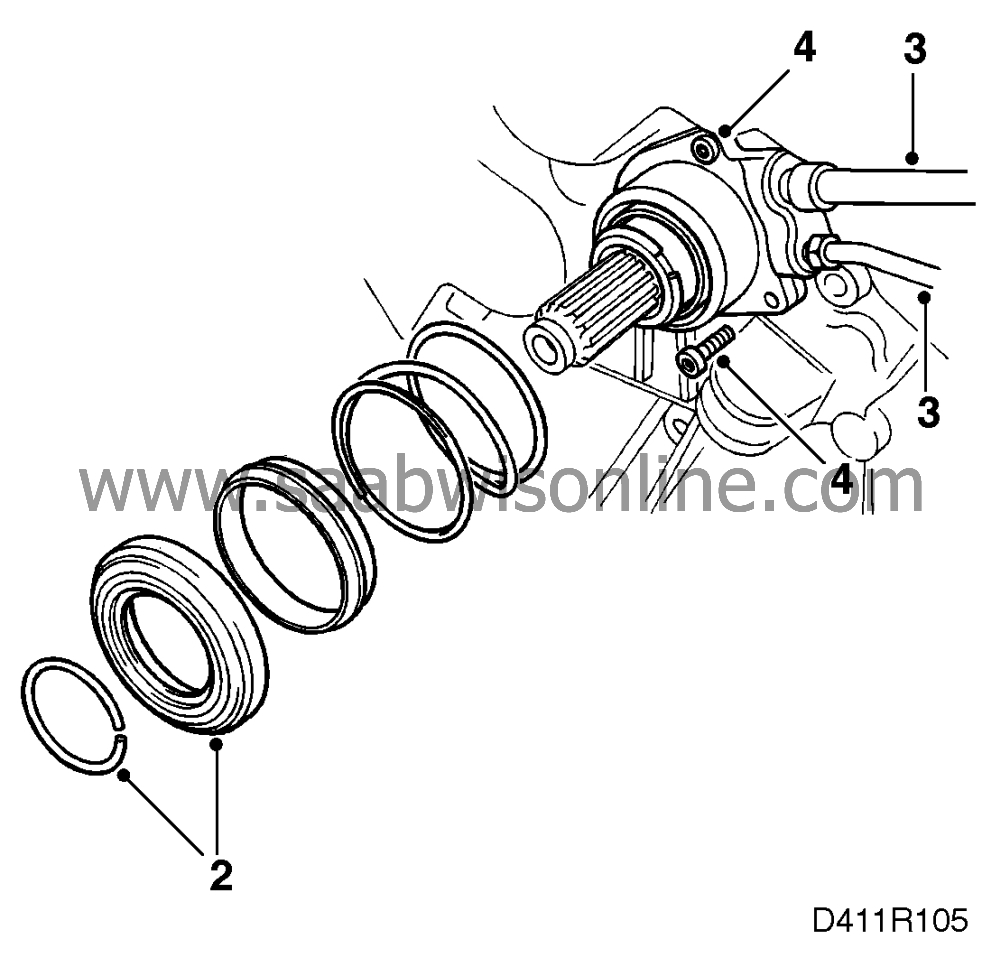
| 2. |
Remove the de-clutching bearing.
|
|
| 3. |
Remove the hydraulic pipe and bleed nipple from the slave cylinder.
|
|
| 4. |
Remove the slave cylinder's three retaining screws and withdraw the slave cylinder.
|
|
| To refit |
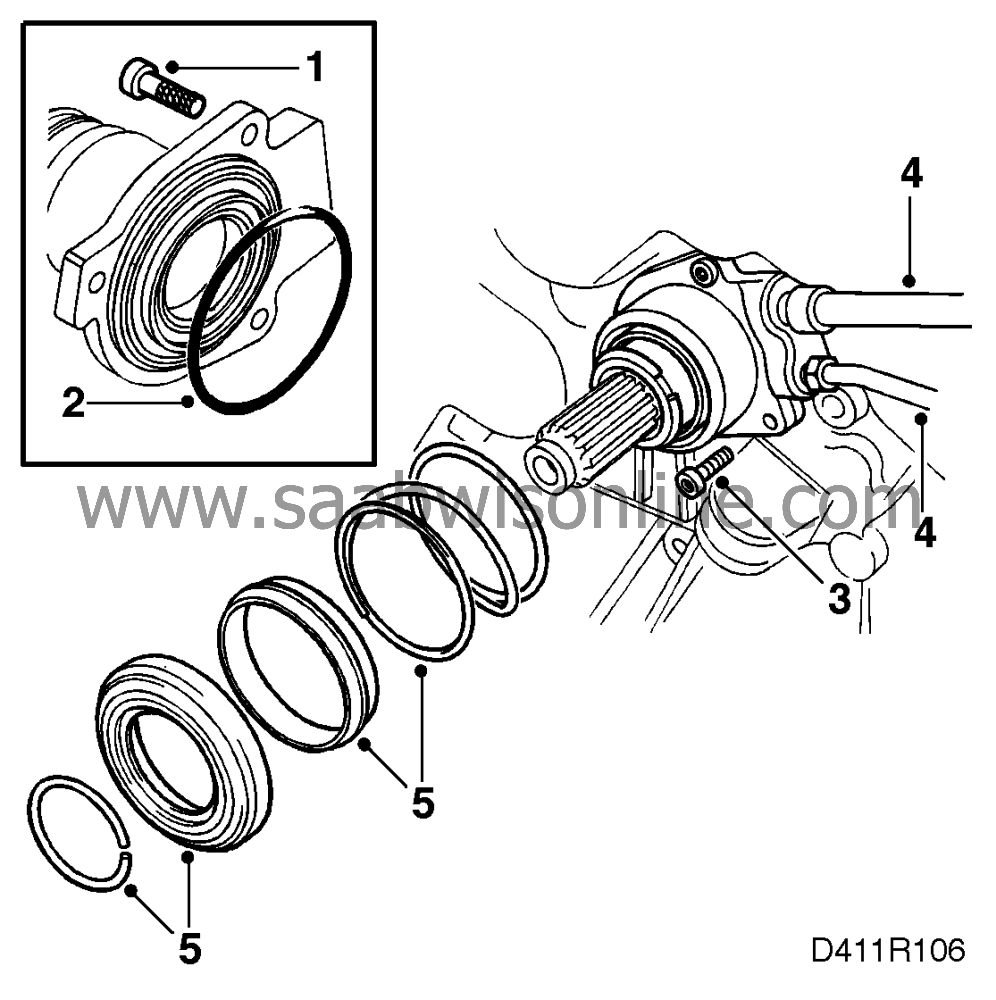
| 1. |
Apply thread sealant to the retaining screws.
|
|
| 2. |
Fit a new O-ring on the slave cylinder. (Use non-acid vaseline to keep the O-ring in place during assembly.)
|
|
| 3. |
Screw the slave cylinder in place.
Tightening torque: 10 Nm (7.4 lbf ft). |
|
| 4. |
Fit the hydraulic pipe and bleed nipple on the slave cylinder.
|
|
| 5. |
Fit the release bearing with spring and locking ring. Check that the locking ring is properly located in its seat.
|
|
| 6. |
Fit the gearbox as described in the "Removing, fitting" section of "Manual gearbox"
.
|
|
| 7. |
Bleed the system, see
 .
.
|
|
| Dismantling |

| 1. |
Remove the slave cylinder, see
.
|
|
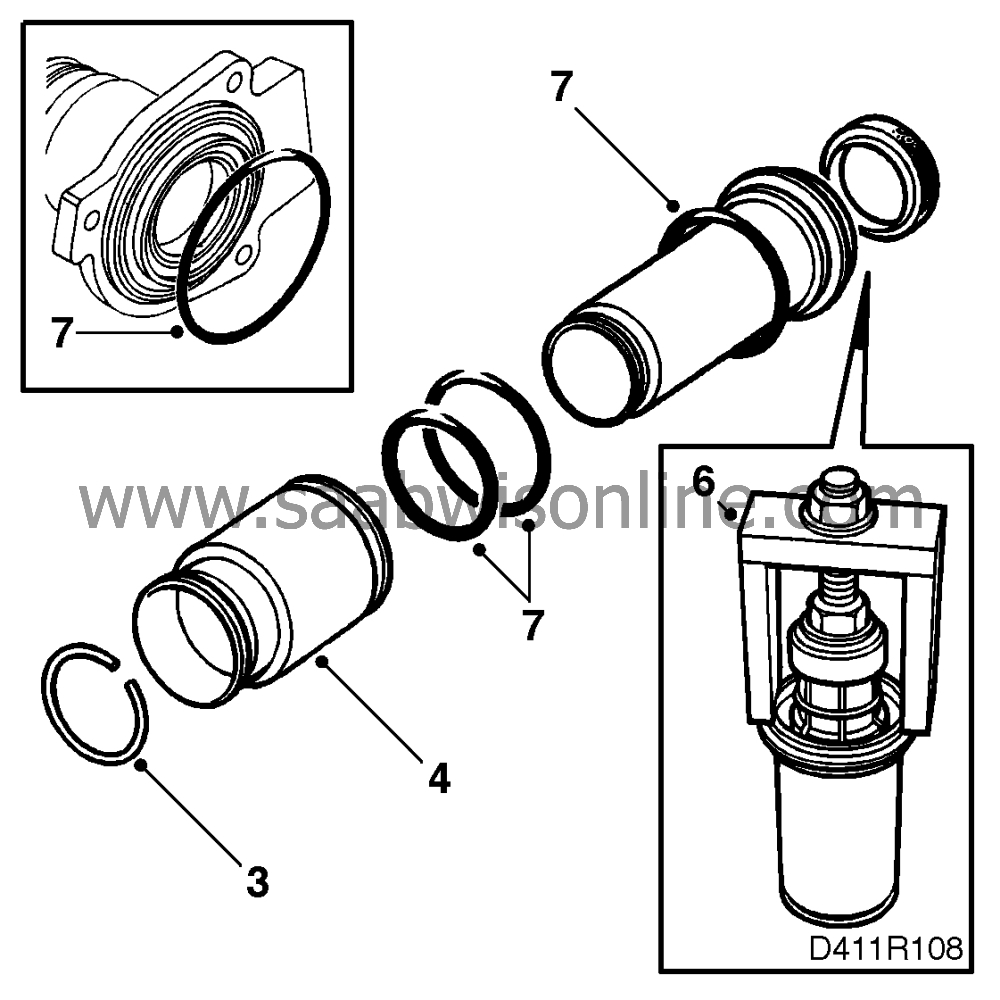
| 2. |
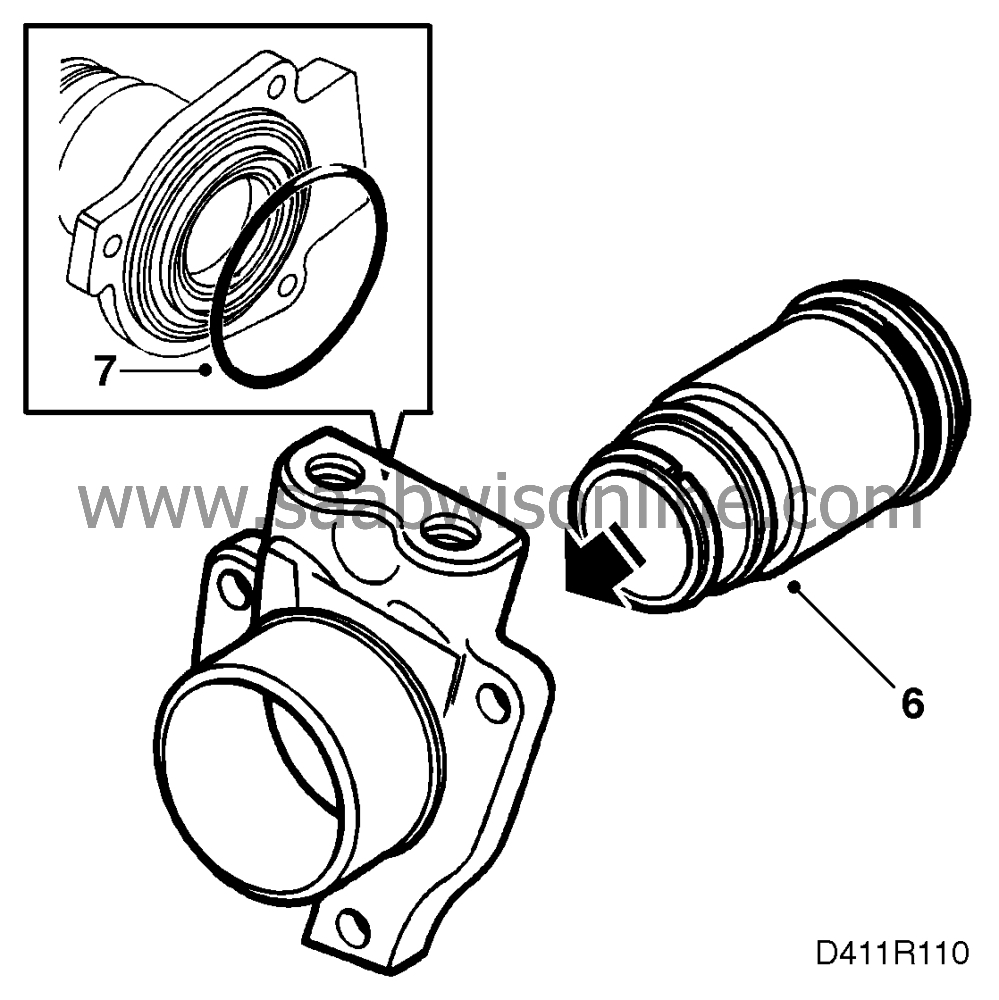
Press out the guide sleeve with plunger from the slave cylinder housing.
|
|
| 3. |
Remove the circlip which prevents the plunger from moving too far off the guide sleeve.
|
|
| 4. |
Pull the plunger off the guide sleeve.
|
|
| 5. |
Carefully cut off the rubber on the sealing ring inside the guide sleeve.
|
|
| 6. |
Fit tool 260 147 020 and pull out the sealing ring.
|
|
| 7. |
Remove the remaining seals.
|
|
| Assembly |
| 1. |
Make sure that the slave cylinder is thoroughly clean. Wash the parts in brake fluid or special cleaning fluid for hydraulic components, such as a mixture of washing spirits and acetone.
|
|
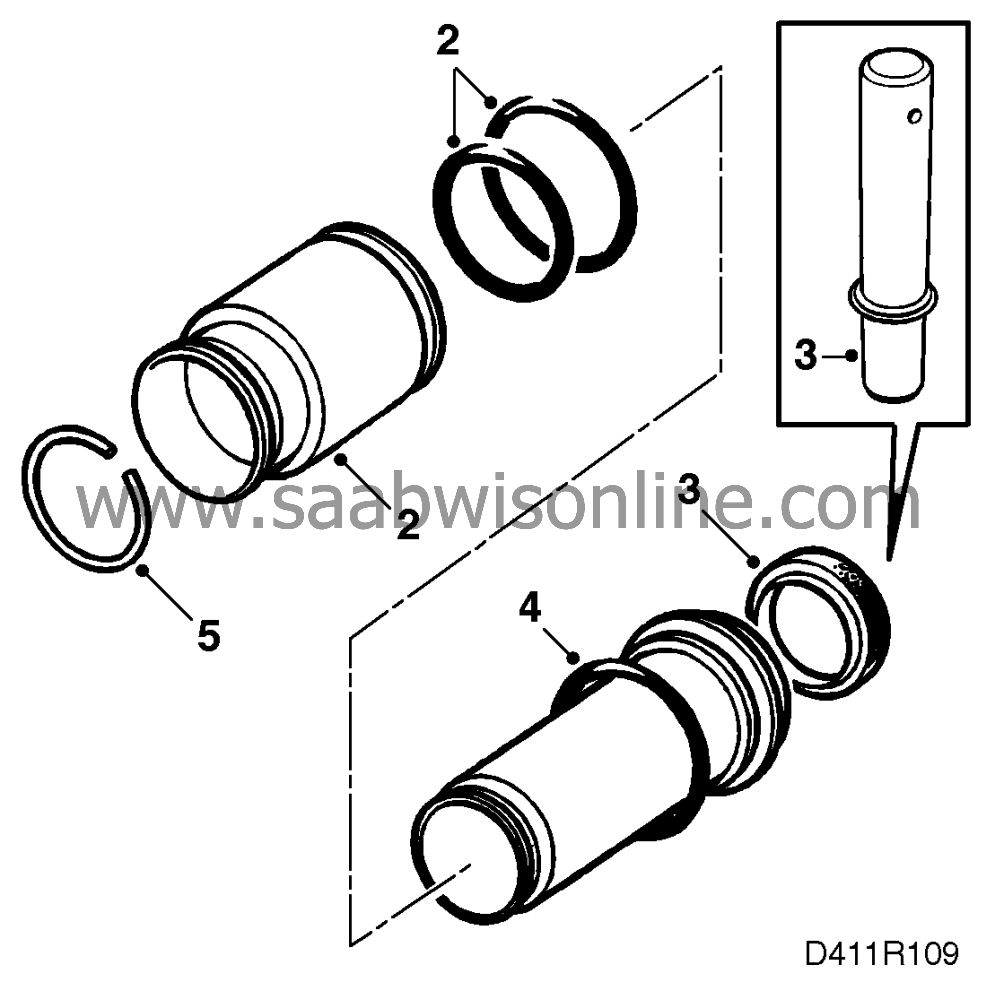
| 2. |
Fit two new seals on the plunger. Lubricates the seals with brake fluid or grease for brakes.
|
|
| 3. |
Press a new seal into the guide sleeve using tool 78 41 067 and lubricate it with Shell Grease 1344 LIEP II.
|
||||||||||
| 4. |
Fit on the guide sleeve the O-ring which seals between the guide sleeve and the slave cylinder body.
|
|
| 5. |
Slide the plunger in place and fit the circlip on the guide sleeve.
|
|
| 6. |
Insert the guide sleeve with plunger into the slave cylinder housing.
|
|
| 7. |
Fit the O-ring on the rear of the slave cylinder. Use non-acid vaseline to keep it in place during assembly.
|
|
| 8. |
Fit the slave cylinder, see
.
|
|
This project is supported by memberships and donations. If you use this site, please consider Joining SCNA and/or making a donation.
Our Friends
