Linkage between rear rail and middle rail
| Linkage between rear rail and middle rail |
| To remove |
| Important | ||
|
The linkage between the rear rail and middle rail on cars with VIN from V7008824 must not be changed. |
||
|
The screwed joints securing the linkage must not be loosened either. From VIN V7008824, the whole side of the top stack must be changed. |
||
| 1. |
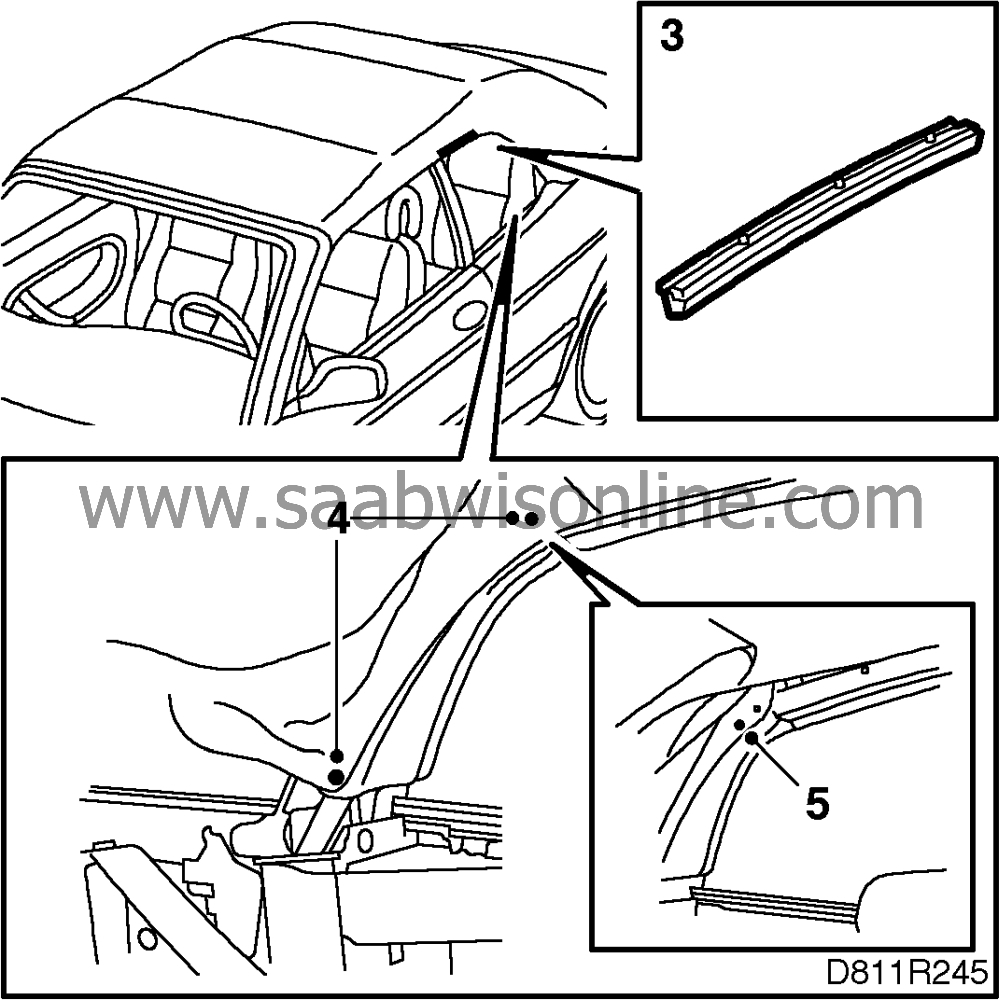
Remove the rear side trim.
|
|
| 2. |
Operate the soft top to half open position.
|
|
| 3. |
Remove the middle rail seal and seal retainer.
|
|
| 4. |
Drill away the blind rivets securing the headlining to the rear rail.
|
|
| 5. |
Remove the screw on the top joint of the rear link arm.
|
|
| 6. |
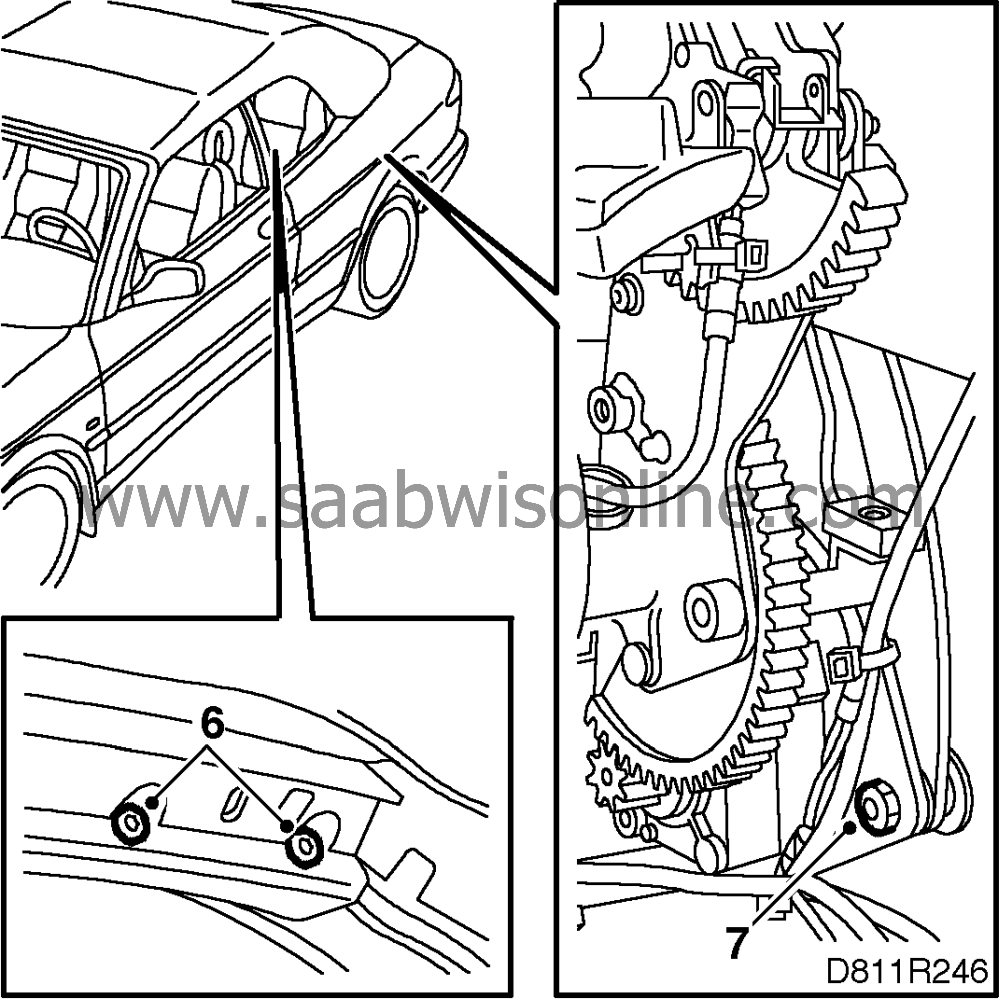
Remove the top screws on the middle rail.
|
|
| 7. |
Remove the eccentric screw on the main motor and lift the link backwards towards the soft top cover.
|
|
| To fit |
| 1. |
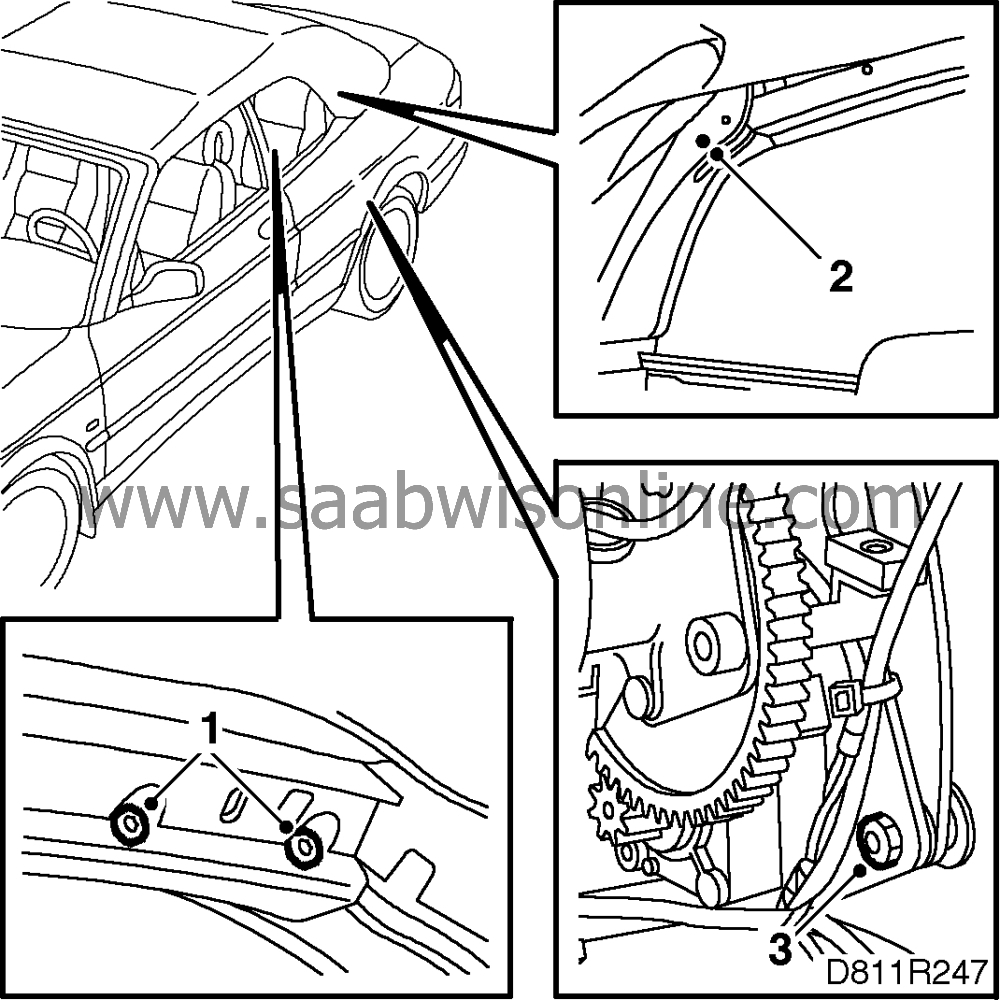
Apply threadlocker to the screws. Position the link and fit the two screws in the middle rail.
|
|
| 2. |
Fit the screw for the top joint on the rear link arm.
|
|
| 3. |
Fit the new eccentric screw supplied with the spare parts kit. Adjust the soft top to the windscreen member. See
 .
.
Tighten the nut. Tightening torque 23 Nm (17 lbf ft) |
|
| 4. |
Blind rivet on the headlining.

|
|
| 5. |
Fit the middle rail seal retainer and seal.
|
|
| 6. |
Fit the side trim. See
.
|
|
| 7. |
Connect the diagnostic tool, clear any diagnostic trouble codes and then program the control module. See
.
|
|
This project is supported by memberships and donations. If you use this site, please consider Joining SCNA and/or making a donation.
Our Friends
