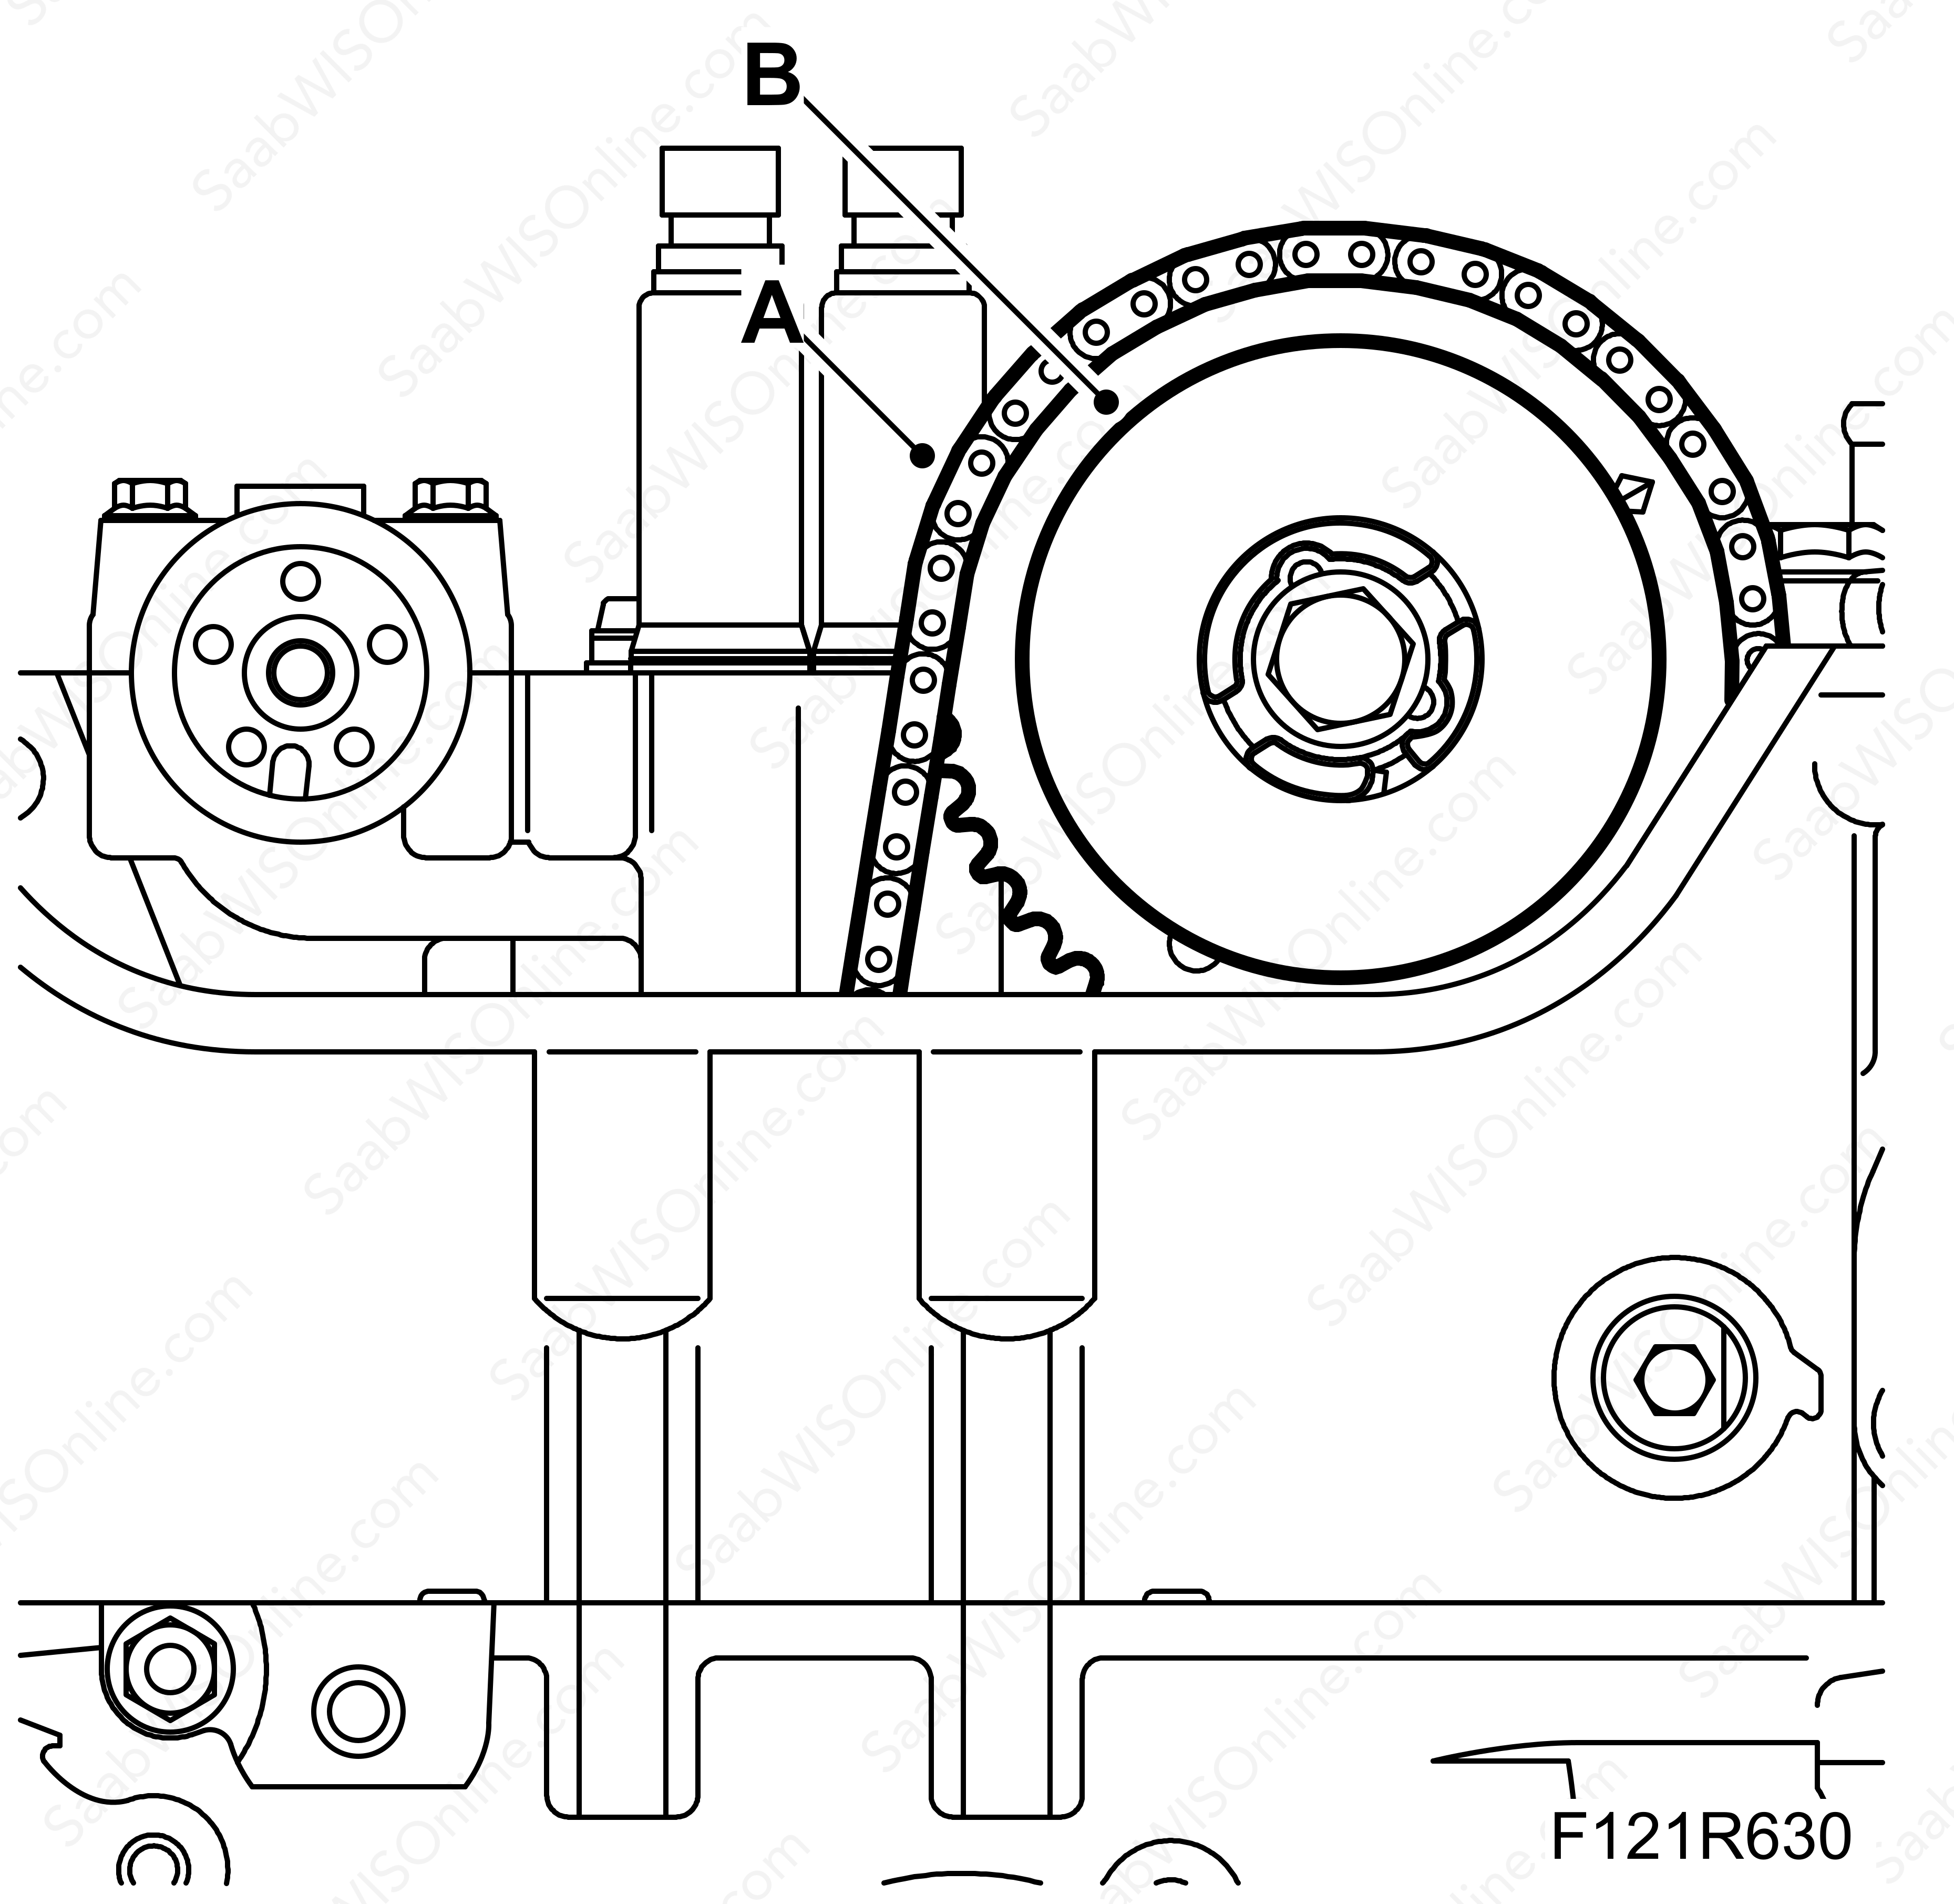
Timing chain, A20NFT/LHU
| Timing chain, A20NFT/LHU |
| Removal procedure |
| 1. |
Remove the timing cover. See
Timing cover, A20NFT/LHU
.
|
|
| 2. |
Remove the camshaft cover. See
Camshaft cover with gasket, A20NFT/LHU
|
|
| 3. |
Remove the chain tensioner. See
Timing chain tensioner
.
|
|
| 4. |
Remove the upper chain guide. See
Chain guide, upper, A20NFT/LHU
.
|
|
| 5. |
Remove camshaft pinion. See
Camshaft pinion
.
|
|
| 6. |
Remove the lower chain guide. See
Chain guide, lower, A20NFT/LHU
.
|
|
| 7. |
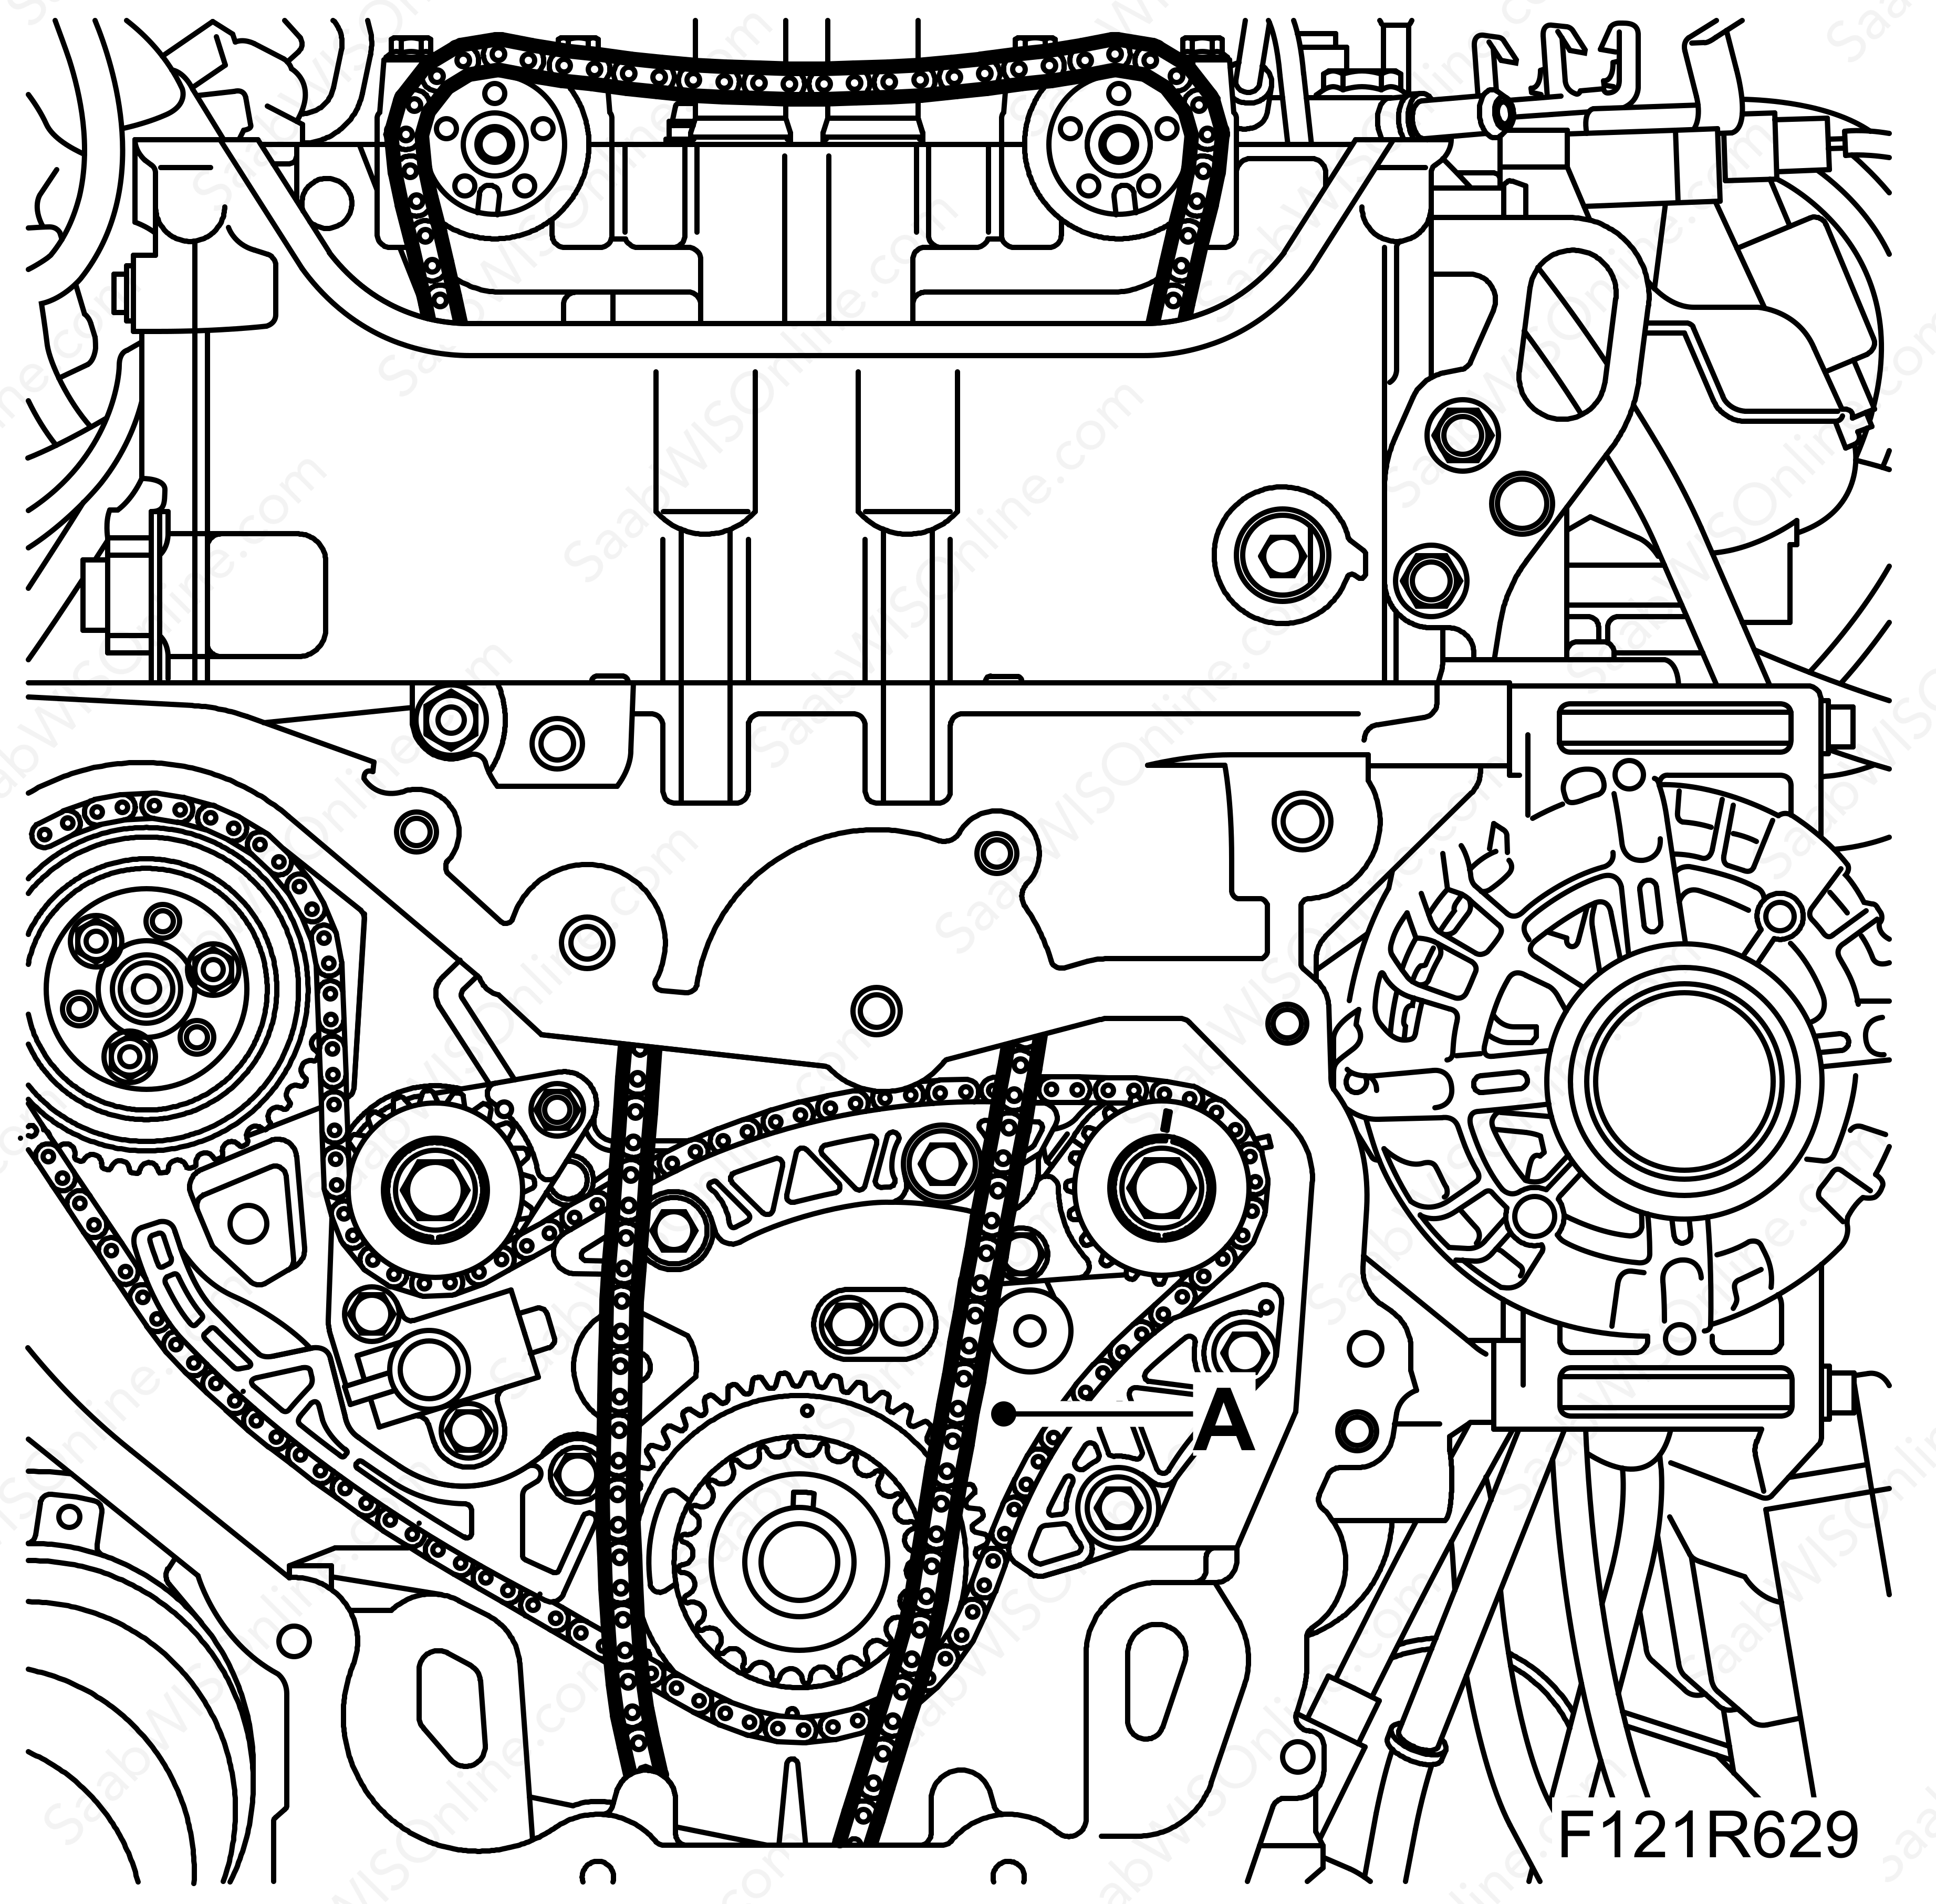
Remove the timing chain (A).
|
|
| Fitting procedure |
| 2. |
Fit the chain to the crankshaft chain gear.
|
|
| 3. |
Fit the lower chain guide. See
Chain guide, lower, A20NFT/LHU
.
|
|
| 4. |
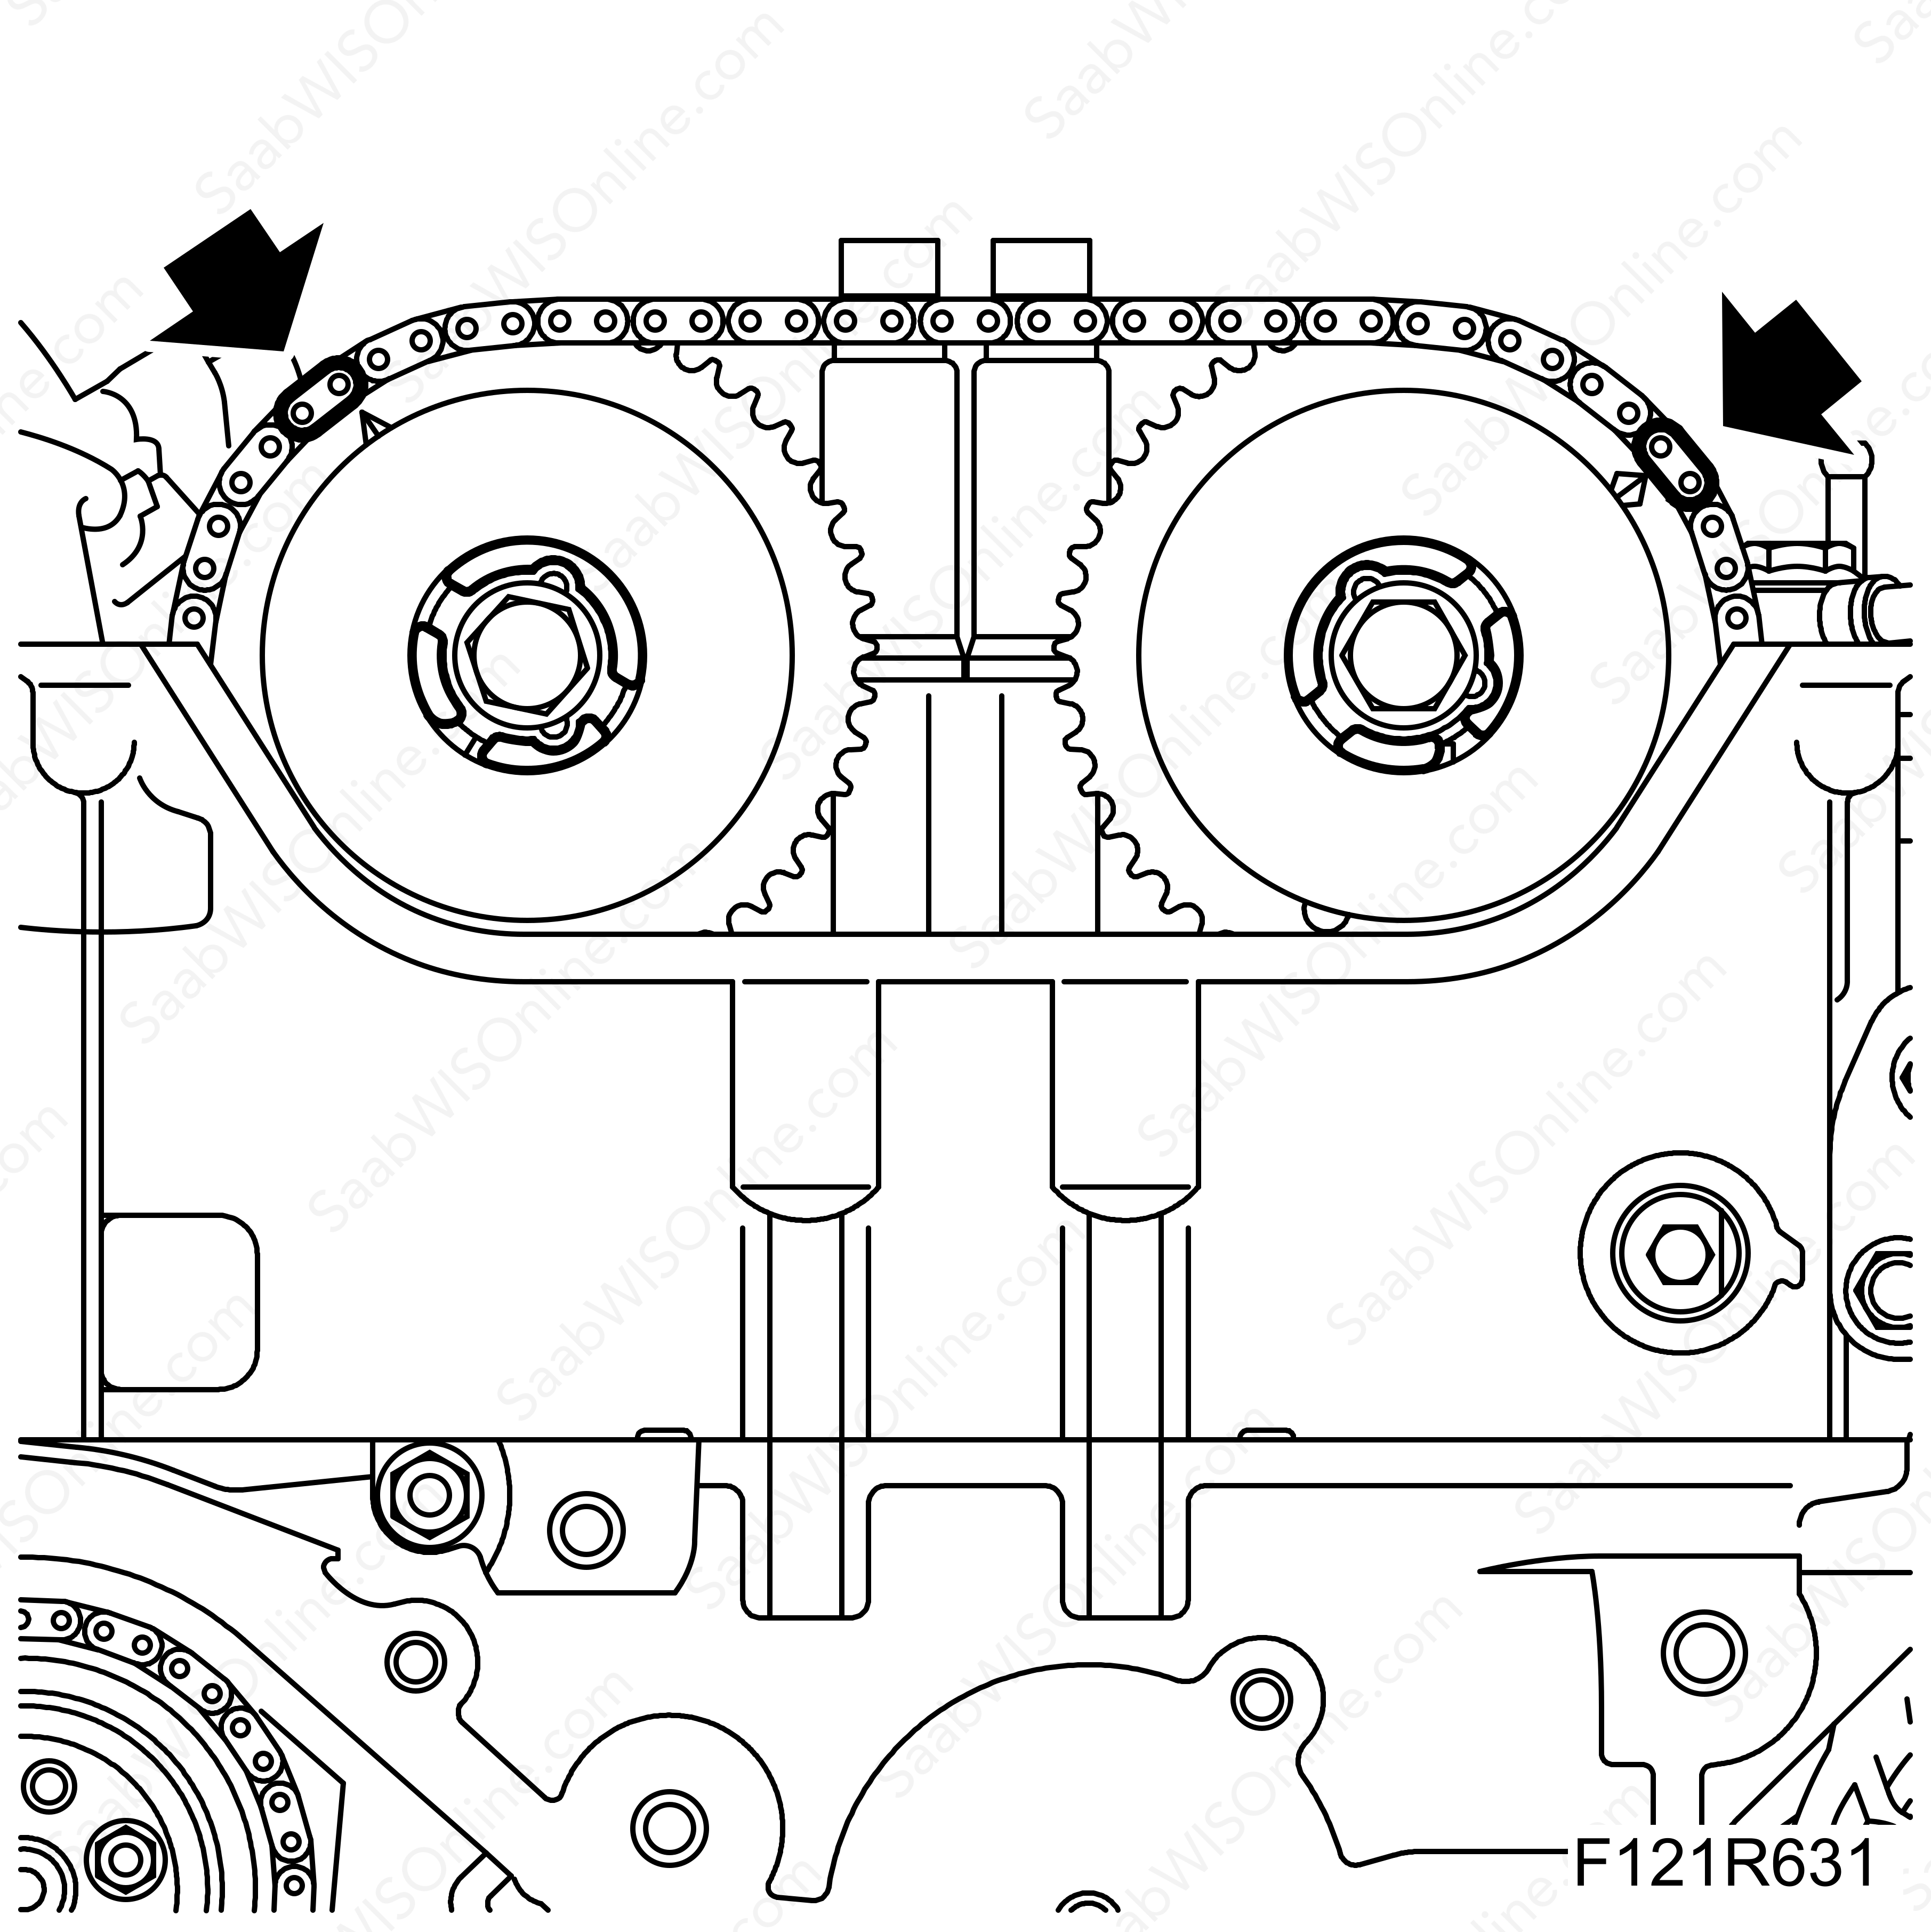
Put on the chain and fit the exhaust camshaft pinion on the camshaft without tightening the screw. Make sure the drive guide enters the shaft hole. The camshaft may need to be rotated for it to engage correctly.
|
|
| 5. |
Count the chain rivets between the marker for the camshaft pinion intake to the camshaft pinion exhaust. There must be 30 rivets for the setting to be correct.
|
|
| 6. |
Tighten the camshaft pinion (C) screws (A). Counterhold using a wrench (B) on the camshaft flat.
Tightening torque: 30 Nm + 100° (22 lbf ft +100°) 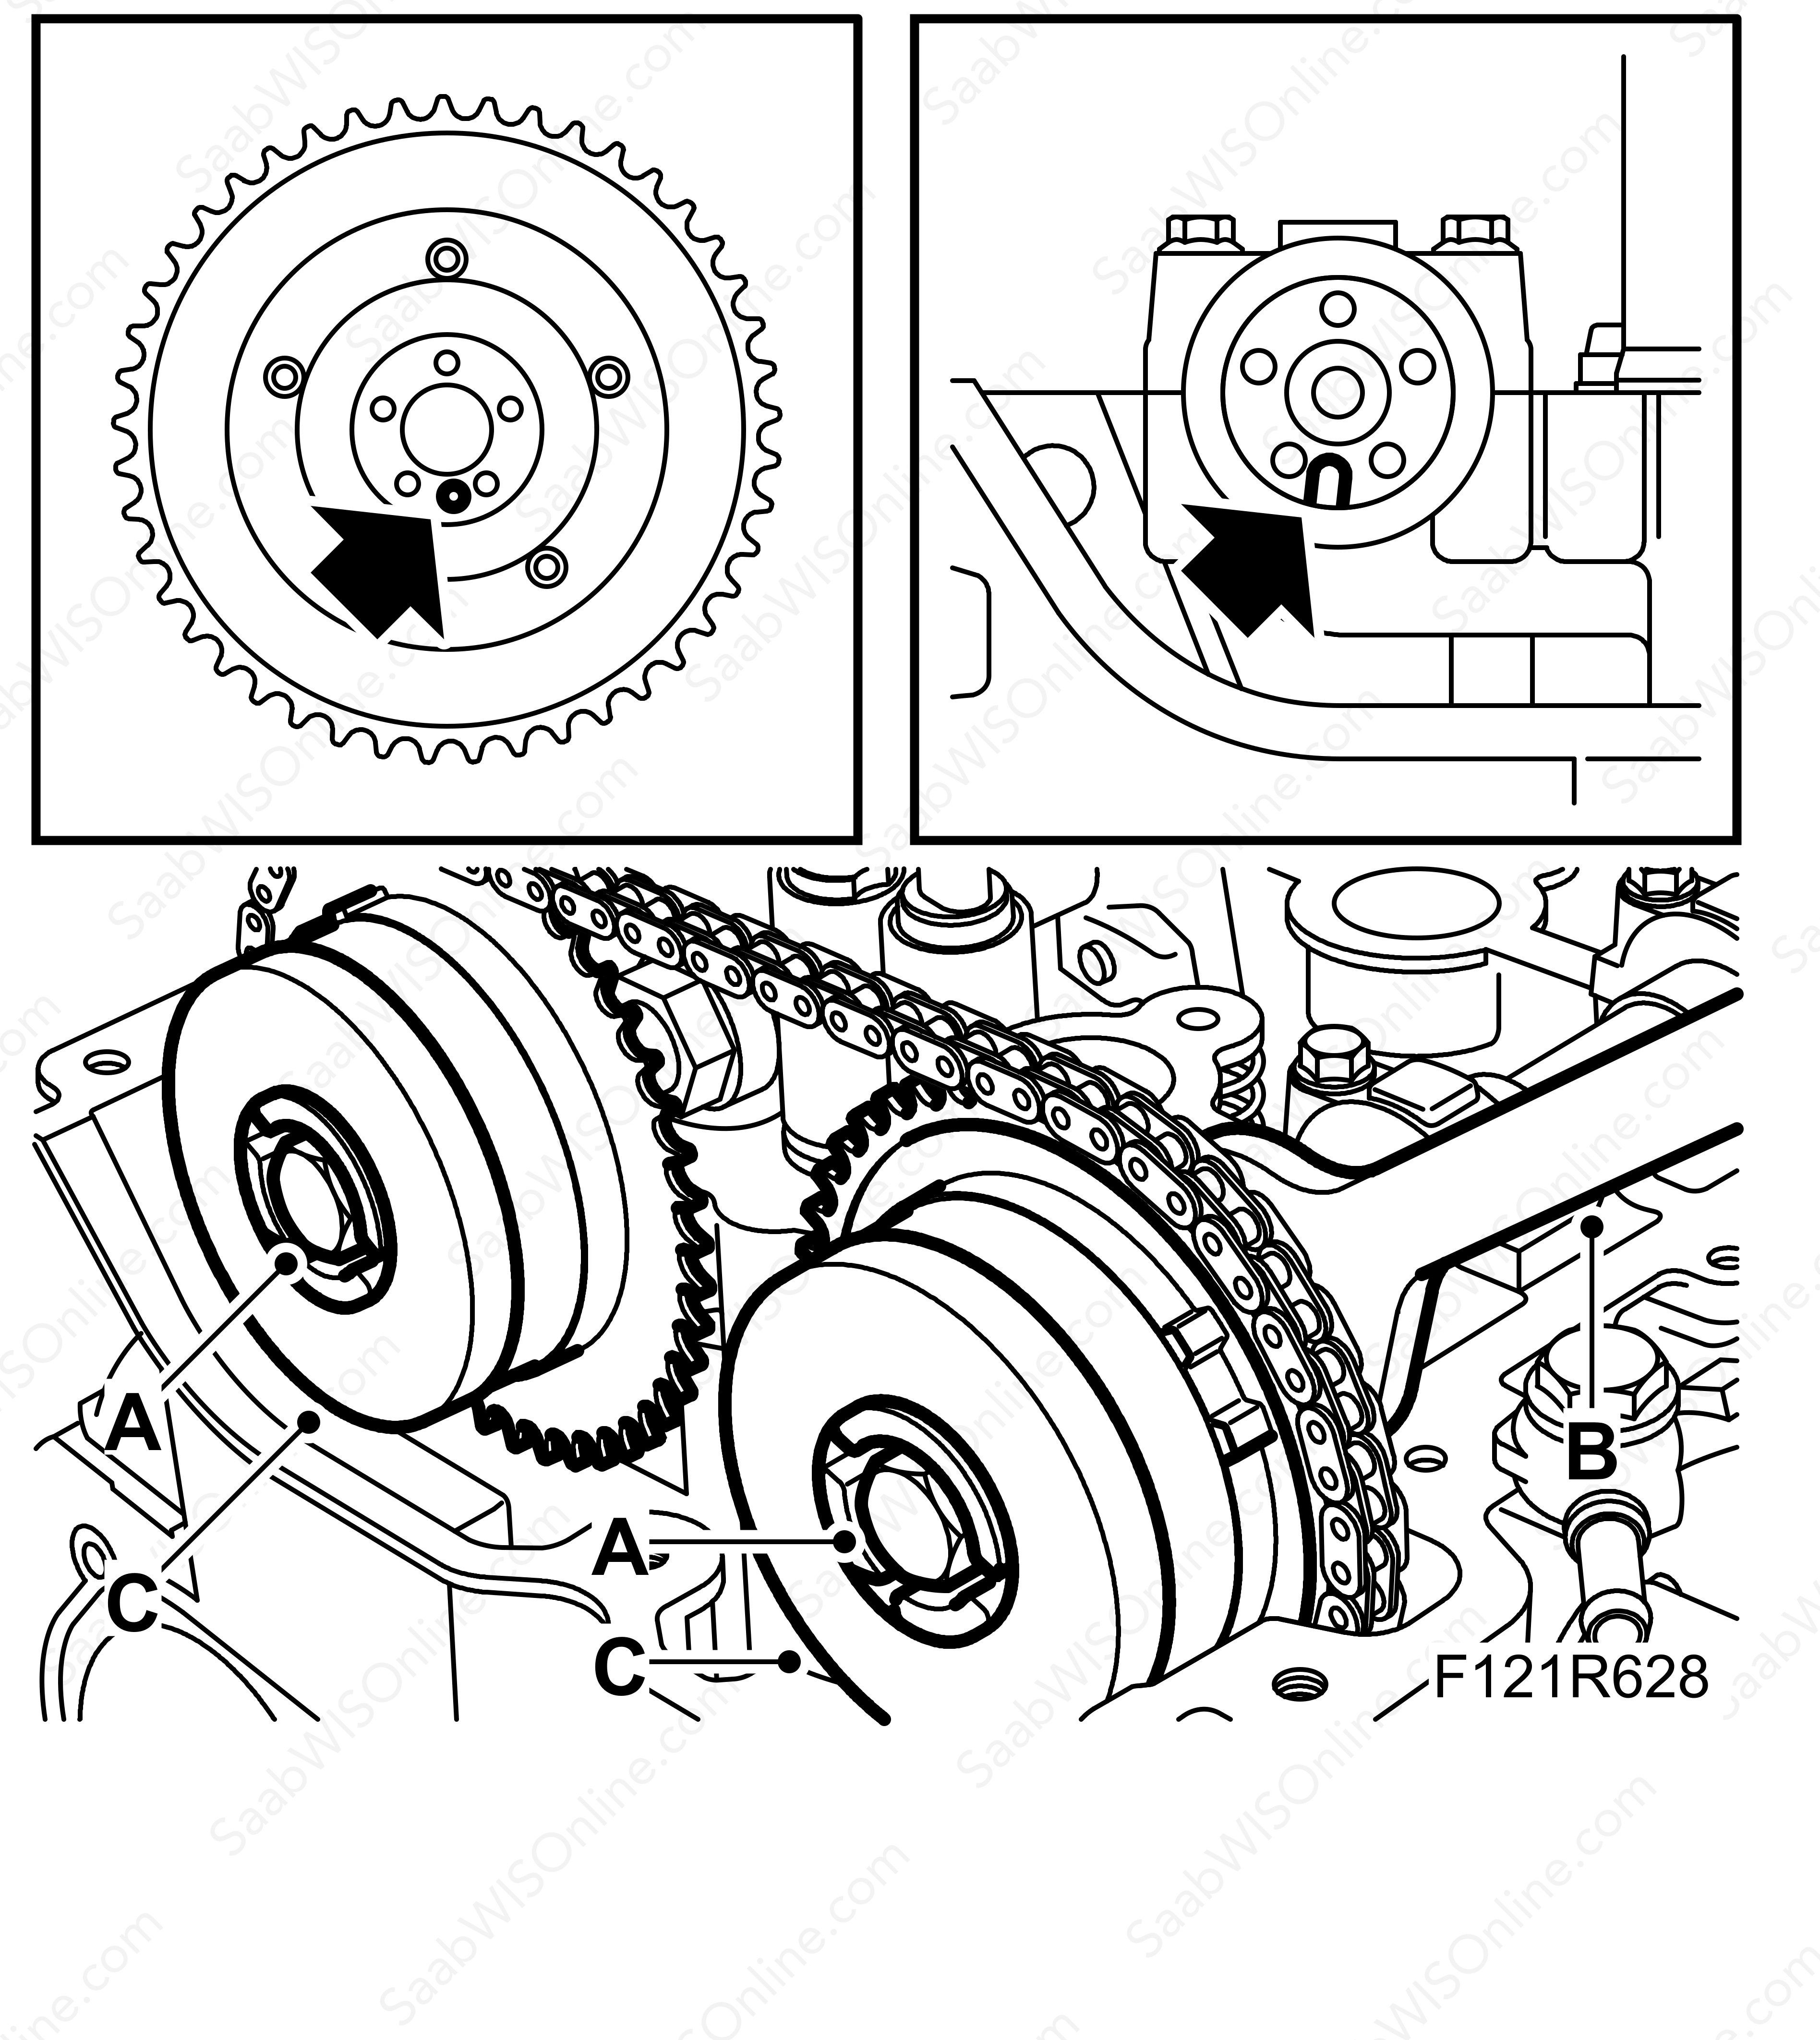
|
|
| 7. |
Fit the timing cover. See
Timing cover, A20NFT/LHU
.
|
|
| 8. |
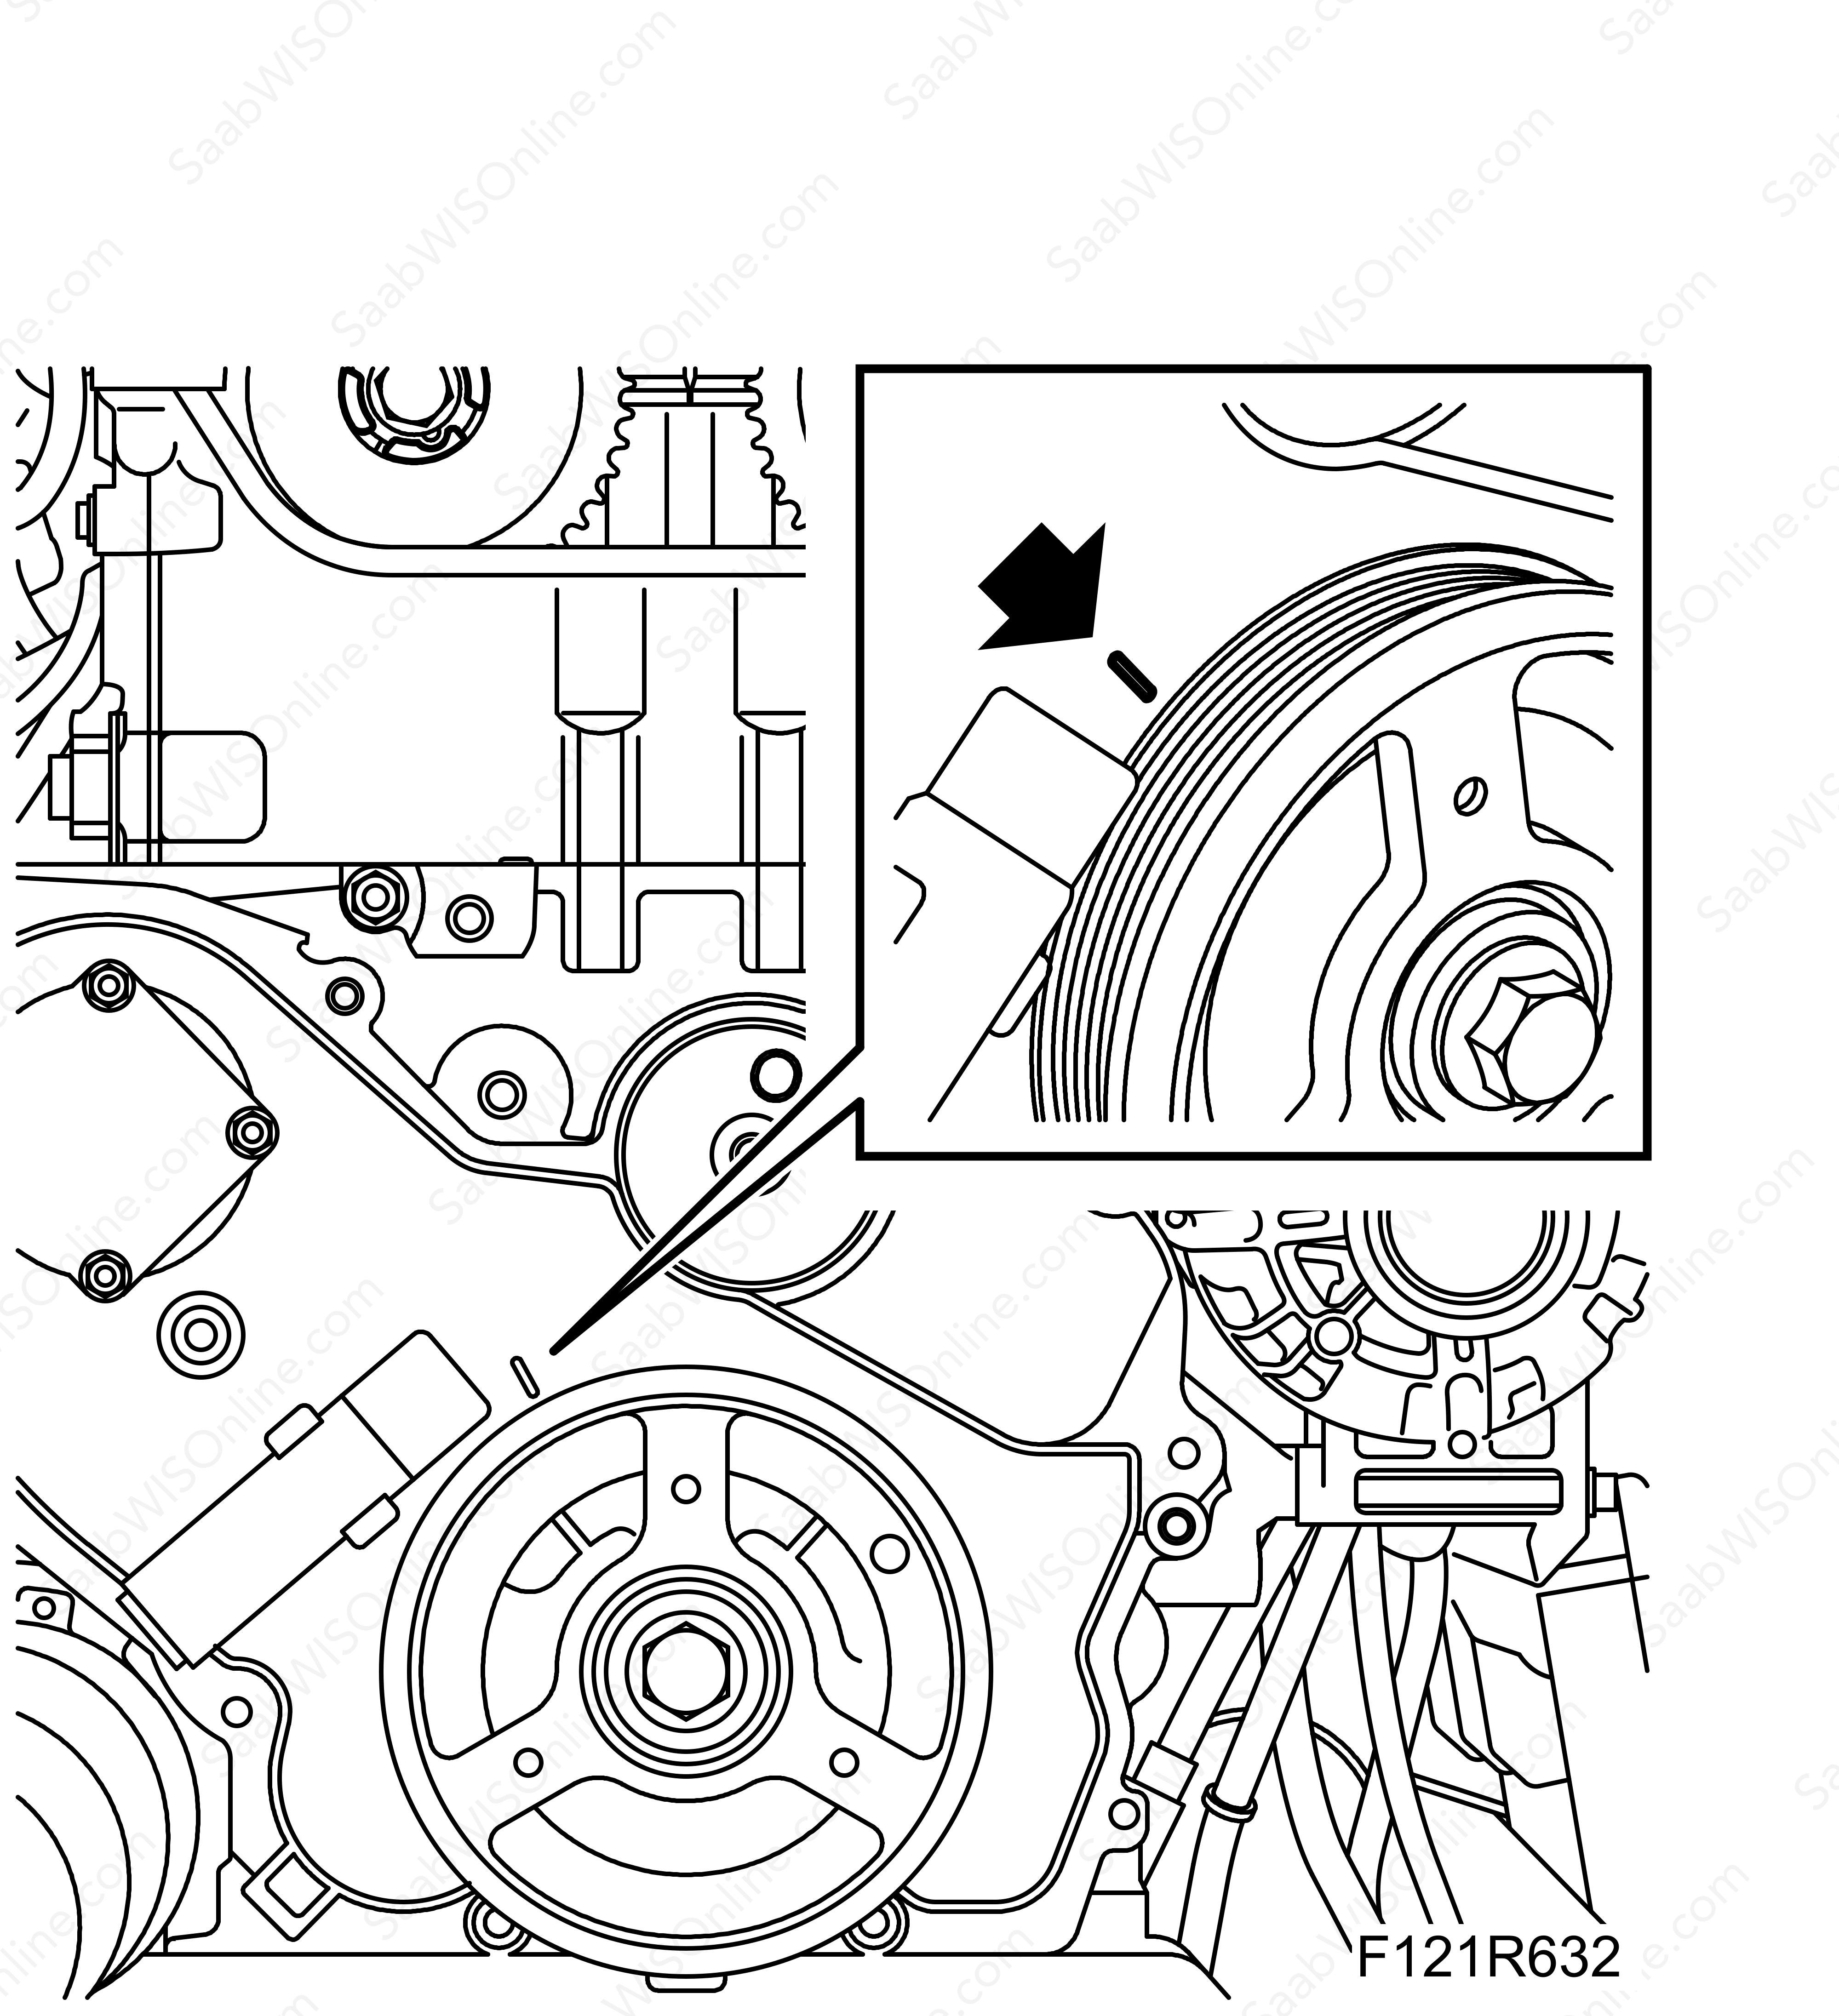
Check that the crankshaft is reset.
|
|
| 9. |
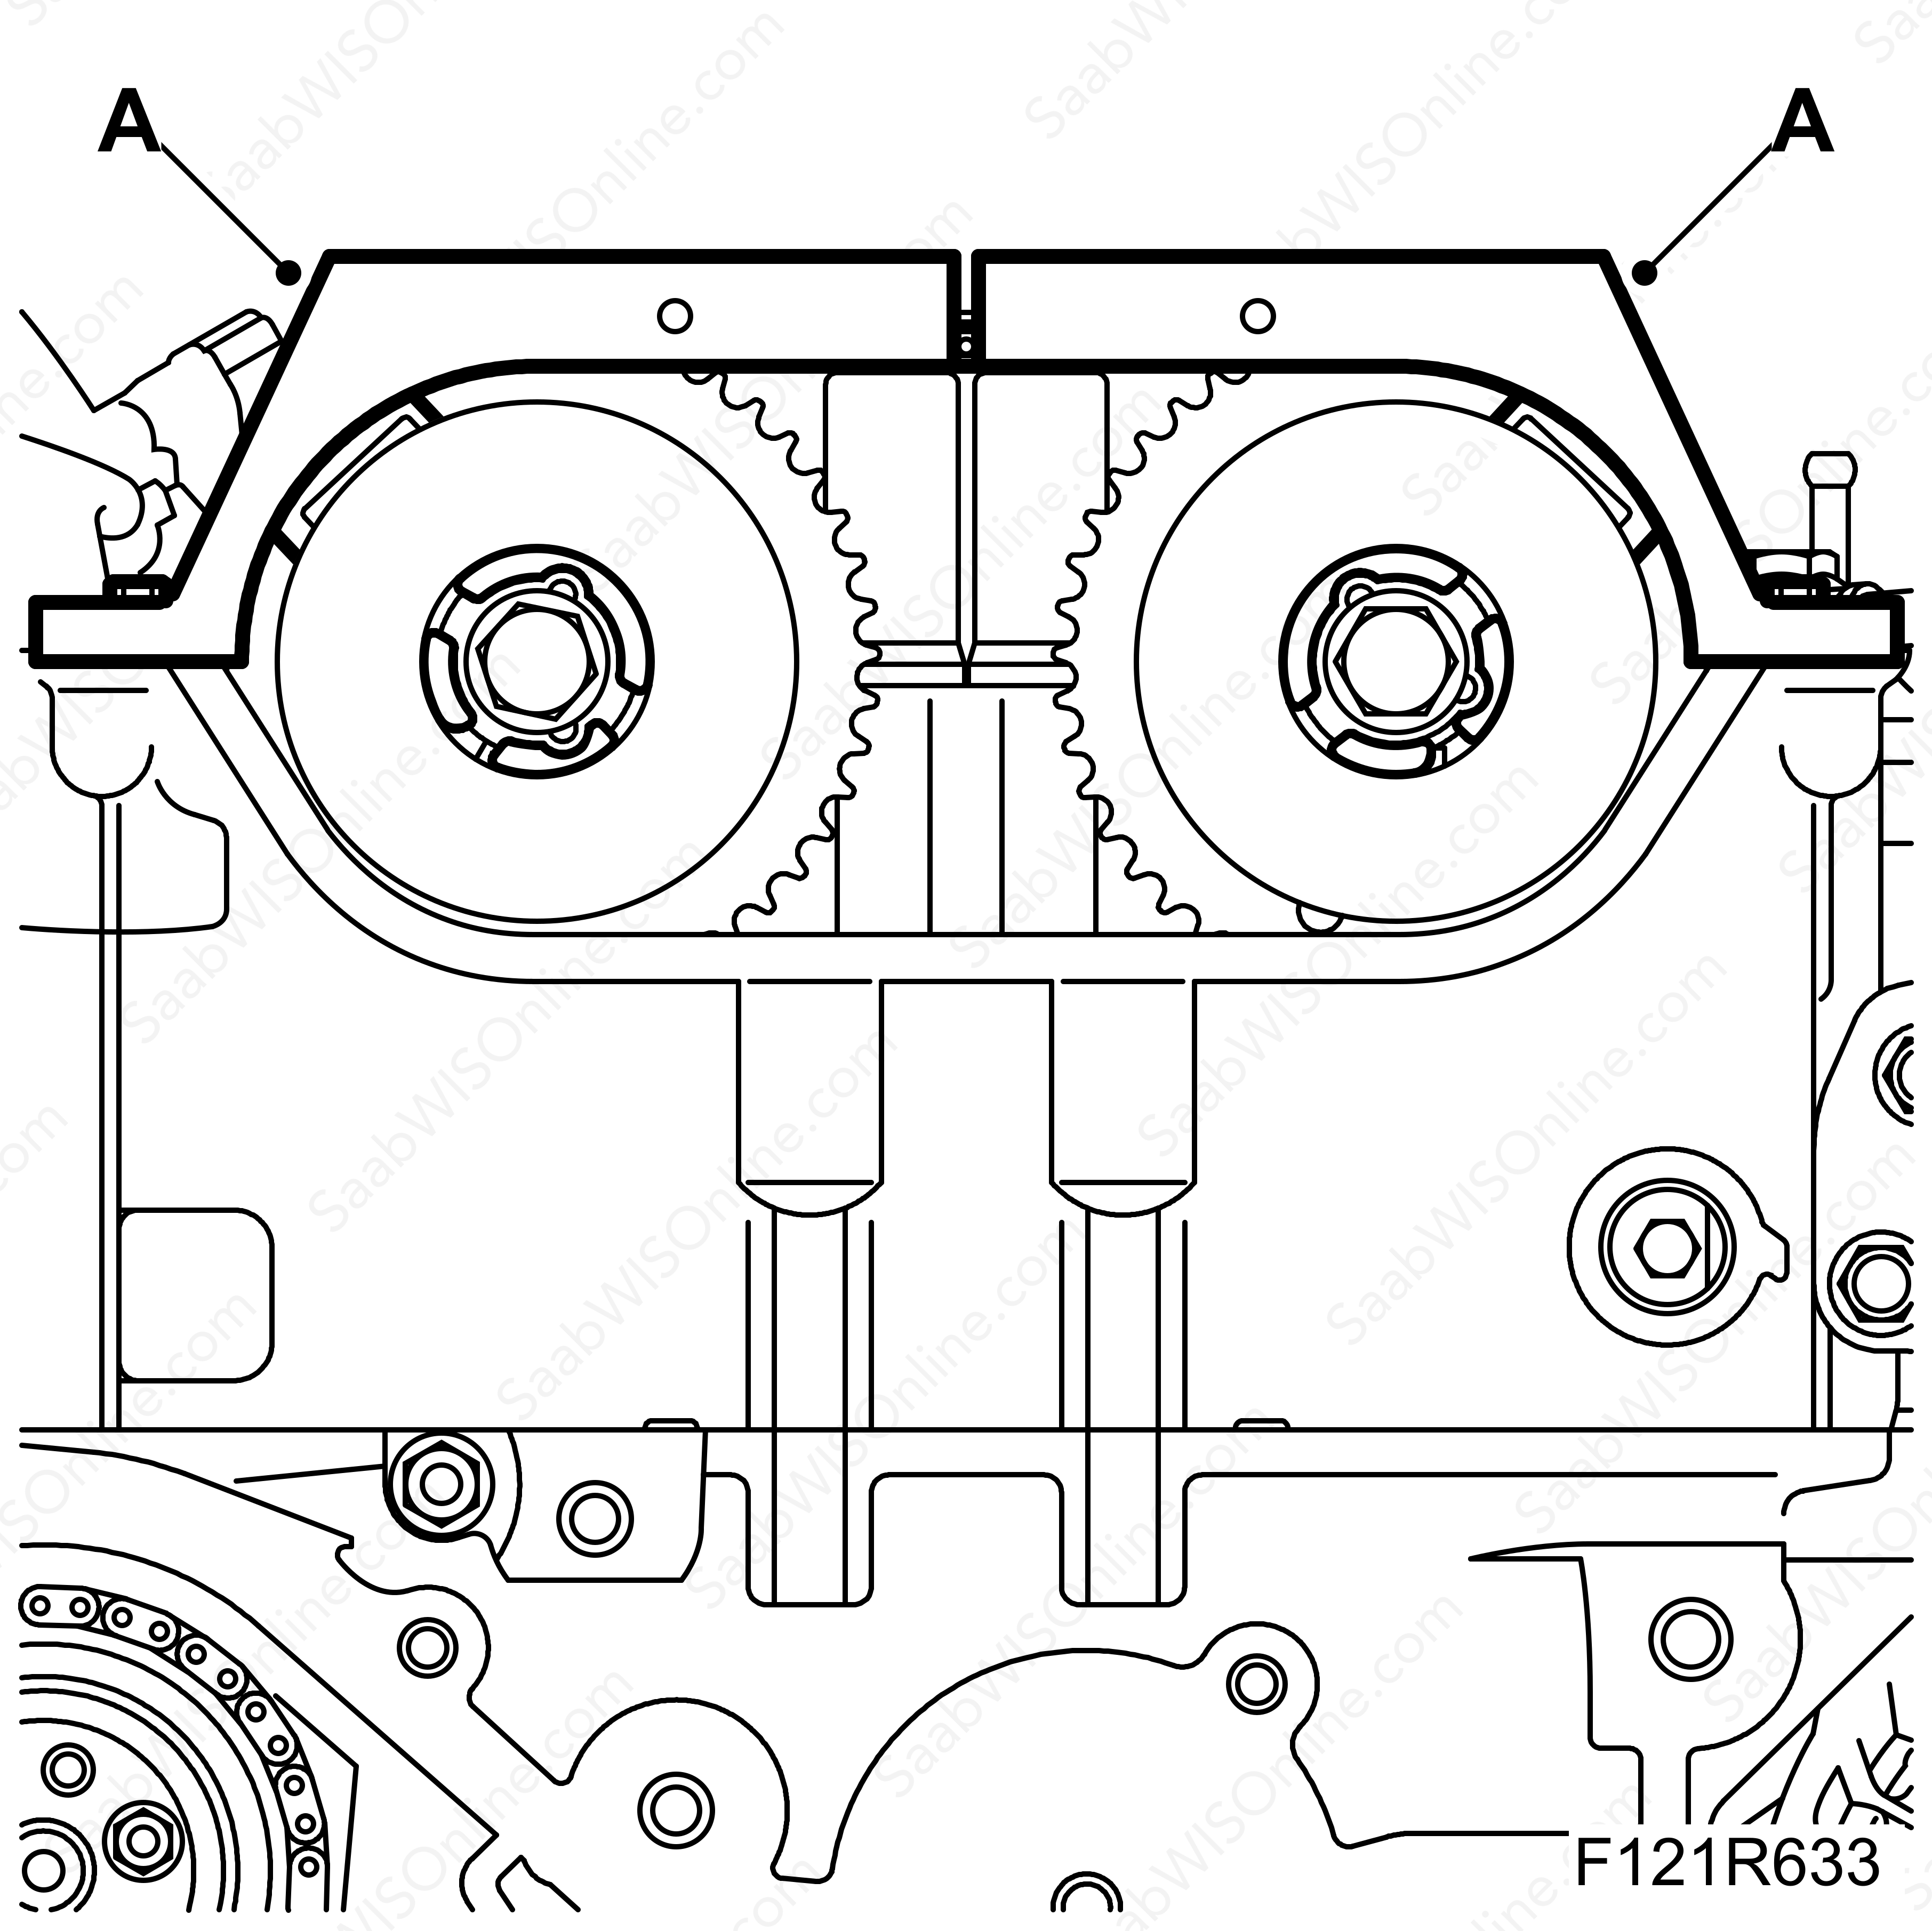
Fit
EN-49212 Camshaft fixing tool
(A) and check the camshaft pinion settings.
|
|
| 10. |
Fit the chain tensioner. See
Timing chain tensioner
.
|
|
| 11. |
Remove
EN-49212 Camshaft fixing tool
and turn the crankshaft two revolutions in the direction of rotation of the engine until the marker on the crankshaft pulley matches the marker on the timing cover. Check the setting.
|
|
| 12. |
Fit the upper chain guide. See
Chain guide, upper, A20NFT/LHU
.
|
|
| 13. |
Fit the camshaft cover. See
Camshaft cover with gasket, A20NFT/LHU
.
|
|

