Secondary Fuel Tank Module Replacement
| Secondary Fuel Tank Module Replacement |
Special Tools
CH 48482 Fuel Tank Sender WrenchFor equivalent regional tools, refer to Special Tools .
| Removal Procedure |
| 1. |
Refer to
Gasoline/Gasoline Vapors Warning
.
Remove the fuel tank. Refer to Fuel Tank Replacement . |
|
| 2. |
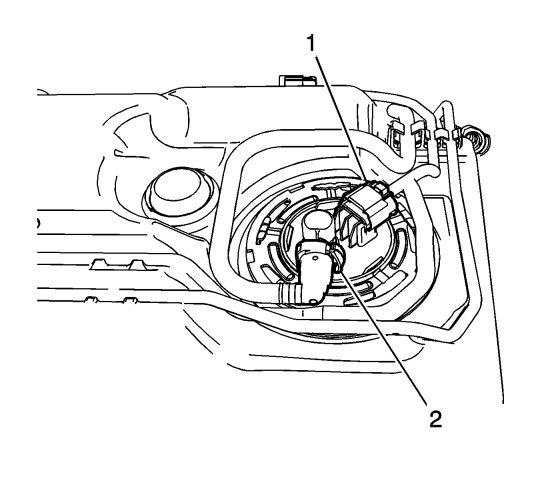
Disconnect the electrical connector (1).
|
|
| 3. |
Disconnect the evaporative emission line (2). Refer to
Plastic Collar Quick Connect Fitting Service
.
|
|
| 4. |
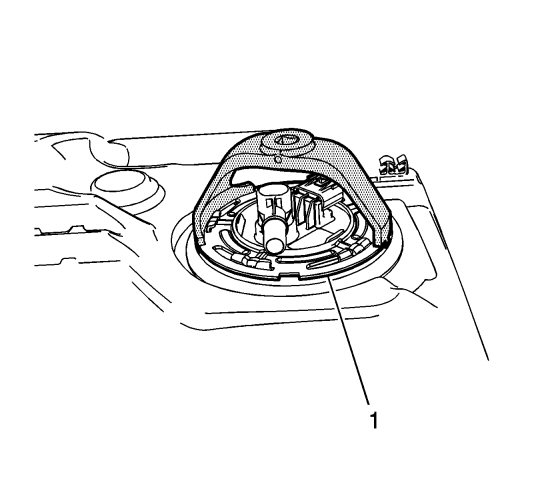
Using the
CH 48482
wrench , remove the cam lock ring (1) by turning counterclockwise.
|
|
| 5. |
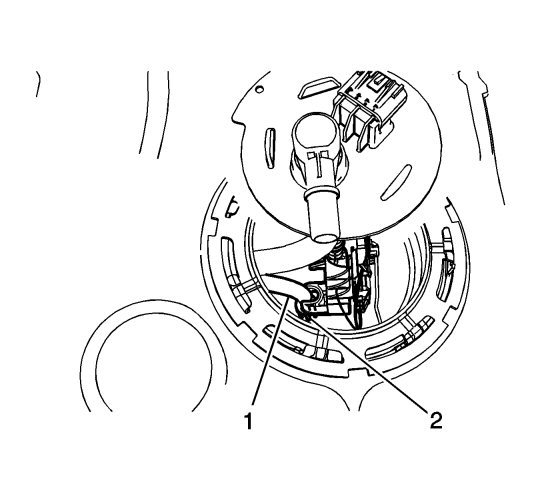
Partially raise the secondary fuel pump module and disconnect the crossover tube (1) by pulling back the plastic retaining tab (2).
|
|
| 6. |
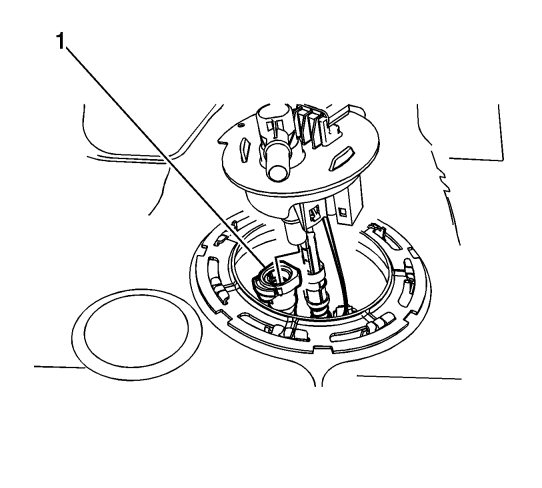
Disconnect the evaporative emission line (1). Refer to
Plastic Collar Quick Connect Fitting Service
.
|
|
| 7. |
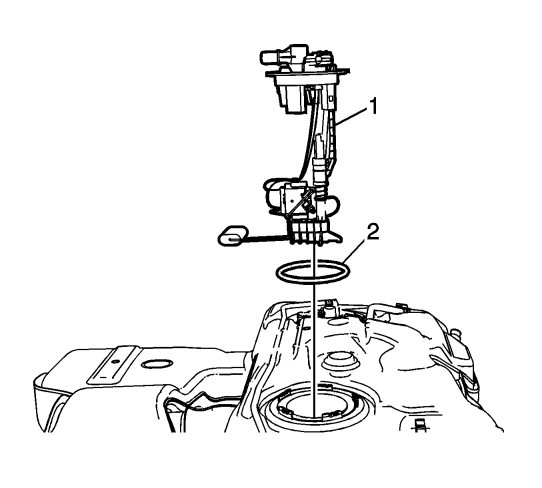
Remove the secondary fuel tank module (1) and the O-ring (2).
|
|
| Installation Procedure |
| 1. |
Install a NEW O-ring (2) and the primary fuel tank module (1).

|
|
| 2. |
Partially install the secondary fuel pump module and connect the crossover tube (1).

|
|
| 3. |
Connect the evaporative emission line (1). Refer to
Plastic Collar Quick Connect Fitting Service
.

|
|
| 4. |
Using the
CH 48482
wrench , install the cam lock ring (1) by turning clockwise.

|
|
| 5. |
Connect the electrical connector (1).

|
|
| 6. |
Connect the evaporative emission line (2). Refer to
Plastic Collar Quick Connect Fitting Service
.
|
|
| 7. |
Install the fuel tank. Refer to
Fuel Tank Replacement
.
|
|


