Oil Pump Replacement
| Oil Pump Replacement |
Special Tools
| • |
CH-49290
Centering Fixture Subframe - Engine
|
|
| • |
EN-977
Holding tool, crankshaft pulley
|
|
| • |
EN-47630
Holder, crankshaft
|
|
| • |
EN-46788
Fixing tool, crankshaft
|
|
| • |
EN-46789
Camshaft Fixing tool
|
|
| • |
EN-46793
Fitting tool, oil pump seal
|
|
For equivalent regional tools, refer to Special Tools
| Removal Procedure |
| 1. |
Remove the timing belt. Refer to
Timing Belt Replacement
.
|
|
| 2. |
Fit the right-hand engine mounting (2). 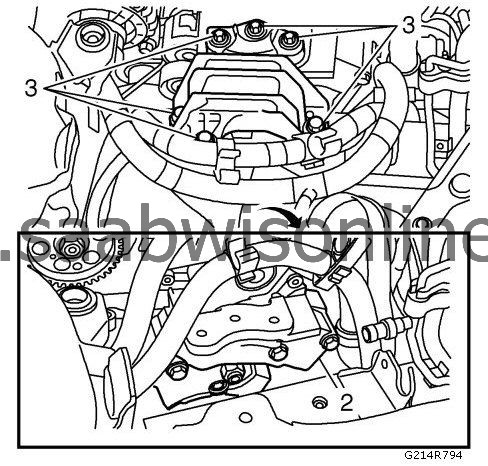
|
|||||||
| 3. |
Fit the right-hand engine pad (3).
|
|
| 4. |
Raise and support the vehicle. Refer to
Lifting and Jacking the Vehicle
.
|
|
| 5. |
Remove the
CH-49290
centring fixture.
|
|
| 6. |
Remove the oil sump. Refer to
Oil Pan Replacement
.
|
|
| 7. |
Remove the belt pulley using EN-47630 holder (1) in combination with EN-977 holding tool (2). 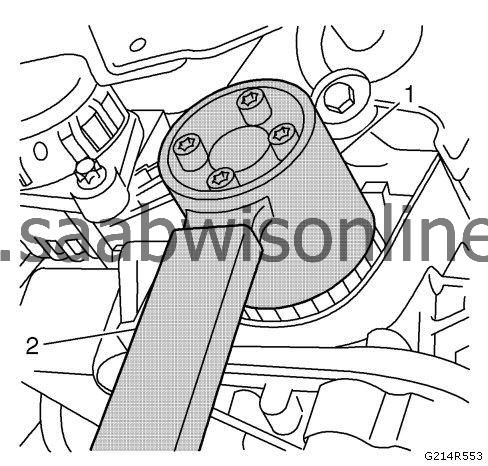
|
|||||||
| 8. |
Remove the oil pump sealing ring (8). 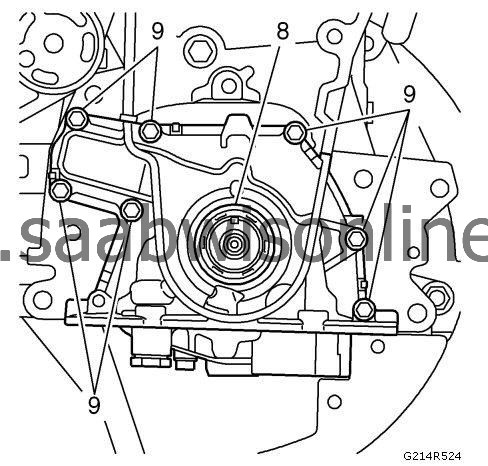
|
|||||||
| 9. |
Remove the oil pump (9). Unscrew the stud from
EN-46788
fixing tool.
|
|
| Installation Procedure |
| 1. |
Clean the threads and sealing surfaces.
|
|
| 2. |
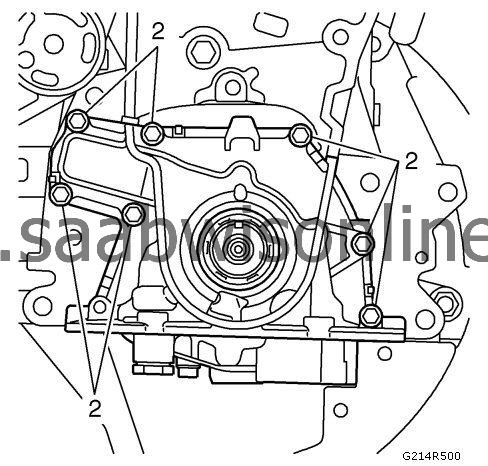
Fit the oil pump (2) with a NEW gasket. Use locking agent on the M6x20 bolts. Screw in the stud for the
EN-46788
fixing tool.
|
|
| 3. |
Fit the oil pump seal using EN-46793 fitting tool (3). 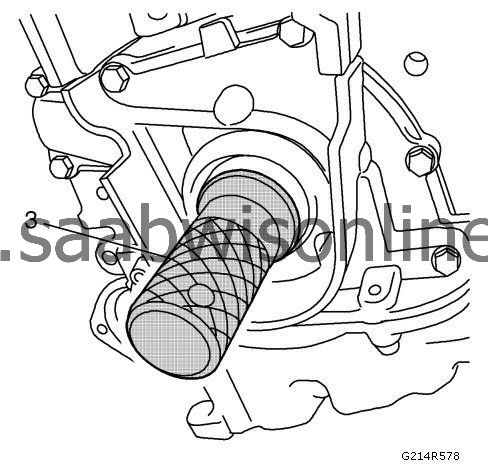
|
|||||||
| 4. |
Refer to
Fastener Caution
.
Fit the belt pulley using the EN-47630 crankshaft holder (1) in combination with the EN-977 crankshaft pulley holding tool (2). Tighten bolt to 380 Nm (280 lb ft) .

|
|||||||
| 5. |
Remove
EN 47630 holder
(1) and
EN-977
holding tool (2).
|
|
| 6. |
Install the oil pan. Refer to
Oil Pan Replacement
.
|
|
| 7. |
Raise and support the vehicle. Refer to
Lifting and Jacking the Vehicle
.
|
|
| 8. |
Place CH-49290 centering fixture on the left of the front axle member. |
|||||||
| 9. |
Put both holders to the right of the front axle member. |
|||||||
| 10. |
Fit
CH-49290
centring fixture.
|
|
| 11. |
Lower the vehicle.
|
|
| 12. |
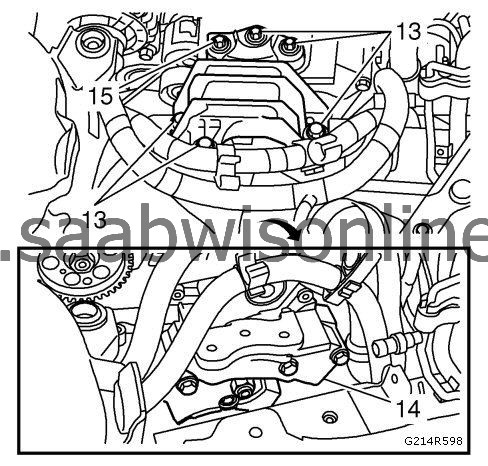
Remove the right-hand engine pad (13).
|
|
| 13. |
Remove the right-hand engine mounting (14).
|
|
| 14. |
Install the timing belt. Refer to
Timing Belt Replacement
.
|
|


