Camshafts, removing and fitting
| Camshafts, removing and fitting |
| To remove |
| 1. |
Remove the top of the tooth belt cover - see
Tooth belt cover top part, removing and fitting
.
|
|
| 2. |
Remove the multi-belt - see
Multi-belt, removing and fitting
.
|
|
| 3. |
Remove the multi-belt tensioning pulley - see
Tensioning device for multi-belt, removing and fitting
.
|
|
| 4. |
Remove the bottom of the tooth belt cover - see
Tooth belt cover bottom part, removing and fitting
.
|
|
| 5. |
Screw in the drive belt pulley bolt into the crankshaft.
|
|
| 6. |
Remove the camshaft sensor (1) from the cylinder head and put it to one side.
|
|
| 7. |
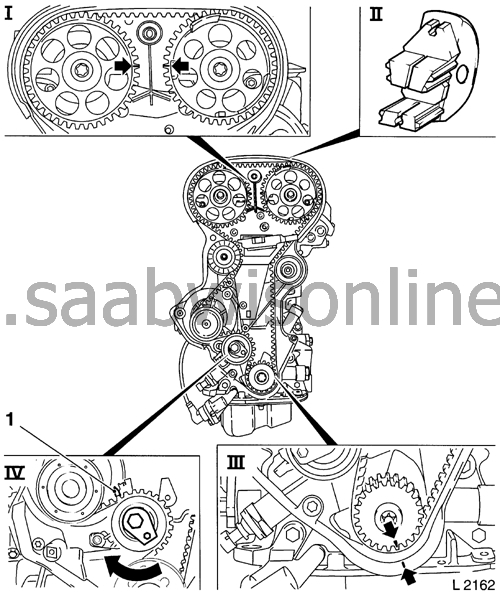
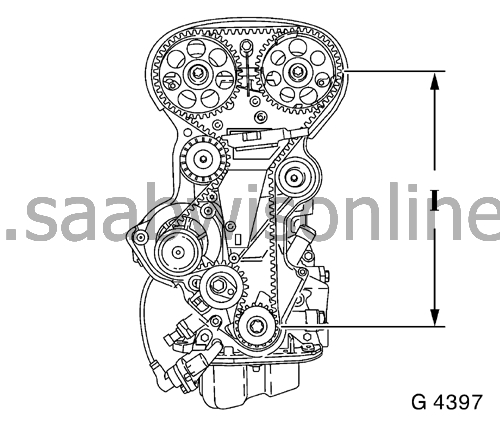
Turn the crankshaft in the direction of engine rotation to "ignition TDC for cylinder 1" (III). The markings on the camshaft gears must be in front of each other (I).
|
|
| 8. |
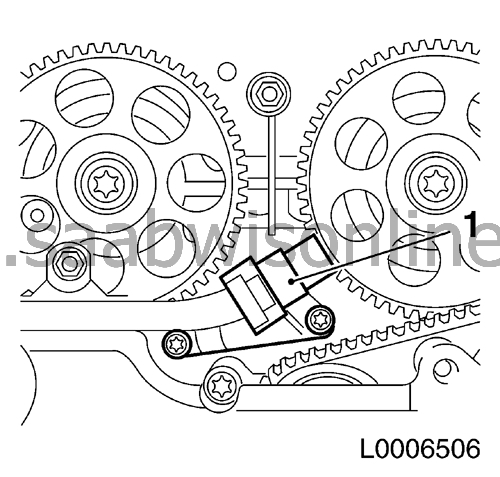
Fix the camshaft gear with KM-852 or
83 96 319 Holder tool, fixing of camshaft sprocket Z18XE
(II).
|
|
| 9. |
Undo the bolt on the drive belt tensioning pulley (IV) and turn the eccenter adjuster in the direction of the arrow (clockwise) until the pointer (1) is close to the left-hand stop.
|
|
| 10. |
Remove the tooth belt and put it to one side.
|
|
| 11. |
Remove the ignition module - see
Ignition module, removing and fitting
.
|
|
| 12. |
Remove the camshaft cover - see
Camshaft cover, removing and fitting
.
|
|
| 13. |
Remove the relevant camshaft sprocket - see
Camshaft sprocket, removing and fitting
.
Caution Note the marking on the camshaft bearing bracket before removing! 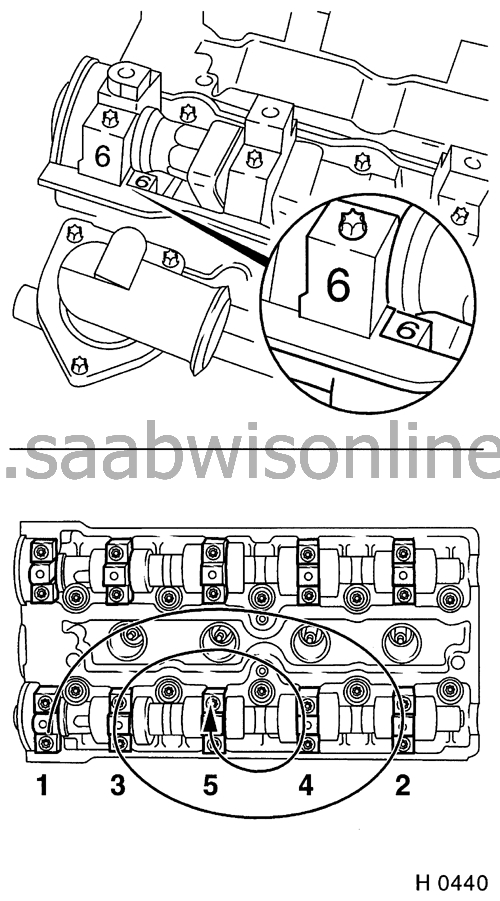
|
|
| 14. |
The camshaft must be loosened evenly form the bearing seats.
|
|
| 15. |
Undo the camshaft bearing caps in steps starting from the outside and working in 1/2 to 1 turn at a time.
|
|
| 16. |
Take off the bearing caps and remove the camshaft.
|
|
| 17. |
Clean the sealing surfaces and remove remains of sealant.
|
|
| 18. |
Check the wear on the camshaft and bearing seats, change as necessary.
|
|
| To fit |

| 1. |
Moisten the sliding surfaces on the hydraulic tappets and the camshaft with MoS slip paste (grey). Put the camshaft into the cylinder head.
|
|||||||
| 2. |
Apply sealing compound (green) to the bearing sealing surface (arrows).
|
|
| 3. |
Fit the camshaft bearing caps onto the cylinder head and tighten from the inside and out - tightening torque 8 Nm.
|
|
| 4. |
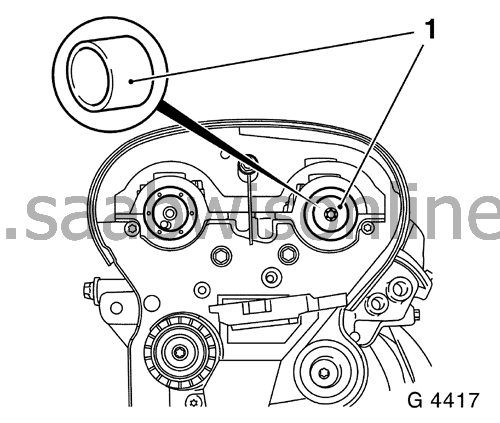
Moisten the new sealing ring lips with a little silicone grease (white). Press in the sealing ring into the camshaft bearing caps with KM-422 or
83 94 959 Fitting tool, camshaft seal
(1) - use the camshaft sprocket bolt and washer.
|
|
| 5. |
Fit the camshaft sprocket - see procedure
Camshaft sprocket, removing and fitting
.
|
|
| 6. |
Fit the camshaft cover - see procedure
Camshaft cover, removing and fitting
.
|
|
| 7. |
Fit the ignition module - see procedure
Ignition module, removing and fitting
.
|
|
| 8. |
Put on the tooth belt - check that the pull side (I) is taut.
Caution Note the valve timing marks! |
|
| 9. |
Adjust the tooth belt tension - see
Tooth belt tension, setting
.
|
|
| 10. |
Fit the camshaft sensor to the cylinder head - fit the bolts with locking compound (red) - tightening torque 8 Nm.
|
|
| 11. |
Fit the bottom of the tooth belt cover - see
Tooth belt cover bottom part, removing and fitting
.
|
|
| 12. |
Fit the tensioning device for the multi-belt - see
Tensioning device for multi-belt, removing and fitting
.
|
|
| 13. |
Fit the multi-belts - see
Multi-belt, removing and fitting
.
|
|
| 14. |
Fit the top of the tooth belt cover - see
Tooth belt cover top part, removing and fitting
.
|
|
This project is supported by memberships and donations. If you use this site, please consider Joining SCNA and/or making a donation.
Our Friends
