Exhaust Pipe Front Hanger Insulator Replacement (AWD)
| Exhaust Pipe Front Hanger Insulator Replacement (AWD) |
| Removal Procedure |
| 1. |
Raise and support the vehicle. Refer to
Lifting and Jacking the Vehicle
.
|
|
| 2. |
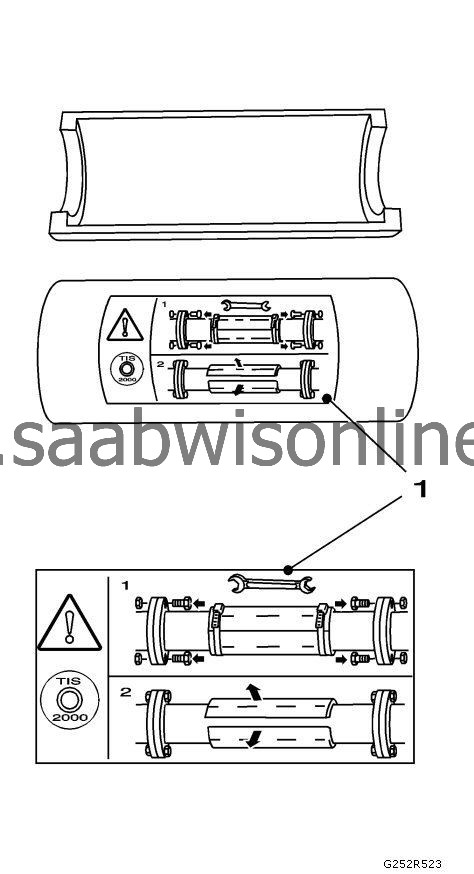
Install the shipping fastening (1) to the flex pipe.
|
|
| 3. |
See assembly instruction (1) on the shipping fastening. |
|||||||||||||||
| 4. |
Remove the propeller shaft. Refer to
Propeller Shaft Replacement
.
|
|
| 6. |
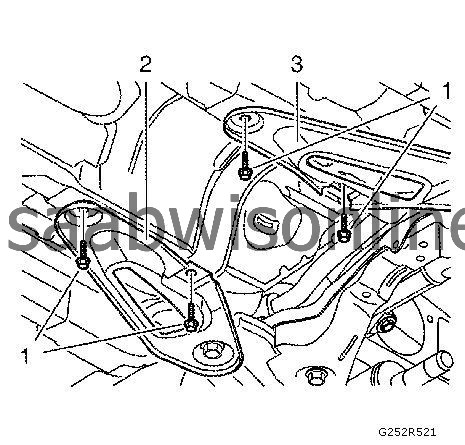
Remove the 4 fasteners (1) of the drivetrain and front suspension frame front crossmember reinforcement (2, 3).
|
|
| 7. |
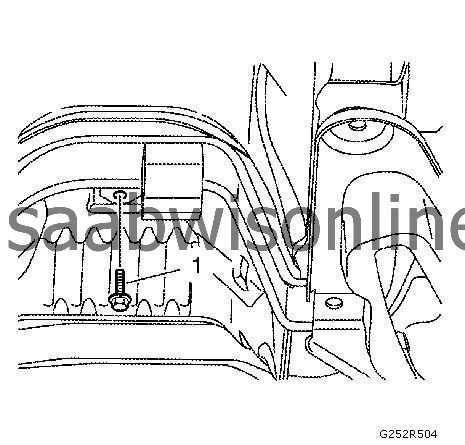
Remove the fastener (1) of the exhaust pipe front hanger insulator bracket.
|
|
| 8. |
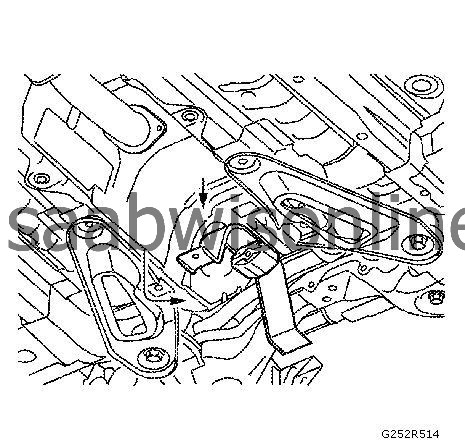
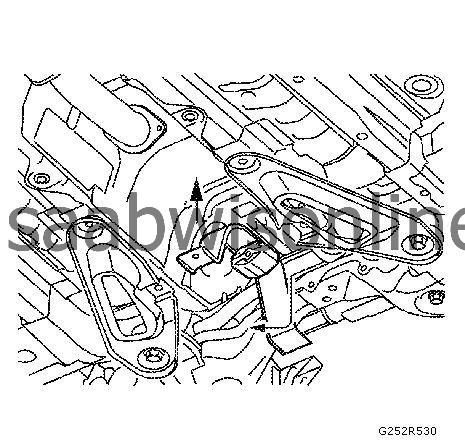
Remove the exhaust pipe front hanger insulator bracket.
|
|
| • |
Press reinforcement with a suitable tool downward.
|
| • |
Turn the bracket around 90 degrees.
|
| 9. |
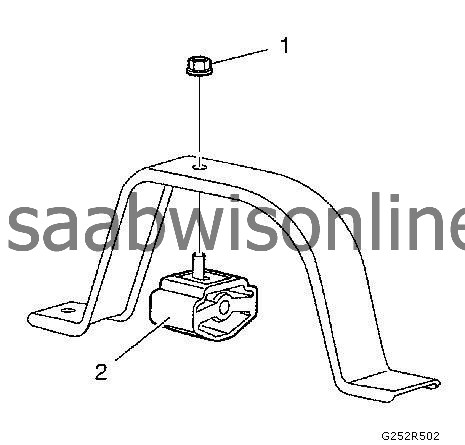
Remove the exhaust pipe front hanger insulator fastener (1) from the exhaust pipe front hanger insulator (2).
|
|
| Installation Procedure |
| 1. |
Refer to
Fastener Caution
.
Install the exhaust pipe front hanger insulator fastener (1) to the exhaust pipe front hanger insulator (2) and tighten to 35 Nm (26 lb ft) . 
|
|
| 2. |
Install the exhaust pipe front hanger insulator bracket.
|
|
| • |
Press reinforcement with a suitable tool downward.
|
| • |
Turn the bracket around 90 degrees.
|
| 3. |
Install the fastener (1) of the exhaust pipe front hanger insulator bracket and tighten to
25 Nm (18 lb ft)
.

|
|
| 4. |
Install the 4 fasteners (1) of the drivetrain and front suspension frame front crossmember reinforcement (2, 3) and tighten the fasteners to
42 Nm (31 lb ft)
.

|
|
| 6. |
Install the propeller shaft. Refer to
Propeller Shaft Replacement
.
|
|
| 7. |
Remove the shipping fastening (1) from the flex pipe.

|
|

 Warning

