Primary Fuel Tank Module Replacement (NA3, NE9, NF9)
| Primary Fuel Tank Module Replacement (NA3, NE9, NF9) |
Special Tools
CH 45722 Fuel Tank Sender WrenchFor equivalent regional tools, refer to Special Tools
| Removal Procedure |
| 1. |
Refer to
Gasoline/Gasoline Vapors Warning
.
Remove the fuel tank. Refer to Fuel Tank Replacement . |
|
| 2. |
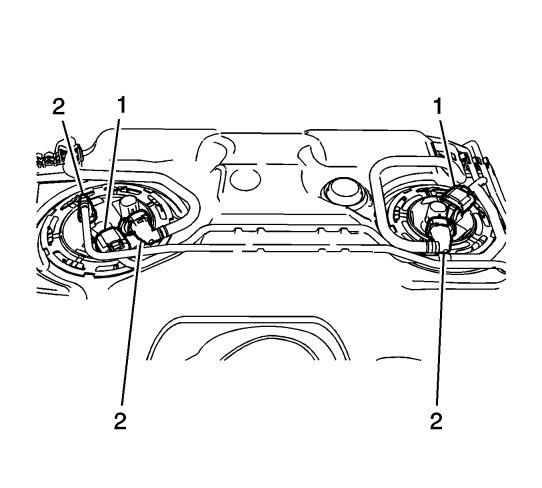
Disconnect the electrical connectors (1) from the primary and secondary fuel tank modules.

|
|
| 3. |
Disconnect the fuel and evaporative emission lines (2). Refer to
Plastic Collar Quick Connect Fitting Service
.
|
|
| 4. |
Remove the secondary fuel pump module. Refer to
Secondary Fuel Tank Module Replacement
.
|
|
| 5. |
Using the
CH 45722
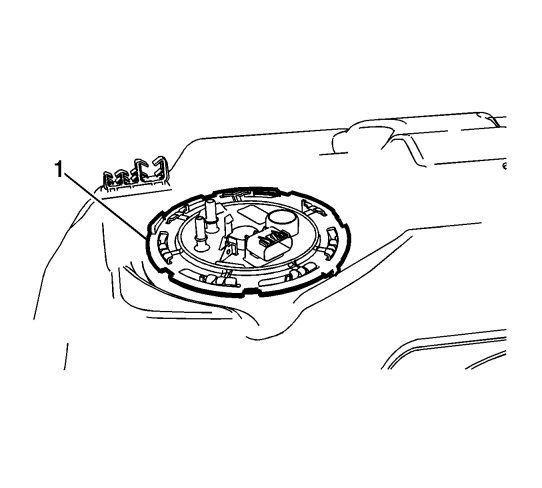
wrench , remove the cam lock ring (1) by turning counterclockwise.

|
|
| 6. |
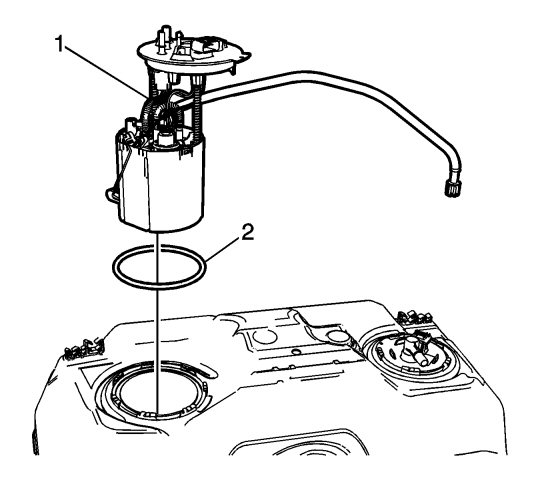
Remove the primary fuel tank module (1) and the O-ring (2).

|
|
| 7. |
If replacing the fuel pump module only, remove the primary fuel level sensor. Refer to
Primary Fuel Level Sensor Replacement
.
|
|
| Installation Procedure |
| 1. |
If replacing the fuel pump module only, install the primary fuel level sensor. Refer to
Primary Fuel Level Sensor Replacement
.

|
|
| 2. |
Install a NEW O-ring (2) and the primary fuel tank module (1).
|
|
| 3. |
Using the
CH 45722
wrench , install the cam lock ring (1) by turning clockwise.

|
|
| 4. |
Install the secondary fuel pump module. Refer to
Secondary Fuel Tank Module Replacement
.
|
|
| 5. |
Connect the electrical connectors (1) to the primary and secondary fuel tank modules.

|
|
| 6. |
Connect the fuel and evaporative emission lines (2). Refer to
Plastic Collar Quick Connect Fitting Service
.
|
|
| 7. |
Install the fuel tank. Refer to
Fuel Tank Replacement
.
|
|


